Goals in Post Processing
Lesson 24 from: From Images to Art: Storytelling in Wedding PhotographyJim Garner
Goals in Post Processing
Lesson 24 from: From Images to Art: Storytelling in Wedding PhotographyJim Garner
Lessons
Day 1
1Evaluate Yourself and Your Business
28:52 2Transforming Our Business
26:59 3Reinvent in 2014
25:55 4Embrace the Philosophy
26:20 5Picture Taker vs. Story Shooter
25:30 6The Philosophy in Action: Testimonial
20:01 7Identify your Unique Style
40:105 Steps to Experimental Style
20:01 9Defining Your Goals - 10 Year Plan
26:26 10Unleash Real Profit
34:18 11Wedding Sales Part 1
29:58 12Wedding Sales Part 2
21:17 13Product and Partnerships
38:45 14Camera Gear
22:19 15Client Testimonial: Trica and Drew
24:26 16Refine Your Craft
24:46 17Experiential Awareness
41:41 18Shoot: Groom and Groomsmen
21:03 19Shoot: Bride's Details
17:04 20Shoot: Bride and Bridesmaids
22:46 21Shoot: Bride and Groom
19:37 22Shoot: Group Shots
23:21 23Shoot: Couple In Bright Sun
27:56 24Goals in Post Processing
31:00 25Post Process: Stretch and Texture
19:13 26Post Process: Skin
20:18 27Post Process: Hard Light Retouching
16:28 28Album Design: The Formula
40:16 29Album Design: The Album Design: Demo with Andrew Fundy
21:21 30Take Control: Workflow Part 1
29:08 31Take Control: Workflow Part 2
21:06 32Work Enviorments
13:36 33Master Client Communication and Experience
17:41 3410 Opportunities for Communication
44:04 35Refine, Reinvent and Thrive
14:04 36Location Night Shoot
32:42Day 2
Day 3
Lesson Info
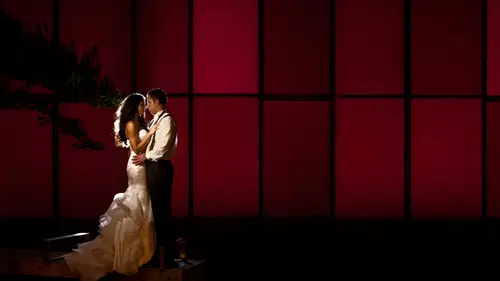
Goals in Post Processing
we're gonna have a lot of fun. This is my favorite segment because we're still in step seven, practice and play, and we're gonna get into Photoshopped. This is where we finished the images we shot yesterday. And I'm even going to take the opportunity of doing some Photoshopped on a couple images from the bonus shoe. Tricia and Drew, I want you to see perhaps we photo shop now I've got an idea. Well, photo shop the image that we gave them yesterday so you could see how we finish that images image to being art. So let's dive in. I want to start with some keynote slides to gives excited about this process. My goal for this this section is to show you that the post production work is absolutely necessary for us to be to set ourselves apart from most of the photographers out there who are capturing their event. There are putting their image through light room or image processing software, and they're doing subtle tweaks. They're making their images look good. Color density. All those things...
dot little dodging and burning, and then the output it perhaps they post them online or give him as a disk. That's the picture taking philosophy. And unfortunately, so many people do that that those folks Aer are competing over Price. And we talked a lot about that on the first day. In fact, that's the same process that many, many amateurs that people are just picking up cameras or buying a nice, nice camera doesn't have to even be a nice camera. Now it could be, Ah, simple camera, the single, the snappy mirror list cameras. The quality is so good, right? Just holding like this. Steps up, snap beautiful. You put it through imaging processing software. It looks as good, if not better. A zit did as professionals during the film era, so I believe strongly and what I'm going to talk about today, finishing your images into art. So I love this. I'm going to share all of my secrets. You guys at home. I'm not only going to share this now, but also provide an opportunity for you have tools to even take this further. Some advance Photoshopped techniques. This is your future, um, in my opinion. So let's dive into photo shop Kino. So why is Photoshopped so important? It is exactly what I just said it is your way of setting yourself apart. The simple techniques that we use are designed to getting, um, are simple Techniques that we use are designed to make the images have more of an emotional appeal. Digital captures Don't capture everything. Okay, us often We have to dodge and burn ring detail back in the shadows. Bring detail back in the highlights. We need to focus our attention to our subject. So that's a vignette ing technique. Perhaps bring light towards where we want the viewers I to go to. There's a few techniques I use at the end of the process. I used a texture overlay sometimes, and that is a right brand emotional brain promoting technique. Okay, you want that sense where you were talking about this today, where you feel something unique about that image, but you don't necessarily see it. Okay, that's what texture overlay, as well as believe it or not Grain adding grant to your images. It does a couple things, you know, you could hide out of focus areas by fooling the eye into thinking is sharp by putting grain over the top. Do you guys know that also that overall. Look, when you get close to a very large enlargement like this one hour to take your old closer, you'd you'd see just that beautiful grain, and you have a different experience far from the art. Then if you were near, but it's but it's the same experience, uh, emotional that ISS. So it's pretty exciting stuff we're gonna do today. It's very simple. It's gonna be repetitive and redundant by the end of this, um, these programs today, I'm hoping each of you at least see what I do and go. Hey, I could do that to my other main goal Today is to show you that your workflow your work full can be decreased by half if you deliver art to each and every client. It's such a win win. This whole program is. It's just all about giving you back your life, providing you an opportunity to have extremely high put sales potential, uncapped earning potential through your art and at the same time, degree your workflow by half. Okay, it's gonna channel the right type of clients who value art into your world, and the future is beautiful. So simple techniques. Let's go through a couple slides. This is, Ah, Hawaii. Wedding of storytelling on a hill. First I photographed the groomsmen and I did a quick contrast to it and I'll show you it. And then it adds a bit of emotion. Okay, here's another from the Hawaii wedding bride and groom on the beach. Bit of contrasts and saturation and diffuse glow, and you get a completely different experience. Okay, here's another one from that same wedding before after same wedding. This is the Jurassic Falls. I've got the real name of this fall. So this is where they filmed a Jurassic Park before. After this is a Nick Filter and I K nick effects. I can show you that if I have time today, here's a before here's a after with a diffuse glow and dodging and burning adds emotion out. A lot of these were really subtle. I know you and the Hornets are saying, Hey, that's super subtle. Yeah, that's how you want it. You don't want people to be thinking. Oh, wow, What a beautiful photo shop trick. Okay. You want them to just feel it, but not necessary. See the techniques that we use? All right, So let's continue. Here's before this. Obviously storytelling, they're walking. This is a transition spread. I was thinking in my mind before after just punched it up. Easy stuff. Well, here's one. This is adding the sky member. I told you, I think yesterday or the day before that sometimes I captured the sky separately, like I know that it was gonna be kind of blown out like this. And so I'll take a second exposure of the sky, and I'm an aperture priority moment. I point right at this guy. This guy, it'd just immediately get a darker image because it sees all that light, and I put it back in the image. So this ended up being the cover photo for their book. Okay, here's the helicopter shot before, and this is one of the major techniques is hide and remove, and we've got a few issues with it. We've got the seat belt on the bride, her dresses blowing up. You could see my arm. I'm holding a mono pod and I'm hanging out the side with that mono pod. My assistants popping the flash off. He's next to me. He's to my left shoulder. So I need to hide some things. So here's the finished shot. Now watch the dress change. Okay? So I had to rubber stamp the texture of the dress back in and then give each of those areas of motion blur to counter Teoh match Here. I'll go back to that to match the motion. See the back of the dress that's already there. I needed the new stuff that I photoshopped in to match, so I did selective blurring in many different directions. Okay, watch The seat ball disappears to absolutely necessary. Okay, so it's most of these. You're gonna find really easy. This is one of the tutorials. A family portrait retouching is so important in the advanced to tourism in part of the transformational tool box that we'll talk about today. There's thes advanced tutorials and these things really got there 45 minutes each. That's a really high level. You're given the image to work on. You are given the texture We lay over the top. We talk about the issues with each image. We talk about things that we can do If you want to take today, we're gonna do basic photo shop in the two segments that we have first segment being individual images. Second, we're going to talk about the album design of photo shopping in in the album itself. Time, Savings, Glory. You'll love these two segments, but this is going to take to the next level. You have the opportunity to have these. We're going talk later, but there's the before and after. Here's another one Nick before, after high level stuff where we do advanced skin retouching, etcetera. These the type of retouching techniques that I use before and after that I use for these large art pieces. You need to do a higher level of photo shop, post production work or what we call in our studio digital mastering of a file if it's gonna be viewed in large format. Good news. If you're viewing it in the album, it's very exciting. You need to do a lot less because your images are being seen smaller. Okay, it's not as much post production work. It's actually much, much faster. Hey, here's the umbrella shot. I want to show you this. This is a composite style shot, obviously not very not. Not the best moment here. Not not very exciting, but we get done with post production work. This is in the tutorial set. Advanced tutorial set. By the way, when you're done, look, look at what it looks like. Okay, This is the signature image on the wall there. So it's fun. This is in our studio. But obviously, it's right here in this studio. Have a version of, um, the trip take of it. So skin. Okay. I talked a little bit about this yesterday. Hard light or sidelight is the most beautiful light. It creates dimensionality. It separates you off the page we mawr sideline. We can use the best type of sidelight being Rembrandt light, which comes from top left. It goes to bottom right? Or vice versa. It creates an eye catching the eye that's at 10 o'clock or two oclock position. It creates a little triangular shadow under the nose. And it makes this beautiful dimensionality called Rembrandt lighting. Um, because Rembrandt utilized it to create three dimensional work. And so we can do that too, with our lighting. But when we do, it sure creates ah, lot of texture in the skin. We need to fix that, and I'm gonna show you down and dirty super fast way to do it. There's a 1,000,000 ways to do it. I like to go. Especially the album Down and Dirty. Okay. For the larger images, the wall art, I do different technique. It's a higher level. Okay, so before and after look at the soft glow, Katie. Time we blur something. Anytime we blew something, we need to add the texture back in a lot of Photoshopped techniques. I'm seen today where people are doing their skin retouching. They don't make the skin come back in. They don't have the skin texture come back into the images. Just looks plasticky. We gotta not do that. Okay? Gonna make it look like she's made up Butte with a makeup artist. Did a fine job on. So here's before and after. Look at crooked lines before after, Okay, that what I just did there. See it again. It's so important for dropping images into art, which is a rectilinear environment. And in your album, slight angles and slight tweaks. Boy, is that a bad thing? It just grabs your eye. And it doesn't match the edge of an album. We need to straighten our lines before and after. And that, um Skylab achieved a pop by doing image. Adjust shadow highlights and you go to advance mode. And you, you, you just the mid tone contrast. It's real easy, and of course, you do in a layer mask, and you paint that effect off of the skin of the people of your subjects. So here's a wonderful candid image during the toast before, after dodging and burning, adding a texture, emotion, Let's do that again. All right, before after. Okay, just super subtle. But boy, meaningful. Here's a technique we need to talk about for albums. Okay, there's an image right out of camera. I'm down on the ground. I think I did some of sister. It's full sunlight. Right? And I had this kind of idea of of making it the reflection of this this Geary building Go to infinity. I want to call this this image in infinity image because it reflects to blue. But I need more space on top. So we're gonna grab that. We're gonna we're gonna grab the top area in the side area. We're gonna stretch it out and we end up with this. Okay? There's an infinity shop with that line through it just a completely different composition from a single snap. Perhaps we could have never really gotten this image with the lenses on the technology they have now. But understand that we can move edges out. Sure makes our world open up. Teoh Unlimited. Uh, unlimited areas. We could go if we understand that we can move things over, stretch things out. But be careful construction images and I learned the hard way. Overdid it. Early on. It becomes obvious, and you don't wanna be known for stretching. I learned how to hide the stretch, though in recent years that is. Stretch it late, texture over it. Lay grain over the top of that. Do all your layers on top. More layers, the better, because that image it was once a capture. And now it's working into an art piece. It's becoming layered and layered layer, and the more layers you have, the more becomes a new experience. Okay, for images, toe art means you have to layer up. So we're talk about layers today. Here's a before image. Before I prepared it to be in an album spread, there's the shot. It's an incandescent can coming from the ceiling, the excuse for head being up was that you know he was giving her kiss on neck was just a loving, you know, stylized moment, for that matter. Let's fitted to an album. We have negative space on the left and negative space on the right. Let's see what we could do with that negative space. We pull it over, we add a texture. We've been yet the whole thing. Grain it up to hide that stretch. We gotta album spread single image while spread easy. Um, here's A before and after okay, out emotion before, after I was a grain Millet hears it before caps. We're gonna have some of these today. We did some of this yesterday because we're in a tight, tight locations. You saw some of the images we would really tight on so before, after totally different emotional experience, by removing the color from this image. Still one more time. This is one of those where and this here's our rule. If colors this distraction to emotion, that's when it disappears. We don't use black and white ing images Azaz, a Photoshopped trick. We Onley least in our studio. We do. We use those techniques to again. How it affects the emotional brain. That's all we care about in this world of retail photography. How it affects the motion brain right now. The colors distracted me right there. Now I'm feeling it. And by the way, I'm showing you just everyday these air what we call bread and butter images thes of the type of images that make us successful and our clients purchased from us as individual images or in the art books that we make okay every day. Simple images. These are not my very best portfolio images I want. Always, I said this could be this program. I'm not trying to press here. I just want you to see how simple this could be if you have your mind on converting images. Toe art. All right, so here's one kind of a garbage. The location. Let's convert it to a vertical experience. We stretch up, we've vignette all the garbage out, and you have this beam of light that comes down. That's fun. I love these challenges, so you just can't do that stuff in light room. Here's before. Look at the after totally different experience. Totally different experience. I've duplicated shelves over to fit into a spread. And then I actually moved bottles around so you wouldn't know That's a composite that was designed to meet the criteria of a horizontally oriented album spread. And by the way you'll see that that is our look. We go horizontal 11 by 14. So it opens in 28 inches. 11 high. It is a horizontal minutes. I could get a lot of story, and it's a greater challenge to shoot in the horizontal orientation because you have to do a lot of panorama thinking. Don't you have to think about negative space left and right? Do a lot of stretching. You gotta like think in story filmstrips fit really well in horizontal. Okay, we used to do a lot of square, which is also ah, horizontal experience, but not as difficult on frankly, um, impactful as when you open an album of super wide okay. And we've experimented over the years with albums that open the other direction super wide their vertical Okay. Or how about 11 14 the other way, where you open it up and it turns into more or less a little bit wider than a square. Okay, I just love this horizontal look because you have to do things like that. You have to composite shelves back in. You know, here's a before notice. Just take it like a skin. Take a look at all the noise around these air like the shots we took yesterday in the full sun. Here's an after totally different experience. Emotionally, the white pop is from image. Adjust. No filter distort, diffuse glow. We'll use it today. Just one of those finishing layers. Oh, this is actually, oddly enough, the first place image of WPP I many years back because it is difficult image. The video light is lighting the backdrop, just barely. The candles are almost blown out in the capture, the lights just hitting their face. They're slightly out of focus shot with a 24 millimeter 14 obviously vertically oriented kind of stretches them out, and you get this is the finished image first place. How the heck did that happen? It was out of focus. I hid the out of focus portion of it, Which was that the most important part. Their eyes. I put a grain layer over the top, and so when the judges went into look out there seeing sharp because they're looking at the grain. It's super subtle. Techniques like this is so helpful to getting our images where we need him. Okay, Look at this. Very busy. Kind of right out of the camera shot. Totally different emotional experience, David. Just to art. It's not hard either. You won't think so after today. Okay, Here's another example of fitting to a spread before and after. In this case, we have to flip the middle. You can't stretch foliage, get to flip it and then remake areas of it. Okay, so flipping means you grab a section and then flip it that way, and then you could stretch a little bit, and then you have to fill in the middle. So I didn't do a very good job of that. But we're going to show you how you can photo shop individual images right in the spread today. This is the liberation of workflow before. After easy. It's gonna be five minutes at the most. Per spread on the busiest 20. Image spreads for five minutes per per per spread. Get him done. Time savings. Ridiculous. Okay, here's a before and after. All right, How do we fit it? Two albums Reds before is a skin example. After Not fun. I love that door. Clients deserve this extra effort. Absolutely, They dio Absolutely, they dio because they really the goals of photo shop are to take our images and separate them from everybody else. Just like you talked about at the beginning. It is too put us in a place where we could stand apart and be known for that artwork that reproduce. We just need to find you more time to do that post production work. But I promise you this. After you see the workflow portion of today, you will smile because every click of the mouse or stylist I prefer everyone getting a tablet. This house should be doing photo shop with every click of the tablet you are earning money, every click of it. There is no longer photo shopping, 300 images, 500 images over 3 to 5 days and then put him on a desk and hoping that someone will purchase him from your want to do something. Gosh than that as a whole. Another complicated layer. How do I put them in the album and have them all have continuity. House, the one I photoshopped in the morning is different for the one hour photo shopped in the afternoon or even five minutes apart, for that matter, and you put it next to each other. It's like, Oh, totally different picture experiences. You need continuity if you want to take for the emotional ride. If you want emotional rod, everything's spread has to have a theme that it has to have continuity. Okay, so goals of photo shop. Let's talk about him real quick. Our goals are to snap, to take a snapshot to an emotional experience. Okay, they are to add impact. Of course. Emotional impact, a ticket image, the next layer of creativity. This is the fun stuff because this is why we're artists, right? We just need to be paid for it, so it don't resent it. And that's what Really we're gonna really go over how you can make your workflow pay for pay for this time that you haven't even be smiling because every time you get commission to do wall art, you don't want to pull it out of the album. You want to redo it, but you're like no problem because they commissioned 809 $100 wall art. I have no problem spending next 45 minutes to an hour retouching that image to perfection at resolution. You know? What is that? 60 inches by 30 inches. 250 dp I mean a canvas up first and then redo it. Okay, but no problem when paid. I know those people that I was gonna say, Hey, what Jim does his wall art. You know what if they want that image separately, well, you could give a low rez version of it by cutting it out of the album artwork. But certainly if they ask you to do a wall wall art piece, you're gonna have a smile on your face because they commission something fresh from you. Really great making money so defines one styles and you improve upon your camera composition. That was kind of that. That moving areas of the image around portion of it you improve on your composition. Okay. You could perfect the image for print presentation was talking about perfected for the resolution. You're out putting it out. Really big message to the industry guys. The true output professionals know this Okay, you retouch at the resolution is being viewed at for maximum impact. Okay, So bring the viewer to the center of interest Dodging, burning, taking out. You know, blown out skies need to be filled with sky. That's why part of our our transformational tool kit includes an action set that will do that for you. Put skies back into the image and also includes my favorites Skies in that and textures, textures and skies so that you can hide those areas that grab your eye. If you have an image of the bridal party that the girls walking up to the church that's ominous. Rainy day and the sky above that church is all white. You were just messing up that just like your eye goes right above the church and you miss the impact of everything blow. You gotta put something back in it. You gotta bring detail back in there and Miles will make it look, Rainey. That's how they remember the day. So you add a texture and blur that texture in a vertical orientation. It looks like motion blurred rain. It's so much fun. OK, do our clients deserve this mind do and they hire us for that. Okay, um, enhanced lighting. That's our job. We can on li make light, do what it's gonna do, and we need to work quickly. Ah, wedding. Especially something. Let's get your shot. Move on. Get your shot. Move on way. We need to do some work in post production to make it even better. Okay, Maximize sharpness. The very last thing I do Well, before I add any grain or texture a sharpened things. Okay, we define a store is the last thing we dio define. The story here is just I just want to show you the artwork from the piece we gave Trish. Andrew, Maybe I'll redo this image for you. You could see it done. And I chose a heavy texture because I knew this would be viewed online. I probably bring that texture down. I want to. And we in our studio when I work with Kara and Audrey and Sarah, If we're creating art piece, we say, Hey, we don't say Do you like it or not like it? I'm almost done with this image you like, You know, we say OK, I'm almost done with average. How does it make you feel, You know, I'm feeling the motion between Tricia Andrew. However, I feel like the textures distracted me from that a little bit. Okay, I'm gonna back it off a pass it down, down, down, down There it is Perfect. That's how we work as a team. And I need your minds to think in that way to you have to be in an emotional place before you start a post production work in order for it to be effective. Okay. And when you work with a team, talk on a feeling level, in fact, everything in your business how does it make you feel? How does make you feel when you read your price list? Does it make you feel Wow, I need to get my glasses on and focus in on that. Or is it or is it like I said, a relationship? Hey, how does how does this price work for you with the following services? Okay, this is a little too much. We'll tell you what, why don't we We can add some more time to this old member. Those gifts to sweeten things up, all result and your ability or better chance to create this art etcetera. Okay, been alums. Here's some Tricia drew from the bonus footage, but I want to show you textures in. This guy's real quick. And here's that church I was talking about the sky in it. Let's take a look at these for here's Here's Here's what the action set does you pick your Here's your image. This is a scene setting shot at Newcastle Golf Course I need to get. This is an opening image before I show the details. What's inside? We do the exterior, so we take the use. The action said it, ask you to grab the sky. You'll, in fact, this guy's part of the action set. If you guys want that, it pops it in and you do some subtle masking. It teaches you how to do that. There's a tutorial alongside it, but it's super easy and you get the day as it was seen. I actually shot that Scott at that moment. Okay, Number two, Here's another example. We've seen that this is their cover now. We just saw this one, but this was done with E skies action. So here's ready to dive in. I know we have a couple questions, probably as I load up images or anything that that way want to talk about Yeah, I think a good place to start. There's a little bit of discussion going on about, like the nature of art and what is too much and too little and photo shop. And is this? My style is it's your style. Do you want to kind of set this up just a little bit with the discussion of what you think, you know? Should people try to emulate exactly what you're doing? Is this or should they try to figure out their own style? What is the too much too little? Yeah, yeah, you know, what I wanted to do here today is make sure I'm letting the audience know that this is our particular style that's made us successful, set us apart. What I'm also showing you are mostly images from years of the past. I like to do that because I liked it. It's fun to see how my AR style has evolved, and I just find it that a lot of them are still, for the most part, pretty timeless because we obey that we tried to obey the rule for at least our area art region, our type of clients that that the images should look as close to the film era as possible, close to what was produced with a really good fiber printed, dodged and burned print from the film era. For the most part, I mean, there's sometimes we go. We went a little heavier, did too much or whatever. But if you think about it during that time period, we had a greater latitude in the film and were able to I mean, we're approaching the same latitude now in Digital world, but were able to in the dark room do some extraordinary things. Dodging and burning that sky back in was essential to an image you have to have detail all the way through if you want to have an impact on your bottom line. So once we switched Teoh and these images where I put the sky back in with that church that was early digital era. That was the one D s. I think our 1st 1 and it just didn't have the latitude, and I was forced to do these techniques. Now I could use shadow and highlight in the initial capture. Probably bring that back or a single image HDR. But certainly I don't have time to set up a tripod. So for we wedding shooters, I recommend that you have these tools in your back pocket so that you could get around it. Now. What is too much? Certainly there are moments where this too much many might think, Hey, that composite on the wall and that's too much. It's. But you know what? The clients absolutely freaked out about it. So it's not about me. It's not about some style I'm trying or some I don't think any particular way is better than others. It's what my clients want that matters to me the most, and for and I could probably refine and slow down and shoot perfect work. But they wouldn't have the same experience as I do with speed and the way I go and I again, expression is way more important than perfection in this world of retail photography,
Class Materials
bonus material with purchase
Ratings and Reviews
Ester Knowlen Photography
LOVE LOVE LOVE all the bits on how to create a wow shot without stressing about getting it/catching it by chance. So SPOT on!! A little bit of planning, a little bit of vision, and great ideas/recipe for amazing "wow" shots that are prompted and genuine (unique just like the people we shoot), rather than stressed over and chased. :) Amazing video!! :) Thanks Jim Garner!!
222 N 43rd Pl
This is such an amazing course. It is my first purchase that I have made with Creative Live and I couldn't be more pleased. Jim shared so much information and so many insights. It's great to be able to watch the segments over, picking up something new every time. Taking volumes of notes! I am starting to implement Jim's approach to photography—storytelling. I am just starting out in wedding photography and am so excited to have found this gem tutorial! I would highly recommend this to any photographer who wants to take their work from photographs to art.
Student Work
Related Classes
Wedding Photography