Post Process: Skin
Lesson 26 from: From Images to Art: Storytelling in Wedding PhotographyJim Garner
Post Process: Skin
Lesson 26 from: From Images to Art: Storytelling in Wedding PhotographyJim Garner
Lessons
Day 1
1Evaluate Yourself and Your Business
28:52 2Transforming Our Business
26:59 3Reinvent in 2014
25:55 4Embrace the Philosophy
26:20 5Picture Taker vs. Story Shooter
25:30 6The Philosophy in Action: Testimonial
20:01 7Identify your Unique Style
40:105 Steps to Experimental Style
20:01 9Defining Your Goals - 10 Year Plan
26:26 10Unleash Real Profit
34:18 11Wedding Sales Part 1
29:58 12Wedding Sales Part 2
21:17 13Product and Partnerships
38:45 14Camera Gear
22:19 15Client Testimonial: Trica and Drew
24:26 16Refine Your Craft
24:46 17Experiential Awareness
41:41 18Shoot: Groom and Groomsmen
21:03 19Shoot: Bride's Details
17:04 20Shoot: Bride and Bridesmaids
22:46 21Shoot: Bride and Groom
19:37 22Shoot: Group Shots
23:21 23Shoot: Couple In Bright Sun
27:56 24Goals in Post Processing
31:00 25Post Process: Stretch and Texture
19:13 26Post Process: Skin
20:18 27Post Process: Hard Light Retouching
16:28 28Album Design: The Formula
40:16 29Album Design: The Album Design: Demo with Andrew Fundy
21:21 30Take Control: Workflow Part 1
29:08 31Take Control: Workflow Part 2
21:06 32Work Enviorments
13:36 33Master Client Communication and Experience
17:41 3410 Opportunities for Communication
44:04 35Refine, Reinvent and Thrive
14:04 36Location Night Shoot
32:42Day 2
Day 3
Lesson Info
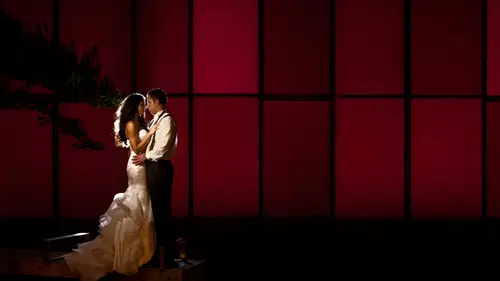
Post Process: Skin
Okay, first I wanted individual images where they were going to spreads later and fund is gonna help us get him in there and efficient man or superfast photoshopped we could do one of the girls here or one of just the bride. How about that one? This is such an important image how would you skin on just all right you guys saw a lot of these images but not all of them yesterday, right? I didn't see how these reviewed but what a lovely bride, huh? I was really fun I want this to make it spread out of this one uh let me find harder light so you're saying that we're really excited to see you work on skin good this to this? Well, I'm just gonna grab this one because it is sidelight then I as explained sidelights not always the best thing for skin but we're going to fix that up part way first of all, how easy would the speed to kind of let me do it real quick new layer of your copy I'm going to get on the bottom layer hit the crop tool I'm just I'm just gonna hope I'm fixed rule of thirds non...
e okay clear okay, so I'm in the bottom layer and I'ma just go beyond it's going to make a quick spread right? So I get to the top layer now and I'm a grab this area and free transform a little bit over now we have the negative space we need we can't go too far because that design gets too stressed right so sometimes we'll definitely ltd this is a moment we can't stretch much also when there's foliage we can't stretch must much so this is now our new image right here crop it okay but perfect no it doesn't a bride deserve to have better skin I mean beautiful makeup done etcetera if we light properly the light crosses the face in a manner that makes more texture we need to fix that okay so this image first thing you think is hide and remove what can we do ok im going teo I'm gonna flatten down because I know this is my new spread now we'll start from there so there's not too many layers to work from from educational standpoint I usually never flattened down I always have layers were are often be asked to fix an image on a spread and using only have to throw away the top two three finishing layers grain texture diffuse glow and then we can change the image out and then redo everything that's all to do an adjustments if the bride would like us to do that but let's do this first I want to quickly show you you know had had this been a situation she's beautiful lovely flattering photo but I just want pretend we need teo we need to fix a little of our fall perhaps we didn't get high enough on a plus size bride or something filter we go okay brand new layer via copy shift option command and e get too many keys shift option command and so that should bring a new layer all the way up through these out of made a mistake. Okay, this is our background there okay? And brand new air filter liquefy no most people know about this but just in case out there in the audience this is a wonderful technique so what I want you dio is understand this it's pretty pretty basic but I bet you most people that do this don't know about the freeze tool so I'm gonna teach you about free still right here over here freeze mask I'm going to freeze the area I don't want moved in this case her eyes perhaps I don't want her mouth position to move either, right? I'm then going tio go to the move tool which is the finger pointing here? This is I'm gonna push in the area don't need it and I'll heidi's none of this right? But you will in your career have moments where you this's necessary okay, trust me so I'm gonna push it in a mouse is better than a stylist for this effective by the way, all right? I'm just gonna push, okay and I'm not oh my gosh yeah just get it out of your system all right, do it get it done get it out of your system it's this resolution we have the computer but you see it's subtle differences right there, okay? And you can have a lot of fun with this actually, but don't have too much fun with it trust me, you'll get busted all right? I'm actually make your back I'm not going in there all right let's do a skit now so the down and dirty way of doing it okay? If I were to do advanced this thing was going to be massive on the wall I would do technique about to show you we're going to create a nuclear I'm first going to hit the j tool, which is the healing healing spot brush tool and I'm going to grab a few errors I'm gonna hold control option make a larger mouth and we're just going this is ah going to grab that area come over here and I want this tone over the top or we could just use the hell until she doesn't actually need much of this I just want to show you could take out those major blemish is that the first thing you do is skin okay down here looks like your little scar but by you guys again if you want the the high level an opportunity to really work on image together really get it right it's all part of that transformational to a box that you get on go butter dot com we there's six forty five minute lessons and up on ten basic photoshopped techniques intend to different tutorials and then six more advanced tutorials two levels of photoshopped hours of content if you really want to know everything we do this's a workshop in fire might wish we had more time with you all I can honestly do photo shop for a week because I love it and it's so important but that's why we made the tool kit it really complements this entire workshop we hope you check that out of goto dot com okay now let me share with you a quick down and dirty actually this is advanced technique you'll see and when those tutorials we can't really do much of it today but let's get started with it I'm going to hit the brush tool I'm a five percent flow I'm gonna grab using the option area from here and move it to there okay this is this is basic color color pushing pushing color around I'm gonna actually go to flow like to all right and I'm gonna get a smaller brush I'm just gonna grab cia grab detail from there and I throw it down over here did you see how it just I just gotta highlights by the way this technique ride here is the technique I use on gentlemen okay I don't want to blur skin on men but I can get rid of the speculum highlights just like I am right now grab color they removed their grab color hair move it there it's just that the flow is so important to this because I could push down more or less and I am in essence putting your makeup on her okay, look watch us if their bags under the eyes I grab it there move a little there okay? I'ma smoothing hears that he's kind of a darker tone you khun sculpt with this too okay and you can also take away blemishes so that is the higher level way of going about it now let's do the downing jury this is an album spread I need you to photo shopped this much faster so let's just pretend this is the layer we started from forget that I just did that technique I I'm gonna get this israel fund watch it select color range we're gonna expect right here okay? And I'm hold downshift and grab more colors I'm gonna grab all over her face except the lips and mouth things that I really need sharpened unaffected by this our eyes edges and of lips et cetera jewelry look at that selection it made I'm goingto man j of that new layer of just that so here's all I've got through that select color technique okay now let's flirt filter blur goshen blur okay remember I said take it past the point where you're comfortable there that's uncomfortable that's really uncomfortable so you want to be just in the area of well it's uncomfortable but I am not comfortable that ok she looks like plastic but no problem we're gonna add a layer mask and I'll wear masks are are their greatest tools in photoshopped consider ah layer mask if I am selecting a larry mask if I paint black on it I'm I'm cutting a hole into it down to the layers below I'm creating a hole into it I'm cutting from the top layer on the bottom and you could do a little bit of cutting so a little bit of the bottom layer shows up we're just cut right through it so certain areas aren't affected at all but what you just did in that layer it's so powerful and brilliant okay so I'm a hit be for I mean hit b for brush on his ex and my black is on top and I'm going to pay back the areas that I don't want affected it's good a flow of like twelve for speed here I want to get more images done I don't want this to be affected on the nose et cetera shift their five sammy oh five percent flow okay grab a larger brush by holding that shortcut let's make our brush super soft okay. And we are so are allowing on ly the amount of blur hit ac's, right? I'm going to paint a little back it's too sharp here and hit x and start with your lips again. So you slowly bring it back, and this can happen on you guys. If I did this with the entire bridesmaid group, I could do this so fast to three minutes. Okay, it's starting to look pretty good, but, you know, we got a problem. We have blurred pixels. What I tell you about blurred pixels. Rule number one blurred pictures are not acceptable. All right, anytime you use. Gosh, chandler, what you have to do over the top of it, you have to add texture back now in the advanced tutorials on the terrace transfusion toolbox. I show you how you first create, uh, high pass filter of the original skin, and at the end, you put that high pass filter of that original texture back over the top of the blur, and it is awesome or skin returns. All right? We don't have time to do it with smaller images. So for the people out there asking the questions, what do we do with smaller images? Uh, you don't have to do that high level of retouching I could just add grain back, watch this I cannot grain to the whole image and it be wonderful or it can not grain just to the parts that I blurred to do the part so I blurred we'll have to do is command click so where's command who command click and look I clicked on that selection I had earlier I'm gonna create a new layer above it and I'm gonna fill gray shift elite is the short cut fifty percent gray boom there's the grant I'm on ly gonna add grain to that grey area now filter this uh noise noise so we're going to be about three or four points of grey boom let's look at it before I make it disappear do you see that and what's the blending mud overlaying bye bye okay so I want to see this okay seal this let's go even bigger he's blurry kind of looks like plastic look at it with grain attitude the hope that shows up for lease teo audience out there but it really looks like a really well done makeup job especially in the size of our albums this it might be a date by ten in the album so shall we finish this together? Sure jim all right let's dodger bird okay okay I'm going teo I'm making a really rough square marquis cause I'm gonna I'm gonna blurt sorry guys this is I'm getting used to this okay so I just made I'm sorry to move around a lot I just made this is where I want the edges to be dark I'm gonna feather it. I use the square marquis kisses so fast but what's this filter or select modify feather notice it, I turned it into shift f six I'm going to go to hundred fifty pixels a large, very large feather. I'm going to slap disliked inverse shift command I and now I'm a new levels I use levels for broad stroked items, backgrounds, things like that. I use curves for mohr for things that require a high level of of, um, more specific and technical things skin specific areas, etcetera. So I just darken the area, but some areas I don't like darkened with others before or after. I don't want it on her shoulder so much so he'd be for brush, getting larger and larger brush and I'm gonna paint away here and here it is that's distracting. Okay, now let's do this let's light texture of the top and diffuse glow the end of it it's going my action sets transformational toolbox texture, overlay but through it yes, we want texture. Let's use our favourite number forty eight this is oh my gosh, I have used this texture in almost every one of my award winning albums. This texture there's something about it it's warm it's fine grained it has this ability to be really take on the theme is perfect is number forty I want everybody to have it in the tool kit it is my go to I think we use this more than any texture all I've made beautiful, uplifting albums with this also we want with an album that was really moody and dark it was a really sad story we want a competition without a cz well it could be bring you up take you down it's he might go to emotional one hand built this thing it's a already album sized and it goes over the top and this is this is a great example of how a texture khun ad warmth to your image and I remember every new layer every new layer adds a new element of emotion so this is khun ad tone and I'm not going to paint it off her face this free transfer first just get it in place right now it's a little muddy right? We're going to bring it down lower the a passage e this is what I'd look over and go hey, keira, what do you think right about there okay, perfect so again I'm gonna go heavy for the audience out there you really see it wow you're really seeing on that tv oh yeah okay, it's way too heavy. Just bear with me. I want you to think in those terms in your own processing space in your own studio I'm going heavy here, so you really see it? Okay, now let's select the area. I mean, its like to get on the texture itself in the layers I'm gonna get on her skin on I'm gonna select her just her skin there can't move that around a little bit now I'm gonna gaza and blew that. Okay, but first we select modify feather two hundred pixels and I'm gonna blur that away here goes filter blur goshen blur by by that okay, but before, after I blurt it off her skin but the tone remains, it becomes a dual tone it's such a powerful tool, these textures. Okay, um so I'm very happy with that. I'm gonna bring it down a little bit let's see before and after that to this point before after okay, and I'm going to finish with a diffuse glow. Here we go. This could make the whites pop selecting all I could remember that shortcut is nebraska shift command shift option command andy nebraska five finger one or you could just drag down duplicated, flatten it with command e there's a new layer on top of everything else filter distort, diffuse glow press okay, just let it go it's going to be beyond the level of comfortable but that's what we want we're gonna pull back and fine tune it well past the level bring it down but I like it on your face right about there and then I've credited lair mask on a paint a little bit off this area it just got too heavy, didn't it? It's too bright is grabbing our eye so we're going to hit b for brush and I'm gonna get a black brush and paint on the larry mask a hole in that top layer bringing that down and I might paint a little bit off her eyes off off here but I love what it does to veils and that's it let's see before or after before after okay you know, wait very simple that would have normally taken us about five minutes per spread. A few people are asking if you ever offer options black and white and color options to your clients if you added a whole image and in color do you offer a black and white option as well? Yes, I do way again. That was one of the things I struggled with when we switched to the art philosophy it was okay if I was what before I switched the art philosophy because I used to shoot color camera in a black and white camera but then I was shooting one camera even too but all my files which one do I convert to color? Which one do I comfort to black and white for them like do I give him a set of black and white and color? I didn't know it became really clear clear where we're delivering art which images needed to be black and white which experience is needed to black and why should say which stories were absolutely understood that this because it was distracting the colors distracted we got to convert it if our clients are mohr in love with the black and white look, perhaps a room in their house really would look like cpr black and white world to create the art with that state of mind for them ok, we'll get in that place that these were black and white art and we'll put ourselves in the black and white place which we loved to go is my favorite I love and I wish I could do more black and white frankly these days but for some reason these large albums everyone wants thes color stories were hired for these color stories ever since that emily album I showed you on the first day, which is a high color, high color theme with just our style developed into this so it is it is what it is um and I actually love it because it yeah, yeah, we get it. We get to do black and white quite a lot. But it makes it easier when we know that most of our work will be delivered in color.
Class Materials
bonus material with purchase
Ratings and Reviews
Ester Knowlen Photography
LOVE LOVE LOVE all the bits on how to create a wow shot without stressing about getting it/catching it by chance. So SPOT on!! A little bit of planning, a little bit of vision, and great ideas/recipe for amazing "wow" shots that are prompted and genuine (unique just like the people we shoot), rather than stressed over and chased. :) Amazing video!! :) Thanks Jim Garner!!
222 N 43rd Pl
This is such an amazing course. It is my first purchase that I have made with Creative Live and I couldn't be more pleased. Jim shared so much information and so many insights. It's great to be able to watch the segments over, picking up something new every time. Taking volumes of notes! I am starting to implement Jim's approach to photography—storytelling. I am just starting out in wedding photography and am so excited to have found this gem tutorial! I would highly recommend this to any photographer who wants to take their work from photographs to art.
Student Work
Related Classes
Wedding Photography