Lessons
Lesson Info
Finding Good Light
Now I have a set of photos that I want you to look at. And I want you to tell me what's common with all these photos that I have here. Okay let me give you another hint here. What did you see in all those photos? Catch lights, that's correct! And so a lot of, for me shooting in natural light, good light is catch lights. And so I want you to be obsessed with finding catch lights. And so whenever you shoot natural light it's like where's my catch light? And so when we talk about catch lights we have to talk about what really creates a catch light, right? And to look, to find a catch light what's happening is there's a contrast of lighting, okay? So, for example, I can find catch lights in a window. Why? Because usually it's brighter outside than I am inside. And so when your eyes are reflecting what you see, you're seeing a real bright spot, but it's dark where you are. And so that's how you get a catch light. How would you not see a catch light? When the light is all even, when there's ...
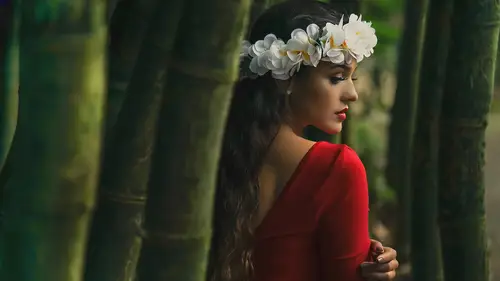
even lighting all around you're not gonna get a catch light. So therefore you're gonna have to find areas of contrast in lighting in order for you to get a good catch light. If you don't see a catch light that means there's no contrast in lighting, okay? So first example, here's ways of where you can find these catch lights. Window, archway, this is outdoors, right? And so a lot of times there's an archway and then there's shade underneath that archway and then there's bright light on the outside. A door is a great example. Especially if the door goes to outside or even if it's brighter out there in the hallway or whatever than inside you can create a great catch light. A lot of times I'll just turn all the lights off in the room, open the door, and then that will give me a great contrast of lighting and it's something very easy to do and for you to control, also. Open shade, this is a great technique and I'll go in detail about this, but open shade is gonna be an excellent way for you to find a catch light anywhere. And, you know, going over my course of my career I never really, no one really explained it to me really well. So anyways I'm gonna go into detail and show you how amazing this technique is and it's gonna open up so many possibilities for you to shoot in outdoors, especially. Okay let's get into window light, right? Your eyes actually reveal what the subject sees. So when you're shooting that eye is kind of like a fish eye lens. And so it directly reflects what the subject is seeing. And so that's why you can get clues of what type of lighting was used when you look at the catch lights. So a lot of times if you see a great picture, you want to analyze it, a lot of times I go in and I look at the catch lights and I can see, "Oh wow, that looks like window light," or, "Oh yeah I can tell that was an umbrella." Or whatever, a soft box or whatever. So just remember that is that the eyes reveal what the subject sees. And they're going to show that bright light source. Okay and a lot of times I use window light. That is like my number one go to when I'm using natural light and I'm shooting indoors I'm looking for windows because they're usually plentiful. And so in this case here I'm using window light, but this is the actual situation. You can see the window camera right. So I have that soft light coming in and because it's at an angle to my subjects you can see the toning. Do you see shadow and highlight? Shadow and highlight is your friend. Why do we want to see shadow on our subjects? Anybody know? Yes, in the back. It crease depth, it creates shape. Photography is two dimensional, right? And so in order for you to see shape and texture there's gonna have to be a shadow involved. So that's why you need to get the light not directly on the subject, but off to the side a lot of the times. So now you can see that beautiful contouring on their arms and on their shape and you can bring out the shape of your subjects. So you're looking for light that's soft, but you're also looking for light that's directional, meaning coming mostly from one source. And that's gonna get you the shadows. Alright so here's another example using that same window but I'm taking a portrait here. And where is the light coming from? It's coming from her left side 'cause you can see the catch light right there. And I usually, in general, just a general rule, we'll get into this more on my next lecture at 12 o'clock but I generally keep the nose towards the light, okay? And that was you're gonna get a beautiful contour on the face, if it's directional. See that slight shadow? That short side shadow there? Without that shadow you're not gonna see the contour in the face and you're gonna make your subjects look a lot slimmer. So in general I just use it all the time. I know if somebody were to take my portrait, short side shadow is a must with me. I don't have very defined features on my face and so I need that shadow to bring the contour out. So if you're shooting a subject and their features are very petite or they don't have a lot of strong bone structure, you've got to have that short side shadow on their face or else it's not gonna come out very well. So as you can see catch light there, nose slightly toward the light, and you've got a nice short side shadow and it really bring out the shape of the face. Okay and look at the light contour on their arms here. I don't know what it is but every woman thinks, "Oh my arms are so big." Everybody says it and so I make sure, especially when I'm shooting women that-- Especially if it's like they don't have any, it's just a bare arm, that I get that contour there. I get that shadow highlight. You're looking for shadow highlight and it really makes their shape come out in a very pleasant way. And here's another picture here where I'm just using that window light off to the side, as you notice, the nose is towards the light, right? And, um, it looks very nice. In this particular picture she really wasn't, she's just a normal, she's not a model or anything like that and she was very uncomfortable taking pictures. So a lot of times when they're uncomfortable I just have them close their eyes and look off to the side and it creates a more natural expression. So I'll do that a lot, actually. Okay so window light. Guess what, folks? We've got some nice windows here. What about we do a little bit of demonstration here on doing that? So I'm gonna get my camera up here. And I don't want to pull anything down here, so I've got a lot of-- How does that work here? There we go. Alright so let's bring up our lovely model, Sarah. Perfect. Now let's do a variety of things here. I'm gonna shoot with light that is straight on my subject here, okay? So let's take a couple shots here, let's take a couple shots maybe where the light's off to the side and then maybe over here so you can see the different angles and what it creates. So how about, Sarah, why don't you sit on that bench right there. And why don't you just cross your legs, right? And then lean up on one side. Perfect. Great, learn forward just a little bit. Right. Okay so turn this way. Now I do have some catch lights here, but they're not pronounced. So is it possible to turn this light off here. Because there's some studio lighting that is creating even light, but it's not giving me the dr-- I just really want to focus on the lighting that's just from that window and it will be more directional and I should get a little bit more catch lights. I am getting some catch lights, but I want them a little bit more pronounced. So let's see if we can turn that off and that'll make a difference. So I always try to eliminate the other sources of light that's in the room. Sometimes I'll have to turn lights off and in this case I can't do it but I would use curtains to eliminate some areas so I could just use that directional light and then that catch light is really gonna pop through when you do that. And get you a more intense, this looks a little bit better. Okay perfect. Turn your head just a little bit that. Beautiful. Let me just line this up right here. One, two, ready. You can see the catch lights in her eyes and I'll get a little bit closer. How about if you look straight at me, right there. Now if I'm using this big directional light here, no matter really what-- 'Cause I always say nose towards the light. In this case you're given more freedom where she can turn her nose this way, she can turn her nose that way. Whatever she does her nose is always gonna be towards the light. So if you're posing a subject and they're kind of a little bit they can't sit still or they don't take direction very well, you may want to do the situation because no matter what they do you're getting great light. And so let me just try to get this beautiful light right there. One, two, three, good. And you notice I'm preparing the subject? I'm counting, I'm saying, "One, two, three." Why? Because I want to make sure that their eyes are open. And if you just start clicking shots the model, or your subjects are gonna be really nice and they're gonna try to keep, they don't know when you're gonna click, they're gonna keep their eyes open for you. And then what happens right when you click it they blink. So that's why it's a little bit of preparing when I talk to my subjects. Okay so let's try another one. (mumbling) One, two, three. Good. And just turn your nose this way a little bit. Look back at me. A little bit more. Right there look right there. I like that, that's beautiful. One, two. Oops, let's try one more. One, two. See how you can see the highlights? I mean the catch lights in her eyes. Alright now let's move my subject, let's try right here. Why don't you stand right here. This is more of a split light situation. I'm having light on half of her face here. This is great for guys. So when you're shooting guys, plus guys don't look as beautiful as gals and so if you shadow half their face they're gonna look better. Just kidding, just kidding. So I'm gonna use more of a split lighting look. So great. Why don't you just relax and put all your weight on one-- Perfect. Okay good. And I'm gonna, so right here. Open this up a little bit, good. One, two, three, good. Turn your head just a little bit this way. So now I'm gonna put her nose a little bit more towards the light. Turn your head a little bit more and look back at me with your eyes. Good and just pop your hip out, relax, perfect. Just ind of bring your hands up here. Good, beautiful. Love it. I like that. Okay good. And I can crank down a little bit on that. One, two, ready. Good. And so this is trying to get a little more Rembrandt like where you've got some more highlight by the cheek where you can see that beautiful light coming in. So that's the shadow is-- What you're trying to do by moving the subject around is you're trying to get different shadows on the face. Here there's really no shadow at all and then here there was shadow. So in the case of using natural light you can move your lighting source so you have to move your subject. And if you get in a little bit of rut of not knowing what to do you put yourself in a routine and you try to use the different lighting directions. That you can put on your subject and it will give you a different look, okay? Where's my clicker at. Perfect. Okay let's move on. So channeled light. What channeled light does it you're taking light form a larger area and it's being channeled or funneled into a certain space, creating nice directional light. And so that's what I'm looking for what I'm looking or channeled light because that light coming in will be directional, it will be large, and it will be giving me beautiful catch lights at the same time. So that's light forced into a narrower area. One is a door, we talked about. There's an archway, which you see right here in the photo. And then there's tunnels. And so let's look at this particular situation here. So let me go back to this photo and explain where I'm shooting. So you see this diamond pattern in the background, right? And so when I see a situation like this where I see a beautiful arch light, beautiful diffused light coming in and I see an interesting background, bam, that's where I'm going, okay? And so here I'm setting up the subject. Right in that area. Where's the nose pointed towards? The light. And so that way you're gonna make sure that her face is the brightest part of that subject. And so that's what you want. Your eye naturally goes to the brightest point and so make sure that that nose is always pointed towards the light and bam, you'll be able to identify that subject. And so you can see the beautiful highlight and shadow on her skin and it gives it nice contour. So you can shoot it wide and now you can come in and you can change it, even though it's the same light. She's sitting down, you're changing the expression and you do something about waist up. And then you can go in just what we did and go in even tighter. So there's a variety of images that you can do with just one light source. So don't feel like you're limited by what you're doing. So remember to try to shoot wide, mid, and tight, no matter what you're doing. And then you'll get a variety of images. Okay let's keep moving. A door. I love doors. This was actually in a trailer. So I just opened up that door to let that natural light come in and it naturally channels right into your subject to give her, look at those beautiful catch lights that are right there. But you can see the vertical catch light, which is a door. So you can see that that's a door right there. This is another thing that I love doing during weddings is I use the sliding door. The sliding door is a great source of light, you opened up the curtains, and a lot of times when you're using the sliding door you need to turn off all the lights in the room. So you just get one light source and look at all the beautiful catch lights in there. A lot of times I'm shooting on a lower position. Why am I shooting at a lower position? Does anybody know? The reason why I'm shooting at a lower position, because I don't know if you've ever been into rooms where the bridal part is getting ready, it is a complete disaster there. There's like panties and bras and everything all around. And so I'm like I've got to eliminate all this stuff, let me shoot up at the ceiling and then I'll have a cleaner background for them. But look at that beautiful light coming in. And that's just the sliding door and I'm just using that, love that technique. So a lot of times, too, when I'm shooting a group of people I don't want a lot of side light or anything like that, I just want even lighting. And so if I were to shoot a group I would put them right here. Because the light from this window is coming in and it's giving you an even light no matter which way the faces are turned I'm gonna get a great shot at it. Okay open shade is your secret weapon. So let me tell you a little bit on how to find open shade. And so what you've got to do is you've got to find, you're going outside and you need to find a large area of shade, a big area. The reason why is in the eyes it needs to look dark and then one little light source. So if you use a small patch of shade that's not gonna work because there's light all around. So you need to find a large area of shade and have the sun behind or to the side of the subject. And so what happens is the sun that's creating the shade will also fire up at the sky and that sky acts as your reflector. So I want you to think of the sky as a dome, okay? And so when a subject, let me show a little bit of an example here. Let me get my video light here and see what we can do. So here's your sun, right? And it's creating shade on this couch, right? So what I would do is as the sun is creating this shade I would put my subject right here, in the shade. And so what's happening is if you think the sky as a dome what's happening is this light will reflect off this blue sky here and give you a catch light right there. Every single time, without a doubt. Every single time. So as long as you can see the bright sky, right? Get into some shade and you see the bright sky there and that sky is gonna be evenly illuminated. There's not gonna be a hot spot on it because the sun's in the other direction, it's gonna give you a beautiful catch light and usually it's gonna look like a long strip because that is what the catch light is is the sky above. And so you can see in this picture here that long strip. So whenever you see catch lights and you see a long strip across the eye, a lot of times that's open sky. Especially if it's shot outside. So let's give some examples of that. And then you have the subject, of course, look towards the light. Catch light often looks like a long strip across the eyes, which I talked about. Okay so here it is. The sun is actually setting behind the subjects. Look at the beautiful highlight on the hair that it's also creating. They're in a large patch of shade, but above them is the beautiful sky and that creates a catch light right in the eye. Here's another situation. Of course you can tell that the sun is behind them, right? I put them in a big patch of where the trees are, right? So a lot of times when you're looking for, it's really hot outside, you're always looking for shade somewhere, right? And so this was in mid-day, it was extremely hot, it was probably over 80 degrees. So I'm looking for shade, I put them in the shade, the sun is behind them, but above them where they're looking is open sky and see that beautiful catch light it's gonna give in their eyes right there? Same situation here, sun behind, look at the sky reflected in her eyes. So whatever's in their eyes is what they're exactly seeing, okay? Here's another situation in Hawaii I found these big beautiful trees here, the sun is setting behind, she's in a large patch of shade. And look at that catch light that's right in her eye. The sky is a big reflector. Think of the sky as a reflector and that's what it is. You can get a catch light anywhere with this technique. Just look for shade, look for some open sky and it's gonna create a catch light. So that's very helpful.
Ratings and Reviews
Margaret Lovell
Scott is a passionate and engaging instructor. He's hilarious. I like a side of humor when I'm in a class. I have a preference for shooting in natural light, so I'm glad that I took this course. I learned more effective tips than what I had been doing. I know I'll be re-watching this course in the near future.
Phillip Tour
Great course!!! I learn a lot about natural light, im very good with natural light but I can't wait to get out of my studio and start shot again with natural light! Thank You Scott!!!
a Creativelive Student
Excellent Lesson from Scott. Easy to understand. One of the best CL Lessons I have ever watched. Good job