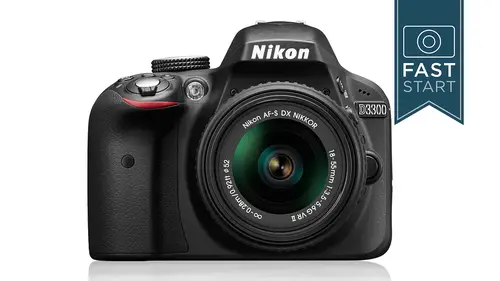
Lesson Info
2. Button Layout
Lessons
Lesson Info
Button Layout
So let's, start with the button layout of cameron. This is where you want to have the camera in front of you, and we're just going to start walking around the camera, looking at things and talking about what they do. So to start with, we got the camera and we're going to be looking at the top side of the camera first and foremost to turn the camera on. We have the on and off switch right around the shutter release. Now, when you do turn the camera on, it stays on, but then goes to sleep. The camera is always trying to conserve battery power, and this is something that you can control on the menus and that we did kind of in the set up. You can go in there, you can control how long your camera stays awake before it falls asleep. And so if you let it just sit there for quite some time, you pick it up and you squeeze the shutter release. It may not take a picture right away because it still needs toe wake up it's, usually very quick to wake up, but I have a press on the shutter release wil...
l usually wake the camera up, and so the shutter release kind of the next button that I want to talk about is a two stage button. You'll press halfway down to focus and the lens will actually move. And actually, if I put my hand right here in front, you can see the lens moving back and forth, and then when you press all the way down, the camera will take a picture. The shutter release will also activate the meeting system as well as the focus is sean's focusing system as well as waking the camera. So it's a good kind of button have your finger ready to go out the mod I'll here on the top of the camera, very important, I'll so let's talk more closely about this on this dial. We have a lot of different ways to set the camera up for different types of shooting let's start with the auto mode. This is a full automatic setting, and this is something that once you finish this class it's my hope that you never used this mode again. It's a good mode. If you were gonna hand the camera, somebody who doesn't know what they're doing, they can't get into a lot of menus. There's a lot of what I call child safety locks on the features of the camera, it makes everything as simple and as automated as possible and it's very hard to get creative when it's in that mode. But it's, a safety precaution note. If you're going to hand the cameras to somebody to take your put picture, you can put it in the full out full auto mode and you can be pretty sure that they're not gonna make too bad a picture of you. Next up, the flash off mode is exactly the same mode with the flash turned off, so if you're in a museum and you want to make sure that the flash doesn't fire, you could turn it to that mode. The problem is, is that the camera is still in full auto and you don't really have much creativity that you could do with it. You don't have the control that you do in the manual sections now below that are a number of other automatic sections, and primarily what is going on here is that they're setting shutter speeds and apertures for you. It is also going in and changing the motor drive. It might be changing the meter ring system, the ray, the way it reads the light and everything else that's going on in the system and if you knew nothing about photography. These are slightly better than the full auto mode, but they still are very restrictive with what you could turn on and turn off the camera and what they do and so it's my recommendation, if you complete this class is to never use thes modes again, this's you've taken the step me on this these air for people who were not willing to take the class you're going to you're going to be moving beyond that, and so we do have a guide mode and a guide motives for people who do want to learn and there's kind of a learning system based in here, and this is one of the areas that we're not going to be spending a lot of time it's got these guide menus that help guide you through learning photography and once again, this is for people who want to learn photography, but they actually haven't taken a class so it's a it's a step better and in the right direction, but we're going to go straight beyond the guide mowed into the more manual modes, first of which is p for program this is where the camera is going to set shutter speeds and apertures for you and that's it you get to decide everything else that goes on with the camera, whether it's the motor drive, whether the flash pops up, whether you should rather whether you shoot j peg you get to choose that in programme it is simply choosing shutter speeds and apertures for you in the other automatic modes it's making decisions on all those other things that I was just talking about and so if at the end of this class you forget everything you're not sure what to do and you want to take a quick picture I would recommend the p mode it's a good place to to be the shutter priority mode this is for you to select the specific shutter speed you want and let the camera figure out the rest of the equation and it could be handy for someone who wants a very, very specific shutter most photographers though when they want an automatic mode prefer the aperture priority mode it's a quick and easy mode to determine the depth of field the amount of light you want coming in through the lands and it's just a very simple way of getting directly to what you want with a little bit of automation you get to choose the aperture the camera will choose the appropriate shutter speed and finally is thie em for manual and this is where you should be if you want to learn photography you should be comfortable setting your shutter speeds and temperatures as well as everything else on the camera and when the cameras in manual you have complete control and all the options are available to you so I highly recommend working with manual for most of the time and some of the time when you need to be a little bit quicker, used the aperture priority. And as I say, if you forget everything, you have my permission to use the p mode, but I wouldn't rather see you in the a or the m o for controlling the camera in the shutter priority or aperture priority mode. There's a dial that we haven't really got to yet is this main dial here in the back of the camera, and so if I am in shutter priority and I adjust the rear dial a camera like this, you can see the shutter speed changing, and we're going to talk all about this graphic back here in a little bit if I change it to aperture priority and I adjust this dial, we're going to be changing the f stop, the aperture on the camera and the resulting shutter speed as well. So the problem is, is that we're when we're in manual, we only have one dial. So what do we do with that one dial? Well, the one dial control shutter speeds to start with and to control apertures, we have to be very tricky fingers here, we have to need two fingers who need one finger to press this plus minus button that we haven't talked about and turn the dial and then we can change the aperture so it's a combination of turning the dial as well as pushing a button and turning and I'll to change the aperture. And so these buttons and dials are right where they're supposed to be for you to quickly access them, but you need to be careful about which ones repressing which ones you're turning, and once you do it a few times, you'll get quite used to it and there's our plus minus button right next to the shutter release. So it's very easy to get to all right. Next up on the camera is a very large lever that's kind of located right below the mod dial, and this is your dr know this controls what happens when you press down on the shutter release doesn't take one picture or does it continue to fire as you press down? And so if we were to put this in the motor drive mode here, we can fire off pictures pretty quickly. We also have a self timer mode as well it's a quiet mode and so we'll put it in the quiet mode take a picture you can hear it's a little bit quiet or what's happened is that they've slowed the motor's down so that they make less noise your camera will not be as quick, so I certainly want to use that at a sporting event if you want to take quick pictures you'd want the motor drive for that but for most of the time a lot of people will be in s for single shot there's our single are continuous or self timer and her quiet next up we have the exposure compensation button and we've already kind of got a preview for this this is for adjusting the aperture if you want to control the aperture in a full manual mode but if you have the camera say in shutter priority go ahead and turn the camera here if you press that button and turn the dial you will do is called exposure compensation you will be adjusting the brightness of the picture and so let me show you a picture example of why you would want to do this is if you take a picture and you're not sure that it's quite as bright or as dark as it should be you khun dial a minus to make it darker or a plus two make it darker now you can go beyond the plus one you can go plus or minus one two or three or maybe even beyond but for most people a little plus or minus if they want to make the picture brighter or darker in any of the automatic modes that is how you would do it so that's very easily at your fingertips and easy to get teo next button right? Besides, that is the infor information button. The info button. So if we press the info button, we turn on the lcd on the back of the camera and the reason that we wanted turn it on us to see information. The reason we want to turn it off is that when we hold it up to our eye, this bright light in our face is kind of bad. Maybe if we go to this camera over here, if we hold it up here doesn't automatically turn off, we can just press that button to turn it on and turn it off. And so if I'm looking through the camera, I'm going to want to have it off. But if I want to figure out what's going on, what shutter speed of my at how my working with the camera I'll leave it on it's so that's just an on off for the back of the camera. Next up we have the flash and we're going to talk more about the flash in a moment, the hot you wave a little protective cover it's very, very stiff on here, and this is where we would mount any sort of hot you what is important is that there are some contacts on there. That are specifically placed for nikon tt l flashes. I would highly recommend a nikon tt l flash you do not want to stick on another brand, you know, canon or pentax or sony flash because those contacts could be in the wrong spot. Ah, you're not going to get automation through it. There are some generic devices that you could hook up so long as they sync up with the large pin in the middle and there's a little marking right here. And I don't know if they can make out on this above camera here, and that little marking indicates exactly where the sensor is in the camera. It's the focal plane, and from time to time, you might get yourself involved in photography that you need to measure the distance from the focal plane to the subject, and that is exactly where you measure it. All right, let's, go to the back side of the camera and to start with, we have a die after which is this little turning dial kind of hidden up by the viewfinder, and this is for adjusting the viewfinder to your eyesight. And so when you look through the viewfinder, you want to make sure that the focus brackets and if you press halfway down on the shutter release, the information at the bottom of the screen is clear and easy to see, if not you can turn this dial so that it is adjusted for your eyesight. I have seen cases where people think that every picture they take us out of focus and it's, just simply that they're diop turn needs to be adjusted can sometimes get hit. So be careful about bringing cameras in and out of the bag. Get bumped that way, right next to that is the a e l an a f l button, and what that stands for is auto exposure, lock and auto focus, lock and there's. Also a little key just to the upper right of it, which is image protect and so there's a number of things going on with this button. If you want to lock the exposure in if you were in an automatic mode probe graham shutter. Priority aperture priority and you want to lock the shutter speed aperture combination in you would press this button in, and so if I figured out my correct reading, I would press the button and I do have to leave it held in as I am taking the picture so I would find my reading. Press the button in and then take the picture and so that works with focus and exposure and it's one of the buttons that you can go in and customize so that it only does one of those two things perhaps or maybe it does something else and we will get to that when we get into the menu system the image protect us when you play an image back you can protect that image from getting deleted by locking it in uh so if you want to make sure that you don't inadvertently delete an image that is one way of doing it next on the back of the camera is your command I'll now this is one that we've already been using to change shutter speeds and apertures it's what you will frequently use to make any sort of common change in the camera next up is our live view and this is a rotating switch and so if we switch this overto live you ah we'll rotate this to the side and this is simply turning it on and off so it takes us from our information screen to our live you and now we can view through the back of the camera like the way many point in shoots d'oh and in my opinion this is not a great way to do general photography what is good as if you are using this on a tripod where they have a very steady shot of this it's very good for landscape photography because one of the things that's nice is that you can zoom in on your subjects and you could make sure that your subject is in focus and so that's how you turn live you on and off now at the center of the live you button is a record button for recording movies and so I want to talk a little bit more about live you and movies because the camera operates in a very different system when you get into the live you ah, one of the important things is thie information button go ahead and throw this in the live you the information button will pull up different sets of data. We have a grid screen, we have lots of information, we have kind of minimized information on it depending on how much you want to look at next up the zoom in button actually already did this, but I'll do it again. You can zoom into your subject very close to see if you have proper focus on it and this is a great way to ensure that you have absolute perfect focus and then there is a minus zoom to get you back to the normal view on it now the focusing system when you were in live you or shooting movies is different than when you are normally taking pictures with the camera and so we have some different modes in there that we're going to get two when we get to the menus and I just kind want to give you a preview of the four different modes that they have first off there is the face priority auto focus where the camera will actually recognize faces and focus on the face so if you have a person that is moving around in front of you, you could use that. So if you're photographing your kids, you're shooting video of him that mike work work well in that situation next up is a wide area auto focus and this just takes a really wide reading of auto focus and it's good for general photography normal area is a smaller area, so if you want to be more specific I would choose that one and then there is also a subject tracking auto focus that isn't specifically looking at faces but it's looking at subjects and might be useful in different types of action or sporting areas. In general, though the autofocus system is fairly slow in the video or the live you mode, the cameras focusing system when you're in live you or in the movie mode also has something else you need to be concerned about and that's how the camera phone this is before we were talking about what it focuses on this is how it focuses and it has three different options here it has single where it will focus on one solid object and stop so if something is rather stationery that would be a good choice it has a full time auto focus, so if something's kind of moving around a lot, then you would want to use full time focus so that it will constantly adjust and track and change to that moving subject. And then of course you can always do manual focus as well by manually turning the lens yourself which one you choose depends on the situation as to you know which one's the best choice to make but this is different than when you are taking standard pictures. This is only for the live you or for the video recording capabilities of the camera. So once again right there in the middle of it is the record button so if we're gonna go ahead and flip this camera on, throw it into the live you weaken start recording and you can see we have our record light blinking at us it gives us a ten minute limit, so we're I have nine minutes in some odd seconds left before we can before I actually stops on us and it's a very good image that you get from this camera the large sensor it's very good in little light it's not the world's greatest video camera just because there's not a lot of controls for a video camera on it but it's, a nice feature to be able to have on the camera and so some things to know about recording movies, is that there's a number of different standards out there. Hd tv has kind of taken over recently, and so that is nineteen twenty by ten etienne pixel height and width. And so if you have an hd tv and you want the highest resolution possible, the best you can get out of this is full hd at twenty four p or frames per second. You can also shoot at what's called hd their standard high definition in theirs. Full hd twelve eighty by seven twenty eight thirty frames per second would be a standard that is common here in north america. In other parts of the world, twenty five frames per second might be common and if you like twenty four frames per second that's what hollywood films they're movies at s o if you want that kind of look to your movies, try twenty four frames per second and then it also has a small size of six forty by four twenty four. If you're recording, you know something simple that you want to email, something you want to post on youtube really easily and is easy to download, and so you are limited to ten minutes of video shooting. So it's not going to work for a two hour interview? You have to shoot it in ten minute segments, you can only record four gigs at a time. You could put in a thirty two gig card and just record a siri's of four gigs at a time. And so with his camera, it is best to shoot kind of in short burst when it comes to the movie mode and we will talk more about movies in live us, we go along right below that is the multi selector it's, this four way circular button, and it is essentially your mouse when you are in the menu system and you want to move up down, left to right. This is what you will use to navigate your way around, and then the ok button is something that you will hit when you I have found what you want and you want to lock that in, you'll hit the ok button for a lot of different features. Next up is thie speaker, which is there in the lower right corner, those little tiny holes there. So if you're trying to listen to what you've recorded on your movies that's where you want to press your ear up next to and then right next to that not too visible is a card light. When you take a picture, let me go ahead and take a picture right now and you'll see that light come on for just a moment and that means it's writing information to the memory card if you that light is on. If I was to fire a syriza shots, let me put this in the continuous mode make sure it's all in manual going to fire a bunch of shots, the lights comes on and it stays on as long as the camera's recording it's a recently fast scarred the camera's pretty fast and you don't want to turn the camera off. You don't want to take the battery out or take the memory card out of the camera when that light is on. Next up is the garbage button if you take a bad picture like I believe I just did right there, you compress the garbage can button and it's going to ask whether you want to delete that button or delete that image and you would just simply press the garbage can again to delete that image so it's a pretty simple process. Next you have your main lcd and this is where you're going to see your shooting information as well as your, uh, imageswhen you playing back it's a very good quality screens about three inches in size as we work our way over to the left hand side, we have a number of buttons over here that we're going to be using quite frequently. The information button can be used for turning this information panel on and off. We had another one up on the front of the camera. We essentially have another one back here if you press it twice you khun start entering information, and this is something that we're going to be getting into in the second half of this class, so one button to turn it on another button to start entering information on it right above that is the zoom button if we take a let me go ahead and take a real picture here, but I can be back in a little bit of automatic mode who that felt like a really slow shutter speed. I think that's going to be a blurry picture, but let's play back anyway, if we want to zoom in on it, my info button here, perhaps back to my standard side, okay, right there? Actually, I'm going to take a better picture. I'm going to redo that because I want to take a better quality picture, I'm going to choose a lower f stop, and so now we have our full image back here play the image back, and now we can zoom in and to see if I got this sharp and it's not a lot of light in here so you can see that it's not sharp enough I should get my tripod out and use a tripod and so we have a plus minus and um plus button and a minus button for zooming in and out of our images to check focus we can also do it with live you as we did before and so that's what the plus in the minus button is for the question mark if you'll notice that right beside the button is for getting help if you have questions on something may go ahead and enter something here it'll give you more information about what you are looking at and so sometimes it'll give you a couple sentences to describe what's going on rather than one simple word or an icon next up is the menu button and this is where we will get into the second half the class going through all of the features that you can go in and customize the camera to your liking and then finally the play button which we've already used is for playing back your images and you could just turn that on and off to go in and out of the play mode next up we're gonna look at the left side of the camera all right right up on top is your flash button if you are in one of the automatic modes that button will likely not do anything at all if you're in one of the more manual modes program, shutter, aperture, priority or manual that will pop the flash up, so just simply pressing the button pops the flash up, but you'll also notice that there's a little symbol above it and this button is also useful once the flash is up. When you press that button and turn the dial, you can change the mode that the flash works in. So why would you want to use the flash? Well, let me show you some pictures first off, if you use your camera under low light conditions and you don't have enough light, you're going to get a blurry picture now, there's a couple of options that you have one option is to raise thie so something we haven't talked about yet, but you could raise the sensitivity level of the censor and get a fastener after her speed to take the picture. But your image is gonna have some problems called noise, and we'll talk about that as well in a moment, so obviously, using the flash for low light conditions is a good quick, simple way to throw some more light on your subject matter now flash in general has a unique characteristic to it is that it has a lot of fall off. It falls off very quickly, so it's hard to have subjects at different distances because it's going to illuminate whatever's closest to it quite a bit more than what's. Further behind it. It is generally on lee going to be good for about ten to fifteen feet in front of you there's a few rare exceptions, depending on the lens and lighting condition. But think of things that are directly in front of you. Now, a good time for using the built in flash is exactly when you want it. Expect to use it shooting a portrait under daytime conditions with enough light, you can get nice pictures under cloudy like conditions, but if you add a little bit of phil flash, you can add a little bit more light into the eyes and into the shadowed areas on faces. And so if you're going to shoot a portrait of somebody under cloudy skies or even lighting conditions, even though there's plenty of light, this adds light in the right area. And so it's a good way to add a little bit of phil flash to your subject they want a sunny day, it's probably even more important. People might think you're a little crazy when you shoot a picture with him in bright sunlight, but you're using a flash but the problem is is that when you shoot pictures in sunlight is that your subjects are often have a lot of shadows on their face now you could use that plus one exposure compensation that we talked about earlier about lightening the pictures up, but it probably be better to add a little bit of phil flash to it that way you're not blowing out the highlights a cz you are in the plus one exposure compensation photograph so in the fille flash we've just popped open the flash and we've let the camera figure out how much light we need now there's a lot of different modes that you can use the flash in and these are the ones that I was just showing you how to get into and so something's to be aware here any time you see the lightning bolt that means the flash and if it's on that means you're probably going to be using light at the adding the flash to the shot you could turn the flash on you can force the flash to turn off slow refers to slow sink shutter if you want to use the camera with a slow shutter speed let's say a half a second you can use flash at that slow shutter speed to get some interesting lighting under low light conditions mixing flash with ambient light red eye reduction is kind of a double edged sword on this one. If you have young kids or you have people that you photograph that have red eyes, it has a built in system for helping to reduce the red eyes. The problem is, is that delays the shutter firing by about two seconds so it's hard to take spontaneous photographs because there's a light that comes on, stays on for about two seconds before the picture is taken rear refers to rear curtain synchronization on that slow shutter speed of a half second, you can have the flash fire at the beginning or the end, depending on the effects you wanna have. Automatic is just if the flash is in fully automatic and to change these modes. What you want to do is once the flashes up is you want to press the flash button and turn the dial and back. When you do that, you will see the flash modes changing on the back of the camera. Now the flash does need to be up while you do this, and so those are some of the different modes that you could be in for right now, I'm just going to leave it with the simple lightning bolt for flash. Some more information just about about flash first off you'll be limited to one two hundredth of a second you can't select anything faster the camera will force you to stay at two hundred or lower as I mentioned before, it has a range of about three meters ten feet or so at s o one hundred another nice feature on this is that it acts as exposure compensation and that's what this little I'll button up here indicates it's it's lightning, the lightning bolt and the plus and minus so if we do that we're going to press that button. What we have to do is we're gonna have to press get this up on the keynote so you can see this you have to press three buttons at the same time so you gotta be really tricky. You gotta have one finger on the flash plus minus you have to have one finger on the plus minus button and then you can exchange you can change the flash exposure compensation what this means is that you can power up or power down the flash the flash whenever it fires is automatically doing its own thing is far as power and this gives you the ability to brighten it up or darken it and let me give you a photographic example why you would want to do this under cloudy light conditions normal like and you add flash it'll often add too much flash and the tt l stands for through the lens technology it's the flashes firing automatically toe what it thinks is the correct amount of light, what you can do and what I would recommend for a lot of people. Portrait style photography, which is where you're most likely to use the flash, is to dial that down to minus one so t t l minus one. So I'm going to do that right now on the camera, I'm gonna press the flash plus minus button, I need to press the plus minus button, and then I'm going to turn this dial so that it goes to the minus side by minus one. Now you can go further than that. If you want teo in this particular example, I don't see too much of a difference between minus one and minus two, so I think minus one is a good standard to leave your camera, but your name you may need to go beyond that in some situations. In this example, you'll notice how the flash completely blew out the face of our subject here and it's, partly because our subject has a very dark sweater on as well as there's, a dark background on the cameras trying to compensate by lighting up whatever it can, and so we can dial in a minus one of mine. Is two and a minus three and in my preference is to minus two on this one, and so in some situations you may go all the way down to minus two. In some cases you make all the way down to minus three, but I think bouncing between minus one and minus two is good for general people photography. Next up on the left side of the camera, right below the flash button is something called the f n or function button. And this is a general all purpose button that can be programmed for a variety of features, depending on what you think is most important. As it comes out of the box, it is programmed to control the s o the sensitivity of the sensor and this, I think, is the best option. But there are other options, and I will show you when we get to that next step over on the lens side, we have the auto focus and manual focus switch. This is a manual switch and for the lens autofocus it does need to be in the a mode. This button or switch will look different depending on the lens that you have on your camera below that on this particular lens, we have vibration reduction. And I'm gonna go ahead and turn that on that's probably why I was getting a blurry picture there before on, so I'm going to leave it in auto focus and leave the vibration reduction on. I would generally leave the v r on all the time that you are hand holding the camera. If you're going to mounted on a tripod, I would turn it off. In that case over here in the door, the hidden door, we have a number of connections that we have for the camera and so kind working from bottom top. We have a navy plug in here so that we can hook it up to a traditional tv hd, my port for hooking up to an hd tv u s b port for downloading images directly from the camera. Personally, I recommend a card reader, but I will talk more about that in accessories, but you can go directly from the camera to a computer. And then finally, nikon has a connection for a remote or a gps unit. You connect lee, actually hook up a nikon gps unit to it so that you can record data when and where you shot all your photographs. There is a remote that you can also plug in so you can have a wired cable release that why I will also talk about in the accessory section at the end of the class over on the right hand side of the camera not too much to talk about over here we have our card slot and this is where we put our memory card it's spring loaded so the card can on lee go in one direction and just make sure you press it in so it's firmly inserted and close the door next up we're going to talk about the front side of the camera and so we've obviously had our shutter release right there in the front. Here is the red eye reduction lamp it's also the self timer lamp it's also an auto focus the light it's a general purpose light that will come on for a variety of reasons so for red eye reduction it stays on for about two seconds and this is the delay when you're taking red eye reduction photos and so whether you want to use that once again you'll have to weigh the costs of the two second delay versus the red eye reduction the self timer lamp it'll blink it you when you put it in the self timer mode to let you know when the picture is going to be taken and it's also an auto focus assists light essentially a little flashlight when the camera can't focus it's obviously not going to be very powerful so it's not good for long distances usually good for probably about two meters or six feet in distance over on the other side, right above where it says d thirty, one hundred are a couple of little holes, and that is the microphone below that is a lens mounting mark, and you could see this little white dot on the camera, and then we have a white dot on the lens and that's where we want to match the dots up, too. When we mount a lands are lens release button is what we need to press to get the land is on and off that's what locks the lens in and out inside is the mere, and we talked about that earlier with the single lens reflex that so you could see through the lends itself the contacts, the cpu contacts for connecting up with the lens or up on the top side. You want to make sure that they are clean and don't have any dirt or obstructions between it and what is on them lands and that's the front of the camera. Now the kit lands there's a lot of different lenses, but I'll talk about the cat land because a lot of people get this lands with the camera there's two different types of lenses that you can muse with this d thirty one hundred. Ah, you can use f s lenses and f islands is, and they will say right on the lens if it's one of those two types of lenses and you do need to have these to type, it is not compatible with a number of current nikon lenses that are being sold in the sense that it won't auto focus. The lenses will still mount. You'll still be able to use him in many ways, but it needs to have that system on it for it to auto focus. Your zoom ring for changing your angle of view is right here. Eighteen to fifty five eighteen is the wide angle fifty five is the telephoto your focus ring. If you do want to put the camera into manual focus, it has a manual focus ring out in front and you would turn that manually to focus and for certain types of video works very well to just manually focus ahead of time and some types of photography. You may just want to manually focus the filter threads in. Here are fifty two millimeters in size, so if you want to get a uv protection filter or polarizing filter or any other type of filter, you're gonna want to get fifty two in size to fit this land's properly. You may notice little ridge around the edge of the lands, and this is so that you can mount hood. I'll talk about exactly which hood you need when we get to the accessory section, but it's a good idea to have a hood on there to protect the front of the lands from stray light entering it. It also works as a nice bumper. We have the focal length as to where we are set on the lens in our focal length, little mark right there, and then we have a number of our bit of lens information down here as to what type of lens this's a d excellence, and I will talk more about that when we talk about lenses and then the index mouth, which we've used to mount the camera to the camera, and then our cpu contacts on the lens, something else we want to make sure that we're not getting in the way of her having getting dirty in any way, and so that kind of does the walk around on the whole camera, and we're going to go ahead and start looking for questions now, um, before we take a break, and so hopefully we'll have lots of people who have questions and if there's anybody in class who have questions about features that we've seen or controls on the camera, all right, anyone in the classroom? If not, we'll go straight to the internet, so let's go back to the beginning. We always have crossed hopefully been keeping a lot of us think we have a good time here we have so going back to the beginning, I have a question from sparks tm there were some conversation going on in the chat room, john, about the water resistance of this particular camera, you mentioned that in the beginning, um, and so could you maybe talk a lot about more about that with this particular camp and related to that as well? Um, we had somebody to go back to my notes who is joining us from a very cold place, wondering if this could go down to temperatures of negative twenty zero on below. Okay, well, first let's address the weather repellent. First off the camera is not weather resistant it's not waterproof it's not anything like that, but that doesn't mean that I wouldn't use it out. When it's raining, I would be very, very careful and I would limit the amount of time I am out in the rain, but if you're out in the rain for ten minutes, there is a potential case where something could go wrong and when camera would stop working, what typically happens is that the camera will shut down, it won't play back images it won't fire, and when that happens, what the recommended course of action to do is is to go back to your home go back to your hotel room someplace where it's dry and take the lens off take the battery out take the memory card out and let the camera maybe even pop up the flash but I can't do that now that I've taken battery out but just let the camera air out like this for several hours don't take a hair dryer and try to dry it out but just let it sit there in a reasonably warm and dry environment toe let it dry out and there's a good chance that after doing that for who knows two hours twelve hours twenty four hours the camera will come backto life simply because whatever it was dried it off and it's gone in some cases it may need to go back to the factory to have a circuit board replaced and that's why you do want to be careful out in the field it once again if it was my camera I paid good money for this camera my money and it was raining and I really wanted to take a picture I would try to set the camera take my couple pictures as quickly as I could and then hide it away if I needed to be out there for a long period of time I would get a rain cover for it I would not go out in a rainstorm with it just hanging around my neck walking around the block probably not do that for a couple of reasons but definitely not for the camera on the next question was on cold weather yeah, it was from laurel in the chat room and she wanted to know it was twelve degrees today where she wass and I've kind of always wondered that myself how how cold can you go and for how long can you be outside? Right? Well at a certain point the camera will probably shut down if it gets cold enough but there's not really too many precautions about how cold it can be the biggest issue is with how much life you'll get out of the battery the colder it gets, the faster it zaps the power in the battery and you may that I think I estimated it was four hundred to six hundred shots that you're going to get that may be cut in half or a quarter or a tenth as long and so you'll find that the batteries air just simply dying really quickly the camera itself I did not see any ratings in the instruction manual they may be in there so if you want to dig in and find it, let us know but I didn't find any minimum ratings that it could be used at so if it's twelve degrees I wouldn't have a problem taking the camera if it's if you take it out and it's really cold in it stops working it is most likely going to come back to life once it warms back up and once you get a charged battery in there so I wouldn't feel bad about taking this out into very cold conditions it's more about your hands, your hands freezing hands, freezing frostbite things like that something else to be more concerned with probably but it's just that battery power on the same for heat in the opposite direction for one hundred camera can have some problems with it when it overheats the digital sensor and there can have problems if it gets too hot and so if you're in a really hot environment you know like one hundred thirty degrees which let's see you let me do celsius fifty degrees celsius if you're fifty plus degrees that would probably be a really hard situation for this camera to survive it we have a question in class yeah go ahead on a similar subject how can you guard against condensation when going from a very cold environment into a very warm environment? Yeah let's say you're out on a boat deck right inside the boat condensation can be a bit of a problem and in some cases you may take your camera from the inside where it's really warm if you haven't experienced this year take it from a place that's really warming you go outside and all of a sudden the eyepiece starts fogging up and the len starts fogging up on the inside of the lens to where you can clean it off and it is best to slowly acclimatize the camera to its environment and so one good solution is to leave it in its camera bag and put it where you're going to use it so if you're going to go out and shoot it outside, put it in the camera bag and put it outside for half an hour before you go outside seems kind of unusual to do that, but it's it's maur slowly acclimatize is itself to that environment once you do get condensation on there, you may have to let it do the dry out scenario for many, many hours cold into the warm when get term cold into warm one of the things is so if you're outside shooting in the call then you come back into your home I would leave the camera the camera bag you could quickly going to get your memory cards so that you could download your images but I would leave the camera in the camera bag for several hours at at that point if it was really cold yeah, good questions, great question and actually have another fellow question on whether and this question was from never city who would believe it was joining us from dubai so his or her question was any tips for using it in desert conditions with heat and dusty sandy condition dusty and sandy conditions can be really difficult. The biggest problem there is going to be changing lenses uh this is, uh, a great attribute of the camera being able to take the lens on and off, but you do not want to do this in a sandstorm on dh. So when I was in the desert and we were shooting with these cameras, we would go back to the vehicle that we came there and and change lenses inside the suv because because we don't want to be outside with anything blowing around eso one thing is not changing lenses not changing batteries, not changing compact flashcards, keeping it away from us much blowing stuff as possible you khun use once again rain covers as well in that situation but just being somewhat precautious about how you use it. Sparkes had another question in the chat room about the esso when it's all the way up. Um, how grainy are we talking about? I s o is something that we're going to get into in the menu section. I have visual examples in any time I have visual examples were gonna wait for that. So I'm going to hold that question for the second half there's a slide for that there's a slightly we like to say there's a slide from going to get t shirts made on then creative life there's a class for that right okay, uh, next question there's ah, question in the chat room from eddie chavez and this often comes up, although I think we're actually gonna get to that to memory cards. He's asking about class for what I get better performance with something fast we could talk about it now because I think I can week we kind of have time right now. The memory cards when you buy a memory card what's going to affect the price of the card is the size of the card in memory how many gigs and memory it's gonna have the brand of the card? There are some better known brands that may have better features, but then there's also the speed of the card and that's how fast the camera can right information to the card and how fast the card can be downloaded onto your computer for this camera to work properly. There are different classifications it's kind of going through like a one through ten classifications right now for basic picture taking, taking class to would be fine if you're going to shoot video class four should be fine. Some people like to be a little bit faster and be a class six you can get all the way up to class ten it's not really necessary on this camera, but if you're going to use that card for a more advanced camera it might be nice to have and so memory cards on this I would look at class for class six cards question in the chapel from claire eo is exposure compensation on ly relevant if you're not adjusting shutter speed aperture and s o yourself what factor does exposure compensation change exposure? Compensation is something that can't be used in manual, so if you're setting everything yourself, it doesn't do anything so there I think they're correct in that part of it, but you could be an aperture priority where you get to select an aperture let's choose aperture f ate and you're letting the camera figure out the shutter speed and you go well it I don't like that shutter speed it's it's too dark you could lighten it up by pressing plus one and that's going to change your shutter speed to a different shutter speed to allowing more light so it is kind of indirectly affecting either shutter speeds or apertures or potentially both depending on which of the modes your aunt and so it can't affect those those factors great I have a follow up question again on heat um and the question from anna of anna was is heating issue for the censor s o she's meaning in terms of long exposure that's ok, good question yeah, the heat of the sensor when the sensor is on and it's actively gathering like this is a sensor that it is designed primarily for still images for being open for a sixteenth of a second or two for thousands of a second it's not used to being turned on for hours and that's one of the reasons why the cameras limited to ten minutes on shooting video so having the camera in live you turned on for extended periods of time does build up heat on the sensor and that's why there are those limitations on it and so I would want it try teo push those boundaries too far now the other aspect of that is doing long exposures. One of the problems that happens is when you do a really long exposure if you were to use a timer and leave the camera open for, say, five minutes, the sensor is on its gathering light and it we'll produce and noise and what I'm going to show you some examples of noise there are there is something in here called noise reduction to help reduce that noise, which is something that you could turn on if you do that but it is kind of limited you can't do a two hour exposure with this camera would not be wise you would end up with terrible your results because of that heat issue, so there is a heat issue with it the camera's not physically going to get hot it's not anything you can see there's not any sort of warning if something was to go wrong in that regard, the camera would probably just shut down and stop working for a short period of time. Thanks, john. Question from breckenridge, er is there a depth of field preview function? Depth of field preview is not on this camera and so it's, something that traditionally has been only on professional cameras and in recent has been brought down to some different intermediate and some beginner cameras. But that's, one of the features that you'd I don't have on this camera that hiring cameras like the d seven thousand have and if you're not familiar with what depth of field preview is it's just a little button on here that stops the aperture down to the working aperture that you're going to be shooting the picture out to show you what the depth of field is, and it was a little hard to work with with traditional film cameras because you look through the viewfinder, you stop the lens down and got really dark people. I had a hard time seeing the effect of it, but you can use it in conjunction with live you with cameras that do have it uh, but it's, not a feature on this camera I had a question from daniel k photo I heard you should put your lens to manual focus when switching lenses is this indeed better than switching with f on? I've never heard that one but I would say no it's perfectly okay to leave your camera in auto focus when switching there's no mechanical things that are going on on the back of the camera when we switch it from auto focus to manual focus is simply it is changing something mechanical in the lens and it's changing the electronics but there is no problem at all. You will have no problem being in either mode great. And I'm just jumping the gun on the question that we often get with should the camera be honor off itself when changing lenses? No, that doesn't matter either. Yeah, I was convinced that matter personal reason wei have question in the audience yeah, back to heating on the center would you recommend another camera if you wanted to do start trails photography where you need to leave the camera shutter open for maybe hours at a time. How right? How can you do that if you want to do start trails what I would recommend is a film camera. There are no digital cameras that shoot start trails really well the miner minor exception is that you could shoot a time lapse shows, shoot a picture, say every thirty seconds of the stars and then you could combine those hundreds of images to make star trails there are programs out there that will stack all those images it's an image stacking program you cannot leave this camera open for six hours and even if you could somehow hack it and make it do it, you'd end up with terrible results and so a film camera and if you're into nikon I would highly recommend like a nikon fm too I think those were great cameras fm three a's new version of that camera lots of those out in the use market in these days they're pretty cheap and so if you occasionally like to do start trails it may take a special body and good old roll of film. So couple questions joanie in the chat room would like to know what happens when they get to the ten minute mark on video will it reset itself and I'm sure there's a slide for video and then sparks also asked why is there a limit on video? Well the video when it comes to ten minutes I haven't tried it and so this is one of the things I haven't done absolutely everything but I assume it just stops recording and then you could press record and start again on dh so you could do that and it's just part of the built in limitations now whether that is because the cameras really only capable of something or whether it's because nikon put those controls on there to force you up to a higher camera if you want to buy if you want that feature I don't know they didn't really clearly explain they just simply said this is the limit on it so ten minutes is the limit ten minutes is a lot john have a question from plum gecko can you attach a p c chord for off camera flash and can the d thirty one hundred tether to pc and light room okay as faras the pc goes this does not have a pc socket on dh if you're wondering pc has nothing to do with microsoft or personal computer in this case it has to do with a common connection for studio lighting equipment eso some of the more professional cameras will have that connection this does not have it however you can get an adapter that plugs on the hot shoe at any decent camera store for probably about ten dollars so you can hook it up pretty quickly and easily for that and the second part of that question wass tethering tethering for computer room uh, you know, tethering to a computer trying to think I think it's something that you can do through the usps is one of those areas that I haven't fully investigated most people who are using the d thirty one hundred aren't tethering it's usually a higher and feature and so I'm gonna have to say I don't know perfectly on the one. So somebody out there can be no yeah, with the camera using the usb port. So okay, I'm not sure about thirty one hundred, though, and you just hook up through the usb port. Okay, so it does have the usb port, so it is sending data back and forth on that, so I'm going to kind of presumed that it can do it. I'm not sure how well it does it. Ok, another question from joanie in the chat room. Uh, why can't I get the camera to get a lower f stop when it's in a mode, I cannot get it lower than three point five can't get lower than three point five. I'm betting that they're lens maxes out at three point five s o in my little picture example, I had it going down to one point four, and they're actually lenses that will go faster. One point to even one point. Oh, for most people that kit lands that I have right here, it's three point five and so let me go ahead and activate the aperture priority mode. I'm going to set it at eighteen, maybe turn on this top camera and I could go down to f three point eight why can't I get there? We got three point five and as I zoom the lands the max that I can get to is five point six, so it depends with the lens that you have. This lens varies from three point five to five point six and so my guess is that they're lens is simply a three point five to five point six lens and they can tell that by actually looking at the lands and right there on the top is the f stop that is listed. All right, great. So let's, see, we know that we have talked about that potentially there's a class for this are you envision one, but a question from mr double gum was about the d thirty one hundred versus the dean, ninety in terms of low light capability without flash highest so image quality and ergonomics, since the d ninety has two dials is wondering, bye. Yeah, the d ninety is is a little bit older camera now, it's, about two years old from nikon. It is a step up in in the model lineup, and it does have the two dials, which makes working the camera and manual easier to work with. And I think, there's enough people out on the internet who are doing tests between cameras. And so I'm going to leave that up to them to decide which one is better in low light conditions, a cz faras, eh? User who uses the camera a lot the d ninety is ah higher performance camera even though our this is newer there's going to be some features on this that are a little bit different the video capabilities are a little bit better in this than the d ninety and so it depends on what you're looking for us to what's the better care for that person and so if they're looking at the d ninety they might also want to be looking at the d seven thousand because that gets those higher and features as well as all the new features that this one has but there is a price to be paid for that newer higher and cameras all that more money than the d ninety right this klaus had asked about sensor cleaning are you going to talk about that sensor cleaning of not really but we can talk about it now let's talk about it now yeah uh the sensor in this camera has a self cleaning sensor on it huh probably shouldn't mention this when you turn it on and off kind of the standard system is that it will clean the sensor with an ultrasonic cleaning system automatically and this is something that we will touch upon again when we get into the menu system and this is a pretty good system for clean most of the dust off but every once in a while something kind of gummy gets on there and you have to get it off either by blowing some air in there and I have a rocket blower which is a bulb lowered for blowing air in there and actually show you what that looks like and we actually have that up on the website that you get this got being h numbers on it where you can figure out exact model that I'm looking at but that's a simple solution and what you do is you would uh, take the lands off and you would blow this in here to clean the mirror box or to clean the sensor out itself. There is also the option of going in and cleaning the sensor by hand and this is something that you only really want to do if you're very comfortable exposing the sensor and cleaning it off some people are are that type of people if you're the type of person who when something breaks, you're more than willing to take it apart to see if you can fix it and you are usually pretty successful at it then you're the type of person that could probably do your own sensor cleaning. If not then I would probably turn it into a repaired center or camera shop that does censor cleaning you may have to pay a little bit of money for twenty five forty dollars or so, but I found that the automatic censor cleaners on this work really well and in general cameras seldom ever need to have anything more than the automatic clean and then that rocket blur to help clean the sensor okay, nicholas photo would like to know if the camera can use older nikon lenses and will the older manual lenses for film work on this camera? Well, well, nikon has maintained the same lens mount from nineteen fifty nine this particular camera does not have a little drive shaft right down here for driving the early autofocus lenses, so all the light nikon lenses that were just standard auto focus lenses won't auto focus on this camera because it doesn't have the right to drive system in it. They took that out to save money on the camera to make it less costly. And because of that, this cameron needs a f s or f I lenses on other lenses will work as faras shutter speed aperture you khun manually focus them, you can use them for a lot of different types of photography you're just not going to be able to do anything with the focusing system, and so you do need to be careful about that when you get this camera getting the right lenses and getting what you expect. Thanks so just a follow up on that rick had asked really basic question well, the lenses I use on my d seventy work on the d thirty one hundred auto focus well that holy depends on what lenses he has on his d seventy just look on the lenses they'll sell say either if I f s or just a f and it's the ones that just say f are the ones that are going to be limited by that and so it may be a bit of a mixed bag and that's one of the downsides of the entry level cameras it's not one hundred percent compatible with all the lenses and just to let everyone know that night cons all their current care all their current new lenses are f s or f I generally it passes the designation that they put on it so everything that they're bringing out now into the future is likely to be in a f s lands it's just that you can't use the lenses that are fifteen years old john carmen in chicago would like to know if you can talk about metering metering is something that will get into a little bit more when we get into the menu system and we look on the back of the camera and just just does a quick little preview we throw this in the manual mt just cause I think we have a little bit of time to spare here and we have an indicator that's in the back of the camera as well as on the inside of the viewfinder for me during it unfortunately this does become bit more a bit more of a photography issue as opposed to a d thirty one hundred issue you can meet her things very easily there's different metarie modes will specifically talk about those metarie mounts but how best to meter foreseen is more of a general photography class I have, uh kind of random question, but your exam bully zambo the rubber on my zoom ring is cracking is it possible to replace just that rubber part of the lens? Well, you know the rubber part on the lens I have seen various defects in that happen you would have to turn it into repair facility. There are certain accessories that you can buy and that is considered a repair accessory and they will only sell those to repair outlets. Eso either you need to purchase it through a repair outlet or you have to send the lens in to have them put a new piece on. But I would think that would certainly be something new that you could put on, which just makes me think I'm surprised that somebody hasn't devise their own custom focusing grips that you could put on for lenses and sell those there you go somebody somebody take that idea and run with it I don't want it you can have it for free customized focusing grips do you know where nicholas photo is asking what does thie f and I stand for f s and f I I was and I believe it was internal focusing because it was built into the lens. The earlene icons focused the focusing motor was in the body and it had a drive shaft that drove the mechanisms in the lens. And then the eyes put it inside the lens and there's only there's only a few a fi lenses out there. The f s stood for a silent wave motor, which is a very quiet and fast focusing motor built into the lands. Makhan has the whole alphabet soup of letters and it's. Hard to keep all of them straight. Sometimes I'm just, uh, chatham has said that the fifty millimeter one point eight does not auto focus on this camera. Correct. That's. True, because it is because the fifty one point eight is an a f lance. Ok, there is a fifty millimeter one point four f s lands and there is a thirty five one point eight. That is an a f s lance. Ok, so you have to be very careful about reading those little letters to make sure that things are compatible with it, okay?
Class Materials
bonus material with purchase
Ratings and Reviews
a Creativelive Student
Wow! Amazing course. I started learning photography on my own about 6 months ago. I read many blogs and tutorials and watched a lot of you tube videos. I then decided to buy Johns Intro to Digital Photography course. It's an excellent class and I was learning so much, but having still having trouble understanding how I could translate what I was learning into taking great pictures with my camera. I read my user manual a few times and still had a lot of questions. I was really hesitant to buy this course because I am cheap. Lol. I thought I should b able to learn everything using my FREE user manual. I am so glad I decided to buy the class. Everything finally makes sense. He even gave examples of pictures and showed how he would set up this camera to get a good shot. John is an excellent teacher. Worth every penny.
a Creativelive Student
Wonderful resource! I'm a brand new photographer, with a brand new 3300 that I bought because I decided that if I was ever going to get the most out of my point & shoot, I would have to learn to use a "grown up" camera. That seems backwards, I know, but there don't seem to be classes that help a person go beyond p &; s. Since I'm new to photography in general, I found the pace to be super fast - thank goodness I could yell "wait!" at the computer then rewind! The operational section was extremely useful. Being able to practice resetting the various elements was exactly what I needed. I do wish that I'd watched the 3300 update before watching the rest of the episodes. The functionality of the newer model was just different enough to make me want to pull out my hair. What dial? What button? So that would be my tip: if you have a 3200 or 3300, watch that segment first and maybe make a note of the changes so you don't go mad during certain portions of the course. Otherwise, it was great, and I so appreciate the fact that I'll be able to go back and review sections whenever I want. Now it';s off to the basic photography class! Thanks, CreativeLive!
Rick Erbach
I'm an amateur photographer. I decided to upgrade from my iPhone and point and shoot camera. I bought the Nikon D3300. I then found John's class on the D3300. His easy to follow course walked me step by step and button by button around and in my new camera. It was worth the money. His tips, tricks, and hidden gems took me from auto to the big 4-manual, aperture, shutter, and programming! Wow. With my new understanding of the camera, my pictures improved with each shoot. Practice makes better...but it was the confidence John gave me to go out and use the entire camera that is making me a better storyteller. This course is a must view for all new Nikon D3300 camera owners! Thank you John for a great learning experience!
Student Work
Related Classes
Camera Guides