Lessons
Lesson Info
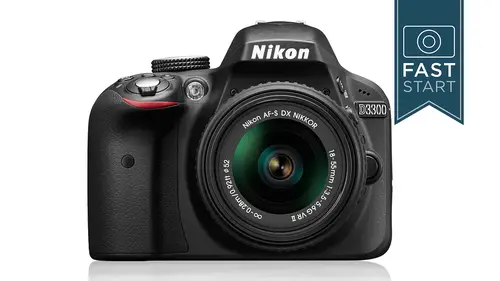
Display System
So let's talk about the display system in general, and that is going to be the viewfinder display and the lcd monitor on the back of the camera. Let's, start with the viewfinder display what you see when you pick up the camera and you look through the viewfinder you're going to see and overall frame that you're getting from side to side as well as a bunch of focusing brackets in there. Let's, start with the overall frame first off, what you were seen in that frame is about ninety five percent accurate. It is not one hundred percent accurate. You are getting a little bit mohr than you see in the frame, so if you line up something with the very edge of the frame, you're going to have a little bit of extra when you look at the image on your computer it's just that it wants to give you a little margin for error in case you get too close to the edge on cropping something for the focusing brackets. We have eleven focussing points and the one in the middle is a really important one because it...
is the end excuse me, it is the only one that is a cross type focusing system, which means that it is sensitive to both vertical and horizontal lines. The other ones are either verdict are sensitive to only vertical or only horizontal lines down at the bottom, when you press halfway down on your shutter release, you're going to get a whole bunch of information and that information will vary depending on what's turned on and off on what mode you're in, and so I just want to go through and kind of walk through what this whole line of information is going to give you starting on the left has a little dot over there that's a focus indicator which will pop on when you are in focus and this will also work when you manually focus the a l we looked earlier at the a l, which is the auto exposure lock button. If you are locking the exposure in and you have pressed that button that light will come on in the viewfinder there. Next up is a flexible program indicator. If you are in the program out, I'm gonna go ahead and work on the camera here for just a moment gonna put the camera in the programme mode and you'll notice that I am getting a particular shutter speed an aperture right here in I can adjust that by turning the dial. I don't have a lot of leeway right now just because I'm pointing it at something quite dark, but I can adjust shutter speeds and after cher's even in the programme mode, it is still giving me the right combination. Is just allows me to change which combination that isthe, and you'll notice that the little asterix by the p comes up and that indicates that you are in the flexible programme mode basically meaning shutter speeds and temperatures are still chosen for you it's just different than the standard next up is your shutter speed and something to note is that here shutter speeds are typically in fractions of a second you know, one sixtieth of a second, but it's just simply going to say sixty it assumes that you know the difference between a sixteenth of a second and sixty seconds with full seconds it's going to give you a couple little hash marks after the number your exposure indicator lips I'm sorry skip the aperture. The aperture will be the f setting it's, also known as your f stop. So wherever your aperture is that it's what's going to be listed in the viewfinder and then comes our exposure level and this is how we can manually set the exposure ourselves and we can actually do this, I'm going to do this on the camera in front of me. I'm gonna go ahead and put this in the manual exposure mode and we have our shutter speed and our aperture, which is pretty close we can see our meter hovering here around minus one and aiken change my shutter speed and my aperture here's, my shutter speed pushing that light meter back and forth. I can also change the aperture to let in less light or let in more light. And typically you're going to want to have it centered out below the zero that's a good starting place, but where it needs steve for the actual picture, it might be plus or minus ah, stop or two depending on the situation you're shooting and so generally this is what you want get towards the center of zero when you were in a manual mode. Next up is your battery level just indicating how good about the battery is that you're using and then there's the flash exposure compensation we talked a little bit earlier about changing the exposure of the flash, and that was done once again by popping up the flash, holding down the flash exposure compensation button as well as the plus minus button. And then you can adjust this. So this is where we set it to minus one, which I think it's a good setting for that. So if you set it to minus one and you look through the viewfinder, it's going to have that little warning that you have adjusted that setting next up is exposure compensation. So if we just want to make our pictures a little bit brighter or a little bit darker we could do a plus or minus but it's something you want to be careful about leaving your camera on all the time you don't want to accidentally leave it on minus three when you go out taking pictures who end up with some very, very dark pictures next up eyes some information it varies depending upon which mode you're in much of the time it tells you how many shots you have remaining on your memory card when you press halfway down on your shutter release it changes to an r number and it's the remaining shots you have left in the burst at that particular time and so you can only shoot so many pictures in one burst and that's telling you how many you have left in that burst if you press the function button right now it'll show you the so so you can change the so without taking your eye away from the viewfinder if you have the auto is so set on this camera to automatically select theis so that would be indicated it's not something I recommend so it's a good warning in the viewfinder there is a flash ready light lets you know that the flash is up and ready to fire and on the number of shots if you have over a thousand there's a little k that'll indicate you have say one point two k one point twelve hundred shots one thousand two hundred and then there's a warning indicator in case something has gone wrong on it if you have questions about something that you can hit the question button on the back of the camera and it will give you more information so moving on to the lcd monitor in the back of the camera so in general we had the information button on top but we also have the eye button on the back for turning on information in the back and so that's a very important button you will also use the menu button and this will get you into the menu and we're going to be going through that menu step by step no on either one of these modes you'll be using the multi selector your mouse over here on the right to navigate up and down and in and around all the different features in there when you have found what you want to change you can press the okay button and enter that into the field on the top in the mode dial let's go to the guide section and so if you put your camera in the guide mode you're going to get a whole different menu system on the back of the camera and this is where the camera's going to try to kind of help educate you and help you ease along in tow learning photography my guess is that once you've taken this class, you may not need this mode too much, but if you want to play there, they kind of have their own learning system set up, but it'll be a completely different set of menus when you get into their into that, and that will be activated by hitting the menu button and by hitting the question button. So if we go into one of these modes here, let's, see if we get this to work, shoot, advanced operation, so by pressing that question button, it brings up additional information that might help us figure it out. It's not something that we're just not going to spend a lot of time in this class, we're going to kind of dive straight past it and get into the good stuff, so once you're in here, you can also use the tab buttons off to the side to move your way around. Now, when you do press the information button on the back of the camera, so if you are in anything but the guide modes, I'm going to go ahead and put mine in m for manual mode, you're going to have two different types of screens on the back, you're gonna have the classic display, which is what I am in right now, you also have a excuse me, I don't hope I said that, right? We're in the graphic display, but you also have a classic display and you can choose which one of these formats you have for your information screen to start with. I liked the graphic display I think it clearly shows thie aperture closing and opening a lot of people have a hard time remembering which direction they're going without so it's nice having that little graphic thumbnail to go along with it, but I will explain when we get to the menu section if you would prefer to have the classic display because some people like that because the numbers are a little bit larger, so if you have poor eyesight, that might be a slightly easier system to use no let's talk about the information display, and so when you press the info button, you get this screen with information on the back and this has a number of different areas and different bits of information all of what it is determined is the most important information. Now what we're looking at here is information that we can change with me oh, buttons directly on the camera so first off is our shooting mode go ahead and change the shooting mode while you're in it and it will actually show you a little icon of the mod I'll turning around selecting different features, different modes on the dial and so they've done a very good job making this very easy to see what's going on and so that will be adjusted by the mod dial. Next up we have our shutter speed, so if we turn our main dial, we can change our center speeds and we'll have a little shutter speed graphic around the outside that you can see changes with it for changing apertures. We do have to press that plus minus button up on top or exposure compensation button, and we turn the aperture in back. You can see that aperture display opening and closing in the back of the camera. We have our exposure indicator. We talked about that in one of the question sessions, so let's, go ahead and see if we can even this out right about there is the correct exposure for what the camera is pointed at now it's going to depend a little bit on what focusing mode you're in, but if you have chosen one single focusing mode, you can adjust which bracket you are using by simply touching your multi controller, and you can see those focus points are moving either to the left to the right, but you do need to be in the right focus mode where you are selecting one single point of focus we were adjusting our flash mode earlier let me go ahead and pop the flash up and when we press that in and turn the dial on the back, we can see the flash modes that we're adjusting here's our flash exposure compensation, we were just talking about this, I think that's the third time we've talked about it so it's it's adjusted in one spot, we can see it in the viewfinder, but we can also see it back here because all the important information is available here on the back we have our exposure compensation, so if we had our camera in, say, aperture priority and we were shooting under, say, ace in snow conditions where it's very bright, we could do a plus one exposure and it would show up there in yellow as we're changing it, we could go further than that. How far can we go on this? We'll go up to plus five that's kind of far and going to marine turn that back down to zero because that's where it should be for general picture taking now, one of things you may notice when you look at the screen is down at the bottom, it says I set, and what that means is that if you press the eye button down there in the lower left hand corner again, you're going to pop tow a different screen, and this is where you can start entering information on the screen and so the first option that we have is image quality, so I'm gonna take the camera here in front of me, and I am going to navigate up to image quality and let's go through these one by one, and these are things that you need to press the eye button to get the screen on. You need to press the eye button again to start entering information, the first option here, I'm going to hit okay, and we're going to go in, and we're gonna look at some of the options we have with image quality. So with image quality, these air, the options we have, we can shoot raw, plus fine quality j pegs straight raw or j pegs of fine, normal or basic stiles my preference, I like to shoot in rocks. I want to shoot the best quality pictures that my camera can get and raw gets you the raw, true information off the sensor, but it does require that you use software to look at your images to make j pegs that you consent him out so it requires a little bit more work if you were into photography, though it is worth a little bit of time and effort to shoot the raw if you just want simple, basic pictures without any hassle later on. You might want to choose a jpeg and if you are going to choose j peg, there are three standards fine, normal and basic and it all depends on how much the image is compressed and I don't know that I need to tell you, but I'll tell you anyway, the more you compress on him, the more you ruin an image and so if you want to get the best quality j pegs, you should leave it in the fine mode, which is where I'm going to leave it right now because we can go down to the setting, which is right below this, which has to do with the image size it's all a part of image quality. But here is where we get to select how many mega pixels are we dedicating to this picture? Obviously a larger number of pixels is going to get you a finer quality image, so if you are going to shoot in j pegs, I would highly recommend shooting in large that way you can get the finest resolution possible. There may be reasons for shooting medium or small. The main one baby would be to get mohr images on the memory card, but memory cards are cheap enough that I think you should probably be shooting in the large mode if you choose to shoot in j pick personally, though I prefer to shoot in raw because you can have more leeway with what you d'oh ah later on in the images and you're getting the full information from the censor next on the list down is white balance if you enter into the white balance mode you can scroll through the many different modes that it has to shoot under different lighting conditions this is something that has changed quite a bit with digital compared to film with film we bought daylight balanced film for the most part there was tungsten balanced film but for the most part we bought daylight balance film and every once in a while when we took pictures in her house we got really orange pictures of people because the lights were tungsten lights and it was an orange light and so you need to be aware of is your camera recording the correct color because it doesn't necessarily know what the correct white balance or the temperature is or what the light sources and so this is really important if you are shooting j pegs it's not so important if you're shooting raw because in raw you can fix things later because you captured the true data off the sensor so if you do want to shoot j pegs this is one little hassle you do have to be conscious up you have different modes in there and you can as you scroll through you will see sunlight cloudy and shade these air for natural lighting conditions light of different light levels and then for artificial light will have incandescent fluorescent and flash which are again at different levels and ideally, if you are shooting j peg, you will go in and adjust the white balance before you shoot a series of pictures under giving lighting conditions. If you are getting funky colors and you're looking at your pictures on the back of the camera, you may need to go in and adjust the white balance. We're not going to take the full time to explain preset white balance on how to do it, but basically the idea here is you can take a picture of a white sheet of paper and it will balance the rate of the room the white balance toe that lighting situation, which is a very handy way to get the lighting exactly right for the situation that you're in. Check your instruction manual for more information about that you also have auto white balance and as I like to shoot raw, I get to leave it at auto and not worry about it because I can fix it later in general for basic picture taking auto is find the camera does a pretty good job figuring out the correct white balance and so if you're not sure where to put it, I would put it in auto and then change it if necessary if you are getting bad results as you move along okay as we move down the next setting on this information panel is thie so and the so is the sensitivity rating of the digital sensor in the camera that is reading light to get the best quality image possible you should probably start at one hundred it's going to give you the finest quality you could go all the way up to twelve thousand eight hundred although they just simply call it high one in hae to hae won is double the previous number which was thirty two hundred so that means that sixty four hundred and high two is twelve thousand eight hundred you consent it wherever you want but for best quality I I believe it at one hundred here's some picture examples if you shoot it one hundred ah the censor gets enough light and has good clean resolution as you move the risotto a higher number you are basically amplifying the signal on the sensor and it is not receiving as much information as it needs and you are going to end up with something called noise it is an undesirable artifact that looks a bit like grain from the days of film and so I would try to stay away shooting from jai I sl now the reason you don't just leave it at one hundred all the time is sometimes you need to choose a different shutter speed or aperture to make the picture that you want to take happen and you do have to bump theis so up on this particular camera I generally probably when it shoot above thirty two hundred if I could avoid it in fact, I would probably stay at eight hundred or lower if I could. Next on the menu system is the focusing mode hand you need to have your camera in auto focus for you to get access to this so once you get into here there is going to be four different modes f a a for automatically switching back and forth between whatever it thinks it should be focusing on f s for single shot focusing and see for continuous you're can also turn your camera to manual focus when you do that you want to be you want to do it on the lens itself, not in the back. The important thing here to know is the difference between s and c s is for subjects that are still that are not moving. The camera will focus on the first reliable sub subject and stop, so if I'm using, I'm going to set it to s here and I'm going to do a little test here myself I'm just going to focus on this monitor in front of me, the camera's gonna focus and it actually gives me a little chirp chirp that it's focusing let me do this again and so it's focused on that subject if I leave my finger halfway down on the shutter release, it has locked in right there and I can move over and take a picture if I am in the continuous mode and let me change it to the continuous mode and a f c if I focus on something it's going to continually adjust, so if you're further away it's going to change and I can't lock it in on one particular item, a f c is generally for sports for any sort of action movement. And so this is one thing that you will be coming back to at the end of this class. When we change from different types of photography for basic photography, I would leave it at a f s for single shot focusing the next mode to choose from is the auto focus area mode. What area do we want to choose? And here we have a number of areas and it depends a little bit on where our mode settings are going to change the one on our cameras, so I'm going to go back so that I can give all the options here on the camera we have single point dynamic area auto area and three d tracking single point chooses one particular point that you get to select where it is in the viewfinder, so we saw earlier how we use the touch pad and back to select up down, left and right, which of those eleven points you're choosing its a good general purpose area to be very specific about what you're focusing on next is the dynamic area it uses one single point, but if necessary it will reach out to its nearby points to help acquire data and information about where the subject is. The dynamic area is typically good for action or in sports auto area looks at what is coming in in all the brackets, and it tries to choose the closest item in all those brackets that's the default system. So if you have objects that are both near to you and far away from you it's going to focus on the subjects that are near to you it's a reasonably good general purpose focusing system, but I prefer the single point for the more discerning photographer who wants to pick what they're going to be. Choosing to focus on in this camera is a new one three d tracking now your camera does need to be into a continuous mode or an auto focus a mode where it is automatically choosing to get into that mode. And so this is a mode may go ahead, switch into it here a three d mode for somewhat erratic moving subjects now which one works best? It completely depends on the types of subjects that you're focusing on you may find that football racers and cyclists need different types of area and ways to track their movement. And this just gives you a lot of options for focusing. Next up is our meat oring system, and we have three different meeting systems available on this camera. We have matrix center, waited and spot me eatery for general purpose. I would leave it at matrix it's a good all around me during system that uses over a thousand points within the frame to measure the light figure out. What's bright what's dark what's. The best average for lighting cameras traditionally had a center weight. It's a meter in system where the light reading was concentrated in the middle of the frame. Some people like the system, so they still include it. I think the second most valuable metering system is the spot metering system. If you want to very precisely read light in a very small area, you would select the spot me eatery. Do be careful when using this. Do not leave your camera accidentally here because it reads the light in such a highly concentrated area, it can yield to poor exposures unless you realize you are using it. And so for general purpose, I would leave it in matrix ah, and then I would occasionally use spot metering as necessary next up is active, delighting a and this is an option that we can change here, or we can also will also see it again when we get into the menu system. And this is where the camera is playing around with the shutter speeds, the apertures thie exposure to adjust for highlights and shadows. And one of the main things it's trying to dio is it's trying to brighten up the shadows. So in this case, the active delighting is turned off, and you can see that the shadows air kind of dark. If we were to turn it on, it would let more light into those shadows and so let's compare the before and after shot here. In this particular case, I prefer the active delighting being on allowing more more light in the shadows, but it's not something that I would necessarily recommend that you turn on because there's a lot of situations where you want strong contrast in the shadows and the dark areas, and so I'm in general, my advice would be to leave this turned off, but to turn it on, if you think it's necessary for certain situations, we're getting light into those shadow areas is important. Next up is movie frame sizing, and this is something that we had talked a little bit about earlier about how many pixels you're recording from top to bottom as well as your frame wait and this is one of the ways to change it we will see this again when we get more into the menu system next along is flash exposure compensation we're able to do this directly on the button we don't need to come into this screen and do it but we can do it if we are here and the same is true with flash exposure compensation we've already talked about this a couple of times it's just a gn additional way to make that change and the same is once again of the flash mode we can do this directly by pressing the flash button and turning the command aisle in the back of the camera now the final area in this information screen is just where some information is displayed these air things that will be changed by going into the menu system you can't change it directly from the screen it's just they're showing you that it's there and unfortunately my sample photos here don't have everything that can be done you can imprint the date on photographs you khun I have an external flash and have exposure compensation set on that flash if you have auto aya so set which is something that you want to kind of be wary of the indicator will be right there you have picture control we're going to get more into this in the menu system will describe this more the drive mode this is that lever than the top of the camera where you have the lever mode set. So if we said it continuous, we can see in the back of the camera that we have continuous set right there. There's a little beep that I find very annoying that you khun turnoff on. We will do that when we get to the menu section, how good your battery iss would be indicated there. If you have a gps unit hooked up, what a knife I card is is it's kind of like a y fire it's, a wireless system it's a memory card that isn't a memory card, it's a, uh, transmission device basically so that you can send images to a nearby computer and then finally down at the very bottom is your total number of remaining shots. And so this is where I think we're going to take our break, because when we come back from our little break, we're going to dive into the menu system where we can start really getting in and customizing the camera to the way we want it to work.
Class Materials
bonus material with purchase
Ratings and Reviews
a Creativelive Student
Wow! Amazing course. I started learning photography on my own about 6 months ago. I read many blogs and tutorials and watched a lot of you tube videos. I then decided to buy Johns Intro to Digital Photography course. It's an excellent class and I was learning so much, but having still having trouble understanding how I could translate what I was learning into taking great pictures with my camera. I read my user manual a few times and still had a lot of questions. I was really hesitant to buy this course because I am cheap. Lol. I thought I should b able to learn everything using my FREE user manual. I am so glad I decided to buy the class. Everything finally makes sense. He even gave examples of pictures and showed how he would set up this camera to get a good shot. John is an excellent teacher. Worth every penny.
a Creativelive Student
Wonderful resource! I'm a brand new photographer, with a brand new 3300 that I bought because I decided that if I was ever going to get the most out of my point & shoot, I would have to learn to use a "grown up" camera. That seems backwards, I know, but there don't seem to be classes that help a person go beyond p &; s. Since I'm new to photography in general, I found the pace to be super fast - thank goodness I could yell "wait!" at the computer then rewind! The operational section was extremely useful. Being able to practice resetting the various elements was exactly what I needed. I do wish that I'd watched the 3300 update before watching the rest of the episodes. The functionality of the newer model was just different enough to make me want to pull out my hair. What dial? What button? So that would be my tip: if you have a 3200 or 3300, watch that segment first and maybe make a note of the changes so you don't go mad during certain portions of the course. Otherwise, it was great, and I so appreciate the fact that I'll be able to go back and review sections whenever I want. Now it';s off to the basic photography class! Thanks, CreativeLive!
Rick Erbach
I'm an amateur photographer. I decided to upgrade from my iPhone and point and shoot camera. I bought the Nikon D3300. I then found John's class on the D3300. His easy to follow course walked me step by step and button by button around and in my new camera. It was worth the money. His tips, tricks, and hidden gems took me from auto to the big 4-manual, aperture, shutter, and programming! Wow. With my new understanding of the camera, my pictures improved with each shoot. Practice makes better...but it was the confidence John gave me to go out and use the entire camera that is making me a better storyteller. This course is a must view for all new Nikon D3300 camera owners! Thank you John for a great learning experience!
Student Work
Related Classes
Camera Guides