Lessons
Class Introduction
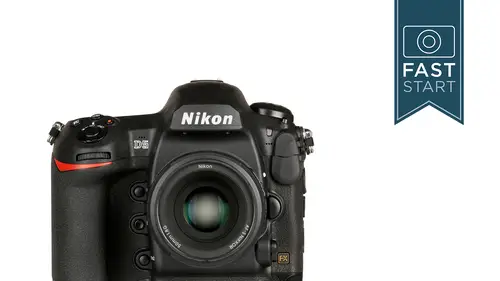
03:00 2Nikon D5 Overview
14:16 3Photo Basics
04:58 4Basic Camera Controls
03:40 5Exposure Modes
21:34 6Top Deck Additional Features
07:34 7Release Mode
09:18 8Lesson
06:30Play Back
11:21 10Backside Controls
18:12 11Live View
19:18 12Movie Settings
11:15 13Focus
12:41 14Left and Right Camera Features
04:59 15Bottom and Front Camera Features
06:41 16Lenses
09:31 17Menu Functions
07:15 18Photo Shooting Menu
06:39 19Image Area
04:45 20NEF Recording
05:54 21ISO Sensitivity Settings
04:50 22White Balance
06:35 23Active D Lighting and Noise Reduction
05:57 24Flicker Reduction
04:36 25Multiple Exposure And High Dynamic Range
05:42 26Interval Timer Shooting And Silent Live View Photography
07:19 27Movie Shooting Menu
09:01 28Autofocus
13:08 29Metering Exposure
03:52 30Timers AE Loc kAnd Shooting Display
08:28 31Bracketing Flash And Controls
18:34 32Setup Menu
17:27 33Retouch Menu
03:47 34Camera Operation
09:08Lesson Info
Top Deck Additional Features
Alright, so that covers our exposure modes. Next up on top we have our metering button. We have four different metering systems that this camera uses. Most people are very happy with the Matrix metering system. It's a multi-segment metering system. It uses many different points of information of how it's gathering the data from all over the sensor for that information. We do also have a Center-weighted, which is customizable. We have a Spot meter if you wanna be very precise about where you're reading that information, and then we have an unusual, fairly new tonight, kind of, this isn't the first camera it's been in, but a Highlight-weighted. And what it does is it tries to prevent the highlights from getting overexposed. Think of a situation where you might have a person on a stage with a spotlight, and the camera is reading a whole lot of dark area, but it also has something that has a fair bit of brightness to it. And so this would prevent that histogram from getting too bright, or ...
the picture getting too bright. And so I think that could be a very valuable tool. It's not something everyone's gonna use, but it might be something worth employing in some difficult and tricky lighting situations. Now once again, like many of the other buttons that we're going to be talking about, if you do hit that Info button, you will be able to see those changes on the back of the camera. And so, for instance, by pressing the info button and then pressing the metering button and turning the back dial, awkward hands grip for me, but you'll be able to see those changes in the back of the camera. For many of these, you'll also be able to look in the viewfinder as well as on the top, but this is the one that's easiest to show you. So that's the one I'm going to be showing you a lot here in the class. Next up is our BKT for Bracketing, and there's a couple different controls for Bracketing. By pressing the Bracketing button and turning the back dial, you'll be changing the number of shots that you shoot. And by changing the front dial, you'll be changing the increment amount. So let's take a look at bracketing a little bit more closely. So, turning the back, we have a different number of shots that can be changed from two, three, five, seven or nine shots. We can change the front dial to change the increment, the amount between each of the shots that the camera shoots automatically for us. One-third, two-thirds, all the way up to three stops exposures which is a huge amount. Next little thing here is that you can use exposure compensation with this, in addition to it. So if you wanna do three pictures all overexposed, plus-one, plus-two, plus-three, you would choose three frames, one stop apart, and then you would do a plus-two with your exposure compensation to get that middle one started out at plus-two, and then it would do one under that and one over that as well. And finally, if you see zero F, that either means off or zero frames, which means you're not using that particular feature. And so this can be really handy for people who are either doing HDR photography, which is High Dynamic Range where they shoot a series of photos and they're going to compile it later in some sort of post-production program, or for people who are a little unsure of what the best exposure is. And they just want to be able to shoot through it very quickly out in the field. It's exactly the same as exposure compensation, but it can do so very very quickly, because when you have your camera in the continuous mode, the camera will fire through all three, five, seven or nine of those shots just as quickly as the camera can fire. Now, if you want to set things up so that you are deciding the timing, maybe there's some sort of time element that you're trying to get exactly right in there, you can put the camera in the single mode and just fire each shot individually on your own. And so there's a great number of options on this. This is something that I used a little bit more back in the days of film, but it's still something I do with landscape photography in exactly this sort of case. For instance, these photos of Mount Rainier, where the mountain is in bright sun but some of the foreground is in the shade. You're not sure what the best exposure is, or you might be working with multiple photographs later on. So it's kind of a way to hedge your bets and make sure that you walk away with all the information that you need from a particular scene. And so that's the Bracketing feature on the camera. Next up is the Movie Record button on the top, and we're not gonna talk too much about the movies right now, we're going to talk more about that as we get into the menu system on that. But there is a number of custom menus that you can get in and you can change. One of the things is, is that when the camera is in its normal, still shooting mode, that record button doesn't do anything. So one of the ways that I'm going to recommend on changing it, is that you can change it to change your mode, because this is pretty close to where the Mode button used to be on previous Nikon cameras. And anyone who's upgraded to this and is going through withdrawal symptoms on not being able to change the mode with one hand, they have to use their left hand to press that Mode button on the top left, you can now have this change the mode buttons when you're not in the movie recording mode. And all you do is go into the custom setting G and then reassign that button a new feature. And we'll be able to do that with a lot of different buttons on the camera. All right, we have a hot shoe on the camera where we're gonna add flashes. There's lots of different flashes that you can get from Nikon. Let's take a quick look at those. No flash at all on the camera, so you may be interested in one of the smaller ones but my guess is that most of the people who use this camera are going to want a fairly substantial flash. The SB-700 is a nice, what I would call intermediate-level flash, but I think most people are gonna be using the SB-5000, which is their top-of-the-line flash. We're not gonna get into all the different flash features, but one of my favorite accessories is the SC-29 cord which allows me to use the flash handheld a little bit off of the camera. Good for macro photography or portrait photography, getting that flash off the camera. And it's very helpful if you're gonna be using a bracket system so that you can shoot horizontal as well as vertical images, keeping that camera directly below the flash. There is also an SU-800 unit, which can control wireless systems. As I say, we're not gonna get into the whole flash thing. That's a whole class in itself. I think we have a class here at Creative Live that does go through that as well. It's not one of my classes, but there is a lot of information about controlling these other flashes. But if I owned the D5, I would probably be looking at the SB-5000 as my main flash. Little indicator over on the side, looks a little bit like either an icon for Saturn or a UFO, that's the Focal plane. So if for some technical reason, maybe you're doing cinematography or you're doing some high-magnification macro work that you're trying to do some measurements with, and you need to figure out where exactly is the sensor in this camera, all cameras have that little focal plane on it. And it's just indicating the exact front surface of the focal plane of the camera.
Class Materials
Bonus Materials with Purchase
Ratings and Reviews
Michelle Mealing
As usual, John Greengo has provided me with a wealth of information, this time to decide on my next Nikon camera purchase. John has a talent for explaining technical aspects in a simply to understand, yet intelligent, language. I feel very lucky to be able to tap into the knowledge of such experts and thank the day I found out about Creative Live. Unfortunately I had to miss a little part of the live broadcast due to international time differences. I will definitely be watching the class again and again (there's so much content). Thanks John and Creative Live. Looking forward to my next class.
a Creativelive Student
Already set the Fn3 button for Voice Memo - easy peasy thanks to this and so many other "buried" ( in the manual ) treasures. Notwithstanding three years with the D4 and one year with the D5, I am substantially more familiar and comfortable with the available tools / features of this amazing camera, Nikon's D5. Thank you, John, for the relaxed, easy-to-follow yet informative, professional instruction - well done!
Dave Safley
John Greengo does a fantastic job of going over all the great features of this camera. Yes, there is a lot of information, but the format of the class enabled me to drive right into the features I needed for an upcoming shoot. I am new to Creative Live but this class is showing me the fantastic value of this platform. Happy Shooting!