Lessons
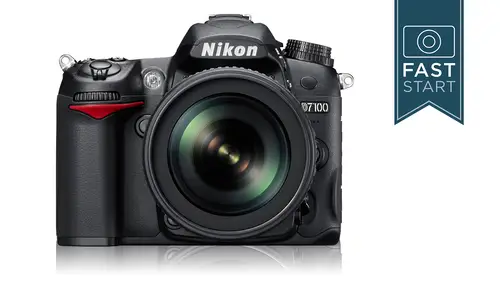
Camera Introduction
24:36 2Top Buttons
30:21 3Backside Buttons
19:32 4Buttons Continued
18:29 5Live View and Movie Mode
13:12 6Flash Button
18:46 7Left Side Buttons
27:36 8Right Side, Bottom, and Lenses
16:25Lesson Info
Displays
So when we talk about the displays were talking about what you see in the viewfinder and what you see on the back lcd monitor let's, go ahead and start with the viewfinder itself so when you hold it up to your eye and you look through the viewfinder, the frame that you see this is kind of cool is one hundred percent accurate a lot of cameras or ninety eight or ninety five percent accurate so what you see in the frame is what is going to end up in the final picture next up we have an option and you don't necessarily see this unless you have this turned on under image size in the shooting menu is you can do a one point three crop with the dx sensor now this ends up being about a two times crop if you compare this with a full frame sensor and the reason that you would want to do this is if you want to go from six frames per second to seven frames per second. So for sports photography now you are not going to get twenty four megapixels. I don't know the exact number, but you're going to be...
cutting that down probably two around sixteen eighteen megapixels if you are using the one point three crop area but it could be a handy for those times when you need a little extra reach and just a little faster firing on the frames per second next up the focusing points and we just kind of talked about this before our break in the last section, we have the fifty one different focusing points, whatever ones are active and ones you're using are the ones that are going to light up for you to see we have a grid pattern that kind of fits around all this other stuff, some people like a grid pattern so that they can align vertical lines, get the level correct. And so this is very popular with landscape photographers and architectural photographers and it's something that you can choose to turn on and off in the custom menu d to we'll get to that when we get in the full menu system, and then we have something called the role indicator, and this lets you know if you are tilting the camera left or right now, one of things to note about this unlike other nikon cameras, both of these are not on at the same time, so they're not doing both up and down and tilting left to right there on lee doing if I get this correct the tilting left to right, and so if you turn the camera vertically switches from one and horizontal, it switches to the other, and this can be activated with shortcut buttons and you can go into the custom menu and a sign maybe the function button on the front of the camera, which is this little function button right up here and so are actually function button is down here, so when you press this button down here, the role indicator would come on and so it's a personal preference whether you like something like that or not, I tend to want to keep a clean frame in the viewfinder for most of the things that I'm doing now, there's a number of warnings that you should be aware of if you have the camera in that particular mode, the camera will alert you to those warnings if, for instance, and we'll kind of go from bottom left counter clockwise around. If you have forgot to put a memory card in the camera, if you are in a black and white on ly mode, you wouldn't want to be shooting color and you wouldn't want to be shooting black and white if you thought you were shooting color if you have to the camera set to the effects mode, if you remember there was the color sketch and a bunch of other goofy things that you could do with your camera, it warns you that you are doing it, and then finally the one point three crop if you are actually only getting a smaller portion of the area, it does outline it but just to make it really clear to you it also has a little warning in the little upper right hand corner on that and then finally down at the bottom we have actually for an icon a new led info it's it's been kind of greenish yellow for many, many, many years and now it's just slightly off white ah a little bit brighter a little bit easier to see a little better detail on it and you'll never see it look like this hopefully because if you do there's probably a problem with your camera it's kind of the entirety of what might be seen in the viewfinder but we're just going to kind of go through this grill quickly left to right the white dot indicates that your picture is in focus if you see one of the arrows that is the direction the lens needs to be turned in which to focus and so if it says this direction you could just turn the lens manually that direction if you are manually focusing in order to get proper focus if your auto focusing they might just blink in the fact that they're changing next up we've got the auto exposure lock and the flash exposure like you remember the a l button on the back of the camera when you press and hold that button this will come on and you khun if I recall correctly will see this in a a little bit you can actually change the parameters of that button so rather than pressing and holding you khun tap the button once and it stays locked in and so some people prefer to have it locked or just a press in whole and that lets you know that that button is pressed we also have the flash value lock if you do a test flash you can lock that value in for the next picture it's a little bit more of a feature of the flash on the camera itself the ex sank we refer to this earlier in the ex ink on this camera is thie too fifty shutter speed at the end of the shutter speed dial it just means that your camera's locked into two fiftieth of a second next up we'll have our shutter speeds to note for the beginners it will indicate with the two little hash marks to the side if it is in full seconds so if it's two little quotation that means two seconds if the quotes aren't there the two would indicate one half of a second and so most of the shutter speeds that you'll be working with our fractions next up we have our apertures and after that we have our light meter also known as the exposure level and you'll notice in the example that you see here it says plus on both sides of the zero this is not a mistake on my part nikon has been going through some unusual times trying to figure out which side of the zero the plus should be on and it can be switched around the way the camera comes from the factory. The pluses on the right side, the minuses on the left side and I believe this is the first camera from nikon that has done that and so if you're used to all that night cons, you'll be able to customize this and you'll see this when we get into the custom menu for the most part you don't need to worry about it right now. Next up we have our battery level and are flash exposure compensation and then we have our bracketing and exposure compensation so you want to be aware of any of these are turned on that means your cameras doing something funny with the exposure now I did recommend for a lot of people to just leave the flash exposure compensation somewhere in the minus two thirds two minus one stop territory and so that might be on all the time if you've chosen to make that setting, we then have our s o or our shots remaining depends on what you have set in the menu setting and so I'm going to recommend when we get there changing it over to s o because I think that's a mohr important setting than the shots remaining if you see a k it means you have more than a thousand images, so if you saw two point three k, it means you have two point three thousand pictures or twenty three hundred pictures left and it's just night cons way of giving you an estimate of how many pictures are remaining. And then finally, there is a flash warning light that comes on whenever it's low light and you need flash or additional light, and for some of the more advanced users, that little warning light is a nuisance because they know they need light but their training trying to do a particular type of shot, and they're not worried about it, so you can actually turn off that warning as well. And so that's something we'll see when we get into the custom menu now, let's, jump back to the screen itself on the camera. First off, you could hit the info button, and that turns on the lovely display. That is, that this is a new display, and they have little little different look to it, which looks quite nice and so just hitting the info button will bring out all that information on the back screen, which is just helpful for your basic camera settings. If you hit the eye button to the left, what it does is it allows you access to the bottom to rose. Of settings in a lot of these settings were going to see duplicated in the menu, so we're not going to discuss them all here there are ones and unfortunately now if nikon wanted to improve this camera, here is my suggestion on how to improve it allow you to customise what goes into these this info screen right now of the ten or twelve things they haven't there I find two or three has really valuable and I would love to be able to switch out what they have in there but you can't do that at this time they have a preset selected number of items that you could go to change in there so let's talk about the top of the screen first these are obviously your basic settees and they're just going to change as you change shutter speeds apertures and so forth on the camera over on the left hand side you khun seymour information exactly about what file sizes you're storing raw jay pig, for instance and what you're doing to each card card number one, which is the top card or card number two throughout the rest of the area you're going to see basically a whole bunch more of information general settings will be seen in here your light meter and you see the battery level indicator how many shots remaining in your highest so and very importantly which focusing point you have selected I can't tell you how many times I've been working with somebody with a camera and they have either the left or the right focusing point activated and they're having a hard time focusing because they think they're in the centre but it's actually off to the side and so just keep check of what focusing point you have activated now down in the bottom the eye button will allow you to go in and change these features down here for instance we have the image area so if you want to do that one point three crop you could kind of take this shortcut and change it right here we're going to go ahead and not talk really about these right here but we're going to go ahead and just go into the menu system where will this discuss him in depth the ones that I see valuable in here let's see what I see um did you khun program your function button which is kind of nice and other than that there's really nothing in here that at least I used on a really regular basis but you might find something in there that you do change back and forth and it's going to be faster to do it here then it is actually diving in to the entire menu system and then when you want to turn it all off you can just hit the info button and it turns it all off
Class Materials
Bonus Materials with Purchase
Ratings and Reviews
judy49
I'm sold. Can't wait to upgrade from my D5200 to the D7100. Thanks to John I have just been convinced of what I have been reading about this camera. And John is much more interesting than a manual. Since I now own this video, I can re-watch it when I get the camera. I have watched and purchased John Greengo's videos several times, and he never ceases to amaze me. I have been shooting for about 18 months, and really have developed a real passion for the art. At 65 years old, its not as easy as maybe it would have been years ago, but with the help with instructors like John Greengo, and others on Creative Live, I'm on my way to an exciting retirement.
user e35335
I think Nikon should supply this course as part of the purchase price, it's that good. John is a great ambassador for the Nikon brand and there can be no better way to get immediate confidence in your new camera. He has a calm engaging manner, is very fluent (no umm's & err's) and is a true inspiration. I owned the camera for a couple of months before I came across this course and my hit rate has dramatically improved with his instruction. I have gone on to purchase "The fundamentals of photography" and the fast start for my other camera OMD EM1, both equally excellent.
~user-458e96
This is my first experience with a DSLR and John's class and instruction style is excellent and easy to understand his instructions. I purchases the D7100 and am happy that I can watch this video again and again to increase my knowledge of this wonderful camera. I am so satisfied with John's style of instruction I intend to purchase "Fundamentals of Digital Photography 2014" Thank you CreativeLive. eddyhc1
Student Work
Related Classes
Camera Guides