Lessons
Segment 1 - Class Overview
26:50 2Segment 2 - Button Layout: Top Deck Part 1
24:08 3Segment 3 - Button Layout: Top Deck Part 2
20:39 4Segment 4 - Button Layout: Back Side Part 1
22:16 5Segment 5 - Button Layout: Back Side Part 2
23:27 6Segment 6 - Button Layout: Left &Front Side, Bottom, & Lenses
19:14 7Segment 7 - Shooting Menu
25:59 8Segment 8 - Custom and Setup Menus Part 1
27:10Lesson Info
Segment 1 - Class Overview
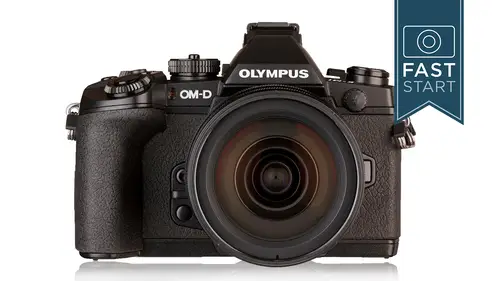
welcome to the om D E M one fast start class. I know that's a mouthful of Ah, the name. There is logic to it. I will explain that as we, uh we get into it, but it is a fantastic camera. Olympus has come on very strong in the muralist world, and they've been producing cameras that a little bit different than everyone else. And they are packed, filled with Pete features. And this, I would argue to date, is their most professional camera to date eso It's well built. It's got a ton of features and I am not a huge fan. Wait for it, Wait for it of the the way that it's organized within the menu system. And I'm gonna try to go through and kind of explain how that all works and we're gonna go through the menu system in here, which is a big part of this class. The other things we're gonna be doing in here is we're gonna be covering all the dials, all the buttons, all the controls on the outside of the camera. I'll be explaining what, therefore and how to make best use of we're gonna go through ...
the visual viewfinder system. Explain how that works as well as going through the menu system, and by the end of this class, your camera will be set up the way you want it to work highly. Recommend that as you're watching this class, you simply have the camera in hand and you get to play with camera in class. You know, normally your teachers told you, put down your toys and stop playing. You take notes. If you want to take notes, that's fine. But if you want to play with camera, that's fine as well, because you'll be learning as you go along. So that's what you can expect in here now, just kind of in general what this classes for its. It's all about learning the major functions of the camera, everything that you need to know in order to get the highest quality images. If the camera has a number of features and it does that don't relate to getting the highest quality images, I'm not going to spend as much time on that, so we're not gonna be able to cover everything, and I'll kind of explain that as we go along. So here's the layout of the class. Here's what we're gonna be doing over the next roughly five hours or so, I'm gonna give you a little overview of the whole Olympus camera system. We're gonna go through a few photography basics just for those who are kind of new to this world of serious photography. We're gonna be going through all the controls, all the buttons, all the dials. You were going to know what everything that does on the camera. We will go into the menu system and we're gonna go completely through the menu system. I'll be giving you recommendations on where and how to set up everything in the menu. And one other thing about this class is that we do have as part of the class. When you purchase it, you get a Pdf download, which is a multi page outline of the class. It's ah, it's a general outline. It's got a lot of the graphics, a lot of the kind of the specific technical things that I have to say in here. But as you get towards the back of it, it's got hold it up for you guys over here. It's got a listening of the entire menu system on one page, which I find really handy because a lot of times I'm looking for a specific thing and I look for that word and I can scan the entire page very, very quickly. And I have given you my recommendations as a good starting place for settings on all your menu items and because I know that everyone is a little different. I have included a second page that doesn't have my recommendations at all. That's blank, that you can write in your own thing so that if you want to write in where you normally like to have things set, you can take this page, rip it out or print it out and then fold it up and put it in your camera bag so you always have quick reference to it. Also in here, some people like, is towards the end. Very last page is my recommended settings for different types of photography, like sports photography or landscape or portrait shooting, where you would set the most important controls on the camera. So that's a handy little guide. And if you do have the class, print that out and keep it handy as you're going through the class so you can take notes and put your own notations on that as we go through. All right, so let's get into this now. When you get this camera, you're going to get this fairly large instruction manual that doesn't exactly have everything in it, but it does have a lot of stuff in it. And this class is not a complete substitute for the instruction manual, although it's gonna cover pretty much everything that's important in that manual. It's just that there's going to be a few other technical details you may wanna have reference to in that manual, so don't quite throw it away yet. It still has some purpose to it. Also, be aware that this is not a photography. Wanna one class? I'm sorry to disappoint you, but I will not be explaining how depth of field works. We'll talk about it a little bit, but we're gonna stay concentrated on the features functions of this camera in particular. If you are interested in a photography class, well, I have some recommendations. As we get through the class. Be aware we're concentrating on just the E. M. One in this class Well, first off, if you are new to Olympus like to welcome you to the Olympus family. They have been around for quite a while. They did start making cameras quite some time ago. Back in 1936. They started with their first cam. Right now, I tell you this history because it does play into where they are today in the products that they have available today, 1959. They came out with the Olympus pen and it was a very, very small camera for the time. Very portable camera. And that is something that Olympus has been notable for throughout the years, including their SLR system, the O M. Siri's, which started back in 1973. They really wanted to have something that was very small and lightweight. And if you compared it to the competitors of the day like night cons and cannons, it was definitely smaller and lighter than those cameras. Also, if I could just throw another appointed, it had a really good viewfinder. It was one of the other things they were noticed for. Now the oh, of course stands for Olympus and that I m best I can tell stands for men, and I'm not sure how to pronounce it. But my tiny or martini it was the designer of the Olympus camera. So if you're wondering where the O. M comes from, that's what it stands for. And then they continued making cameras through the eighties and nineties, and they started going into the digital market. What's kind of interesting is that in the late eighties and early nineties, they never really made the transition with their SL ours into the world of auto focus. And they're one of the camera companies that kind of got left behind. Canon, Nikon, Pentax and Minolta were the mainstays throughout the late eighties and nineties, and Olympus kind of bypassed the whole digital SLR SLR world. They went straight into the digital world in 1996. Remember, their first camera coming out had point three megapixels on, and we're just so excited to be able to see an instant picture in that digital realm. In 2003 they kind of reinvigorated and started up the interchangeable lens division again, and they came out with a 4/ format lens system. I'm gonna talk more about this as we get into the exact system on this camera. But interchangeable lenses, autofocus and digital was revolutionary in many ways for the time. It did not sell well, though for ah, problem of it being just a little too big for what it waas. And so they kind of went back to the drawing board and they decided to redesign it. And in 19 in 2009 they introduced what's called the micro 4/3 and it's kind of the return of the pen camera. So if you go back to that earlier pen camera, it has a very similar styling to it as well as a similar size to it. And right now, Llopis is doing pretty good as far as their offerings from in variety of cameras and options available. So it's a it's a good company to be with because there's a lot of options, both in lenses and in general accessories. Now the system that they have that they're working with on this camera is in a greater sense, called the 4/3 System. This was started in partnership with Panasonic and a couple of other manufacturers that have had smaller dealings with the 4/3 system and what's unique about the 4/3 system is first off the size of the sensor. It's quite a bit smaller than your traditional 35 millimeter film or your full frame sensor and digital cameras. They went with this to make the cameras more affordable and smaller in size. The name also comes from the aspect ratio of the sensor. It is 4 to 1 side and three on the other, so it's why it's called a 4/3 ratio. The full frame, our millimeter frame has a little bit longer, skinnier frame at one by 1.5. And the 4/3 in my opinion works much better if you're shooting verticals matches up very closely with an eight by 10 aspect ratio, which a lot of people here in the United States like. For enlargements, it's not quite as good for shooting landscapes. And horizontal is because it's got a little bit more of a boxy look to it. But that's just simply my opinion on it. The other thing that's unique about it is the lens mount. There is a 4/3 lens mount, and one of the beauties of this system is that you could buy an Olympus camera and you can buy a Panasonic lands, and it works perfectly. Auto focus, exposure. Everything works, just as you would hope it would. Full compatibility between them. And there are even other manufacturers that will be making lenses. And there's a few out there, but not many, that you can get some after market lenses that will work on this as well. Now, as I said, Olympus started off with what's called the 4/3 system. This was an SLR system, and it was just a little bit smaller in size but had a much smaller image sensor, which means the image quality was quite a bit behind where the cannons and night cons were, for instance. And so you do have to be careful, cause there was this earlier 4/3 system, and now we're on the micro 4/3 system. So, for instance, there is a 14 to 42 lens that is the 4/3 and the micro 4/3. And so, if you're picking up a lens on eBay or used or on a real big sale at a store, make sure that you're getting the right type of lens for your camera because some of the older lenses don't work straight on the camera. These earlier cameras were, as I say, S L R camera single lens reflex is, which means they had a mirror in the camera. It bounced the light upward to a prison system and out the viewfinder, so you got to see straight through the lands. But that made for a fairly large camera. So what they decided to do is to remove the mirror, removed the prison system and reduce the size of the camera on. What happened then is that the lens mount got much closer to the image sensor made the cameras quite a bit smaller. They're able to make the lens is smaller, and now you had a really distinct size advantage versus the larger SL Ours. And this is a micro 4/3 camera, which is also known as a mirror less camera. Now be clear that the differences between the 4/ and micro 4/3 can be a little confusing. They have the exact same size sensor. They have the same lens mount. However, it uses different lenses because they mount a different distance from the sensor. If you do have some of those older lenses, and they made some really nice looking lenses. You would need to use this mm F three adapter from Olympus. It sells for around $160 allows you to use 4/3 lenses on a micro 4/3 camera. One of the great things about having the mirror list camera is that short mount distance from the lens to the sensor. And there are a wide variety of adapters for you to use other older lenses from different camera system, so you can use almost any lens that's ever been made on this camera. If you have the right adaptor, there's a lot of very, very good adapters out there at a very wide variety of prices. As you can see, there was also something called a meta bone speed booster, which works like a tele converter in reverse, and it takes the large image circle designed for a full frame camera and kind of condenses it down to the 4/3 sensor so that you get pretty much the same angle of view with the cameras you did on 35. It's a little different, but it's pretty close, and it also adds a stop a light, because rather than spreading the light over the full frame sensor, it concentrates it just on the 4/3 sensor. It's a unique device. You're not going to see a lot of amount there, but it does allow you to use older lenses near the same focal length or angle of you that you had before with a one stop light gathering capability. So very, very cool device, in my opinion. Currently, the micro 4/ family has two different Siris of cameras. It has the pen, Siri's and these air basically cameras that do not have view finders. So these air extraordinarily small cameras in many cases that use interchangeable lenses, and they share the exact same lenses with the OMG, Siri's and the OMG. Siri's is called that just simply because it kind of heralds back to those 19 70 in 19 eighties cameras and has a somewhat similar look to it. They have a bit more of a grip, and, of course, on these they all have Elektronik viewfinders so that you could hold the camera right up to your eye. You can view under very bright light conditions. Now the family is still kind of small. In my opinion, they had the E M five, which came out about two years ago and was hugely popular. It's actually one of my most popular classes here at Creative Live. There were so many people who bought that camera, it just kind of really broke a lot of new grounds. And what they've done from the E. M. Five is they've moved forward and they basically split the line in two. And they wanted to go up and have a higher quality model, which is the E. M. One, which will be talking about. And then they wanted to have a smaller, lighter, great model that had some of the new features of the M one, and they came out with the E. M 10. And so the E M five in the E. M 10 are pretty similar in size and general capabilities. But I'm told by Olympus that if you want kind of the most common class, if you haven't e m 10 you want to be watching this class. It's actually better and more relevant to your camera than the E m fought. So still undecided If I'm gonna have an E and 10 class, we're gonna still see how that camera does. So that's what's going on in the Olympus family now under your camera here. When you get that instruction manual, you're gonna get it going to get all sorts of warnings about what not to do. Don't operate your camera hospital on other things that you just couldn't do with your camera. It's kind of obvious. One thing that people have a question about is getting water on their camera. This camera is listed as dust splash and freeze proof. I'm not sure exactly why you would want to put your camera freezer, but I can understand wanting to shoot under very low temperatures. I was in Yellowstone recently, where it was minus 39 degrees, and so it's good to have a camera that can work in the cold. So it is a well built camera, one of things I want to show you. If we can get one of the cameras on the camera right here, I want to show you a little detail about weather proofing of this is that the camera or the lenses have these rubber rings around the edges that are waterproof on. That's one of the little seals that's going on in and if you can see it very well. But there's a very, very small rubber seal right here. And if we look at another lands that does not have, it does not have that rubber seal around it. There are lenses that are weatherproof, and there are lenses that are not. And if you have a lens that is not weather proved, then the whole system is not whether because water can get within that scene. And so having that little rubber seal is something to look for. There's not a lot of lenses that fit in that category, but they are out there on their don't like leaving that sensor exposed to want to get dust in there. So a Zara's the weatherproof nous. Just don't go too far with it. I If you're going to shoot in the rain for an extended period of time, I would probably still want to have some sort of rain cover on it. Okay, let's hope you're ready for today's class. You need to have charged your battery. Last night, I charged mind is going to be using it all day. Today takes about four hours to charge. You're gonna get a little over 300 shots. Your mileage may very depending on how much battery or depending on how much video use you do. How you have the cameras set up, how often you look at your pictures and you go through your menu system but should get three toe, 353 103 to 350 shots. I go ahead and make sure that your lenses attached You got a memory card in there will be shooting some practice pictures, maybe in here, and it kills me to say this, but you can turn your camera to the eye auto mode, which is the super simple mode. And during you can follow along with your camera in here and go ahead and just take a picture. I'm going to take a picture of your Darren, and you can take a picture of me if you want. I just want to make sure that cameras are working and let's make sure I get this an auto focus here. All right, Everything working on your end, sir. OK, we've got a nod there. That's good. Okay, so for the next few minutes, you can just relax, all right? You don't need to worry about taking too many notes. I just want to go through some basics, some fundamentals of photography. And I'll be honest with you folks. I have totally stolen all of this material from another class of mine called Fundamentals of Digital Photography. If you want to know more about photography, here's a little bit of what you get in that class kind of tailored for this camera. So we have an interchangeable lens camera that is a muralist camera that we've been talking about. So we have very high quality lenses, which is one of the great parts about this system. Here in the lens, we have an aperture that can vary in size. We can kind of open it up and close it down if we could look straight through the lands. This is what it would look like as we change our F stops or are apertures. And each time we close it down, we're letting in half assed much light. As we open it back up, we're letting in twice as much light with each setting change that we make on the lands. And so this is the first way of controlling light that comes in the camera beyond controlling the amount of light. It also controls the depth of field or how much is in focus. So you can see here at 1.4, we have very shallow depth of field. As we start changing our aperture, those red hash marks over on the right side start growing, and mawr of that yardstick is coming and focus with each setting change. It's not a huge difference, but it does continue to grow as we get down to F 22 which in the case of this lens is maximum depth of field. So that's all going on in the lens down the muralist camera light comes straight back to the image sensor, and it is fed electronically to the LCD in the back of the camera. I like the LCDs on the back of the camera cause they're really good for judging general composition and overall content within the image, but they are not good for judging sharpness. Of focusing or depth of field can show you the depth of field really well. But it's the sharpness that it doesn't do a very good job at, and they are terrible under bright sunlight. And so if you have some light shining on the back, your camera, it's gonna be very hard to judge the exposure of what's going on. So the big benefit on this camera is a very high quality Elektronik viewfinder and E V F, as they are known. So normally, I would recommend using the E V f. When you are generally shooting photos, it'll actually keep the camera in a steadier position. But it's easier to see, especially under bright light conditions. Now what's going on at the level of the sensor is kind of interesting. So let's take a closer look at this. So light is normally just coming straight in and hitting the sensor, and it had the camera has to shutter curtains. It has a first and second curtain. So when you press the shutter release, what has to happen is that the first curtain has to close so that the sensor can prepare itself to capture the image, and we now open the exposure. This is the actual picture you're taking as the second curtain then closes, then for you to see the next image. The second curtain needs to open again, so both curtains need to close and then reopen again. So there's a lot of shutter movement going on in the camera now. Of course, the shutter can control the amount of light coming into the sensor as well. We have fast shutter speeds for stopping action like a whale breaching out of the water. 5/100 of a second is a good shutter speed for stopping fast human action. So sports dance things like that 500 or faster is a good place to be 125th of a second. Pretty pedestrian shutter speed, you might say for stopping some camels walking in the desert, we start getting into the slow shutter speeds around 1/30 of a second. So if you have something that's moving pretty quick, you're gonna be getting some blurring. In this case, the camera is on a tripod, and you can see how much blurriness you get from people walking at 1/8 of a second. If you want to get those blurry shots of waterfalls and rivers, you can get that very easily if you go all the way down to one second. And if you like to do nighttime photography, well, then you might want to be in the 15 to 32nd range so that you can let in enough light to let those stars shine through up there in the corner or do a little light painting with a flashlight. So that's what's going on on the sensor level within the camera. And that is basically how the muralist camera works. Nice little system there keeps the camera very small. Using that electronic you find her. Now the sensor in the camera is very important in the size of it. There was lots of different cameras on the market, and there are lots of different sensor sizes, which kind of determine the overall quality, the capabilities and limitations of the camera. And so we're not gonna worry about the small ones in this class. But right now, the largest ones out there, the 4/3 the A. P s and the full frame sensor. The full frame is based, of course, off of 35 millimeter film, which was a very good film size for a lot of different reasons, and There are a few cameras that do have the full frame sensor. It does make for a bigger size camera, but it does enable it to work under low light conditions very well. This has a crop factor of 1.0, which is another way of saying it's the same size as 35 millimeter Found another way to measure These is the dying diagonal of the sensor. So 43 millimeters compared to the smaller AP s system, which is 28 millimeters across. And that's used by a lot of the cannons. Nikon Pentax is Sony's. Fuji's probably the most popular of the models out there, and the 4/3 is a little bit smaller. It's millimeters across, and for the current crop of digital cameras on the market, I just kind of consider these the large, medium and small options, and between one size and the next size, up or down, it's a pretty close competition. If you're jumping all the way from 4/3 up to full frame, it's hard to compete with the image quality cause there is quite a bit of difference in overall area of that sensor, but 4/3 has a number of smaller size products that you just don't find with the full frame options. Quick little note on attaching the strapped to your camera. I want to make sure that you do it right. I see a lot of people that have it done wrong, But if you are using a traditional strap, make sure that the tail end of that strap is on the underside of that little buckle or strap adjuster. That way, pressure is pushing down on it, and it's less likely to slip out next up. Holding your camera. Darren, pick your camera and hold it in your hands. If you're gonna take picture, I want to see how you're holding your camera. Okay, everybody, take a look at how he's holding that camera and he wins a prize, I think, because he's holding it correctly. Uh, there are a couple different ways of holding the camera, and if you put your thumb on the bottom, it's not as good as it is on top. Telling this to students for quite some while and Kenna today brought in if we could get a shot over here on the side of the table. Uh, We got this great little guide for shooting pictures and this was done. Can it do you know when this was produced or dio? It's 1978. And do we actually have A We have a price on here. It's a dollar 50 and wait for the cameras to get over on this. But the fun thing is that my aunt just brought me this from my grandmother's house in Miami, and it's the same stuff we're teaching today. But this back, you know, back in the day. And so I was looking through this this morning, and when you just go just a couple of pages in and take a look at the picture of the guy here holding the camera, what's the correct way? And if you read it down here, he's got it. The thumb on the underside is the incorrect way. This is the wrong way and hold it. This is the correct way to hold it. And, you know, just I got the same slides in today's. It's funny to see in this, So I want to show you that and the reason for this Why don't you want to hold it like this? a lot of people who don't know about cameras do just kind of picked him up and hold him like this, and I guess that's the comfortable position when you first grab it. But the problem is, is that your elbow doesn't have support down here. It's gonna have support. Also, you can support the camera in the base of your left hand, and your fingers can have more fine tune control for the focusing and zooming. So you're not trying to support the weight and turn something here. You could have a little bit more delicate and fine tune controls, as I say, and so it may seem a little less comfortable at first, but you'll totally get used to it and you'll look like a pro when you use your camera that okay, let me give a couple of words to you on screen here, take a look at these words and tell me which one of these words do you like? Some people like everything automatic. I don't want to have control of anything Well, in this camera, there is tons of different controls where you can let the camera choose to make decisions for you or you can do him yourself and you can work your camera however you want. It is your camera, but I think one of the reasons a lot of people are taking a class like this is that they want to learn how to do it. Manual. And I can tell you from doing this for the last 25 years. It's fun doing things in manual. I like being able to make these decisions because if the final picture is important to you and you know what you're doing, you have time to do it. It's great to be able to make those decisions, and this camera does give you full manual control. But it's good to know how to set some things and automatic, because sometimes you just don't have time to fuss with it. And you just want to take the picture on DSO realize that as we go through the options on the camera, that there are some variables that you're gonna maybe want to start with a little bit of automation, but then start gradually getting more and more manual inm or more different categories as we go along the line
Class Materials
bonus material with purchase
Ratings and Reviews
Hal
John does an excellent job of making the OMD E M1 understandable. His knowledge of the camera and relaxed style clearly and painlessly walk you through the maze of buttons, menus, and functions. He objectively points out the strengths of the camera as well as those things Olympus could of done better. His opinions of the camera are consistent with other knowledgable reviewers, and are consistent with my own (limited) experience. The manual tells you every little thing the camera CAN do. John helps you understand what is important to get the best use of the camera in most situations.
user e35335
Three simple words, " Thank you John " I have really enjoyed the course. The OMD EM1 is a wonderful camera, and with the clear guidance of this course I feel instantly at home with all its capabilities. Clear concise instructions delivered in a faultless manner. A joy to watch.
FerOlea
John is a very good teacher, and this is indeed a useful class. Class material is excellent as always. But I don't think this is his best work. He seems to be too conflicted with Olympus' menu systems and design decisions (which I admit, are a bit strange) to give the students a clear picture of the full potential of their new gear. He also fiddles/struggles with the camera a bit too much in all the live demonstrations. I would recommend this class only to absolute photography beginners and not really to people with any experience.
Student Work
Related Classes
Camera Guides