Lesson Info
2. Segment 2 - Button Layout: Top Deck Part 1
Lessons
Segment 1 - Class Overview
26:50 2Segment 2 - Button Layout: Top Deck Part 1
24:08 3Segment 3 - Button Layout: Top Deck Part 2
20:39 4Segment 4 - Button Layout: Back Side Part 1
22:16 5Segment 5 - Button Layout: Back Side Part 2
23:27 6Segment 6 - Button Layout: Left &Front Side, Bottom, & Lenses
19:14 7Segment 7 - Shooting Menu
25:59 8Segment 8 - Custom and Setup Menus Part 1
27:10Lesson Info
Segment 2 - Button Layout: Top Deck Part 1
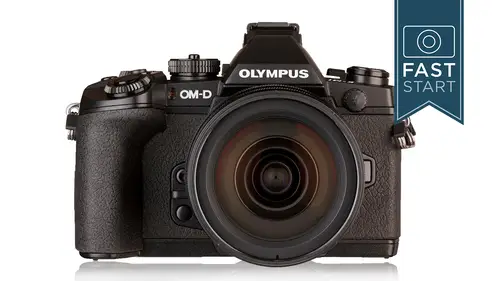
first off, make sure that we have our cameras turned on. You can leave them on for the rest of the day because we're gonna be using a lot of features of him. Shutter release is not only for taking pictures, but it's for waking the camera up. So if the camera goes to sleep, which it tends to want to do after a few minutes, just tap down lightly on that shutter, release the front dial and the back rear dial. Excuse me, are the two main control knobs on the camera, and these will have separate or sometimes identical controls, depending on the features that we go through. On the back of the camera, we have an aero pad, which will be most commonly be used for changing focusing points and navigating the menu system. So moving up and down, left and right, and then the set button in the middle is going to be used for selecting items. And so if you have something highlighted and you're like, yes, that's the one I want to do, you will be hitting that particular button on it. So we're going to st...
art our tour of the camera on the top deck and with the shutter release. So when you press halfway down, it does wake the camera up if it has been asleep. If the camera has been asleep for a long enough period of time, it will be going into deep slumber, in which case you have to turn the camera off and turn it back on. If it's just a light sleep, you can wake it up just by pressing halfway down. Pressing halfway down also activates the metering system and the autofocus system. And then, of course, pressing all the way down will take the photo, so make sure that you are comfortable pressing halfway down. Photographers are also often times leaving their finger halfway down the way a race car driver might be slightly putting the foot on the gas pedal right as the lights ready to turn green, getting ready for that picture to be taken. This camera also has a touch screen on the back, and there's a lot of functions that you can do on the touch screen. If you don't like touch screens, you don't really need to use it for anything. If you don't want Teoh, there are specific controls and dials on the rest of the camera. But a lot of people do, like using the screen, and you can use that four taking pictures. In fact, I would like to do a little demo for it right now, So I'm gonna turn my camera on, and I'm going to see if I can maybe give a little something to focus on here in front of May. Zoom in just a little bit. Don't have a lot to focus on, but you'll notice over here on the left side of the screen, there is the little green touch button, and it means if I touch the camera, it's gonna want to focus and take a picture. If I touch that little green shutter release, it's now in the no touch mode, which means touching the screen doesn't do anything. So I deactivated the touch screen on it, and I'm gonna go to the next one, which allows me to focus but doesn't take the picture so I can change focus. And then I would shoot the picture up on the top of the cameras. So there are three options. There is the shooting option. There is the deactivated option and then they simply just focusing option. And so be aware that there's a lot of things on the screen that you can touch and open up, and we're going to get into what some of these other little options are on the touch screen. Come on, go away. There we go. OK, so be aware that you can do the type screen. It's, uh, something I wouldn't use for hand held photography, but I could see using it for use on a tripod. It might be just easier to touch the screen right there than the reach around and find the shutter release. It's a nice little option. Tohave alright, the mode dial on the top of the camera, obviously going to be one of the most important controls on the camera. This is controlling the exposure. The shutter speeds the apertures as well as a number of other features. So let's take a closer look at how the mode dial works. To start with, Let's go to the most simple mode. It's the I auto mode, the intelligent auto mode, and what's going on here is the camera is setting shutter speeds apertures esos, and it's looking at what you're taking a picture of, and it is trying to figure out what's going on and trying to make a judgment call on what you need to have happen in the camera to get the best picture. The problem with this is the camera doesn't really know what you're pointed at, and so you may know that you're pointed at basketball players. But it may not understand that these people sitting on the bench are actually going to get up and start moving here in a moment. And so it's a very, very simple mode, and I think anyone who takes this class and you watch it all the way to the end and you pay attention, you're probably not gonna want to use this mountain because it limits what you can do with the camera. When you go into the menu system, there's gonna be a bunch of items that are great out that you can't get to you like this, but normally is supposed to change the I S O. And now it won't work well, you're not allowed to use it. There's a lot of what I call child safety locks in this mode. If you're gonna have this camera to your brother in law, your sister in law, Your friend who doesn't know how to work your camera. This is a great mode to put it in because they're not gonna be able to get in and change your settings. And it's good for just really simple basic picture taking. Now it does give you a few options in here. If you do hit this OK button, it's gonna bring up a live guide where you can go in and change a bunch of small little settings on the camera. It's too limited, in my opinion, for a lot of great photography, but you can still get in and you can blur the backgrounds. You can change kind of the way it captures motion, which is really shutter speeds. And so, most of the time I would just recommend just go full manual, get in there and get your hands dirty with shutter speeds and apertures and I esos this is a way to kind of lightly play with it Now. You can also do this with the touch screen as well. There's gonna be a little arrow off to the side that you can touch and it's gonna open up. What kind of seems like a drawer off to the side. And you can do this as well with the tabs on the back of the camera. And so let me do a little live demo with my camera here. I have it in the eye auto mode. I feel personally a little guilty about having it there right now, but we have it in the eye auto mode. And so I'm gonna hit the okay button and it opens up this little drawer and it's got a bunch of little graphics in there, and it says right along the top. What? It's trying to dio so we can change the color saturation. We would hit the okay button in here, and I can use the tab in the back of the camera. Or I can use the touch screen to scroll up and down, and it's changing the saturation of that particular situation. It can hit. OK, let's see if I could get back in here. I got to hit the menu, then hit, okay? And so let's see if we can change the depth of field in here. So this is the blurry background option, and I can go toe blurry background or and say I don't want a blurry background. I want it sharp and you can actually see that background changing in its sharpness. You can see the lens in the foreground is in focus, and then it gets blurrier as I move it up here to the Blur. The problem I have with this mode is that first off all first of all, manual photography can be a lot of fun. And now it's not telling me that f stops and the things that are changing in the camera. So I'm not learning anything by doing this. I am getting it done with simple terms, but I'm not learning anything, and it's not that hard to learn this sort of stuff. So I'm not a huge fan of Mike. I spent a lot of time going on and doing that, but that is what that little option is for in there. Okay, let's go to the next mode. The art mode. The art filters in this camera are kind of like instinct instagram in a really nice camera. And so, in order to get to these filters, you can hit that right tab in order to get over. And you know, I gotta play around. I gotta learn these things. So I decided to take the camera out and try it in all the art filters. And so I went over and shot it first, just in natural, just to see this is what the scene actually looks like. And then pop art adds a bunch of saturated color, and then they put a soft focus filter on it for one, and then they change the contrast of it, make it a little bit lighter at a little bit of grain to it, put a heavy vignette ing on it and kind of lower the sharpness of it. Then they, uh they blur the top and the bottom edges. This is best shot from a higher angle. If you're looking on on a balcony down, it's something that makes it makes what you're looking at like a miniature They've gone through and played around with the color. They've made your traditional C pia images. Your ultra contrast E version Very unusual key line. And, uh, weird watercolor. One s. So those are some of the different art filters that you can do now. That's, um if you shoot those in raw, they will be recorded as a raw and JPEG. We're going to get into the Ron Jay Peak a little bit, but those were gonna be a J peg image. With that effect on it. They're not gonna be raw images. Rye images are the original highest quality, pure information from the sensor. But if you want to play around a little bit, it's there. We're not going to spend any more time on it, though, in this class, Next up is the scene Mountain. Now, these are gonna take, for the most part more natural looking photographs, but with a little bit of a twist to it. If you condone, remember back to the I auto, where the cameras trying to figure out what you're shooting a picture of here you're giving it direct information that you are shooting sports or landscape, and it will be able to make better decisions when it comes to choosing the I S o shutter speed and aperture for getting better pictures. I still don't recommend this mode for anyone. Well, you know, with a camera of this level, most people who own it are not gonna be satisfied using this mode. But if you know, you said you wanted a hand, the camera off to your kids and, you know, tell him to take some simple landscape photographs. Just put it in the landscape mode, and you don't have to worry about teaching them photography for that one quick moment for them to take those pictures. But, uh, you can go through, and it's what it's gonna do is it's also gonna go in and change color and contrast a little bit for the photographs just to kind of tweak him a little bit. And it is a simple and quick way of getting pictures that are a little bit more like it. One thing to note about these modes is that they are not doing anything that you can't do on your own. And so there's no special little magic fairy dust that Onley they put into their stuff that you can't do just going around and doing it yourself. It's just a little bit quicker for people who don't know what they're doing, But once you know what you're doing, you'll be able to far surpass what the camera has stored in here for you now. A few of these modes are specifically designed to be used with some of their add on lenses. Now these are not interchangeable lenses. For the most part, these air add on lenses that you would add on to a few of their basic lenses, like their 14 to 42 14 to 1 50 or the 40 to 1 50 Lenz. They have a fisheye converter, a wide angle converter in a macro converter. Those three are all add on lenses. The three D lens. The 12.5 millimeter is an interchangeable lens, so you'd actually mounted on the camera as supposed to mounting it on another lens, which was on the camera. So they have special modes that the camera kind of wants to know that it is in. If you are using any one of those lenses now, those add on lenses are a slightly cheaper way of getting either more white angle or close up, and they're going to sell. Let's see the macro converters. Only about 60 bucks. The fish eyes around 170 there's not a lot of fish I options available for this camera, and that's one of the cheaper ways of getting into a fish eye. The white convenient converter is going to sell for about 100 bucks. In that case, Okay, next up is this little symbol, which is the photo story mode. So if you want to tell a story in photos not to be confused with photojournalism but somewhat related, you can do this in the photo story area and what this is gonna be. Well, there's also a shortcut on the touch screen that you can get to and what you do here, and it depends a little bit on what set up you have. In this first set up, I took five different photos, and the camera takes a sliver of each one and creates one image with it, so you can kind of create your own version of a panorama, and there's a multiple multiple choices that you can make it here in this one. We took two pictures, and it puts one picture inside of the other and puts the date on it, and so it kind of creates a different look. So if you want to create something right in camera, you don't need photo shop or computer or anything else, you can create something writing camera, ready to go. That tells a little bit of a story of multiple images within one image, not something a lot of people are trying to do, creating high quality images but one of the additional little features that I haven't seen in frankly, any other camera. Next up, we obviously have our movie mode. And so if you want to shoot movies, you can do so at any time you want. There's a video record button on the top of the camera will talk about in a moment, but if you want to specifically shoot movies, I would recommend going to the movie mode. The camera will be a little bit better set up for shooting video in that case, and so there's our movie record button, so you're gonna press that wants to start and wants to stop. There is a focus area that you can magnify using the function to button on the top so you would select the focus area, and then you would magnify with it. And then they have ah, weird echo shot. Have a one shot echo and a multi echo, and I think this is worth a little demo to show you what's going on. So let's go to the camera and let me flip it over into the movie mode in the back. So first off, let me just show you. When you start recording, you'll see that there is, ah, record symbol up in the top left and then I'm gonna hit stop way. We did have a clock running in there. We'll talk a little bit more about that later. Let's go to that focus area. So I'm gonna press function number two. And if I want to move the focusing area down here, I can move it with my finger and choose a different area. I can also use the tab on the back of the camera for focusing. If I press it again, it'll magnify. And if I was wanting to manually focus well, actually, let me try this again. Maybe it doesn't work in manual focus. No, it doesn't. I just learned something about that. So I'm gonna focus on this lens here in the foreground. And if I hit it again, I can go in nice and close if I want to move on. I guess I can't move it. I got to go back to the focus area here, and I kind of get locked in this loop of going back and forth between the two. And then you can just hit menu. Is that correct or no? I got a hit. Okay, to exit out of that now the eco mode. Let's take a look at the eco mode. You'll notice there's some graphics along the bottom here that give you a hint as to what's going on. Let's do the one shot echo, which means I go to the right, and as I pan the camera back and forth, it has a slight residual image in there. Let me do the one on the bottom, which is the multi echo. And if you ever wanted to film a clip that looked like somebody was drug induced, this is the mode that I would want to use because it looks like Oh, I've getting so dizzy now why that is on there. I can't answer that. I can only answer how to do it, not the why. So that is the eco mode woo. Okay, moving forward. a picture. Mel, let's talk a little bit more about what you're going to see in there. I showed you just a little bit about this before. There's a little recording indicator in the top left. There is recording time down in the bottom right hand side. There are multiple different resolutions and frame rates that you can choose from in the camera. In order to do that, you will need to dive into the menu system. And if I could take just a moment here to let you know that as we go through this class, I'm gonna give you a bunch of shortcuts because I know a lot of you are watching this at home and you're able to stop the class and jump forward and go make a change. And so if you see a little box like this that you know, says shooting menu number one, if you want to go change the quality settings of the movie mode, we're gonna get to it in due time in class. But if you want to stop and go do it right now, go to shooting menu number one and look at quality and then you can go in and select from any of the movie modes that are available there. I'm going to go into more detail as we go through the menu system in this class. But that's just a nice little shortcut for getting there quickly and you'll see more of those in the class. So in the motion picture, my would be aware that we have two different formats. We have ah dot movie format in an M J Peg format that are slightly different sizes and compression ratios. We have different resolutions. We have full HD standard HD as well a standard resolution. If you want something lower quality that you could email to somebody a little bit more easily. Most TVs these days are shooting at 30 frames per second, so that's the standard. But there will be some other options available in there. The maximum file size is two gigabytes, or 29 minutes and 59 seconds. Whatever comes first, and so if you're filming a really long event, you may need to stop and restart recording for those times. Now, at any time you want to shoot a still photograph because this is primarily a still photograph and not a video camera, you can press down on the shutter release and take a still photograph. If you do have those older 4/3 lenses, which are not the micro 4/3 but the kind of the earlier generation of the Olympus autofocus digital lenses, you will need to manually focus them in this movie mode. And if you are not in the movie mode itself, the camera will automate it automatically. Be set to the P mode so you could set it anywhere you want. The art mode, the scene mode, shutter priority program, anything like that, the I automotive. The camera automatically is gonna go in and set shutter speeds and apertures for you in the movie mode. If you are in the movie mode and you want to set manual exposure, I will explain how to do that when we get to that little section in the menu. But you will be able to operate the camera in a manual movie mode, but you've got to go into the menu section to select that. Okay, let's get to the good stuff on the camera. So P stands for program, and what that means is the camera is going to set shutter speeds and apertures for you but nothing else. So all of those child safety locks that we talked about in the eye auto mode are no longer there. And so this is a good mode for anyone who just quickly wants to pick up the camera, shoot some pictures but possibly might want to make a change in some other feature of the camera. So while it's in the program mode, you can turn the back dial to do something called Program Shift and the front dial to do exposure compensation. So let me explain exposure compensation first. That is simply making the picture lighter or darker. But it's changing a combination of shutter speeds and apertures, and in some cases you're gonna want to darken the picture a little bit. In some cases, you're gonna want to add a little bit of exposure to it. It depends on how bright your subject is, and that's because all cameras use a standard 18% great average is what they think everything is. And so this something very important for anyone who wants to use the program aperture priority or shutter priority mode. If you do decide to use that exposure compensation, You're going to see a indicator in the camera, and this indication that you see right here would indicate one stop over exposed. They actually break these stops into thirds, and that's why we have a couple little marks in between. This would be two stops overexposed, and this would be one stop under exposed, and you could go as far as three stops in either direction. But normal exposure will be in the middle. So if you do use the exposure compensation, make sure you bring it back to the zero setting. So let me do a little live demo on this camera here. So we put it into the program mode to start with. And, as I said in back the back dial controls program shift. And so I'm able to adjust the F stops and the shutter speeds, and the camera is figuring out the correct amount of life. So at any time I want to take a picture, I should get a decent quality exposure, which I am getting under all these circumstances. But I am getting different shutter speeds and apertures now. You do need to have an understanding of shutter speeds and apertures as to where to set it. But it's very simple and quick and easy to change now, as far as the exposure compensation that's gonna be done with the front dial and you can see as I turn this dial it actually says minus three. And on the graphic scale, it's gonna be over on the minus side as well, and you can see a getting darker and brighter in the image itself. Normally, once again, you're gonna leave this at zero. But depending on conditions, you may need to brighten it up or darken it up. And so if I'm pointing at our cameras against the wall over here, you'll notice that as the camera's pointed right now, that White Wall has gotten quite dark. Dingy because the camera thinks it is an average of 18% gray. And so it's a little counterintuitive, but I'm gonna go to the plus side because I want to make that wall nice and bright. And what's happening is the camera takes that white wall and wants to darken it down to gray, and I'm correcting for what the camera doesn't understand. And so when I was at Yellowstone National Park in the winter time, where it was just tons of snow everywhere. I had to have my camera around, plus 2/3 of a stop to one in 2/3 stop because everything was so white. If you go into a dark forest, it might be minus 2/3 or minus one stop. And so just going to make sure my cameras back a zero because that's where it should normally be. So that's the program mode. Now, if you want, these dials can be flipped around. If you don't want to do program shift in the back, you want to do it in the front. There is a custom menu that we're gonna get to towards the end of class, where you can customize the buttons and dials as faras flipping what they do. And so almost anything that you want to customize on this camera you can. It's probably the most customizable camera on the market today, as far as choosing how maney function buttons, how many dial controls can you switch around? And so there is and almost endless number of options in the way that you have this set up so realize that If you don't really like the way something works, you're probably gonna be able to change it. All right, let's flip it over to the next mode, which is aperture priority. This is one of my favorite modes. This is the Modi, like when I'm traveling and I'm just kind of walking down the street, and I don't know what my next photo is going to be. One. I have my camera ready for something quick, but I want to be able to make adjustments to it and be ableto have very precise control of it. So aperture priority allows us to control the aperture with the rear dial on the camera. The front dial's stays with exposure compensation, and you can set that aperture to get more depth field or less, step the field. But to be honest with you, when I'm changing the aperture, I'm looking more at the shutter speed to see where the shutter speed is to see if it's what's acceptable for hand holding the camera or appropriate in the situation that I'm at for that particular shot. So that's one of my favorite modes. I don't use the program mode very much. That's just kind of a quick I don't even really care about the settings on the camera. I just wanted to take a picture right now.
Class Materials
bonus material with purchase
Ratings and Reviews
Hal
John does an excellent job of making the OMD E M1 understandable. His knowledge of the camera and relaxed style clearly and painlessly walk you through the maze of buttons, menus, and functions. He objectively points out the strengths of the camera as well as those things Olympus could of done better. His opinions of the camera are consistent with other knowledgable reviewers, and are consistent with my own (limited) experience. The manual tells you every little thing the camera CAN do. John helps you understand what is important to get the best use of the camera in most situations.
user e35335
Three simple words, " Thank you John " I have really enjoyed the course. The OMD EM1 is a wonderful camera, and with the clear guidance of this course I feel instantly at home with all its capabilities. Clear concise instructions delivered in a faultless manner. A joy to watch.
FerOlea
John is a very good teacher, and this is indeed a useful class. Class material is excellent as always. But I don't think this is his best work. He seems to be too conflicted with Olympus' menu systems and design decisions (which I admit, are a bit strange) to give the students a clear picture of the full potential of their new gear. He also fiddles/struggles with the camera a bit too much in all the live demonstrations. I would recommend this class only to absolute photography beginners and not really to people with any experience.
Student Work
Related Classes
Camera Guides