Lesson Info
3. Photo Basics
Lessons
Class Introduction
05:29 2Camera Overview
10:21 3Photo Basics
04:10 4Top Deck: Mode Dial
16:27 5Mode Dial: Exposure Control in P Mode
06:29 6Mode Dial: Manual Exposure
08:46 7Top Deck: Shooting Modes
22:35 8Top Deck: HDR & AF Mode
05:58Top Deck: Metering and Flashes
05:57 10Backside: Viewfinder Display
07:15 11Backside: ISO Controls & White Balance
04:37 12Backside: Focus Area and Controls
06:07 13Backside: Super Menu
20:50 14Backside: Playback Menu
06:15 15Left & Right Side of OM-D EM 1 Mark II
04:42 16Bottom & Front of OM-D EM 1 Mark II
07:50 17Olympus Lenses
05:05 18Camera Menu Settings Map
03:03 19Shooting Menu 1
08:30 20Shooting Menu 2
20:18 21Video Menu
17:41 22Playback Menu
09:04 23Custom Menu A & B
22:01 24Custom Menu C1 & C2
11:24 25Custom Menu D1-D4
19:31 26Custom Menu E1-E3 & F
13:35 27Custom Menu G
04:11 28Custom Menu H1-H2
07:20 29Custom Menu I
05:04 30Custom Menu J1-J2
05:45 31Setup Menu
05:32 32Camera Operation
12:52Lesson Info
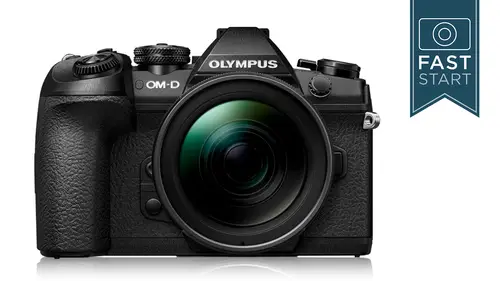
Photo Basics
Alright, so I don't wanna spend too much time here, just going over some basic photography information, but I think for people who are newer to photography, might appreciate this. Alright so this is a mirrorless camera with interchangeable lenses, so we have lots of different high-quality interchangeable lenses. And inside each of the lenses is an aperture unit that you can control by opening and closing to control the amount of light coming into the camera. Now the aperture controls the amount of light coming in with these different aperture settings. You would be wise to get to learn these. As you open up, you're letting twice as much light, or close down, half as much light with each of these different settings that you go to. Not only does changing the aperture control the amount of light coming in the camera, it also controls the depth of field, or how much is in focus, depth wise in your photographs. And so stopping the aperture down will get you more depth of field and it grows ...
a little bit, little bit by each and every aperture that you change, until you get great depth of field. So that's what's going on in the lens portion of it. Light comes in to the sensor. Remember we've taken the mirror out of the camera. Light goes back to the LCD and it goes up to the EVF. And that's a big part of this camera is a high-quality EVF. Now at the image-sensor level, we have another way of controlling the light, and that is with the shutter unit. And there's two parts to it. There's a first curtain and a second curtain. Now as you pick this camera up and view and compose your images, you need to be getting light into the sensor and having that information fed up the EVF, so the sensor is exposed. When it is time to take a photo, what happens is that the first curtain has to close. The sensor is now prepared to capture an image, then this is our actual exposure right here, and then the second unit comes in and closes it off. And it uses this technique so each pixel is exposed for exactly the same amount of time. And then of course so that you can compose your next shot, the second shutter needs to open again. And so each curtain opens and closes once every time you take a photo. Yes, there are exceptions. We'll talk about the electronic shutter later on in the class. But this is kinda the general operation of how these things work. We'll have shutter speeds from eight thousandths to 30 seconds. Yes, we can go further, but we'll talk about that later as well. And these will, different ways of controlling light as well as stopping motion or blurring motion in the world of photography. So that's what's going on at the sensor level in the camera itself. Now the sensor is very important in the camera, obviously. This is where the image is captured, and a lot of the quality and size and lenses are determined. And this uses a kind of medium-size sensor if I, you know, had to compare it into the world of cameras these days. There's ones that are larger, and there's ones that are smaller. It's notably smaller than 35 millimeter film, or what we currently call full-frame sensors. And it does this so that you can have smaller lenses and smaller cameras and more lenses in a camera bag. And so there are other cameras out on the market that use the full frame or the APS-C, which is another kind of in-between size. And this is using the four thirds, which has a crop factor of two times. So when somebody's talking about lenses on a full frame, you have to divide that by two, or you have to multiply your lenses by two to see what they would do on a full-frame sensor. As far as holding the camera, the correct technique is obviously, you're gonna grip the camera in your right hand. And I know how a lot of people when they first grab a camera, they just kinda grab the lens like this, just feels kinda comfortable. But that leaves your elbow without support. And so if you put your hand on the underneath side with your thumb up, that gets your elbow into your torso, and you'll be able to hold the camera a little bit more steady. So that's just a good technique that you'll see a lot of experienced photographers using. And I don't know how you'll ever remember thumb up is good, but if you can do it, you'll get steadier shots.
Class Materials
Bonus Materials with Purchase
Ratings and Reviews
a Creativelive Student
This is exactly what I was looking for - I really feel like I'm not able to control my camera, rather than the camera controlling me! :) I really learned a great deal - some of it was a great review, some of it was crucial information that will (hopefully) make me a better photographer. Thanks for a great class, John!!
Spyro Zarifopoulos
Great and very informative class.... John has done a fabulous job explaining all the simple and intricate details of the very sophisticated EM1 II. Thank you !!!
John Epperson
This is a great course on learning about the OM-D E-M1 Mark II. I have watched it many times to get to were I know it by memory the best I can. I like to go over it as much as possible because there is a lot to learn. I do wish that John would do an updated version since now it is up to Firmware 3.1. It is like a whole new camera with the new settings.
Student Work
Related Classes
Camera Guides