Lessons
Lesson Info
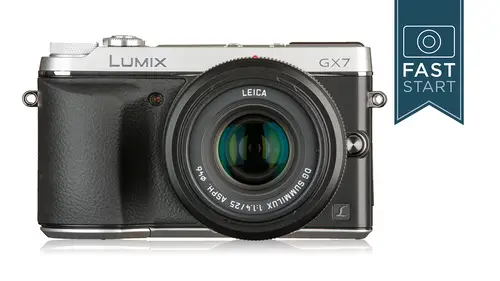
Button Layout: Back Side Part 2
We've just come through the focusing section and we're going to be going into the quick menu now there is the full menu on the camera, which is kind of a full long listing of all the controls, but in the quick menu, we have quick access to some of those features that we just really quickly want to get to and not have to dive and dig through the entire menu system. And so there is a queue menu, which stands for quick menu on the back of the camera, and there is actually a couple of different options when it comes to the quick menu. There is something called the monitor info display, which is this a cz you can see on screen it's a display that's got your exposure information as well as a bunch of the other settings. There is also just simply an info screen that you can have that shows you the image that your cameras pointed at, as on along with that along the top and the bottom line of it showing you a bunch of these settings that you can go through it. So I'm going to go through both of...
these options. First, we're going to go through the monitor info display. And so this is what it's going to look like on camera, so let me do a little live on camera demo real quick just to show you so normally you're going to see the image that you are pointing the camera at in here, and you're going to press the display button to get to a variety of different screens that shows you standard information, no information, the tilt another tells with no information, and this is the monitor information display, and this is basically the same thing as the quick menu, the quick menu differences that you're able to move around and adjust changes in here. Normally, if you are in a different display mode and you hit the quick menu, it would then go across the top. So what? We're going to d'oh one of the best ways that I like to have the camera set up is with this monitor info display on the back of the camera so that it's I think it's using a little less information. I'm not sure it's for us power because it's not showing you a live feed of what your cameras pointed out, but it is showing you all the important controls and so that's what we're going to do on screen, so of course, getting to this you'll want to press the quick menu so that you can start navigating your way around and if you want to exit its the function number two button you'll see right above the function to button is a little arrow that kind of loops backward, which means if you want to exit or get out of this mode, that's the button that you want to head the top row. This information is obvious exposure, shuddered and aperture as well as your battery level below. This is going to be your eyes, so settings and so the iso's on this camera range for the standard two hundred two twelve thousand eight hundred. You can expand that range to go all the way down to one twenty five and up to twenty five thousand six hundred. There is an auto setting in an eye. Oh, eso setting that I'm going to explain in a little bit, but that could be changed quickly. Very going right in there. We have our exposure compensation. Next then we talked to a little bit about earlier and the flash mills mentioned the flash modes were buried in the menu system. Well, this is another little quick access route to them to change the way that the flash will fire next road down a few more options down here, the drive mode. I haven't really talked too much about this, but this is where you can choose between single continuous bracketing and self timer the continuous bracketing in self timer can be customized further in the menu system to choose which one of those sub options you have. For instance, in the continuous you can go anywhere from two frames a second up to forty frames a second there's a lot of different options in the bracketing as well as in the self timer how many pictures you take and how long it takes to get to those pictures the mod uh different options in here are single continuous and flexible and singles pretty pretty common on most cameras. What happens in this case is your camera focuses on a subject and then stops and continuous is pretty common on a lot of cameras and what happens there is the camera continually adjust no matter what you were pointed out if something this close little adjust to that and it's it's further away it will adjust to that. It took me weeks to figure out what a f f s I read the instruction manual over and over I did google searches, I did being searches I asked people in camera shops nobody I knew could explain to me how flexible work and I finally figured it out and what flexible is is uh a f c gotta go it's very similar to a f c is what it is in the continuous mode the camera is constantly hunting for the sharpest focus so every time the subject is a little bit further are a little bit further way it starts moving the lands. The problem with that is when you are shooting video, you're focusing as your lens focuses. It also slightly changes the magnification it's just part of the way lenses work, and it got to be a little irritating for people in video that it was constantly kind of shimmering moving back and forth and you'd see this little adjustment and so a f f works like a f c, but it kind of settles into a position and then it will adjust if necessary. And so think of a f c as ah very hyper focusing system that's, constantly adjusting and changing and ff is a little bit more relaxed and how it does it. So for sports photography, I would recommend a f c for general video shooting. I would recommend a f f I don't know that f f is really very good for any sort of still photography situations, maybe something I am not considering right now, but for still photography, I would normally choose single focus, which is the f s or for sports and action a f c, so hopefully that will help make those a little bit more clear. Next up is the area. There is this in the quick menu, but you know what? There's already a button on the back of the camera for doing this, so that might be a little bit quicker to get to. For most people, the quality is controlling the file type the raw versus j peg options. The options that we have on this camera is that we can shoot raw, which would be the final option on the list on screen. We also have two different sizes of j pigs. We have a small j peg and a large j peg in the small and the large portion of that is how much it is compressed in size, and when you compress a file, you're generally throwing away color information. And so if you are going to shoot jay pick, I would recommend shooting the large j peck. Another option is to shoot raw and j peg at the same time, and you can choose a little bit of difference in which type iran, which type of j peg your shooting, and I normally don't recommend that, except for any sort of special circumstance where you need quick access to j pigs, but you still want to get the raw out of it. So for the more advanced user, I recommend raw for the for the newcomer to photography, just shooting large j peg will probably get you buy to start with but I think to get the most image quality out of this camera I would look at shooting raw in the long term. Next up we can choose the picture size there is a large medium and small and this has to do with the number of pixels that you are recording and this is only going to deal with jpeg images, so normally I'm going to want to choose large. We can also choose different aspect ratios. The aspect ratio of the sensor on this camera is four by three anything other than that you are simply cropping into that sensor and I wouldn't normally do for most pictures the only advantage, too changing the aspect ratio is that you get to see in camera in the viewfinder what your final composition is going to be like. So if you knew that you had to shoot a square for something, well, then you could set it to one by one and you could see what the final image is going to look like compositionally in the viewfinder but normally leaving on four by three next up is y fine so that you can quickly turn on the wifi system will talk a little bit more about wifi in a later section. The function button allows you to go in and customize all the different function buttons on the camera to meet whatever needs that you might have we have photo style which enables you to change the look and style of your jpeg images this does nothing to the raw images it's only the j pegs and it changes the color tone saturation in contrast and gives a slightly different look to your images in general I like to leave this on standard next up is our white balancing so this is the color of light that we're working under if you are getting strange colors in your images you'll want to check your white balance and have it match the type of light that you are shooting under normally I'll leave this in auto white balance and then I'll change it on an ads necessary basis next is something called I dynamic and what this is is this is an intelligent dynamic exposure mode where the camera will go in take a look at the photograph you've taken and for the j peg images it'll go in and it will adjust the exposure levels to get you a better quality picture well how does the camera no what a better quality picture looks like? Well, it has some general ideas and so I gave this to try out and I shot this underpass and this is this is actually the route that can it takes to work this is the west seattle bridge and when you see it turned off you'll notice that the underside of the bridge is very, very dark and as we turn the eye dynamic on toe low standard and on a the high when it's basically doing is it's lightening up the shadows in this particular case and some pictures would benefit from this and others would not. So I can't say that this is something that you should leave turned on if you do shoot exclusively j pegs and you're always concerned that your saddles air getting too dark, you could leave it on probably standard, which is the highest that I would recommend, but I typically don't like having my camera do these sorts of adjustments because I can do much better quality adjustments with software later on. This is nothing that you can't do on your own it's a question of do do you want to do it? Do you have the time to do it? Do you feel comfortable doing those sorts of changes? So normally I like to leave that turned off. Next up is army during mode, we have a number of different choices for in a way, the most popular one is going to be the multiple media remote, which measures light in a bunch of different areas, and so it is balances light areas and dark areas within the frame some photographers like using the spot so that they can get a very tight reading of a specific area of light. And so this uh finally we have the images left down there in the bottom right hand corner and so that of course is that monitor information display the other option is to see the image in screen and have the information that's displayed above and below it and so there'll be a whole row of information along the top and it's going to have the same features along the top as it is along the bottom it's just that you can see the image while you are making those changes which might help out to see what sort of changes that are going to be made and so let me do a quick little live demo just to go back and forth and show you on these let me wake the camera up here it's going to sleep we need to wake it up all right so normally will be here and we'll hit the cue button appear and so we can navigate around and we can make changes between the different modes like so if we hit the display button will go back got a kick out of that go back to the display options so now we have our live shot here and if we hit the cue but now you'll see that we have items on the top as well as items on the bottom and so if we want to go in and change our focusing system that we did before where is it right there it is we can change it from the f s to the f to the sea and then hit the set button and so it just depends on which mode you like using you like to have the image in the background and still visible or do you like to have just the controls up and so it's a bit of a personal choice there now this can be taken one step further and you can customize the quick menu and you can do this in the custom menu settings within the camera and what you would do at this point once you've customized it is you would simply press the cuban q menu button to enter and what you will have is you will have three pages each with five items on them so you get a total of fifteen items that you get to choose in your quick menu and I've done these classes for pretty much all the major brands of camera and I'm trying to think of anyone else I think maybe sony's done it but this is one of the first cameras where you get to choose what is in the quick menu and you get to choose exactly where it is on what page and in what position and it could be a little tricky so pay attention to the bottom of the screen on your camera because that's going to give you additional controls on howto ad in and move these features from one page and one position to another place and so you get to choose fifteen of your favorite items that you put in to the custom menu and this is you're going to be really nice for anyone who has a lot of changes that they want to make but don't want to dive into the full menu system and so normally you're going done navigate left and right to go through the whole list and then when you want to select it, you'll go up and then you'll have the three or five or ten options that you can select it from if you go down, you'll enter the customization mode in there and you can see that on screen there I don't know if I want attempt doing this, but I will just because I am a massive kissed and so first off, I guess I'd better change to say you guys could see what's going on I want to go in and turn on the custom menu, so I'm going to go into the menu and where do I need to know? I need to go to custom menu on page seven of eight, so I'm gonna go down to paid seven custom menu it's on preset are going to go to custom and create my own now when I come into the q man, you well, let's see go to this human you and so if I want to change one of these modes now, you'll notice that there's no row of information along the top that way I know it. I'm in the custom because there's just five items along the bottom, and so I could go through my page one, I think that's page to page three go up, select a different setting, and I'm good, but if I hit cuba and I go down now, I can start adding in an item, and so what I will do is I will find something that I want to add in and so there's four different pages of things, and they think I saw something that I would like to add it there's a very cool feature on this camera. I talked briefly about earlier called the elektronik shudder, and I'm going to select that and now I can select where I wanted to be on my pages of information. I'm going to find an empty parking spot way at the very end right here, and I'm going to set it down there and I'm going to press the exit to get out of there and I'm going to exit out of there so I'm back to my normal screen now, so when I go into my quick menu I could go along the bottom here's page one page teo and page three, and at the very end of that is the elektronik shutter, which I can go now up and on to select or turn it off. And so if I want to add in more items, I would go down and go into the quick menu or excuse me, go into the customizing menu, and I could go select another item and fill it up with one of those spots, so I'm not going to do that because I already did enough, so I'm going to exit out of that s so that's a great way to even further customize this. Cameron so it's it's been, I would say, one of the most customizable cameras that I've ever owned and it's, just a great way takes a little bit of time to get in there and get it set up. I know it's a little geeky, but once it's set up and it's done it's kind of nice, because it's done and it's the way you like it to work and it's quick and easy to access those major features that you're using. So that is the quick men you had kind of three different options, we had the standard quick menu with everything on screen, we had the quick menu where you can see the image in the information on the top of bottom and then finally, we had the custom menu where you get to customize it and that's the one that I would encourage you to go in and set up the way that you want to have set up. All right, the question just quick question that came in a little bit earlier, this was from low in when you were showing the live camera demo on the back of the screen, and there were two strips of numbers and his did not have that. What did he need to set? He says, I think it says ss at times, and sometimes it said five hundred, so could you explain? Yes, but what we're showing is that was showing a graphic interface of the shutter speeds and apertures, and I forget where that is, so I'm gonna have to check my little girl, you have a handy dandy calendar because I don't want it goes paging through the menu, and I'm going to talk about it later, but it has something to do with due to monitor information saying the page right recommend training that stuff on or off, and I believe there is an exposure meter that could be turned on and off, and I'm not one hundred percent guarantee, but I think it's in the custom menu on page five called exposure meter. I may be wrong, so you better watch the rest of the class. You might be right. So that was just a specific setting, right? That you would have tio fine and turn on it wasn't a default, right? Okay, great. There you go. Thank you. And so, yeah, that's kind of a word of warning on this camera is that there will be a lot of things that you can turn on or off that may look different on my camera than on your camera. There is potentially also a mode that you might have turned on, which won't allow you to get to another mode on the camera, and so you'll be wanting to get to something it's like it won't let me get here it's great out or it's not available or I can't see it and it's because something else is conflicting with it, and this is becoming a greater and greater problem on cameras, and I haven't seen a lot of great solutions on it other than to try to keep track of where your cameras set in many different ways. Ok, back on the back of the camera, we have our playback button for playing back images. Of course, you can use the top dial for advancing or going back through previous images. To delete an image, there is a garbage can button on the back of the camera and if you want to zoom in or out you can use the back control dial for doing that you can also change the display option and the display options will vary from showing a little bit of information to a lot of information to showing hissed a gram, which is the exposure of the image that you shot on if you want to know more about exposures, you can check out my fundamentals of digital photography class of a whole long section where we go through the history graham and so these are the controls that you want to pay attention to in the playback mode and if you are going to play a video or a burst of images, it records them together and in order to play that you would hit the up button to do that and so I will tempt fate again and I'm going to do another live demo. What I need to do is I need to shoot a series of pictures so I'm going to turn the motor drive on this camera so that I can shoot a bunch of pictures really quickly and this is not going to be real exciting stuff I shoot and I'm gonna go to manual focus yeah love manual focus ok? And so now I'm just going to shoot a series of pictures and when I play these back, what it does is it shows you the first image. And if you decide that you want to look at the burst, you can go in and look at all the individual images. So if we record a video in order to play, so let me record a quick little video. Let me, uh, video of canada that seem to make sure your focus can a wave to the folks. Okay, there's are wildly fun. Three second video. Ok, so if we were to play back this on the back, the camera, we would go through still images and you'll notice the up arrow in the top left of the screen. So if we want to play back the video, we can play it back. See there's kind of waving to everybody at home. S o if you want to play back your videos, just kind of pay attention to the on screen prompts to tell you what to do next. Okay, where we going next on this camera? So there is a lot of options for playback on touching this on the touch screen so you can play back videos you can delete, you can zoom in, you can zoom out, you go through all sorts of things by just playing with the touch. Screen on the back of the camera. All I can say is, just look for any of the little options that you can touch and have fun playing around and working with that I prefer to work with the buttons a little bit more than the touch screen, but occasionally on certain features, the touch screen is a little bit simpler to work, so you might wantto learn to use both systems so that you can take advantage of the best of both worlds. As far as playing back motion pictures, you can use the four way controller in the back of the camera, too, play and pause. You can also fast forward, rewind and go frame by frame by going left and right and going down to stop. You can also control the volume with the back dial of the camera, and so there is a built in speakers so that you can hear what you recorded with the built in microphones as well. One of the interesting features about this camera that very few cameras have is that you can do a still frame capture from a video, so if you want to pull a frame from the video, you can do that in camera. It doesn't damage the video in any way it just creates a copy of a single frame for to use now that individual frame is off. Relatively lower resolution it's, not the full resolution that you would get off the sensor for a still image, but it's it's going to be more similar to the resolution that you get from the video itself. And so what you would do is you simply play the video, you press, pause and then press the set button, and then you will be able to save that particular image from the video so it's a pretty simple way to do it. It does give you a fairly low resolution image, but it's neat to be able to do that in camera and not need any special software in order to do that. Okay, moving forward playback you can use the function button to star rate your jpeg image. It doesn't work with your raw images. It only works with your jpeg images, but if you would like to start star right just to kind of indicate what your favorites are, you can also indicate images that are destined to be on part of a print set. You can also protect them where you can delete single images as well. When you're in the playback mode. Let's, take a closer look at the control cluster down in the bottom right hand side so we have our function to button, which can be programmed into many different functions that you can add into it. There is the delete button for deleting images, and then that return arrow, which is also going to kind of step back out of any menu that we might be in. And so any time you want to get out of a menu, there's two ways to get out of him and you want us to hit the return key right here or the other one is just a tap lightly on the shutter release of the camera that always kicks you back into a shooting mode, the function three, which is a shortcut to the wifi system, and there is a little wifi lamp on the back for telling you that you are in wifi. And so here is where we're going to tempt riel fate, and I'm going to try to hook this camera with a wifi system and my live phone right here, and so I'll just let you know that I have an allergy to wifi and it doesn't like me, and I don't tend to like it, and we don't tend to work well with each other, but we're going to try it anyway and so let's go to the back of the camera and let's see if I can just hit this button if it turns on the wifi. First parts looking pretty good we got the little blue light and so we're going to make a new connection which sounds good I'm just going to use the touch screen here and remote showed he shooting and view sounds like fun to me so what I'm going to do next is I'm going to turn on my phone and we're going to go into settings and let's make sure that we have the correct wifi setting and so we've got a lot of creative live hot spots around here and we do have the gx seven setting set and I will let you know that I have gone in and tried this before which is why my phone already knows about it normally you would need to select it but it looks like we're pretty good there now I need to go into the panasonic wifi lou mix link mode and let's see if I can get this to turn on here under live control I'm going to go to the next page on the keynote just toe go through some of the basics here to get this panasonic loom it's link you're going to go to the typical places where you get aps you're going to need to load it onto your smartphone or portable device and the the things that you can do is you can do remote operation of the camera which is what I'm going to try to do here since I get this hooked up you khun do remote viewing so I could view on my phone what's on my memory card in my camera I can download it from my camera to my phone and I can also use it as a gps link so the gps information in my phone gets tagged to my images we're not going to go through everything but that's kind of the highlight of it. We can also do some other things where we download from our camera to a computer or to a tv system as well, in which case we can watch images wirelessly from our camera onto our tv so we could do a slide show, for instance. And finally you could hook your camera wirelessly up to a printer uh which would be a way to print directly from the camera. Okay, let's, uh go to the next page on this. So the set up on this works like we have done so far is you need to put your camera into the wifi mode. The function three is the current standard shortcut to the wifi and if it's steady blew you should be in pretty good position. Then we're going to go in and make a new connection. You saw how I selected remote shooting, which we just did right there. Okay, you may need to note the password so that you can go to your phone go into your wifi settings and select your cameras wifi signal and then open the loo mix link and so if you want to see on my phone now I do have a link of what my camera is pointed at yeah, just for kicks I am going tio going to get out of this focusing mouth and actually I'm going to go ahead and I'm gonna point it up here at cannick so kind of you are on camera let's make sure you're in focus there you're in focus and so now I can see on camera what's going on and if things work right, I should be able to take a picture but I can tell that it's not working right now I've had a lot of problems with the panasonic link up between the two of them, so what I'm going to do is I am going to just turn this off we can pretend and I'm going to turn it back on the on see if this connects back up come on playback so there's images that I shot cannot connect okay let's turn that turn it on so there's kind of can a wave to everybody wave with your left hand wave with your right hand okay, very good so we know that slide that wasn't recorded or anything on so I can see what's going on but for some reason on mine the shooting option let me just see if I can shoot a picture here that works there for some reason it's not allowing me to shoot which I don't understand why it's not able to do that we do have some other controls I'll just kind of poke around that you can set up playback settings and connection options they're lovely recording location information which I typically don't want to leave on we can play back images that are on the camera roll that's on the camera roll that's already in the phone and let's try to get back into the camera itself live image there and normally this would be highlighted and you would be able to shoot pictures but as I said I have analogy toe wifi it doesn't always work around me apologize it doesn't work hopefully it'll work for you this is a common problem with a lot of cameras I've been fearing these wifi demos with every camera that has come out because it's very hit and miss on these cameras whether the connection works up exactly right and do you think it's something that has to do with the camera itself or could be something on your phone I think it's more likely the camera on it's just a little funky still on the engineers who designed this have not done a good enough job of making it bulletproof right on I wish I had a better solution I wish I wish that it was just me. But I think other people have this allergy to wifi. It it doesn't work as well, either.
Class Materials
bonus material with purchase
Ratings and Reviews
a Creativelive Student
I bought a Panasonic G9 camera and couldn't find a good visual user guide anywhere. I've hunted through YouTube and online, only to waste hours scrubbing through off topic babble just to find bits of useful information, but there is nothing complete out there. I found John's Panasonic G7 presentation, and it's been immensely helpful. Though the camera button locations and handling are different from the G9, the menu system, and camera functions are mostly similar. I try reading user manuals, but it's easy to get lost and sometimes hard to relate to. John presents everything so clearly, logically, and in terms easy to relate to and follow. He puts in so much time to make everything look professional and make sense. I really appreciate all his hard work, and his love and passion to share his knowledge. I'm so thankful he creates videos like this, as modern cameras have so many features now, that they can get overwhelming to learn how to use. Watching him demo cameras is also really helpful. I've also taken his Fundamentals of Photography class, and it's phenomenal and foundational. It's helped me learn a lot. Thanks so much for these great quality classes.
Nhahanh Nguyen
Simply wow! Worth every penny. The whole course is totally professional and delivered in a classroom-like setting. The visual presentation and live demos are flawless and so helpful if you have your camera on and play along. I would never buy another expensive camera without taking a course like this! I've looked everywhere else online for camera-specific information like this in one place (I have no time to browse the poor manual that came with the camera). John also gives great information on basic photography. Highly recommend the class to all newbies to this camera. I will be much more comfortable using this little beast after finishing this course. Thank you!!
Guy Holt
I have had the GX7 for some time, and never fully understood how to use all the settings. This course was brilliant, clear and precise and easy to follow and interesting. Brilliant!
Student Work
Related Classes
Camera Guides