Synchronization
Lesson 4 from: Photo Editing in Lightroom Classic for The Photo EnthusiastJared Platt
Synchronization
Lesson 4 from: Photo Editing in Lightroom Classic for The Photo EnthusiastJared Platt
Lesson Info
4. Synchronization
Lessons
Introduction
01:49 2A Tour of Lightroom Classic
16:19 3Basic Adjustments
23:16 4Synchronization
16:47 5Tone Curve
08:41 6HSL
03:52 7Color Grading
04:53 8Detail
07:34Lesson Info
Synchronization
now it's important at this phase in our discussion about Lightroom and the develop module to discuss synchronization because once you've done this kind of work to one image, but you were out shooting a bunch of images in the same situation. You want all of these adjustments that you've just made to be able to spread across all of the images that were shot at the same time. That way you can actually look at all of them and see which of these do I really like, because we don't want to go in and really do the fine tuning and really, you know, get in on the nitty gritty and burn and dodge and stuff until we find the one that we love the most out of all the photographs. And so what we're gonna do now is we're gonna synchronize all the changes that we made from one photograph to all of these other photographs down here in the filmstrip area. So what I'm gonna do is I'm going to click on this first image and then I'm going to click on another image that we haven't adjusted. And when I do that...
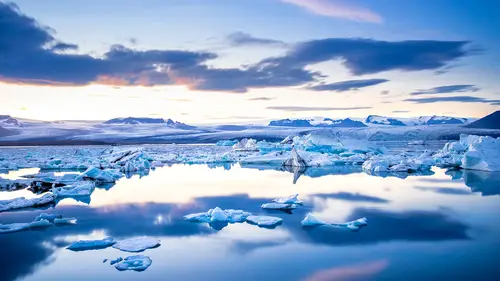
, you'll notice that this button over here on the right hand side turns to a previous. When I click on previous, it takes everything from the first photograph and moves it to the second photograph. Everything, anything that we've done moves it over all the slider positions, all the choices that we made our moved over, I could then do the same thing to the next photograph. However, there's actually a faster way to do it. If I click on this photo and I shift click over to a set of photos and let's just say to all of the photos. Then when I come over this button turns to right now it says auto sync. But if I click on this little toggle and turn it off it turns to a sink with a dot dot dot button so sink three dots. So I'm going to click on that sink three dot button and I'm gonna get a preference dialog box and I can simply hit check all and now everything in this photograph is going to be copied from the one that's the primary selection to all of the secondary selection. Now if I didn't want to copy over a spot removal that I had been doing or maybe the crop or something like that, I can turn those off and then I can synchronize or masking is often one thing that we don't want to copy over so I can turn those off and hit synchronize and it copies everything except for those options. So now as I go through you can see that all of my photographs have the basic the same basic adjustments on them. So then I can make a determination by looking at all of these. And so I could shift click to all of those and then I could click on n which is the survey mode which takes me back to the library module and I can look at all of these photographs and if I hit the tab key, it turns off the side panels so that I get more space to look at my photographs. And now I can actually make a determination and say I like the one that I originally worked on but now I can see that this one is maybe a better crop and then maybe this one or this one actually is closer up and maybe that's the more dramatic one. But see how I'm utilizing the adjustments that I made on the one image to work and look at the other ones to decide which one is truly the best one. So now I can kind of go in here and say well I like this one more. So I'm going to give it a two star by clicking on the two key. And I'm gonna click on this one and I like this one more than I like this one I think. And so I'm gonna give it a three star but I still I'm going to give, well this one's got the two star and it's better than this one. So I'm gonna keep this one, I'm gonna keep this one and then I might want to work on this one a little bit so I'll give it a one star but I'm able to make those decisions because I copied all of the settings that we made on one and moved them to the others. So synchronization is a very useful tool to make sure that you're actually looking at all of your images with those adjustments rather than just one. Now to that point, it's also important to recognize that you can pre synchronize your photographs. For instance, if I'm going to be working on a set of photos, lets say these photos that I shot of the Northern Lights in Iceland, I've got a whole bunch of photos that I shot and some of them are a little darker than others. But I can start the process having already pre selected all the photos that are similar to each other and then I can just go over to this sink triple dot button and I'm going to click on this little toggle. When I click on the toggle, it turns into an auto sync button. Now, any adjustments that I make to this image is going to happen to all of the images at the same time. And so when I come in and I increase the exposure, it's increasing the exposure on all of them at the same time. And then I can go into my whites and bring those down just a little bit. I can bring the shadows up just a little bit, bring the black point down just a little bit. So I'm working on this photograph, oh and I forgot that we didn't change the profile so I'm gonna click on this and turn it to adobe vivid so that it's going to be a lot more vivid and then I'm going to, I think that's good. And now it's just a matter of changing my temperature. So I'm gonna make this a little bit bluer and I'm going to take my magenta up just a little bit or maybe down. Let's see. Trying to make that blue look right, That's looking pretty cool. Yeah. So I like the general look of the northern lights here. And now I'm going to take the clarity up because that's going to give me much more contrast in those mid tones. So I'm going to take that up a little bit and I'm gonna take my vibrance up just a bit there. Now we're really selling it. So that looks great and the beauty of it is all of these look pretty good. See that if I go to these images here, they're all looking really great. So now I can just go through the entire scenario and say, okay, well this one I change the exposure a little bit. So if I click on the frame rather than the photo as I click on photos, you can see that I'm moving between photos but the secondary selection is still active. But if I take the frame and click on it, it deselect all of the other images and only selects that one. And so then I can highlight just a whole section that's darker. And now this one, all I have to do is see how the exposure and everything is exactly the same. It was on the first one. So now I'm going to go in and click on exposure and bring it up. There we go. So now that one looks pretty good and it's doing it to all of them at the same time. So as I go to this one, so I'm gonna turn off the J key so we can actually see what that looks like. You can see that the foreground is still a little dark here. So now what I'm gonna do is I'm going to bring up the shadows just a bit just so that we see it. I don't want to see too much of it, but I'm just gonna bring it up so that it's a hint of some kind of foreground and it's done that to all of these. So see how that hint of foreground is everywhere. That's good. And then some of these got a little darker. So I need to just click on this one and shift, click to these. And then I'm just going to bring up the exposure just a little bit more. There we go and notice that all of them got that exposure increase. And then now watch what happens if I click on this one. I want to change this one so that it's fairly similar to these. And now because I'm only highlighting one image, the sync button turns to a previous and I can click on previous and that'll bring the exposure from the last one but that's a little too bright, looks like daylight. So I'm going to bring that back down like that and this one is a really cool image. So I'm going to probably play around with it a little bit more. Get rid of some of that green and kind of give it a little bit more blue and maybe even give it a little bit more of that clarity and texture. That's a really cool image and I like the kind of the darkness to it. So this might be one I'll work on a little bit more later. So then I click on the next image, highlight these three dark ones and brighten them up just a little bit. You see how I'm working on images section by section but I did all the bulk of the work to all of the images at once by clicking on that auto sync by being an auto sync and then highlighting a bunch of images. I got rid of most of my work and then I can just go through and look at the images that need a little extra help here. And then this one needs a little bit more black in it. Oh and look see that vignette that's going on. Maybe I don't want the vignette so I can go to the lens correction and turn on the profile, correct? Oh I do want the vignette so I'm turning it back off. So maybe I'll use the D. Haze a little bit and see how oh that looks great, see how I'm seeing through the mist and into the Northern Lights and into the sky. So I'm just getting rid of some of that like light pollution and stuff that's blocking our view of the heavens. So I like the way that looks, I'm gonna move on to the next set. This looks pretty good as is um And then this one, oh and I can just simply click on this one here and then go to this very last one and hit previous and but oh that's really really bright. So let's just darken that down a little bit and maybe take the vibrance down, it's too green. There we go. Okay, so now I have a whole series of images that have been adjusted just kind of roughly, but at least now I can see what do I actually have to work with and I can start planning from there and saying, well which of these actually work? Well I know that this one was a real winner in my book. So I'm going to give it three stars and then I know that I like this one so I'm gonna give that 13 stars. Um What else? I think I like the way that the Northern Lights are dancing here. That's looking pretty good. So maybe I'll give this one a three star and maybe I'll give this 13 stars and then I like just the sky itself. So I'm gonna give this one to stars and then I like this bay here so why don't we go with um why don't we go with this one and this one? So now you can see that I've got a series of photographs. There we go. Those are the photographs that I'm going to start playing with and actually working with later on when I'm adjusting my images and getting down into working on one particular image. So I've introduced you to the synchronization tools which are the previous button which takes everything that you just did on the last image and puts it on this new image. Or you can use the sink triple dot button which allows you to choose what you want to synchronize across a series of images. Or you can turn on the auto sync option and then anything you do to one image will automatically be done to all the other images that you have selected. Just make sure that you be careful that you are only selecting the images that you want to adjust because it will change everything that you change. But it only changes the one slider you're working on. So if you select one image here and another image here which actually have different D. Haze. So this has zero D. Haze And this one has a d. haze of 26 that's okay because if I go in here and just change the temperature down to be a little bit more blue it's actually gonna change the temperature here and the temperature on this one. But it didn't mess with the d. haze setting. So auto sync is a very powerful tool. Now there's one other tool that you need to know about when we're talking about synchronization and that is in the grid. So we're going to go back to the we're gonna hit the geeky and go to the grid and in the grid hit the tab key so that those panels come back in and I told you that we were going to talk about this quick develop area in quick develop. If I click on a set of images now all of these images have some similar and some different adjustments made to them. If I was in the develop module and I was in the exposure and I changed it from .852.5 like that, It changes all of them. Even this one, see how the exposure has changed because in the develop module they are exact changes. So let's undo that change that we just made and let's go to the grid and let's work on them inside of the tonal control in the quick develop area inside of the library module. Now in the library module these I told you are relative that means that if this one's at . and this one's at one. If I tell them both to go down by a half a stop, they'll go like this half a stop, this one will go down and this one will go down but they won't go to the same number, which means that if I've done a bunch of adjusting and then I decide you know what? All of these could be a little less saturated or all of these could be a little warmer or all of these could be a little cooler, but I don't know where they are individually and I don't want them to be the same, then I come back here to the grid and I highlight all the images that I want to change. And I go to the quick develop and I say I want all of these to be down 1/6 of a stop. So when you look at this, I've got big settings which is one stop, so this is decreased by one stop, this one is decreased by a third of stop And then if I hold the shift key down, its bring it down by 1/6 of a stop. And so I have a big adjustment. Middle adjustment little adjustment. So if I want all of them to come down 1/6 of a stop, I just simply click once and all of them just got darker by 1/6 of the stop, but they didn't go to the same setting, they went down relative to where they were. And you can adjust things and I can also come in and say I want all of these to be a little cooler so I'm going to take the temperature down one click a small clique and making it cooler and all of them just went down a little bit cooler or I can go drastically more or drastically less just by clicking on these buttons and so I can do the same thing with a little more clarity, a little more vibrance. I can also hit the option key and the clarity turns to sharpening and the vibrance turns to saturation. So the quick develop area is a very useful tool when you need to quickly adjust a bunch of images up or down or cooler or warmer, but you don't know what they actually are adjusted as in the develop module. So with your understanding of the quick developed tool and those relative adjustments and the synchronization methods, you can actually do a much better job getting a really quick rough sketch as to what those images could look like before you start to really get into them. That way you can choose and make a good educated decision as to which images you want to focus on and start working on because you've solved the basic exposure adjustments on all of the images before you made that final decision
Class Materials
Bonus Materials with Purchase
Ratings and Reviews
Byron Sieber
Jared does an excellent job at taking a subject and breaking it down step by step. He includes great explanations along the way to help you understand why he is doing something. His results, which are great photos, speak for themselves.
user-814d7a
Excellent class with great detail on the new Masking tools! Thanks, Jared!
Michael Grosso
Excellent overview of the features included in the most recent upgrade of Adobe Lightroom. Very practical applications are covered at a very good pace. Thank you!