Lessons
Lesson Info
Lab Mode for Color Photographs
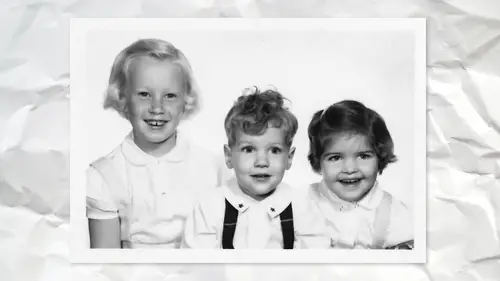
now, one thing that comes up every so often in color photographs and older color photographs is trying to just sort of popped the color. And just simply doing like saturation or vibrant sometimes just doesn't quite make it so. There's a mode in photo shop called L. A B mode that changes the way that your image is described, in a sense, because normally we see red, green and blue channels. So in theory, I could use curves on just the red or just the blue etcetera, and that's certainly a possibility. But there's an interesting alternative of using this thing called L A B mode, and it's I throw it out here because I would say, for me at least two out of five photos L. A B mode is just like a dream come true. And the other three I'm like, but still to out. You know, those two out of five, it's better. But the problem with it has always been this. You change that, gonna say so. Don't do it this way because this is the way the problem with it used to be. So show you, but I want to explain. T...
he difference is it used to be. We'd switch to L. A B color. Now we get these channels or scribes lightness A and B. So then add a curves adjustment layer. And now we can go and edit the A and B information, which is where all the color resides in a very common technique. Let me get this little bigger. I can't make it any bigger, I guess is to take the top of the A curve in like this a little bit and then go to the B and do the same thing. It always looks worse before it looks better. So let's look at the difference. I think the Reds are a little too pinkish for my liking, but I could Tweel further, but that was a really interesting concept. Here's the issue, though. L A B should be considered a very temporary mode to do things and get out of it, because you, for other things, like filters you don't want to do in L. A B mode. But here's the problem that used to always bother me cause I felt like I was kind of stuck in this corner I couldn't get out of is when I went to change the mode back to RGB color. It says changing most will discard adjustment layer and it's not like Would you not like that to happen? It's just like telling you that's gonna happen So you'd click, OK? And so now the adjustment I made kind of went away So the alternate was like, Well, first I should merge down but then I lose the ability to adjust. It was kind of like that's that release Not great. So smart objects to the rescue. Every so often I feel like I wish I could explain to you the technology behind this, but frankly, I don't care. I just know it works. And whoever figured this out, I was just like, Yeah, this is awesome. So this is on RGB Fall, which I wanted to be. I want to stay in RGB, so I convert to a smart object to edit the contents of the smart object. We double click it opens this separate window. Right, So, in the contents file, we can change the mode to L. A B color. What? So now we're able to have an l A B contents inside an RGB file. Oh, that might be interesting because I can now go to my curves and do that same thing. I'm gonna overdo it so you can see that I can edit it. That's where I wish I had a slightly bigger monitor, but still get to the end. Result this? Yes. So I've done all this work at the moment, I think, Oh, it looks fantastic even though it clearly doesn't I hit save, which means the original updates. But because it's so smart, the contents file is actually still L A B. And it keeps the adjustment layer so I could go back to and say I think I went a little overboard. So let me go back to the A and say maybe it should be more like this. And again, you have to be prepared that, as you're editing, is gonna look temporarily worse until you get to the end result. But to me, that looks better as okay, let's say that now and I can close the contents file. So now it just looks to me like I just have a smart object. I just happen to know that inside that smart object is the L. A B version that I have an adjustment layer, that I can continue to add it. So it basically solved a long problem that I used to love doing that technique. But every time I'd have to merge down the adjustment layer. I remember always thinking, I wish there was a way that I could preserve that, and there never was a There were workarounds, but it was never like this. So smart objects. I wish I could tell you again why were able do that. But I don't care why. I just know it's great because it's meant that this technique that I used to use a lot that I felt I had to sort of put on the back shelf because I really didn't want it to be destructive. Now it's not so at any time. And I could get, you know, working course and do more things in here and adjust and do whatever. But at any time I know there's that adjustment layer that I can turn on and off, lower the opacity and at the settings, whatever it ISS. So it gives me the ability to access L. A B controls inside RGB and just as a piece of trivia from all accounts. It's actually, if you want Oh, really sound like a Photoshopped pro. Don't ever say lab. So if you say lap, you don't really know. But as the fellow who was kind of like the father of L. A B processing once said in a seminar, Just because you can pronounce it doesn't mean you should. For example, you wouldn't go. I'm going to go toe mode. So I mean, you can't pronounce that, so don't. So he's just because you can, because its luminosity A and B l a be any one small piece of at the next photo shop cocktail party. So I was in L. A B mode and people be like, Oh, yes, good for you now. So that's an interesting solution, because what I found was just simply going, like adding a saturation. Justin layered. It was okay, but I felt like I always like this l A B mode method, and I should actually show you one thing. I don't think I said it out loud, so I should show you normally when you look at the curved Alec box, it looks like this with a big grid and a lot of people like the smaller grid, so they can use that as a frame of reference to, say, move in like one grid square to grid squares, so a few option all click. It puts the grid smaller. So now when you go to the individual A and B, you can kind of use that smaller grid as a better guideline to help you figure it out. Now this is just one small little piece of what L. A. B mode conducive. Your inner side Dempsey Recon search and find all kinds of There's a Dan Margolis wrote a book years and years ago that people still reference on L. A B editing. Most of it was way over my head, and I didn't understand what he was talking about because it's like pretty high end stuff. But there were a little nuggets here and there like this one. I was just like, Well, I can see using that all the time, just gives my colors a nice little pop that I just wasn't getting the way that using traditional, just like saturation and so on. So now that I have that there, it's already a smart object which, of course, means if I was doing further editing, this one doesn't have a lot of, you know, blemishes and dust and things like that. But I still see a little. It looks a little noisy to me. So once again came a raw filter. Let's go right to the noise and get a closer. So already I'm seeing that looks a little better to me. So even in a case like this, just doing a couple of things I don't have to worry about color or contrast anything else in camera for my liking, it looks pretty good. I might tweak the color balance a little bit color temperature, but just a simple thing like it looks a little noisy, even though it's not noisy in the sense of I s o noise. You think of it that same way. That tells me Well, maybe if I use noise reduction and camera, by the way, much better than Photoshopped. So Photoshopped has a noise reduction. Filter cameras better so you could use the noise reduction filter in photo shop. It's good. This is better. In my opinion question. I'm still kind of stuck on the L. A B uh, sample that you showed us. Uh, did you switch to L. A. B? Because you want to affect the color and not to luminosity or does l. A B actually do a better job with the color compared to energy, aren't you? Well, the difference is close to what you're saying because it's taking. It's almost like you have a grayscale image of luminosity, and then the color is Onley in A and B. So, for example, a lot of people another common use for L. A B motives to sharpen. Because if you only sharpen the luminosity channel, you won't get color halos because you're not Scharping. The color was kind of the same theory. Here is we're saying I want to just Luminosity is fine. I just wanna Onley focus on the color. So when you're incurs now, you can pick a and B and say Onley. In fact, it was kind of like some people go to curves normally and go the Red Channel and do that. But this is just saying we're just making sure we're on Lee affected color and for many situations, in my opinion, it does a better job. I like the results better, whether technically it's better, I don't know. But from a perception standpoint, I like the result that it gives me most of the time better than simply just doing curves or saturation or something like my full question then was gonna be. So why not just doing an RGB and then switched the blend mode to color? And then you know for sure that it doesn't affect luminosity? You could, but I'm I like the effect. For example, when I was in the curves, I was deciding what I want on that grid one square or two squares or three square. So I have more control that way than simply doing curves. And then if I just pick the one blend mode, I don't have as much as many options for control. So certainly another viable option. But if I'm to me, it's now That's not that hard to go into L. A B mode in the contents, piling or smart object. I'd rather have that. What I would consider mawr level of control in that adjustment layer. Okay. Thank you. Sure. So you're probably already seeing this recurring theme that almost every image is gonna end up in camera at some point because to me it's just become I tried other alternatives. I was like, Yeah, that didn't work quite as well. There are a couple of examples I'll show you. That's not where there's some other cases. It still involves using a smart filter, but it gives me some interesting options to do that camera stuff pretty quickly and a lot of the time.
Class Materials
Bonus Materials with Purchase
Ratings and Reviews
Margaret Lovell
While I use Photoshop, I wouldn't consider myself an advanced user. I'm slowly, but surely trying to move in that direction. I've also been interested in learning more about photo restoration techniques to fix some of my old photos. But also because I think it's a useful skill to have, which could function as a side gig. I'm glad that I took David's class. I found his explanations easy to follow, and it's a great beginner's program. I feel as if I can start using what I learned today.
artmaltman
Another superb class from Dave Cross. Well organized, well paced, very clear and extremely insightful! Voice of experience with wise advice. Thanks Dave!
Beatriz Stollnitz
Excellent class for anyone who is looking to restore old photos. Dave's usual clear explanation style makes it an easy and enjoyable class to follow along.