Lessons
Day 1
19:00 am - Introduction to Vanessa and Rob
23:46 29:30 am - What Is Fusion?
19:03 3Equipment for Fusion
22:59 4Editing Overview and Equipment Q&A
12:09 5Video Lingo
22:23 6Setting Up Your Camera for Video & Audio
35:20 7Audio
15:51Fundamentals of Shooting Video
11:15 9Shooting Steady
08:53 10Focus and Depth of Field
32:07 11Managing Exposure, Light and Action
07:02 12Sequencing and Storytelling
27:28 13Shoot: Senior Portrait
16:20 14Shoot: Senior Portrait Q&A
16:57 15Thinking Outside the Box
29:20 16Day 1 Recap and End of Day Q&A
15:26 17Day 2 Promo
01:21Day 2
18Day 2 Pre-Show Banter
04:57 19Day One Recap
20:21 20Plan for the Day's Shoot
37:39 21Planning Q&A
15:53 22Shoot: Wedding Prep Details
22:31 23Shoot: Hair & Makeup
13:42 24Shoot: Dressing & Bridal Session
31:48 25Shoot: Reception Details
18:51 26Preparing Audio
10:02 27Shoot: First Dance
12:53 28Shoot: Toasts and Group Dance
25:08 29Reception Q&A
12:58 30Shoot: First Look
14:01 31Shoot: Bride & Groom Photo Session
13:45 32Shoot: The Ceremony
20:47Day 3
33BONUS: Wedding Fusion Animoto Slideshow
04:14 34Introduction and Day Two Recap
21:03 35Editing Workflow
1:01:03 36Animoto Slideshows
35:24 37Movie Posters
13:25 38BONUS: How to Create a Student Submission Video
07:48 39Audio Sweetening
12:11 40Adding Slideshow Audio
37:12 41The Fusion Album
19:55 42The Fusion Album Q&A
19:15 43Thanks + Credits
09:03 44Delivering Products
36:22 45Marketing & Pricing
19:30 46Final Q&A and Wrap Up
13:07Lesson Info
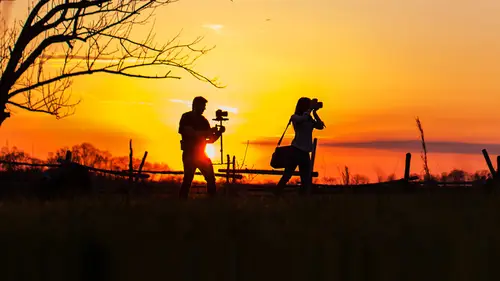
Shoot: Reception Details
We've transformed this room, we've blacked out the windows to really try to mimic a nighttime wedding reception, and what we've done here is we've we've taken down the lights that reads for live broadcast these this lighting setup is exactly the kind of lighting setup that I use for wedding reception, just on a much smaller scale. At first glance, if you are a c, a wide shot of this room right now, it's, it's really tight, it's really close, and I would never really have my lights this close to a subject they'd be pushed back much further. So this just gives me an idea, though, of the look that it will achieve when we're filming on camera. And what kind of lights do you have here? Well, what we're using are, well, my lights kind of like when I used our ar e six fifty's, there are junior six fifty lights of six hundred watts, we used dimmers with them so we can control the output of the light. And this is our basic two point lighting setup, which we diagram before on the whiteboard, and...
what I'm doing is here keeping the lights on the same axis on the same side, and when we get to the toast later on, you kind of see how we use these lights to create dynamic lighting. As a matter of fact with this camera right here that is shooting us you can see that vanessa has really nice back light on her and she's filled in very nicely from the op from the opposite side and the cameras more shooting and more of a shadow side but there is very nice dynamic light and that's what we're going for for both the bride and groom's reaction during the toast and for the speaker who's facing them giving a toast so that's sort of the idea so before we do of that we're going to show you how we shoot details and instead of how we were doing it before where you kind of saw one at a time of approach with robin I shooting the bridal session and the details were going to kind of tag team it so this is how we would normally do this during a wedding and we would but rob kind of go first and he's going to do a wide sweep using his awesome swat teams set up here he's also a with his glad camel he's going to do that first and then set himself up taking pictures of the cake tape I'm sorry taking video clips of the a big table while I'm going to set up and do some stuff on the table and then he's going to move to a table and I'll move to a cake and then he'll move to the main table and well and that meeting there the idea what starting with this is because we want everybody out of the room so while we're doing this and a lot of times at reception facilities you're still gonna have workers and you know, waitresses and waiters and usher or are busters and they're going to be your moving around in the room so there's always a quiet before the storm usually right before the guests were brought into the room from the cocktail hour that you have a chance when all the candles are late and all the lights up lighting is on and you can get these nice sweeps of the room so I always asked the photo crew and whoever else we're working with just kind of step out if I get a couple of stragglers in from the from the waitstaff proof that's fine, I mean I can I'm not gonna force him to go stand in the kitchen trying to do a watch but I will exit so yeah, we're going over here so I'm basically I'm just going to start from one corner of the room I'm gonna make this quick I'm not gonna go to many of these you're not gonna be able to see what I'm doing on this camera because it's not tethered to the live broadcast but you'll get an idea maybe I'll upload one of these clips online later or something like that but I'm just going to kind of walk through in vanessa if you just want to talk to him a little bit more while I'm doing this yet you can see the way that he's walking it's a very slow steady actually he's been a funding for the way he walks before when he's holding that but it's very delivering he's really using his core muscles toe hold it still and tow walk in small steps even though it is it is a steadicam in it's meant to make your walking steady you want to make your steps as smooth as possible as well? So what I'm basically doing is couple wide shots to give the viewer a nice overall view of the room and, you know, in a fusion slideshow I may only use one of these shots for like, four seconds, so I'm not going too crazy, I just want to give a nice representation for my cinema stuff for my films, my feature length ones we used quite a bit of footage from this so it's just I'm shooting with fusion in mind right now yes, so you can see he kind of goes around the whole room and doesn't sleep that way and now he'll circle around these tables get details that way it's also really fun because I know when he walks past this way he's going to catch the flare from his light into into his video clip and he can do it intentionally sweeps from the ceiling don't think just horizontally think vertically as well up and down he can sweep from you know the view of the floor usually reception halls don't have the best floors in the world they're carpet but you can get the idea or he's really sleeping around catching everything and even catching some flair in the lights too I'm pretty happy with what I got so far I'm just gonna and everybody asked me how do you focus this thing how do you stay in focus and the main thing I could tell you is you got to kind of maintain your unequal distance from between the lens and your subject so if I'm shooting this table I'm going to focus on the table on that five six thirtieth of a second six forty on the so I'm just going to do like a one eighty maintaining the same distance and of course get my shadow in there so it's probably a half arc on this table but that just gives you the idea and the shot just looks like it's floating down and then around the table if I'm shooting people with the study cameras real quick what I would do is this you know, sort of get my focus and then you know as I have them move in introduce motions so vanessa just walk I'm going to maintain an equal distance with them and that insures that they stay in focus. So that's sort of the idea when I'm shooting the entire room and I have to walk through the room. There's ah method called hyper focal and there's many different charts out there that will really help you to determine what the hyper focal of your lenses, hyper focal, what it basically means is every lens has a stage at which you focus, and then everything beyond a certain point remains and focus and it's it's a mathematical algorithm mathematical equation based on the lens, the camera body, the sensor type, the sensor size on dure aperture and you can you can find these they have actual iphone apse that are used to help you calculate focal distance and calculate hyper focal. So that's what I do, I always use the twenty four millimeter on my rig, so I'm pretty much good with knowing where my hyper focal is, so I can dial that in. So I'm pretty happy with my glide cam shots. We could move on to doing some photos. Okay, so this is all happening, by the way within, like the last fifteen minutes of cocktail hour, right before the guests come in the room, exactly. So I'm gonna have my assistant, jon, come on over. So I'm not going to use flash at any point here because I want to illustrate how you would use this, especially if you're not tag teaming kind of how rob and I are he's setting something up. Well, I'm shooting maybe your cinematographer, whoever shooting video is going to be shooting with you and you won't want to use flash and I really don't need to hear because I have rob's ari lights here, so I'm going to shoot from this angle, so I have rob's ari lights that are going to create a nice pin light, a rim lighting around my centerpiece here, which I'm going to photograph, and then I have this dead alight, and the satellite has tungsten filter in it, so that's going to match the color of the lights here and I just want you to kind of shine it on a forty five degree angle that right where you are is perfect and I usually get a little bit lower with ease and again, I'm going to get my exposure and I don't don't ever feel afraid, like rearranged the table because it looks beautiful, it is, but your photograph is only two dimensional, so you're going to need to maybe move cem campbell's around and go from there. So I'm just going to use my live you two set my exposure and my white balance and I think I'm actually pretty good and I'm just going to take a shot of this I'm going to let a little bit of flair come into the picture and I love the look of that I love the pin lighting I might do one without it just so I have options good, and then I'm usually shooting my details at a lower so right now I am s o eight hundred my appetite is it two point two and my shutter speed is that one hundred? And when it comes to details, there was rob sort. When it comes to details, I'm going going to take horizontal pictures and vertical pictures, lots of options again, thinking about the album as well is thinking about getting published, so when do you get published? They always want to see details and centerpieces is definitely one of them and let's raise it up a little over there, having the light come from a side angle that was a little bit too hot it's actually put it over here. The white just is going to show a lot more the detail like we have these nice little thistle tape looking things that you're really cool there we go and I love that I'm going to get my own life perfect so I like doing the centerpieces and then I like doing the place settings as well a lot of times especially if you're working with high end weddings they've brought in the plates and the linens cost more than they spent on the photography all that kind of stuff so I'd like to get the whole thing as well let's just get a nice there we go that looks good and I am it normally I'm much more detailed crazy, but for now I will save you my speed shooting methods here we go and a new shot that I have been doing lately that I really like is getting the flare in the glasses and a lot of times we have, like a champagne glass here is well, I think there's an extra one there's one over here if you want to grab that, I'm just gonna need it back when you're done. Yeah, well, borrow things from each other. All right, so let's put this here love that light, everything is good, perfect everyone focusing on the champagne glass and there you go. Just a nice detail want owen let's do one with negative space because I don't work really well in album just like that how you doing of that? I'm also I'm ready to do my hair set all right, so I'm pretty excited about this and this is really? What kind of happens with vanessa and I when we're shooting reception details were just kind of trying to stay out of each other's way she'll see she wants out of the room, I'll shoot another side of the room and we have our full crews it's a lot you have like two or three people doing each so right now I'm concentrating on the cake and I'm pretty stoked about shop that I have over here, so if you want to go to the tethering, I can kind of show you what I'm doing I just sort of set up my slider at a low angle down here in front of the cake and I'm going to roll the camera's gonna black out your screen for just the second and then it's gonna pop back up and you'll be able to see what I'm going to do here there it is, so basically I've got this cool little slide I'm shooting into my lights and just getting it to be smooth because of the tether is a little difficult, but there it is got that nice little flair are coming off the lights it just kind of cool there's something kind of like that just a little foreground on the slider and you know, I might do one of two different case shots just to kind of buried up kind of like that shot it's pretty good and at this point I'd probably go ahead and do another angle of the cake or maybe do some table slider so all bounced back to the messages so she can talk you through a little bit more of the table details while I set up the next shot yeah I'm actually going to go ahead and invade your space a little bit of wine table a lot going on here so this situation is actually perfect I don't think I'm going to need to use my external light because the way that robs les is been letting this cake and filling it in on the other side is really perfect I always shoot cakes so that you see texture in them because again they paid a lot of money for that texture so you really want to see it and have a side lighting or three quarter relating going on there I'm just going to double check the light again and I think I'm going to go up to a thousand on my s o two point oh on the aperture and eighty on my shutter grab a shot from and again I love the flare so I'm going to let that peak in a little just like that perfect and I liked getting little details of it as well I just think the flare really just makes it look more like it's a reception you go grab one more of the flowers whenever you're shooting details and a reception you want to keep in mind? Like I said, getting published, but at the same time you want to keep your vendor relationships in mind as well. I know the forest and the person who designed the cake is going to want a copy of this try to do that get great pictures of them, because then he can build a vendor relationship that way, that will help you hopefully give you a little bit more business. And then here I'll take some of the cutlery as well. I'm not gonna lie. I really hate when have to photograph the cake cutting, they keep getting utensils, and it has, like the engraving of the bride and groom's name that's always so difficult to catch the light to dio correctly, you know, you got my I'm going to do a table shot this kind of illustrate how would two tables, you know so well, what we've done so far for the cinema is we've done an overall shot of the room couple different overall sweeps, andi, we've got nice cake shot and I'm going to do shot on tables, and we do a lot of this for the cinema end of it. We're really kind of like trying to capture the essence of the entire room, and a lot of the venues we working have, uh, plating and you know the lights are really nice and colorful and stuff here I'm just kind of focusing on details we have we do ever dynamic light coming from our lights yourself right here if you just want to switch to the tether what I basically that is a nice table slider I'm just kind of showing off the detail showing off the place settings very slow deliberate movements and then maybe you could switch it up a little bit all kind of change the angle just kind of get a different perspective and check my focus again and I'm kind of focusing by I hear I'm not magnifying I'm already filming some pretty confident in my in my focal point but just a simple little slide just kind of show off table very cinematic very nice yet you turned out so people can see what we're doing here I love that and again rob's used to the foreground with charon there it really just makes you feel like you're in there like you're a part of it. One of the compliments rob always gets on his work is if people weren't at the wedding, they look at his stuff and like I feel like I was there and it's not on accident it's because of little tricks like this that create that kind of feeling exactly I'll show you the original shot that I had before for those of you didn't see it they're just very slow, deliberate movements and this is nice, you know? Sneak these into effusions lie joe when vanessa showing shots of the room, you can show a couple quick slides of tables and place settings and things like that just brings it the life brings the reception room toe life for that, maybe even right here while I'm in position and the light is good, I'm just gonna tilt up and you're going to see some of you guys the background, but just imagine you guys aren't there just to kind of amusing now that this table that's in front of me as a foreground and then the bride's head table sort of the the focal point, a little shaking, their just cause it's top heavy here and if your first time using a slider, don't be discouraged, it is actually in art getting a nice, smooth shot even though it's, you know, a thousand dollars or more piece of equipment that you're buying to get smooth shots. It does take a little bit of practice to feel the tension behind the piece of equipment and how the weight of it camera affects it as well. So true and I'm actually using more of my body than in my arms I'm sort of like cleaning my body into it as opposed to pulling with my arms or my wrists yeah, it's a little shaky, because we would do it again. I usually don't have the big monitor on top of the camera and this and that, you know, lots of course, strange there, get your workout in, but that's the idea. So that's, pretty much how I would do some table details and way would do this until we felt like we had enough. So we felt like we really had a nice representation of the room, because we can cut these in and different parts of a film or different parts of a effusion slideshow, because they're pretty generic, that is, beauty shots, beautiful shots of you know what? They spent all the money on you. So you really want to kind of capture for the client? Unless it was talking about getting published and things like that, but really, our first concern is the client we want to make sure that they're happy with what we're doing. They're happy with the representation we've created of their day radio back to me, I'm just going to create a do a couple more detail shots here. I think I will use my external light for some of this again, we just have some really great stuff actually are floral designer here used herbs from his garden, which are beautiful, and I really want a photograph these yeah really wanted to say everybody here on the cruise has done a phenomenal job turning this place into gold of perception and it looks great we're thrilled it's really, really nice leather yeah, you want to come to this side a little bit just get a little extra pop this way there go other than these yeah, right there is good in that while you're doing that I'm gonna break this down and at this point tonight we would sort of start getting ready as we want as we're winding down with the reception details and get set up for the introductions in the first dance parents, dancers and toasts and all those sort of things so we do a lot of the one question we do get often is do we shoot cocktail hour? The answer is yes, we do get some shots of khan tell our and that comes in the form of what we call face time all right, so we're not in cocktail hour to capture people with a fork sticking out of their mouth. Andi no eating we're more interested in shots of the bar, people getting served drinks shots of people smiling, engaged in conversation in laughing that's the kind of stuff it's very generic stuff it's cute on it could be kind of put anywhere into ah piece that this kind of bring the guest it's into the story a little bit. So we're not really focused on any major players were just looking around for smiling happy faces during cocktail hour.
Class Materials
bonus material with purchase
bonus material with enrollment
Ratings and Reviews
photogirl
Worth every penny and then some! i just purchased the course and can't stop watching it. I normally don't give such high praise, but these guys turn out a very high end product and are so efficient with their workflow. The class was so full of information, they walk you through the process step -by-step, and take the fear out of photo and video fusion. I can see how the thought of adding video to your workflow can be intimidating, but Rob and Vanessa do an amazing job of simplifying the process and showing you which programs and scripts will make your life easier. This is THE photo and video fusion course to buy if you are contemplating adding video to boost your sales. Great job and thanks to Creative Live for finding such great instructors!
a Creativelive Student
Excellent presentation. In your presentation you modeled appreciation, support, affirmation and humility in a way that was inspirational. These characteristics together with a depth of knowledge in your topic area gave it huge integrity. Thanks!
a Creativelive Student
They were good as 'teachers'.Well organized. Rehearsed!! but they are also good at selling. I think this whole course was a big Ad campaign in a way for their sponsors like Animoto and especially for Their actions!! It actually turned me off. Felt like they were trying to sell me something- A live infomercial. Nothing against their work though.They gave you just enough info and tips but the rest really depends on their fusion actions and your skill. They Definitely get you excited to create your own though!