How Time of Day Impacts Panoramas
Lesson 13 from: Photographing Panoramas for Large PrintsMike Hagen
How Time of Day Impacts Panoramas
Lesson 13 from: Photographing Panoramas for Large PrintsMike Hagen
Lesson Info
13. How Time of Day Impacts Panoramas
Lessons
Class introduction
04:35 2Field Techniques, Camera & Lens Choices
08:15 3Selecting Gear for Great Panormas
10:44 4Camera Menu Settings & Exposure
09:58 5Troubleshooting Environmental Obstacles
04:04 6What Contributes to a Great Panorama
11:32 7Shooting Vertical Panoramas
04:57 8Shooting Techniques for Black & White Panoramas
04:59Handheld Technique for beginners
05:10 10Tripod Technique for Intermediate Photographers
07:43 11Advanced Technique for Panoramas
09:58 12Navigating Moving Subjects in Panoramas
04:04 13How Time of Day Impacts Panoramas
13:28 14Workflow in Lightroom
08:59 15Developing Images in Lightroom
11:54 16Merging Images
13:44 17Finishing Techniques
17:31 18Saving Images for Print
05:41 19Controlling Your Environment
05:23 20Profiling & Calibrating Your Monitor
20:54 21Wide Gamet Color Settings
12:37 22Soft Proofing Images
13:49 23Selecting the Right Paper for Prints
08:05 24Sharpening Images
28:33 25Printing with Lightroom
17:07 26Printing with Photoshop
05:46 27Black & White Printing
05:59 28Best Practices for Printing your Image at a Lab
07:10 29Analyzing & Displaying the Print
05:19 30Reviewing Panoramas Printed in Class
10:20Lesson Info
How Time of Day Impacts Panoramas
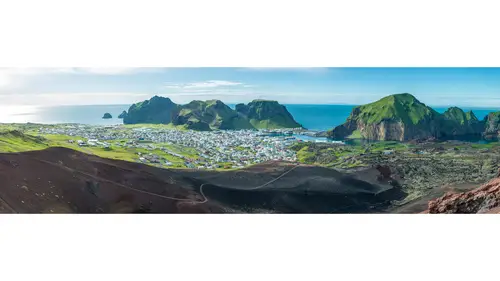
We're gonna show some images that we took from kind of mid afternoon to late afternoon and into the blue hour. And then after this I'm gonna show some prints over here on the wall that we printed out from that adventure. And they are stunning. So here we go, time of day. Time of day really matters in your panorama photography, and it's something I'm always thinking about when I'm planning my photo shoot. I like to know which direction my scene is facing so that I know I'm gonna get the sweet, beautiful light hitting that scene. Right now it's a little bit past noon, and the sun has already moved past the midpoint in the sky, so it's starting to head towards the westerly direction. Well, this area that we're photographing now points, or it's got a westerly, westerly exposure. So we're getting great light on this scene. So we planned that. We purposely decided to shoot here because of the light. Over here we've got the city skyline of Seattle. And what we see now is you see a lot of the ...
buildings are in shade, they're in shadow. So in order to get really great shots of the light hitting there, we have to wait a few hours, maybe towards like 6:00 or 7:00 pm later tonight. So thinking ahead of time and planning your photo shoot for the sweet light really can impact the quality of your photos. So we're here in front of this great scene behind me of Seattle skyline, and the time of day right now is what we call the golden hour. If there were no clouds Seattle right now would be just kind of awash in this warm glow. And so the golden hour is a beautiful time of day to shoot, and it's right before sunset. Sunset happens right as the sun is just going down at the horizon. That sunset moment is in about 30 minutes from now. We call it the golden hour, anywhere from 30 minutes to an hour before sunset, and it's when the light is low in the sky and kind of shines across the buildings, and it produces this nice texture on the buildings. If you look over my shoulder, you see one side of the building is lit up and the other side's dark, it provides nice contrast and beautiful color. Right now the sun is getting pretty close to setting, and I thought this would be a great time to be shooting. You know, for panoramas I spend most of the day scouting, and then I wait for just a few minutes before golden hour, or during golden hour, right before sunset, I spend that time actually taking my images. So I'm gonna take a few shots here. I've got a 36-megapixel camera. I've got my 70- to 200-millimeter lens. And since the city is pretty far away I'm racked out to probably 135 or 140 millimeters on the zoom. I'm gonna use all my good techniques that I've been teaching throughout the day. I'm gonna meter the scene, I'm gonna lock the exposure, and then do this nice panoramic sweep. It's also a little bit later in the day, so the light's lower, so I'm gonna have a little bit longer shutter speeds. So I'm gonna be a little bit more careful about how I handle the camera. Press the shutter release very gently. In fact if my shutter speed started getting longer I'd actually use a cable release to do this so my hands were completely off the camera system. So I'll shoot my first test shot here. In fact I see that beautiful sailboat, that's great. Take a look at my exposure. Go into my highlights. My highlight screen here. And I've got a little bit of blinky going on, a little bit of highlights going on on that building, so I'm gonna reduce my exposure by just a third of a stop. So I hit my exposure compensation button and bring it down to -.3. And here we go. Lock the exposure there on the buildings. This time I'm gonna start on the right because I wanna get that sailboat. One. Two. Three. Four. And I'm overlapping by about 25% from shot to shot. (camera clicking) The light's really beautiful right now. So I'm gonna just really take this opportunity to shoot a little bit wider and a little bit more telephoto. You gotta use the sweet light when you got it. So I'll just keep shooting. This one I'm gonna zoom in a little tighter. And before I take it I'm gonna pan from left to right to make sure everything's in the frame, and it is. Gonna reset my exposure. By locking it here. And I'll start here on the left side. And lock down my panel mount. Take that shot. Move over a little bit. Take it again. Oh, this is looking beautiful. Lot of boat traffic today. Clouds are nice behind it. Tugboat, oh, I'm so happy. This is fantastic. And then I'll end over here on the right hand side with the Space Needle. Excellent. And take another shot. I just realized my ISO was a little bit high. So I'm gonna reduce my ISO back to 100. And I'm gonna shoot it again, starting from the left side. Lock my exposure. Great. And here we go. You can hear my shutter speed is much longer now, so I've gotta be really careful. My shutter speed's about 1/30 of a second. I have a very sturdy tripod, which is great, but if I'm not careful I can still induce a lot of camera shake. So I'm just pushing my shutter release button ever so slightly. Almost like it's a surprise when it goes off. Just to keep this camera system steady. (camera clicking) Pretty scene. There's a kayaker in there. And that kayaker we'll be able to see when we print this out. When you kind of explore the photograph. Oh, that's great. Alright, I'm gonna shoot again. This time I'm gonna go wider and get more of the sky. So I'm gonna back it all the way off to 70 millimeters, and basically shoot the whole sequence again. And this time I'm gonna aim the camera slightly up. I'm getting a little bit of this grass here in the foreground, and that's bothering me. So I'm gonna try to exclude the grass from this panorama sweep. And now that I've gone wider I'm including more sky, so I really wanna be careful that I don't blow it out. So I'll shoot a test shot. Take a look at my highlights. No blinkies here, which is fantastic. So I'm good to go. I'm just gonna lock that exposure in. And shoot the sequence. (camera clicking) I'm at F9. And because the scene is so far away, the sweet spot of most lenses is right in the middle of your aperture range. So F9 will give me the sharpest looking images overall. In fact that reminds me, I'm always thinking through, what could I have screwed up? And I might not have focused as well as I wanted to after I zoomed the lens back. So I'm gonna go back and refocus again. It's digital, so I can just keep doing this until I get it just perfect. So focus right on those buildings. Done. And shoot the sequence again. Exposure is locked. There's a lot of things that are moving in this scene. So I'm watching very carefully to make sure that the boats don't appear in multiple images. So I try to wait until it maybe moves a little bit, or I actually move my camera kinda quicker when I see a boat. Like this white boat here, it's moving fairly rapidly. So I try to take my pictures faster than it's moving. Alright, I'm gonna take one more shot, and I'm gonna zoom in tight again. There's a lot more boat traffic out there now, and I wanna capture all of that. So I'll zoom into about 135 millimeters. Refocus. Relock my exposure. And shoot. These are gonna be great prints. (camera clicking) The light's hitting those buildings nicely. I like all the blue hues in the sky. Great. That mixed with the warm lights on the building is gonna produce a nice image. (camera clicking) There we have it. So this is the moment we've been waiting for. The sun has peeked out behind the clouds. You can see in the buildings behind me there's a nice warm glow on the sides. This is perfect, it's epic. The clouds behind the buildings are great, good texture. And we got nice warm colors on the surface of those windows. So I'm gonna take this shot, it's gonna be probably the best panorama of the entire day. Alright, I'm gonna focus on those buildings. Take one quick test shot, make sure I haven't blown out my highlights. Looks like I'm good to go. Yeah. So now I'm gonna lock that exposure in. And shoot the panorama. Beautiful. My exposures are pretty long. I'm about 1/40 of a second. I'm being very careful not to move my camera in between shots, holding it very steady. Great colors. (camera clicking) And I'm overlapping about 25% for each photo. Excellent, so excited. It's what we live for. So the sunset has progressed a little more and we're getting more intense light on those buildings. It's producing a really neat reflection on the water, but if you notice, the brightness of that building is a lot brighter than the surrounding areas. So when I try to photograph this, and I'm going to, it'll probably blow out. This makes it a very difficult exposure to handle. So I gotta be very careful here. Or I just can say, big deal, I'm gonna let it blow out. So we'll take the shot and see if we can pull out details later on in Lightroom. And again, when I meter this scene, I just know that that building's gonna blow out. In fact I'll take a test shot, and we can see it here on the camera. So I hit Play here, and I go to my Highlight screen. There we go, highlights. And you can see the building is blinking there. So I've lost detail there. Maybe I'll underexpose a little bit more and see what we can get for the final panorama. So I'll underexpose it by another 2/3 of a stop. Lock that exposure. And shoot the sequence again. Gonna zoom in a tiny bit more. Here we go. (camera clicking) Oh, those buildings are gorgeous, though. Lots of warm colors. (camera clicking) Alright, excellent. The fun thing about watching these over, again, is I remember the excitement of being in the moment. And kinda got the feel in that video is like, okay, this is the best. And we'd come back in and go, "But wait! It's better!" And then we did another one and we're like, "Oh, it's even better." So this is one of the best images that we created. And you can see it was taken just right before sunset. Almost right as the sun is hitting the horizon. And you see those colors in the sky, just gorgeous. The pinks and the warm feeling about that. The buildings are just popping. The boats in the foreground. It's my favorite time of day to shoot. But it got better. After we wrapped filming... We kept shooting. Everyone was putting away all the camera gear, and I'm like, "Oh, my gosh, the lighting's getting even better." So this was the final image that I took. And this was right in the blue hour. So the sun had set, the sun was actually below the horizon, it was lighting up the clouds. Everyone was over that way shooting the beautiful clouds, and I was pointed this way shooting the beautiful panorama here. This image here is a 30-inch-high by 90-inch-long panorama. It's an Inkjet print, and that's my favorite shot of the whole day. This is the one down here, this is the one that I just showed up on the screen up on the monitor that we just showed at home. It's a great print as well. I really like it, but I think this one's even better. The blues just really offset with the warms.
Class Materials
Bonus Materials with Purchase
Ratings and Reviews
Fred Morton
Get it, get it and get it. I bought Mike's Speedlight course and this is on the list after watching it on line. The course design by Mike with the Creative Live staff is a successful blend of content and presentation. I absolutely loved how Mike took us on location for several shoots, where we could see the setup and problems that he had to resolve. This is a must have course for photographers interested in landscape work. Another powerful part of this class is Mike's willingness to demonstrate and show us what didn't work. The practical experience in his course was just like being in the field with Mike.
user a5f3c6
Mike combines two characteristics of a great teacher: he's obviously knowledgable and competent about his subject matter and he's relaxed and confident in how he presents his ideas. This class covers everything I need to know about photographing and printing panoramas. But, it is much more. It is a class that shows the essential skills involved in shooting, post-processing, and printing photographs and how to apply them to a specific application: panoramas. I learned a lot! Thanks, Mike.
Sue Sirius
This workshop was terrific! I learned so much about taking, processing and printing panoramas (and photos in general). I found the presentation very easy to follow with great examples and instructions. Highly recommend this!