Lesson Info
5. Light Painting Composite
Lessons
Lesson Info
Light Painting Composite
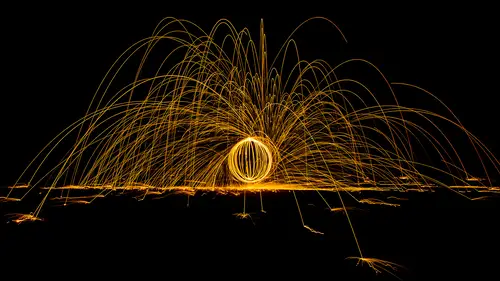
Now there's a lot of other things that I do with this, these techniques. Let's take a look at one which would be, light painting. At night time, usually about 30 minutes after the sun goes down, it's dark enough to do light painting. And if, you have a, blue sky instead of overcast, I would start taking a photograph, maybe, 30 minutes after sunset and try to just get the sky. That's what I did here, I was in Grand Teton. And then, I'm gonna leave my camera on a tripod so it doesn't move from what I took this shot, and I'm gonna start doing slower or shorter shutter speeds. This one here might have been a minute and a half or something to get that sky to show up. But then I'm going to start doing maybe, 30 seconds to two minute exposures. And I'm gonna grab a flashlight and I'm gonna walk into the scene that's here and start lighting objects with my flashlight. I can paint it imagine it's like a fire hose and you just need to dampen down a building, while you start on the left side, get...
it wet, and then work your way across, except for you doing it with light. So, here's one of my shots. There's a barn there, and I started painting on the left side, I'm standing maybe, I don't know about, a dozen feet away from this building, and I'm painting the light, I'm just off to the side. And I paint the light across the building during the long exposure. Then I close my shutter, I open it again and I go light another portion, in this case the rooftop. And I close the shutter, open it again and shoot another spot. And do that again. Here I'm right at the camera I believe, and I'm putting the flashlight near the ground and spraying it across the ground. Get the front again, edge, maybe get a tree I walked way over there to get that. I have a little remote that I can hold in my hand, so I don't actually have to walk to the camera each time. Well, I'm gonna select all those images, with Command A. I'm gonna go to the Tools menu, and load files into Photoshop layers. It says it's busy, but I know it's not. It'll take just a moment, to create a document that contains all those images. I no longer need the timeline, so I'm going to go to the side menu, of the timeline panel and choose close. And now I'm gonna combine these layers together. Now in a separate lesson for the complete guide, we talked about blending modes, I'm gonna use one here. I'm gonna select all of these layers, and I'm gonna go to the top, of my layers panel, there, there's a pop up menu and I'm gonna change it to a choice called, lightened. When I do all of those layers will combine together, and it's going to make it so the top layer, can only brighten what's under it. And if you look at the top layer, most of its solid black and solid black isn't capable of brightening, so that part won't show up. And then the one below it. This is only gonna be able to lighten, what's underneath it. So the solid black areas wouldn't show up only where there's enough light, to be brighter than what's down here will it show up. So we get this, there is an alternative mode. If I select all these and it's called screen, screen is gonna add together the light that was in each one of those layers. It will always produce a brighter result and sometimes can be nice if, their end result was looking a little dark, but I'm going to use lighten mode. But now that doesn't mean you're stuck with this end result. Since we have these on separate layers, I can turn a layer off and back on again, decide if I like it and what it contributes to the image. Then I can go to the next layer down, and do the same thing. And as I find different layers this one here, I wish was warmer. I wish it looked more yellowish like the front of the barn. Well, I can go down here. If I do an adjustment layer, I'd have to, clip it to that layer so it only affected it, but if I come here to image adjustments, this would apply to that layer directly. Then when we, talked about adjusting color, I mentioned that each one of these colors has an opposite, and the opposite of blue is yellow. So if I bring down blue, I should get more yellow. Up there it is. But once I do it looks to green, so I can choose green from here and less than that as well. The opposite of green is magenta. There we go. Click okay. And then I can go to the next layer and decide, do I like it? To me that's too bright. So I click on that layer and I lower the opacity, to control how strong is it. And I could do a similar adjustment to make that more yellow, if I wanted to. Go to the next layer down, turn off and on, I decide that's too strong. I'm gonna lower its opacity to lessen it. And I wish it wasn't so bright near the edge of the frame. Well there, you could add a layer mask. Grab my brush, and with a huge soft edge brush. I don't wanna completely remove it, so I'm gonna lower my opacity, I might bring my opacity down to about 20, and I'm just gonna paint down here to try to lessen that. But that's, a layer mask, with my opacity turned down. And I just continue working the image, each one I turn on and off and say, do I like with that stealing, that's too much in most of the areas but I do like what it's doing to the window that's in there. Well, so just add a mask. And if you don't like what it does, in most areas, you can invert the mask which turns it black. It makes it so it's not showing up anywhere. Then I come in here, and paint with white to control where it shows up. And say I like that, right here where the window is. And do the same for the next layer. I don't like there, get some spill onto the building itself. So I add a mask. I'll paint with black, and get this extra spill off the building. Here maybe, I don't like there's a little fence over there. It looks like a car might have driven by, so I add a layer mask, paint with black and say, I don't want that fence. I'd be a little more careful that I'm being, but you get the idea. I see a red line in there, that means a car went by, that its taillights and I'm gonna turn off these layers one at a time just to see when does it go away. There it is. So that's the layer, I add a layer mask too, I paint with black, and get rid of it. And so you get the idea that, light painting, by taking multiple exposures and combining them in Photoshop, is much more versatile, than trying to do it in a single exposure. Then the only other thing I would do here, is I'm gonna create a brand new empty layer. And there's one little spot, right here that little red light, that was on during all the exposures, I'll use the Spot Healing Brush to get rid of it in this little spot above. So there is, my light painting. So in Photoshop, you can do a lot more, if you think about Photoshop, at the time you're behind your camera. And, the more you can start making a connection between shooting and Photoshop, the more you're going to start developing techniques like these, to get more out of your images. And I do all sorts of techniques like these, and I find the more I do, the more I really enjoy the shooting and compositing process. So I hope you've been enjoying, Photoshop, The Complete Guide.
Class Materials
Bonus Materials with Purchase