Lessons
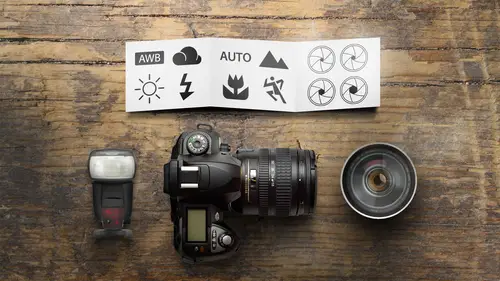
The Camera
19:20 2The Shutter
19:17 3The Sensor
10:45 4ISO
14:12 5The Lens
14:23 6Aperture and Depth of Field
15:59 7Focusing
15:07 8Metering
12:06Lesson Info
Aperture and Depth of Field
we're talking about the lens. The aperture is in the lens, so it's a continuation of the same subject, you might say. So the aperture in your lands is the opening through which light travels. How big of opening is in the lands. Now the word aperture gets thrown around and it gets misused in some cases. Now, this number we talked about earlier right on the front of your camera, this one 0.41 colon. One point for in this case is the maximum aperture. It's the maximum opening. Somebody might say, Hey, what sort of aptitude is your lens have on it? They're asking, What? What's the best it can Dio. Then we'll also refer to that as the lens. But how fast is your lens? But there is a mechanical device in your lens that you can see here that opens and closes that doesn't completely closed down, but it changes in size, and that is your aperture or your F stop or your iris. This is the mechanical device in there, and that's what we're gonna be mainly looking at. In this section is the size of th...
at opening. So the F stop, the focal stop. This is the aperture. These are three different words or terminology that we use to describe this. This is the ratio of the focal length of the lens to the entrance people. This is how big the opening is. And it's gonna be a little confusing because these are fractions. Once again, there's gonna be a 1/1 0.4, but we don't even pay attention to that. We just call it a 1.4. So 1.4 is a wide open aperture. F 22 is a small, open aperture. Back in the old days of photography, I used to be able to grab a lens and turn the aperture ring, and you can actually see this. And you can't do this with the modern lenses, So I have to do it visually on screen. As we stop this aperture down, we're letting in half assed much light with each one of these settings, and as we open this up, each setting will double the amount of light let into the camera. And so once again, this is the doubling and cutting in half of the light that's coming into the camera. So these air kind of numbers that you want to remember that you're going to see. This is part of the terminology that we use in photography. It is our mathematical alphabet that we deal with these air numbers that if you haven't memorized yet, you will memorize because we use these quite frequently when you go from an aperture of 2.822 point Oh, we're increasing the size of a light that's being led into the camera and we're opening up the camera. And so we're letting in twice a much light. In this case, if we're gonna go a full stop down, we're going to be letting in less light. And so this is one of the ways that we have control of light. We were talking about the I s. So we talked about shutter speed. This is our third way of controlling how much light is let in. And this is something that we're gonna have to get very used, Teoh, because there's also has another implication. I put a little question slide in here, but I think I'm just gonna keep rolling on right through because that was just the amount of light coming in the other impact that it has is on depth of field, so depth of field is affected by our aperture. So let's take another look at our aperture. Let's go ahead and open up this aperture to 1. and let's look at a photograph, and you can see in this photograph that we have extremely shallow depth of field at aperture. One point for those red hash marks over on the right hand side indicate the depth of field or how much is in focus from the front edge to the back edge of focus. And as we close this aperture down, we're getting more and more depth of field. It's not a radical change with anyone adjustment of the aperture, but it it's cumulative. It's adding up. You'll notice the numbers down at the bottom of the yardstick are becoming more and more in focus. Now, the smallest that we can close this lens down is F 22 this is the maximum amount of depth of field that we're going to get from this lens in this photographic situation. And so, by changing this, were changing two very important features of our camera. How much light is let in and how much is going to be in focus. So which one of these numbers should we choose? How do we How do we figure out which one of these numbers we want? Well, there is a technical reason, all right, if we want to let in less light, we need to go to F 22. If we want to let in more light, we need to go down to 1.42 point eight or something like that. And this is one of the areas that most people get caught on in photography. Is that the big number? Let's in less light because of these air fractions. So this is exactly the opposite of what you're kind of expecting or what your brain wants to think about. But just remember, there is a one in front of this, and this is exactly the opposite. So these low numbers let in a lot of light. But there is also an esthetic reason why you want to do this. We want more things in focus or we want a very shallow depth of field. And there are perfectly good reasons for having both of these as we will see. So let's take a look at some apertures that I have chosen. And perhaps we can kind of reverse engineer why I have chosen specific apertures. So let's start with a wide open aperture of F 1.4. And I would ask a brave soul to just pick up the microphone. Somebody just pick up the microphone. Be brave. Okay, Would you explain to the folks at home what this picture is about? Describe it, um, the tools that the worker behind there is using mostly about the bits and bolts that's very good. And so what, you think the primary subject ISS, the the the bolts or whatever screws and stuff in the right front. Now I forced her to say that by focusing on these and having them very clearly, we know that things that are sharp are the most important. What else is going on in this photograph? The subject in the background is nicely blurred just so that you can focus everything on what's sharp right, and so there's a second part. Each photo is a story, and we have primary characters and we have supporting characters. And so I have blurred the background because I don't want your eyes to go to them or spend too much time on them. But I want you to understand a little bit about the context of what's going on in the photograph. And so you're really able to direct your photographs and the attention of your viewer by selecting where you focus and how much is in focus. And so I chose shallow depth of field of the story is as I was walking around Egypt and there's this 16 year old kid who's got this box from China, and he just throws out the nuts and bolts and he's assembling a motorcycle and he knows where all of these. And for those of us who assembled something for my Kia, they're not in little plastic baggies. They're just a bunch of nuts and bolts that he's putting together, which I thought was fascinating, and I wanted to tell the story about these nuts and bolts and the person that was working on it. So I'm doing it not because I technically needed to shoot at 1.4, but for aesthetic reasons. All right, Next job. Two point. Oh, can anyone here pick up a microphone and explain or guess why I shot at 2.0, in order to take this picture. What are my motivations for shooting at two point? Oh, yes, while it looks like it's, Ah, photo being taken in the evening and there's not a lot of light. So you you probably want to let in the maximum amount of light so you could see what was going on spot on exactly right. It's dark out. It's night time, and I'm not concerned about depth of field here. In fact, if you look pretty much, everything is in focus and it's in focus partly because it's a little bit further away and subjects that are further away tend to be more in focus. And so my motivation here is I need to let in a lot of light on the lens so that I can have a shutter speed so that they're not complete blurs of me holding the camera and then moving around. So that is exactly right. All right, Next image it F 2.8 now, in this shot choosing F 2.8, we kind of have some shallow depth of field cause the leader is in focus and the guys in the back or not as well and focus. But the motivating factor here was not depth of field. I was thinking about my shutter speed. I was thinking, Boy, these guys were riding really fast. I better have a fast shutter speed in order to stop their motion. And in order to have a high shutter speed, you're gonna have to have a fairly wide open aperture to let in a lot of light. And so I don't mind this look, I kind of like it, but it is more of a byproduct of what my first primary concern is, and something that you'll see is a theme as we go through this is that there are a number of issues that we have to deal with, and we have to make choices as to what's the most important. And we're going to swap around which ones most important. Sometimes it's this one. Sometimes it's that one. In this case, shutter speed was actually important, and I was setting an aperture that would set up the proper shutter speed. Now, this picture, you'll notice that we've moved from to A to F four. But this picture compared to the one of the cyclists proceeding this, this one has much shallower depth of field, and one of the reasons for that is that the bird is much smaller than the pack of cyclists, and its actually closer to me because it's filling the frame and one of the imp. One of the things that affects how much is in focus is how close something is to you. And so this is closer to me. And I've gotten that background quite out of focus, even though I'm in F four, and I know there's some people who start learning the basics about photography, and they think my lens only goes down to F four. I'll never be able to get shallow depth of field. I'll have to go out and buy a 1. lens in order to do that. And a 1.4 lens will be shallower depth field in four point. Oh, but it's just not available in certain lenses and it could be very, very expensive on many other options. But if you get your subject close to you, you could end up with very shallow depth of field at F four going up to 5.6. So in this case, I don't have much depth of field that I need to worry about. It's all kind of flat. Just this is big ball, a rope. This was up in Alaska and I don't need 1. because it z not going. I'm not gonna be able to have the background out of focus in this because there really is no background and f 22 a lot of depth of field will. It's just not that deep. I don't need it. And something we don't have a lot of time to get into in this class is that the, uh when you set your lens in the middle of the range, the lenses tend to be a little bit sharper, and so I don't need either of the extreme, so I'm just gonna set it right in the middle. This next one is a tricky one because there's a lot of things going on. I'm shooting very close to my subject and things were pretty far away. So I need depth of field to get all of this in focus. But they're also movie and So I need a fast enough shutter speed. And this is where I'm really thinking. About what? My shutter speed. What are my depth of field? What lens of my using. I'm kind of going back and forth in my head, and this comes with a little bit of experience. This is hard to just give you numbers and say, said it here. There's a lot of variables going on here, but I've chosen I don't know what shutter speed, but I've chosen a shutter speed fast enough that I'm not really getting very much blur in that foot movement down there. But I'm holding everything in focus. And so, with FAA, you're probably wanting to get a little bit more depth of field. Ah, good old, uh, think it came from National Geographic slogan. If you want to take a great photo, how do you do it? F eight and be there? Okay, Now, as we move up to F 11 were definitely into this more depth of field. We want more things and focus. And so when were trying to hold the grass hut roofs all in equal focus, we're going to need more depth of field that is offered at F 11. Even more depth the field at F 16. We have subjects at a variety of distances, and we want to have them all nice and sharp, which is what we often want to do in nature. Photography's We want everything nice and sharp and easy to see. F 16. When do I go down to F 22 when things air really close to me and really far away from me? So this is Death Valley, and the salt is probably five or six inches in front of the camera, very, very close in front of the camera. And, of course, those mountains are a couple of miles away, and I want to get everything in focus, and that's when you need to go down all the way down to F 22. All right, so let's sort of see what's questions we might have on depth of field your aperture off for, say, those last two photos that you showed, Um, did you need quite a bit of natural light to achieve that, to be able to set it there. It was not really a problem in those cases, because I had the camera on a tripod. And when the cameras on a tripod and the salt flats are not moving there, not moving, then I can set any shutter speed I want. I love being able to use a tripod because then shutter speeds don't matter. I could use any shutter speed I want, because that tree is not moving the salt flats or not moving its when my subjects air moving or I'm holding the camera hand held that I need to start making some of those compromises. Ideally, you'd have all the time you need to set up a photo, but I'm sure when people or animals or moving, that's not always the case. If you have to choose in a blink, whether to touch the aperture of the shutter speed, which do you pick, or are there other decisions? You make it the last minute like that. That's a that's a hard one to answer. To tell you the truth, I think this kind of dive off into another area and people think photographers are very good at reacting to the moment, and they probably are. But I think this skill set that they have that most people underestimate is the prediction of what's going to happen, the anticipation of what am I likely to encounter? And so if I'm doing things right and I'm in tune with what's going on and the type of pictures that I'm trying to get, I am anticipating these changes and I'm making adjustments on my camera even before the possibilities arise in front of me. And so I'm making those changes ahead of time now. Granted, there are things that change when you're out in the field and it's too open ended of a question to be able to answer with with any single setting or something. Let's check maybe online. Okay, question John. Is the aperture on the depth that the field mawr are they used more for the technical side of the photo, or more for the artistic side of the photo? Or is that or both? Yeah, good question. They are used equally for both. It is something that it's a very easy way of controlling the amount of light, but it also has a big impact on how the images look. And I know a lot of people have gotten into a more serious camera because they want to have more control over the depth of field. If you shot pictures with your phone and you've kind of noticed that everything tends to be in focusing, you can't get that shallow depth of field well, it's because you can't get that shallow depth of field with a phone or a point and shoot camera in short, because it has a very small sensor on it and the type of lens it is on it. And so when you get to the larger SL ours and the mirror less cameras that have this depth of field control, you do want to start playing with it. And there isn't a best. There isn't. Shallow and shallow depth of field isn't best. More depth of field is. At best, it depends on the type of subject. When I do portrait photography, I'm almost always going for shallow depth of field. When I do landscape photography, I'm almost always going for more depth of field. It depends on the subject and your artistic vision of what that subject should be
Class Materials
bonus material with purchase
Ratings and Reviews
user-f3f891
I'm not sure my first review posted. But I LOVE this class! John Greengo is a great, engaging teacher who is really adept at representing the concepts visually and excellent at explaining them verbally. I love how he goes through examples with photographs he has taken. Even though I only have a Nikon Coolpix digital camera, it does have Manual, Shutter priority, and Aperture priority modes. Through his class I've gotten a really good sense of how to balance ISO, aperture, and shutter speed. It's a great overview for me especially since I am new to photography, I can play around with some of these settings, and I have a greater understanding of what I might need in a higher level camera in the future. Money well spend! (For $29, this is an absolute steal). John Greengo is an awesome teacher and I hope to take more of his classes in the future!
Megan Wagner
John is extremely articulate and is a great teacher with lots of visual aids and metaphors to help understand photography. I have been doing photography for a few years now and this class was a tremendous help in boosting my knowledge and refreshing my memory in multiple aspects of photography. The graphics that John uses are helpful and he even goes through images and asks which settings would be best to use and will go through the why. He makes things easy to understand and is very clear about the information he provides. I am so glad I took this course and I would highly recommend it even to an experienced photographer. Thank you John Greengo!
a Creativelive Student
Bravo!!! I am an adventure traveler and have been to many places in the world. I recently completed hiking the ancient Inca Trail in Peru to Macchu Picchu with only my Canon Power shot camera. Even though I have some great photographs, I found that I wanted better quality and decided to buy an upgrade to a SLR camera. I have had no idea how to shoot in manual mode and even when I improved quality by shooting in Automatic mode with my new camera on a trip to Jerusalem, I knew I needed to get to manual as soon as possible. I have an upcoming trip to hike to Mt. Everest Base camp and so I decided to check into this course via Facebook. I am so glad I did! I now have enough information to begin to practice as I prepare for my trek. I am confident that if I need further information as I learn, that I can participate in future courses to improve my knowledge and capabilities. Thank you!