Lessons
The Camera
19:20 2The Shutter
19:17 3The Sensor
10:45 4ISO
14:12 5The Lens
14:23 6Aperture and Depth of Field
15:59 7Focusing
15:07 8Metering
12:06Lesson Info
Exposure Modes
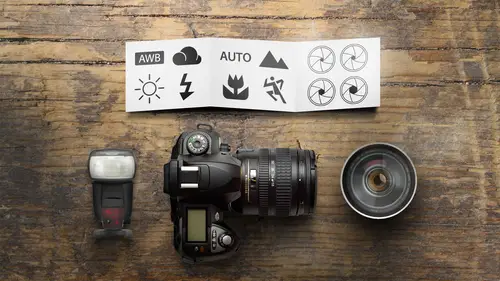
Let's get into the exposure modes. And so this is probably the big dial on the top of your camera that allows you to change the way shutter speeds and apertures are set on the camera. And that's what the style is all about. It's about controlling your shutter speeds and here, apertures. Now all of the cameras seem to have some manual options on him. All the good campus manual aperture Priority shutter priority program. We're gonna go through these now. Your camera probably also has ah lot of these automatic options as well. Now, the automatic options are going to set your shutter speeds and apertures for you. But they're also going to go in and make a bunch of other settings for you. And I don't like this because the camera is basically putting child safety locks on a whole bunch of features that you want to get in and do. And if you look real carefully in the menu system when you put it in this mode, you're gonna see that you can't change the exposure, the shutter speeds or the apertu...
res of the I s. So you have limited control over what things you control in the focusing or the menus. There's gonna be things that are great out and just not an option in there. And this is perfectly acceptable. If you're going to take your camera and you're gonna turn it to the auto mode and you're gonna say, Oh, excuse me, sir, could you take our picture? You're gonna give your camera to somebody who has no idea what they're doing. That's what these modes air for. Now that you're starting to get into photography yourself, you're gonna want to do things yourself. And these modes air gonna frustrate you because they've just locking you out of doing all these things. And I always kind of wondered it. I think doing something that I can't do myself, you know, maybe they're throwing a little extra mojo in there. That is something beyond that I could ever do in my own. And that's not to it all. If you know what you're doing, you can outdo all of these modes, all right? It is fully within your grasp. Toe out, do anything that the camera has its just knowledge. All right, so let's get into this. We'll start simple and we'll go a little bit more advanced as we move along, starting with the program moat. The program is where the camera sets shutter speeds and apertures and kind of a little secret about the program. Moat is it's basically the same. Is this full auto mode Pretty much All these cameras have this little green box or camera mode. This is the full auto mode. The difference is is that we have no child safety locks. So if we want to change her eyes so we could do that. The other difference is that in this little auto mode here, one of the most frustrating things to me is that the flash pops up whenever it's dark. Now we're gonna talk about flash photography and a little bit, but you don't necessarily add flash just cause it's dark. What if you're in a large stadium and you're trying to photograph something down on the floor? The flash is not going to do you any good at all, And so Flash really needs to be a conscious decision that you, as the photographer makes as to is Flash gonna help this photograph or not. All right, so that's something we'll deal with a little bit later on, but the program mode is going to set shutter speeds and apertures for you. Now. What sort of program? What what is the program? What is it really doing? Well, here's what the program does in general. It wants you to have a shutter speed that is easily handhold Herbal 1/60 of a second or faster in most cases. So that's kind of the defining factor of the program mode. 1/60 of a second. And then what it does is it goes in and adjust the aperture according to its needs. Now, one of the great things is that I'm pretty much all cameras you could do. It's called a program shift, which means Okay, you gave me those numbers, but I would like a different set of numbers that add up to the same amount of light. And so it depends on what camera you have, but generally the main dial on your camera, whatever dial that happens to be, if you turn it while it's in the program mode, you're gonna allow the camera to simultaneously change shutter speeds and apertures. It's gonna let in the same amount of light with all the settings, but it changes. Maybe it's faster shutter speeds. Or maybe it's more depth of field, and it's a pretty safe way to play around in here. But you do have to be careful off resets, okay? And so the problem with and I'm gonna pick on the two major brands here, the canon cameras, is that Let's say I put my camera in the program mode and I dial in a particular setting that I would like. I would like more depth of field. I want everybody in the room to be in focus and I go up and I take a picture. Actually, I do this again. I go up and I take a picture. I have it in a very long exposure right now, and it's FBI. So properly. So if I said it up like that and I take a picture and then I think you know what, Maybe I should go stand over here to take another photograph. My camera resets on me after about six seconds, which is very irritating because and I got a dial it back in and I gotta keep dialing it back in. And so for one off shots where you're just gonna shoot one picture of this one picture of that one picture of that it works fine. Now, before you Nikon users start getting too smug out there. Let's think about how Nikon cameras work. So Nikon camera. I put it in the program mode and I said in my particular setting, and I take a picture and I come over here, it's gonna be the same settings, which are kind of nice. But let's say I come over here and I'm like, Oh, I'm gonna do a completely different type of shot now And I just picked my camera when I shoot a picture. It set the way I had it set over there. It doesn't reset, so whether the camera resets or doesn't reset is both a problem. And so you have to be aware of that of what your camera does. Different brands will do different things, and so that's one of the reasons why I don't like the program shift, mo, cause things are either changing or they're not changing for me. Eso You got to be very, very careful with that, so it's not my favorite mode. It's okay for just a quick one off shot. The shutter priority mode is one that I don't use. I know there's some people out there that use it, but I'm not a big fan of it. And the reason I'm not a fan of this and this is gonna be kind of surprising for a lot of people who are new to photography because shutter priority. That's awesome. I know shutter speeds. I understand cheddar speeds. That's the one thing I really get, and now you're telling me not to use it. Why? Well, the problem is in very short, There's way too many options for shutter speeds, but not enough options for apertures. So if you set a reasonable shutter speed like 1/60 of a second, your camera will probably have the appropriate aperture. But if you go too far and there's a lot of shutter speeds to choose from, you want a really fast shutter speed. You go up to 1/1000 of a second. There's a good chance that your camera does not have an appropriate aperture to use without, and the same is true on the other end. If you decide to have more for a longer shutter speed, there's a good chance that you don't have an aperture to work with. There's just way more shutter speeds than there are apertures. And so there's a lot of mistakes that could be easily made when you're in this mode, if you don't have everything else set up in the camera correctly. Many cameras have about 18 different shutter speeds, but they only have eight apertures that they could match up with. Which means if you just kind of randomly go back and forth choosing cheddar speeds, there's gonna be 10 unusable settings in there. And so there's the potential for mistakes very, very easily in there. So I don't like Cheddar priority. So let's review I don't like any of the auto modes. I pretty much don't like the program mode. I really don't like the shutter priority mode that's not leaving us with much to go, and I can tell you right now that most photographers been most serious photographers spend most of their time in two modes. Aperture, priority and manual. Let's talk about aperture priority aperture value aperture. Priority means that we get control over the aperture and the camera will figure out the shutter speed now there's not as many apertures, which means there's a lot more shutter speeds that can be matched up. And so if we choose a particular aperture, the camera's gonna look for the correct shutter speed, and we can change this. And you might be thinking, Well, maybe I'm more concerned about shutter speeds. Well, that's fine. Open up to an aperture like 1.4, and you're gonna let in more light through the lens, which means you're gonna get a faster shutter speed if you want depth of field. Obviously, this is very easy to play around with, because you can just set that with the aperture and then you get the matching shutter speed that's going to work. But I'm off often using aperture priority, but my mind is on shutter speeds. I'm changing the aperture, but I'm looking at where the shutter speed is in order to get me inappropriate shutter speed for a given situation. And so I think this is kind of the best walk around simple mode, because you can leave it in one place that's fairly basic, maybe F 5.6 for general photography, but then you can quickly change it a few clicks, one direction or a few clicks, the other direction for doing different types of photography. So I really like the aperture priority mode. Now the modes that we've been talking about program shut a priority, an aperture priority have something in common. These air, all known as auto exposure moments. And what that means is it means that the camera, the computer is in ultimate control over how bright and dark your images are. Remember that light meter that we were talking about a little bit earlier? Well, it's assuming that everything that you are shooting is middle toned gray, all right, and we know that's not gonna be the case. And so we're gonna need to be ableto accommodate for these subjects that are brighter or darker than average. So what you're gonna want to locate on your camera is your exposure, compensation dial or but okay. And so it's usually indicated by a plus minus. Sometimes we have a nice little dial right on the top of the camera, but they're usually going to be either on the top of the back of the camera. There's this little button, and it's a simple way of making your pictures either a little bit lighter or a little bit darker when you're in shutter priority aperture priority or the program mode. So let's take a look at how this would work. So this picture right here it is too dark. Okay, you can see our subject on Australian playing. A didgeridoo is too dark. Our camera has confused this because it sees this white cloudy background and it's trying to darken the picture up. And in fact, this picture needs to be lightened up. And so what we need to do is we need to get this exposure indicator over to the plus side. We locate the exposure compensation, and we dial in a plus, perhaps a plus one exposure. And that's going to double the brightness and make our image brighter. Now you might see this indicated graphically in your viewfinder, or you might see it just simply as a plus one. It depends on the type of camera that you have. And so if I was photographing in snow, I was in Yellowstone in the winter time, where it's covered in snow. My camera had to have this indicator over in the + plus two range almost all the time because everything was so white. On the other end of the spectrum, If subjects air particularly dark, it's gonna fool the camera. This picture is supposed to be very, very dark, but the camera wants to record it at the middle setting because it thinks everything in the world is right in the middle and it's not. We need to dial this down to the minus to get this dark, these air, very dark skin tones and there in the shadows. And now we have the proper exposure. And so if you look at your picture and you're thinking this isn't quite the way it really looks to my eye, take a second picture and use this exposure compensation to make an adjustment. Now, from real world shooting that I dio, I rarely go beyond plus one in minus one. If in extreme environments like Yellowstone in the winter time, I get up around plus one in 2/3 and each of these little indicators is 1/3 or 2/3 of a stop, I don't know that I've ever shot a picture at over plus two or under minus two, but I suppose it's possible. So that's exposure compensation. And that's for the auto exposure modes program, shutter priority and aperture priority. All right, let's get serious, folks, we're going full manual. You guys ready for this full manual taking control of the camera. This is where you're setting shutter speeds, apertures and everything else yourself. So when I'm working with manual exposure, generally I'm gonna be using manual exposure over the other modes. If I know that I'm gonna be shooting in an area that's not gonna be changing in lighting anytime soon. So if I was gonna be going to a basketball game in a gymnasium, the lights don't change during the game. I'm gonna get my manual exposure set up before the game, and that's it. If I am gonna photograph a person and I said, Hey, can I get your photograph? Let's go over to the shaded area here in the park and I'm gonna take your photograph. Well, I know I'm gonna work with them in that environment for a few minutes. I'm going to set it up manually, and then I don't have to worry about cheddar speeds and apertures as I worry about focusing conference composition down the road. And when I do this, what I'm gonna have to do is I'm gonna have to make a decision. Shutter speeds and apertures. I'm gonna set one of them first. It doesn't really matter right now. We'll get into this a little bit later, but I'm gonna choose one, perhaps apertures. And then I'm going to be looking at my light meter, and I'm gonna set my light meter up towards the middle, probably for the first shot. Now, I will need to make a determination if my subject is a little bit brighter than average or darker than average, and I might need to adjust accordingly. But I basically pick one, and then I set the other according to the light meter. Now, before all this, I've already set my I S O. So that's kind of 1/3 setting that's already done before. This step has done it all. And so this is the way I shoot most of my photographs, because when I shoot photographs, I want to try to get the best shot possible, and I'm going to shoot several shots in order to get the best shot. So let's look an example of shooting manual exposure. I was in Cuba recently and they got these wonderful old cars. They're they're just beautiful cars, and I wanted to get a lot of shots of these cars driving down the street. So I'm photographing this beautiful yellow convertible as it's coming down the street. And if you could look over my shoulder at what the camera is doing as I'm panning with the car coming down the street, here's what would be going on. Now. I would like to ask somebody in the classroom to pick up a microphone to answer the question of Why is my camera doing this? Why is my camera settings my light meter changing when I'm in manual exposure? Can somebody explain? This is picking up some of the light from the sky in the background that's filling more of the frame? Exactly. My framing has changed. Okay, so we have more light back here. This is brighter here than it is then this dark part of the building over here and my light meter is picking this up because it picks up everything in the frame. Now. Did the lighting on the car change? No, not in any significant way at all because it's the same light. That's kind of reflecting on the car. Now let's imagine that I had taken this and I had used an aperture priority or any one of the auto exposure modes. What do you think? What happened in this mode? Well, here's what would happen, and you'll notice how the image gets a little bit darker as we go as we step to the right. And what the camera would be thinking if the camera could think is I've got the perfect exposure for every shot, you know. And it's taking into account something that I don't care about the lighting up here that's of no concern to me in the shot. And so I'm under a consistent lighting situation, the lights not changing significantly in this fraction of a second. And so any time you're going to shoot multiple photos, I like to get the exposure set for the 1st 1 and then it's done. I like to be, get it right, get it done and move on to other task. Then I want to worry about timing, composition and focusing things like that, and so that's why I use manual exposure, allies, because I'm doing a lot of pictures that I kind of know what I'm gonna be getting into, at least for a few minutes. Now, if every picture you shoot is completely different, I'm gonna shoot a portrait that I'm gonna shoot the Grand Canyon and I'm gonna shoot a macro shot, and then I'm gonna go shoot this car over here. If you're gonna shoot every shot different. It takes a little bit of time cause you gotta dial every single one in, and then aperture priority or program might be a better mode for you. But this is a system that works very good, requires a little bit of thinking, which is good for you and good for your images. That's how I work with it in the field. So next section is exposure values where we get to start to kind of play a little bit of a game as far as shutter speeds and apertures. So let's set the camera up for doing different types of pictures. All right, let's imagine we would like to freeze the motion of a subject. All right, so we got a bald eagle. It's coming into this water here. This is up in Alaska. This is really cool, because in this water, as soon as the Eagles came in close, all the fish started just going nuts in the water and this turbulence in the water. And to me, it just reminded me of like a navy jet going over the water and causing turbulence down there. So we want to get a nice, crisp action shot here, and so I'm gonna ask for some participation. And if you are on the left side of your couch, I want you to pick up a microphone because I'm gonna have the two of you on the left side of the couch. Pick up your microphones right now. Help me out in deciding what we're going to dio. First thing that we're gonna do is we're gonna We're gonna figure out what we set on shutter speeds, apertures and eso, and kind of the mindset that we go through as we're adjusting these so first kind of is a prerequisite. I always like to have my eyes. So it 100 because that's the best image quality. Okay, now those of you with microphones, what do you think is the next setting that I should make on my camera suggestions. Shutter speed. Shutter speed. Okay, pretty good. Actually, I would like specific numbers. If you have a specific number that you think I think maybe this and it's okay to be wrong. Just do your best, Calico. Either 500 or 1005 100 or 1000. Okay, what do we have over here? Say 500. Yeah, 500. Okay, you're in the right ballpark. All right. Now, the more experience have, the better you'll be able to make these guesses on it. That birds moving really quick. Okay? And when that comes out of the water, that is just as quick as convenience. So I'm gonna go a little bit faster because I really want to capture this action. 2/1000 of a second. Okay, so we got our I s o set because it was, like, the best image quality. We want a nice, fast shutter speed. And as far as our aperture goes well, is the background really important in this photograph? No, no, no. We really want to stay concentrated on that bird that birds important in the photograph. So what do you think we should do with the aperture, I think lowest possible causes. The very front of that isn't important either. You're trying to get the fishing stuff in the middle, right? So you want shallow depth of field? That right and shallow depth of field would be. What sort of numbers? Smaller numbers. Yes, that's correct. Yeah. So every fours looking at fractions, right? So, yes. So F four is gonna be very shallow depth of field in this case. So this is fantasy world. This is where I would like to be. All right, Now, let's take a look at the light meter to see what the light meter says about what's going on. Now the light meter is telling me that I am two stops over, and sometimes they'll blink or they'll have an arrow that indicates your mawr than two stops away from where you need to be. So I need to let in more than two stops of light. What should I do? How can I do it? What are my solutions? Suggestions. Thoughts? Turn up your eyes. Oh, turn up the I s o. Anything else? Yeah, Just the aperture. Yes. If we adjust, the aperture is this gonna let in more light or less light, it's gonna let in less light. So we've maxed this one out. It's not option. Now we can adjust the shutter speed, but that defeats the entire purpose of the photograph. So the only option His I s so And so we adjust the I s o until the light meter evens out and we get the right exposure. Now, how in the world do we do this In the moment that an eagle comes down and grabs a fish out of water, we do it five minutes before it doesn't and then we sit there and wait for it to do it is how we do it, Uh, in this particular area, Alaska. There's a lot of fish in the water and there's a lot of eagles. And actually, behind me in a tree, there were seven eagles that were taking turns going down and getting lunch. And so this is something that you can predict. You can dial this in ahead of time, and this is something that once you get good at this, your brain will go through this process in about three seconds. But it's nice to slow the process down and take it one step at a time. And so when you go out and shoot pictures after this class, take it slow. Don't be in a rush. Think about things carefully. And as you do this more and more you'll get faster at. Okay, let's do another shot. And if you're sitting in the middle of the couch, you can take the microphone and we're gonna try to maximize the depth of field. So here in Seattle, I'm not at Discovery Park, and I gotta see star right here in the foreground. But I also want to show the background because I want to show it in the context of its environment. So bring up our numbers. We're just gonna assume I s 0 But after that, setting recommendations on where I should set things, What should be my next study? The shutter speed could probably be longer so that it could capture the light that's coming from the sky. Okay, what are your thoughts? Um what are we trying to do here? You're trying to get as much in focus is possible. How do we get as much and focuses possible? What's the most critical setting, the aperture, the aperture. What aperture is going to give us the most things in focus The most depth of field 22. Are you confident about that? Yeah. Say it like your conference 22. There you go. Okay. Have 22 is gonna give us the maximum depth of field. Alright, Shutter speed. We can ask ourselves, how fast is that Sea Star movie? It's moving. Not very fast. Okay, So what would be our concern about shutter speeds? What do we need to be thinking about and aware of when we're selecting the shutters and forget lighting for the moment? Just what do we need to be aware of? What sort of movement do we need to be aware off your hand on the camera and holding the camera? Exactly what would be a reasonable shutter speed for hand holding a camera? Don't worry about the lens. Just a general shutter speed. 16 60th of a second. I am sometimes conservative and like to do one step for safety, you know, just just to be safe. Because I know I'd be safe at 1 So this would be a very convenient place to shoot the shot. We're gonna get a nice, clean image that I s 0 100 We're gonna get the depth field we want, and then we're gonna stop our handheld movement of it, and we'll certainly be able to stop the movement of the Sea Star 125th of a second. But let's take a look at our light meter. Ah, light meter says that we are more than two stops off. In fact, I just give you hit were way more than two stops off. Okay, So if we really want to capture the best quality image, what can we dio? What technique can we use? What tool can we use? I'm hearing a whisper tripod. If if we have a tripod, it's going to solve a lot of problems because it's mainly our hand holding of the camera that's forcing this 125th of a second. If we could put the camera on a tripod, then we can use pretty much any shutter speed we want. And we just dialled the shutter speed all the way down until the light meter evens out and flying two seconds. We can still use two seconds here, and there's not much movement in there now. Keep an eye on the photograph. Photograph we take. The picture comes out a little bit lighter than average. Does anyone know why this picture would come out lighter than expected? Is there something about what's in the photograph that would cause it to come out lighter than expected? It's a lot of darks. There's a lot of dark. I mean, what's in this photograph More than anything out there Seaweed, dark green seaweed in this photograph and your camera doesn't understand what darks green seaweed is. It thinks it's middle tone grey, and so it wants to lighten everything up. So after you take your first picture like this, you go OK, I need to make this picture one stop darker. I need to make it a bit darker. What's the best way to make this image darker? Aperture. Where would you change it to, um, I guess ticket down and step at a time F 16. Does that let in more light or less light? That lets in more light, so that's gonna make the problem worse. We need to make a darker If there was a 32 we would go to have 32 but we can't do it here now. Can we make it darker with eso? If we had a we could, but we can't. So really, the only option is going to shutter speed. But what do we need to do with the shutter speed toe? Let in less light to make this darker the way it really is in the world. Make it faster. We need to go to a faster shutter speed, which lets in half assed much light because it's half is long. So one second in this particular picture, it's best to have this off to the side minus one. And this is one of the things that well from somebody who's sometimes a little too organized, and I like to have things neat and lined up. I always like to have this in the middle of zero, but the fact of the world is, is not everything is an average of black and white. Some things are a little bit darker. Some things are a little bit lighter, so this is perfectly OK to have off to the side for certain subjects. Okay, let's do one more whoever whoever hasn't participated can participate here. This one, we're gonna do shallow depth of field. All right, so we want to shoot a nice portrait of somebody with the background out of focus. Okay. Gonna do are obvious settings here at I s 100 Now, what would be our first setting in the situation? You You want to set the aperture set the aperture? Give me a number. Um, to you, in a very shallow depth. The field. OK. Do we agree on this or not? Beth agreed. Yes. So we want the shallow a step the field possible cause we don't care about the background. We want the boy's face in focus now. Shutter speed movement. Parents of four year old boys. How fast a shutter speed do you need to stop their motion? Eight thousands of a second. Okay, So you've got a four year old boy. Yeah, she had it. You have four year olds at one point, and so you know that kids move around a lot. Okay, so we do need a faster shutter speed. Realistically, let's hear some ideas on what you think you would like to have as a shutter speed to make sure that it's sharp thoughts. That's ideal. Maybe 500 or 1005 100 or microphone use. Mike, I would say 2000 2000 of a second. Okay, so you can see what type of kids people have had, how much they moved around. All right. So the number that I had mentioned before for fast human action was 5/100 of a second, so that would probably be a good place to be now, Okay, he's he's moving around, but he is on his belly, and he's not physically on his feet running around, so we may have a little bit of leeway there, but this would be really nice and convenient. 1/2. Let's check the light meter to see how we're doing. Okay, So okay, at least we are more than two stops over, under exposed. We are simply two stops too dark. We need to let in two stops of light. It's really lucky that we chose to point. Oh, because we need as much light. Coming through here is possible. What should we do to fix this problem? Your thoughts. What do you think? How do we fix it? Two stops of light. This could be a way wrong when I say adjust the shutter speed to let in more light so that you have, like, a longer time longer time, which lets in more light Do you have additional thoughts? I didn't know. Maybe adjusting the I s o Okay, this is where you may be both right, A little compromise on both sides, and so we can probably shoot it to 50th of a second cause he's not physically on his feet running around. And then we would that would get us one stop of light and you notice one stop here. All of these air in one stop increments. That's that's what we love to work in double and cut in half. It's very, very easy. And then we would make up the difference by going toe s 0 200 Okay, so you can see how I'm always reluctant to go toe eso because your cameras image quality always gets lower when you when you do this and you don't do this unless you have to. But if you have to, you have to. And you don't you go with it. But you try to Max out everything else you can to keep the image quality as best as possible. Question immediately. Quick question is similar question from the previous photo that we were looking at. Couldn't you adjust the shutter speed two stops instead of adjusting the exposure I could? Well, I could get the same result. Well, I could have gone down to 25 at 100. Right? And that's a judgment call that you would better be able to make when you're in that situation to see, Is he holding still or is he moving around? And so you're gonna find different judgment calls and any of the numbers that I have given you for this? Yeah, they could be played around with a little bit, depending on the situation. Would you get the same photos? I mean, he was holding still, um, if he was holding still Yes, yes, yes. And it would be slightly better quality because I'm at I s a 100 rather than 200. And so that takes us through kind of the exposure setting experience. And there's there's a lot of these that you need to go out, and you really need to practice and play around with and take your time. Don't be in a rush. This is not a good time. Going up for a walk with your partner who likes to walk fast, and you need to stop and think about things. You need to really give yourself time to go through this process because every time you go through it you'll get faster and faster and faster. And then you'll be doing this before you even walk into the situations like I'm going into this room. One of them is that this and this and this and then when you finally get in there, it's just gonna be a couple of clicks and you're gonna be there. And so it's. It's a fun process to get very, very quick at, and it doesn't take that much. I mean, you guys are already getting in, and some of you are, you know, brand new to photography. Just you gotta work at it. Well, John, there are a lot of moving parts to this, so it is complicated, and I guess the best ways to go out and just start doing it like you said. So a lot of questions in the chat room. Tim cool dot com had asked, Is there really any reason to not use manual all the time in too quickly and you're not able to adjust for them? That's why, as a default, most of my cameras Aaron Aperture priority when I get started, because if I just said, Oh, there's something going on, I need to take a picture. I can pull it up out of aperture Priority. Take a picture and I know it's gonna be reasonably close to properly exposed. I can adjust the aperture if need be, and then Aiken get a picture that in that way. But it's generally I use manual more first set up situations that I can kind of predict what I'm going to be doing for the next little bit of time. Aperture priority is more. One shot here, one shot there. Everything's different, and I don't know what I'm going to shoot next. So you recommend practicing all of the different modes and so that you have them all in your tool kit. I know for myself personally, I have never used anything with manual. So when I want to use something else, I'm thrown off and it confuses me, and I don't know what I'm doing. Well, your camera has a lot of different modes because there's a lot of different types of people who are going to use that camera. You do not need to use all the moats on your camera in order to justify If you have cable TV, you don't have to watch all the shows on all the channels to justify having cable TV. Okay, you use what you like to use, what works for you.
Class Materials
bonus material with purchase
Ratings and Reviews
user-f3f891
I'm not sure my first review posted. But I LOVE this class! John Greengo is a great, engaging teacher who is really adept at representing the concepts visually and excellent at explaining them verbally. I love how he goes through examples with photographs he has taken. Even though I only have a Nikon Coolpix digital camera, it does have Manual, Shutter priority, and Aperture priority modes. Through his class I've gotten a really good sense of how to balance ISO, aperture, and shutter speed. It's a great overview for me especially since I am new to photography, I can play around with some of these settings, and I have a greater understanding of what I might need in a higher level camera in the future. Money well spend! (For $29, this is an absolute steal). John Greengo is an awesome teacher and I hope to take more of his classes in the future!
Megan Wagner
John is extremely articulate and is a great teacher with lots of visual aids and metaphors to help understand photography. I have been doing photography for a few years now and this class was a tremendous help in boosting my knowledge and refreshing my memory in multiple aspects of photography. The graphics that John uses are helpful and he even goes through images and asks which settings would be best to use and will go through the why. He makes things easy to understand and is very clear about the information he provides. I am so glad I took this course and I would highly recommend it even to an experienced photographer. Thank you John Greengo!
a Creativelive Student
Bravo!!! I am an adventure traveler and have been to many places in the world. I recently completed hiking the ancient Inca Trail in Peru to Macchu Picchu with only my Canon Power shot camera. Even though I have some great photographs, I found that I wanted better quality and decided to buy an upgrade to a SLR camera. I have had no idea how to shoot in manual mode and even when I improved quality by shooting in Automatic mode with my new camera on a trip to Jerusalem, I knew I needed to get to manual as soon as possible. I have an upcoming trip to hike to Mt. Everest Base camp and so I decided to check into this course via Facebook. I am so glad I did! I now have enough information to begin to practice as I prepare for my trek. I am confident that if I need further information as I learn, that I can participate in future courses to improve my knowledge and capabilities. Thank you!