Lessons
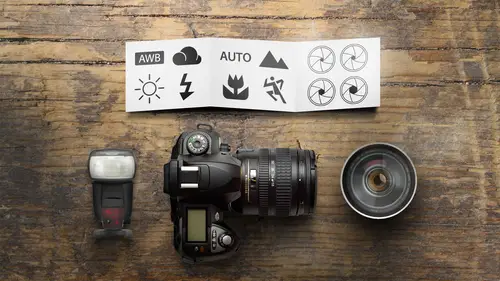
The Camera
19:20 2The Shutter
19:17 3The Sensor
10:45 4ISO
14:12 5The Lens
14:23 6Aperture and Depth of Field
15:59 7Focusing
15:07 8Metering
12:06Lesson Info
Metering
Let's move forward and we're gonna talk about meat Oring in the camera, how it reads the light and how we can get the best exposures while taking pictures. First off, just kind of a general idea of how the camera works in metering his back. In the old days of photography, we use something called a incident or handheld light meter, and this is because what's important to photographers is how much light is falling on the subject. Okay, that's that's the critical point. It's not where you standing, what lens you have, it's how much light is coming on the subject and the way that we used to do this as we would take a handheld meter and we would walk up and we would measure the light. And then right on that handheld light meter would be the magical settings that you put into your camera for perfect exposure. And this is how you should meet her, your subjects for the absolute 100% accurate metering system. It tends to be a little difficult when you're photographing mountains. It's a very lon...
g walk up to the top of the mountain to get the light reading, and then hike back down. So we use in our cameras what is called a reflective light, near which means light comes into the camera and it's measuring. The light reflected off of the subject. Now one of the problems with this is that you, your camera, I should say, doesn't know how bright or dark your subject is. OK, all it knows is how much light is reaching the camera. And there's a light meter that basically is the old fashioned needle does it digitally now, of course, and all cameras based this light meter on the fact that it thinks that everything in the world is this middle 18% gray, all right, it's not perfectly black. It's not white. It's exactly somewhere in the middle. So when you shoot pictures of objects that are middle toned gray, you're gonna have a very easy time getting the correct exposure. The problem is, is when you shoot a photograph of a subject that is very, very dark now, what happens is that your camera receives much less light, and you would think that you would get a dark picture. Well, that's what the hope would be, but in reality, what happens is the camera wants to brighten it up because it doesn't know that it's a dark object. It's trying to make everything the same tone ality in the picture. This is the same is true with a white object. It's reflecting more light. You think that you would get a white subject from that, But in reality, the camera wants to correct for that white subject and make it gray. And so any time you have a very dark subject or overy white subject, you need to be concerned about getting the wrong exposure. And so if you're out in the snow, if you're out in a very dark force with lots of dark trees, those air, some situations that are not average and all you have to do is be aware of what situations are not average. Now, the way that you're going to be dealing with this light meter is in your camera, usually on the bottom, just below the scene. There's gonna be a light meter down here, and this varies quite a bit from camera to camera. This is a graphic light meter, and I like these because it shows me an indicator in this case, were at minus two stops were two stops darker than we're supposed to be. This one indicates, were one stop over exposed and then right in the middle means that we have the correct exposure, or at least a middle toned exposure. That's not gonna be too bright to dark now. Some cameras use a numeric light meter, which is just simply a number that says that you are one stop under exposed in this example, or it might say that you are one stop overexposed. They're both reading the same basic information as to whether you're overexposed or under exposed, so you should take a look in your camera. And if you don't see this, it's because the mode dial on the top of your camera is in a mode like program or auto, and you need to flip it over into the manual mode in order to see this So this is necessary. You'll see it in the manual mode now kind of covering a couple different bases here, the way that the camera reads the light. Traditionally on cameras, they used what was called a center weighted metering system, which means it took a big circle in the middle and it measured the light. They're much more than it did off to the side. And so it was taking what was off to the side and saying that that's not as important. It's mainly what's in the middle of the photograph. The photographers wanted something a little bit more precise, and so the next type of metering that we saw was a spot meter, which measures the light in a highly concentrated small area of the frame. And this could be very good. If you're subject doesn't fill the frame or it's further away, you're able to get a very accurate reading with a spot meter. But you have to be very, very careful where you point that cause if you pointed at the background or something that's overly bright or overly dark, it's going to really throw off your light meter by far and away. My favorite metering system is a multi segment metering system, and this goes by a multitude of different names. For instance, Nikon calls it matrix metering. Canon calls an evaluative Metarie, and what it does is it breaks seen up into different areas, and it measures the highlights and the shadowed areas and comes up with a very nice compromise. And I have found that by using this multi segment metering system, I get good exposures most all the time. And very rarely do I need to make adjustments from that. So I highly recommend it, especially for anyone getting started in photography. It's gonna make things very, very simple now with digital cameras. It's so nice because we can look at the back of the camera and weaken judge if our pictures air too bright or too dark and we have a great way of judging this called the hissed a gram. And this is a graph, and I'm sure that you've probably seen this on your camera, and you've kind of wondered, What is this graphing on my camera? Well, it's telling you what's bright in what's dark. It's a graph of the tonal distribution, and the way hissed a gram works is it breaks up the entire scene into individual pixels, and it forgets about color. It's just on tone ality, and so, if you can imagine a black pixel and white pixel and a whole bunch more gray or middle tone grey pixels of slightly different tone ality. Now let's say we want to organize these. We're gonna put the black pixel on the left, the white one on the right, in all the pixels of equal tonality lined up into a column. And with this, we have a history Graham, and it's showing you a quick graph, and it's a quick way to look and go. We've got a whole bunch of grey pixels in a few pretty dark ones in a few pretty light ones. Now on your camera, rather than just 10 levels, it's measuring it in 256 levels, from pure black to pure white. As we measure this from bottom to top, we're talking about the number of pixels, and as we go from left to right, we go from darks toe light. So we have the blackest areas, and then we have the shadowed areas, and then the main part of the exposure is just your midtown's and then over on the far right hand side are going to be our highlights. And so you could see that in this particular photograph we have a lot of pixels in the mid tones, some in the shadows and very little in the highlights and the darks, and that's a quick way to look at your image so you can have a quick judge of. Is this too bright or is this too dark Now? I particularly like this, hissed a gram here, and the reason is, is if you'll notice in the left hand column the pure black column. It's empty. There are no black pixels. If I recorded a black pixel, there's not much I can do with a black pixel, because if you lighten up a black pixel, it doesn't know what color to become. It's just it's pure black. We've lost it. And if something is pure white, if you dark and white, you just get gray. You don't get any color information out of it. And so you typically don't want things that are perfectly black or perfectly why you want to try to avoid that, if you can. What this is telling me is that I have recorded everything from the darkest to the very lightest thing in the photograph, and I've captured that total information. Now, if later on, I want to go into some photo program and make the picture a little darker or a little lighter. I have a lot of good information to work with. So this hissed a gram was for a wild tiger in India. And if I had overexposed seen this is what the hissed a gram might have looked like. And you'll notice it's shoved way off to the right hand side, which means that I have a lot of very bright pixels. If I or my camera had made a mistake and we had undersea exposed it, it would be way off to the left hand side. And the reason that the hissed a gram is so valuable is that if you've ever ridden an elephant in India, you'll know that it's very hard to judge if that's the right exposure. Is your writing on the back of the elephant? But if you look at the graph, you can quickly kind of tell, Is this good? Or is this not good? And generally what you want is a mountain in the middle, and you don't want it stacked up on the left or the right side. I would have to say that you probably wanted the most careful off things. They're stacked up on the right side because you you you have blown out pixels. They're generally very, very bad. There are exceptions to every case, though, and every photograph will look slightly different with different images hissed. A gram will be different in, So I encourage you once you take a picture to look at the image on the back of the camera and then in order to get this to pop up, what you will do is a lot of cameras on the back of the camera. They'll have a button called an info button or a display button with Nikon cameras. They have this little four way touch tab. You have to go up and down to get to this information and frankly, for you Nikon users. You'll have to dive into your menu system and limit the ended. It depends on where it is on what camera. But in the playback menu, there's something called playback display options, and you have to turn on the hissed, a gram setting so that you can see the hissed a gram. But every camera that I know of for the last eight years has this option on it, and it's something that I use when I'm out in the field and I'm trying to judge if I got the correct exposure or if it's too bright or too dark. And if it is to brighter too dark, I would go back to my shutter speeds my apertures in my eye. Esos and I would make an adjustment, and I know this kind of a brief overview on the meat Oring and the hissed a gram section. But this is a fast overview, and so we're kind of getting yet into the main topics. So let's sort of see what questions This is spurred absolutely well. Christie had asked about shooting her black and white dog. That might be how tough that is. Tough, because that's the extremes. Well, it's, I mean, is that really much different than a bride and groom? You know, in the light in black? I would say that to start with, don't photograph out in bright sunshine. I would choose a cloudy day or a shaded area to get your photographs, and so a shaded area with no sunlight streaming through would probably be the best first start for that. And there's a about 1000 other things, but I think we're gonna have to stop it right? There is just that one good tip to start with that. One more question from Sam Cox. Is there a way to look at history Grams before you shoot or while you're shooting? This is one of the unique advantages of the muralist cameras. Because they have a digital display. They can show you the hissed a gram sometimes right in the finder. I'm a bit conflicted by this because I don't want anything over my subject material. But I will do like looking at the history Graham, because it's a lot more accurate than the exposure indicator in most cameras. Now you can do it with an SLR if you put your camera in live view, which means where you're looking at the back of the camera to view your subject. But that's not the best way to shoot most pictures, and so it's kind of exclusively with the muralist cameras where it seamlessly integrated into the shooting process.
Class Materials
bonus material with purchase
Ratings and Reviews
user-f3f891
I'm not sure my first review posted. But I LOVE this class! John Greengo is a great, engaging teacher who is really adept at representing the concepts visually and excellent at explaining them verbally. I love how he goes through examples with photographs he has taken. Even though I only have a Nikon Coolpix digital camera, it does have Manual, Shutter priority, and Aperture priority modes. Through his class I've gotten a really good sense of how to balance ISO, aperture, and shutter speed. It's a great overview for me especially since I am new to photography, I can play around with some of these settings, and I have a greater understanding of what I might need in a higher level camera in the future. Money well spend! (For $29, this is an absolute steal). John Greengo is an awesome teacher and I hope to take more of his classes in the future!
Megan Wagner
John is extremely articulate and is a great teacher with lots of visual aids and metaphors to help understand photography. I have been doing photography for a few years now and this class was a tremendous help in boosting my knowledge and refreshing my memory in multiple aspects of photography. The graphics that John uses are helpful and he even goes through images and asks which settings would be best to use and will go through the why. He makes things easy to understand and is very clear about the information he provides. I am so glad I took this course and I would highly recommend it even to an experienced photographer. Thank you John Greengo!
a Creativelive Student
Bravo!!! I am an adventure traveler and have been to many places in the world. I recently completed hiking the ancient Inca Trail in Peru to Macchu Picchu with only my Canon Power shot camera. Even though I have some great photographs, I found that I wanted better quality and decided to buy an upgrade to a SLR camera. I have had no idea how to shoot in manual mode and even when I improved quality by shooting in Automatic mode with my new camera on a trip to Jerusalem, I knew I needed to get to manual as soon as possible. I have an upcoming trip to hike to Mt. Everest Base camp and so I decided to check into this course via Facebook. I am so glad I did! I now have enough information to begin to practice as I prepare for my trek. I am confident that if I need further information as I learn, that I can participate in future courses to improve my knowledge and capabilities. Thank you!