Lessons
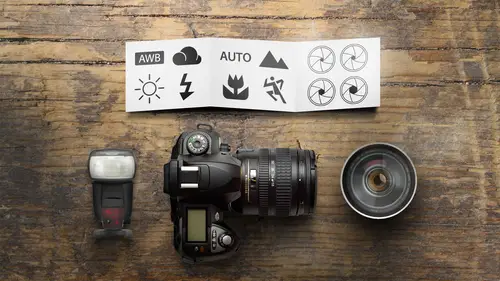
The Camera
19:20 2The Shutter
19:17 3The Sensor
10:45 4ISO
14:12 5The Lens
14:23 6Aperture and Depth of Field
15:59 7Focusing
15:07 8Metering
12:06Lesson Info
The Shutter
next subject is going to be the shutter speed, and this is controlled in the camera. So obviously it comes right after the camera. So a quick quiz for you folks of these two numbers which number is larger, okay, might seem like a foolish question because you didn't even think about things. Nobody pulled out their IPhone to get an application to figure out which number is bigger. It's obvious you don't even think about things. The problem is, is that when we talk about shutter speeds, most of the shutter speeds we talk about our in fractions of a second. But when you look at him on your camera, they're not gonna be listed as fractions of a second. It's just going to say eight, and it really means 1/8 of a second, which is a shorter period of time than 1/2 of a second. So big numbers are small and small numbers are big when we get into the shutter speeds. Now, the shutter speed range that you were likely to see on a camera is gonna range anywhere from 8000 1 8/1000 of a second down to 30...
seconds. So let's just take this very, very simply to start with one second. First off, it'll have a little little kind of quotations next to it to indicate that it is one full second. When you go from one second to two seconds, we've doubled the amount of time and we've doubled the amount of light. It's a linear scale. It's very easy to figure out now in photography. We like doing the these things called full stops, which means we are doubling or we cut in half. And so when you hear the term full stop, that stop actually refers to F Stop, which will talk about a little bit later. But it basically means to either double or cut in half. You need to stop more light. You need to stop less light, and then it will go on down, usually to 30 seconds on many cameras. Now, as you go up to 1/2 2nd well, some cameras companies have different ideas of what 1/2 2nd is. Some of them think it's, too, as in 1/ is 1/2 2nd some companies believe it's point fine because it's a decimal system, and that's that's a mathematical argument we're not going to get into here whether fractions or decimals are better, but your camera has one way of doing it. Just be aware that numbers get a little awkward between one and 1/4 of a second. And so if we go from one second to 1/2 2nd we've cut the light or we've cut the time in half and we've cut the light in half as well. Linear scale. Ah, pretty normal shutter speed would be, say, 1/60 of a second. But when you look at that in your camera, it's just going to say now. In between, these are third stops so that you could be very, very accurate. I don't tend to want to list them because it clutters up my screen, OK, but they're in there, and they're perfectly acceptable to use their a little bit harder to memorize, because the math is just a little bit more difficult multiplying them around, and 1 8/1000 of a second is going to be your top shutter speed. So let me grab a camera and just show you real quickly. Let me grab. I'm gonna grab an entry level Nikon. I think I see a few entry level nightgowns out here just set this up right here. And so with any camera that you have, there is probably going to be a dial on the camera. That and that Maine dial first off for cannons is going to be on the top of your camera, where your index finger would be pretty near the shutter release. For Nikon users, it's a dial in the back of the camera. Now the muralist cameras air kind of a little bit all over the board on where the shutter speeds air changed. But for those basic entry level cannons and icons, there's only one dial, and that's gonna control shutter speeds when your camera is in a manual mode or in some sort of mode that you can turn the shutter speeds. Now, this camera and I don't know if we could go to the live camera on this. This cameras kind of cool because it actually says as I turn this, it says 1 5/100 of a second, so I can actually see what's going on. 1/60 of a second will go down to one full second on this one, and we'll have the one with the two little quotation marks afterwards. And so that means it's one full second when I come back up to 1/60 of a second. Now, if I hold this up to my eye, hold it up to my eye. It just simply says 60 in there. So you have to be aware of those fractions. So wire shutter speeds important. Why are we going to choose a specific shutter speed one over the other? What's what's really going on? What's important here? Well, there's two aspects. Number one is a technical aspect. Obviously, a faster shutter speed is gonna let in less light in a slower shutter. Speed is gonna let in more light. And so, for certain technical reasons, we need to adjust our shutter speed to change the amount of light that's being let in the camera. But there is also an esthetic reason why we choose shutter speeds. We're going to choose a fast shutter speed to freeze motion, and we're going to choose a slow shutter speed. Tobler, the motion. How fast a shutter speed to freeze it and how slow to get it blur. Well, that depends on how fast your subject is moving. So let's take a look at our shutter speeds and some photos, and what I want you to really be aware of here is time and motion on a very fine scale, you know, time, days and weeks. That's pretty easy. We're just gonna take it down two seconds and fractions of a second. And with motion, you need to be really critical in how fast is that movie? So the fastest shutter speed that you're gonna find on most cameras is 4/1000 of a second. So this is gonna be good for stopping things that are moving very, very quick, like a hummingbird. And it's very quick moving wings at 2/1000 of a second refreezing a dog in flight. Okay, not only we have heavily frozen the dog and flight, but notice the water droplets around the dog are also frozen. Water moves very, very quickly, and you need a very fast shutter speed, like 2/1000 of a second in order to freeze the water. All right. Give you a little bit of a warning here. I coach on a cross country team, and so there's gonna be lost a cross country running photos. They're great examples of movement. And so 1/1000 of a second use you can see here has been a very good job freezing the legs and the arms and the hair, and we can see the face very, very clearly. So that's Ah, good job stopping that human motion. I'll give you a couple of key shutter speeds is we're going through the list here. 5/100 is good, cause it's It's gonna be the minimum shutter speed that you would want for human action for fast human action. So sports and dance you really don't want to go below 5/100 of a second because you're going to start getting a blurriness in the shot. As you'll see. That's not a good thing. And so for freezing that action, you want to choose a fast enough shutter speed, but it doesn't help to go overboard with this. Okay, this picture would not be made better by going to 1/1000 of a second. Because once something is frozen, can you be more frozen than frozen once you're frozen? That's it that you stopped moving. And so you want to choose the shutter speed just fast enough for stopping the action. Sometimes I like to go one extra just for safety reasons. Okay, this is 5/100 of a second. But now we have blurriness. Why do we have blurriness? Because those birds wings are moving faster than humans move. All right, you have to be very aware of how fast is that really moving? And so because it's blurry doesn't make it a bad photo. Well, it depends on what you want in a photo. Aesthetically, I kind of like it because it shows some of the motion, and a little bit of blurriness in the right area can show motion and can give a that thought, which could be very helpful in a still photograph as we move down to 2/50 of a second. If you notice the feet and some of the mallets that they're using, they're having a bit of blur in there. And we don't want that blur in a sports figure where we're looking at their face and their faces a little bit blurry. But in this case, it's still acceptable. It's an acceptable area to have a a little bit of motion visible now. If I had to draw a line as to where the faster shutter speeds kind of move into more your normal shutter speeds. Ah, 125th is a very pedestrian, normal shutter speed, as you can see here, stopping the motion of some camels legs that are walking in the desert. They're nice and clear. 125th of a second did a pretty good job stopping the motion back to the cross country races. Now this is a terrible photo, and it's because I did not choose a fast enough shutter speed and one of the most irritating things to per person viewing an image is an image that is slightly out of focus that you want in focus. And so you need to have a faster shutter speed or potentially a slower shutter speed. There's gonna be a middle ground with certain moving objects that is just a no man's land. You don't want to be in these middle shutter speeds. 1/60 of a second is another key shutter speed. What I like about this is it stops casual human movement quite well, and so if somebody is just kind of walking or standing there, you probably need 1/60 of a second. In fact, if your hand holding the camera that would be varies according to a lens and a few other things. But that's kind of a good general number as to what sort of shutter speed can you handhold the camera? You can see these people in Varanasi, India. They're moving around, but they're not blurry. 60th did a decent job stopping the motion. Now, once we get down to 1/30 of a second, we are getting into the slower shutter speeds. And so the faster something is moving, the more blurriness we're going to get. And this blurriness can be a lot of fun. This is a panning shot. All right, So is the The dog is coming in front of me. I am panning with the camera. Okay, so one of the things just a little sports tip for everybody out there Rarely do you see stand at the side, sidelines and go. Okay, here they come. Snap. Here they come again. Snap. Now you don't do that. You want to watch them in the viewfinder and you want a pan with them. You probably want to get a series of shots, and this is what I'm doing here. But I'm using a slower shutter speed, right as they come by in front of me. And I love these 15th of a second shots because we could get this nice, blurry background. And if we pan really smoothly with our subject, they'll be sharpened. Focus. Very challenging shot to get. Expect to get a lot of throwaways when you do these. All right, here's what happens if you leave the camera stationary. Okay, They'll the runners are going to be blurred, and you might have a fun little mirage of colors going by there. That could be kind of fun, But you're not gonna get sharp images of your athletes moving by now in this series of pictures, this is the 1st that I used a tripod down an eighth of a second. You're probably going to need a tripod now. You'll notice in the front row. These tulips are very, very blurry, all right. And the ones in the back row are not blurry at all. And I'm gonna ask our in class audience to see if you can answer the question. Why air these flowers blurry? And these ones Not even though they're all outside. They're all being affected by the same wind. Why are these blurry? Why are these not blurry? Can anyone answer if you can pick up a microphone? Somebody, please. I'm going to take a guess. And either one. There's wind or two. There's focus problems when the wind is equal, the whole area focusing. I'm focused on everything you can actually see. Some of the leaves down here at the bottom are in focus, so there's something else that's causing these to be blurry and those to be sharp. You need to think about what's moving. Anybody else have an idea on a tripod? I am on a tripod. This is very tricky. And you know, most people don't really think about these things. These are blurry or because they are closer to the camera and their larger on frame, so their movement is more apparent. All right, so if you do this, your hand is moving quite a bit and you do it out here. It doesn't seem to be moving this fast, and so this effects, how blurry something is, is how close are you to it? And if you have subject at different distances ones that are closer to you that are bigger on frame. That air moving across more pixels will be more blurry. So I need a faster shutter speed to stop these. But a slower one to stop these. See, you gotta really be thinking about motion down at 1/4 2nd doesn't mean all your pictures down here are gonna be blurry pictures. All right, if you use a tripod and you take the precautions to make sure that your camera is not moving and your subject is not moving during that 1/4 of a second, you can get perfectly sharp pictures at any shutter speed, so long as everything is still okay. Here's another kind of tricky one up in Banff, Canada. This train is moving through the shot, and it's very blurry down here. But as we go around the curve, it's not very blurry back here now. Part of that reason is because we're closer to the train, right? But there's another reason why this is sharp and this is blurry. Does anyone know a reason? Second reason, beyond just proximity sighs. The other factor that's important in motion is the direction of the motion. If you have somebody moving across in front of you. They're moving, apparently very quick. Have you ever been driving down a long straight road and you're coming straight onto a car and it just doesn't seem to be moving at all, and it's just barely getting closer. And then you go right by when it's coming straight at you. You don't notice the movement as much. And so subjects that are moving straight towards you don't have his great of apparent movement as something that's moving across right in front of you. So the direction of the movement and the proximity of the movement are both important. If you like getting those nice cotton candy shots of waterfalls and rivers, you're gonna want to try to get down around a second in order to do this. And so we're gonna see a lot of water shots in the slower shutter speeds. Two seconds. Shooting some fireworks at night. Don't want to leave the shutter open for too long because we get multiple bursts on the fireworks. But two seconds I've shot fireworks anywhere from 1/60 of a second down to maybe 30 seconds. In some cases, it kind of depends on how dark it is outside what type of fireworks show how Maney fireworks they're sending up at any one time. If you like to do nature photography your often around great places at sunrise and sunset. And if you're photographing before the sun is up in the sky or after it's gone down, you're gonna need a tripod, and you could do amazing shots. After the light has seemingly disappeared, your camera can sit open for four seconds. And your sense. Ercan. Just absorb the light and create an image that's actually better than what you can see with your own eyes. Eight. Second some or nighttime exposures here, our library in downtown Seattle. You can notice the flags are whipping around in the wind a little bit during that eight second exposure. But by doing that, we're able to kind of get the ambient light, that little blue twilight in the sky, as well as the artificial light of the downtown city lights. I like doing nighttime star photography, so this is down from Monument Valley. I needed a 15 2nd exposure to capture the moon, illuminating the mittens as well as getting the stars in the shot as well. A 32nd shot, which is his longest shutter speed is you're likely to have on a camera. This is light painting. Hi. This is a self portrait, and what I did is I took a headlamp and I swung it around with an led red lamp on it for 30 seconds. And I wanted to get the stars in the upper right hand corner as well as the path of the light. And so you can either use the light as a subject or you could light up something else with your flashlight and that kind of dives into a whole another area photography, which could be a lot of fun. But this is one of the great things about having a camera where you have manual controls and you can set it up and do these things on your own great thing to do if you were out camping. So that is shutter speed. So let's maybe see if we have any questions in class regarding shutter speeds, recommendations, thoughts, anything or online. We have questioning glass. I'm wondering when you were talking about the you wanted to do, um, the lowest possible, um, speed for that shot because at a certain point it's not going to get any crisper. So the difference between 1 versus 1 8000 you don't want to go on the lower end of that. I was just wondering why, Why? You wouldn't just go at the highest for, you know, just just to be safe. Just to be say, the problem is, is that you are essentially stealing. Resource is from other areas of your camera. And so if you set 1 8/1000 of a second, that's a very short period of time. You're gonna need to make that up in one of two areas. Either you're going to need to open up your aperture in your lens, which we haven't really talked about, but you might already meet maxed out. There may be no room on that, or you're going to need to increase the sensitivity of your sensor, which we're gonna talk about next, actually, and when you do that, you start losing quality on. So it's a balance of these three factors, and we only have one of the factors in the books at this point now, but you want to do it because it's gonna make the other sets settings better quality in most cases, anyone else from the studio audience. All right, we'll have some questions online. John R. J. Shikhar would like to know what shutter speed do you suggest for concert or club photography? Because it's low light and the subject is moving. So kind of compounds the problem right? And there is going to depend a little bit on your lens, your angle of view because how close you are to your subject, what direction it's moving. I was in a very low lit bar and the I was very, very close up, and I had a very fast lens, which will get into a little bit. But I was shooting at 1/60 of a second because that was casual human movement. There was somebody playing the guitar, and they weren't radically jumping around. They were casually playing their guitar in 1/60 of a second was kind of that balance between low light and action stopping. But I've seen the number of musicians who move around much more quickly, and you're going to need 100 25th or to 50th of a second, or maybe 5/100 of a second. But if your subject is blurry, it's probably not going to be good. I mean, there is a chance that you could get a blurry shot of the lead singer, but chances are you're gonna want to be able to identify their face, and so you need and you really critically have to get a shutter speed and compromise with the other settings. And so making sure your pictures is sharp is one of the most important things in photography. Because there is no software that is out today, or even that I can imagine in the future, that's really going to be able to solve out of focus problems.
Class Materials
bonus material with purchase
Ratings and Reviews
user-f3f891
I'm not sure my first review posted. But I LOVE this class! John Greengo is a great, engaging teacher who is really adept at representing the concepts visually and excellent at explaining them verbally. I love how he goes through examples with photographs he has taken. Even though I only have a Nikon Coolpix digital camera, it does have Manual, Shutter priority, and Aperture priority modes. Through his class I've gotten a really good sense of how to balance ISO, aperture, and shutter speed. It's a great overview for me especially since I am new to photography, I can play around with some of these settings, and I have a greater understanding of what I might need in a higher level camera in the future. Money well spend! (For $29, this is an absolute steal). John Greengo is an awesome teacher and I hope to take more of his classes in the future!
Megan Wagner
John is extremely articulate and is a great teacher with lots of visual aids and metaphors to help understand photography. I have been doing photography for a few years now and this class was a tremendous help in boosting my knowledge and refreshing my memory in multiple aspects of photography. The graphics that John uses are helpful and he even goes through images and asks which settings would be best to use and will go through the why. He makes things easy to understand and is very clear about the information he provides. I am so glad I took this course and I would highly recommend it even to an experienced photographer. Thank you John Greengo!
a Creativelive Student
Bravo!!! I am an adventure traveler and have been to many places in the world. I recently completed hiking the ancient Inca Trail in Peru to Macchu Picchu with only my Canon Power shot camera. Even though I have some great photographs, I found that I wanted better quality and decided to buy an upgrade to a SLR camera. I have had no idea how to shoot in manual mode and even when I improved quality by shooting in Automatic mode with my new camera on a trip to Jerusalem, I knew I needed to get to manual as soon as possible. I have an upcoming trip to hike to Mt. Everest Base camp and so I decided to check into this course via Facebook. I am so glad I did! I now have enough information to begin to practice as I prepare for my trek. I am confident that if I need further information as I learn, that I can participate in future courses to improve my knowledge and capabilities. Thank you!