Adobe Photoshop Blend Modes Will Change Your Life
Lesson 1 from: Adobe Photoshop Blend Modes Will Change Your LifeLindsay Adler
Adobe Photoshop Blend Modes Will Change Your Life
Lesson 1 from: Adobe Photoshop Blend Modes Will Change Your LifeLindsay Adler
Lesson Info
1. Adobe Photoshop Blend Modes Will Change Your Life
Lessons
Lesson Info
Adobe Photoshop Blend Modes Will Change Your Life
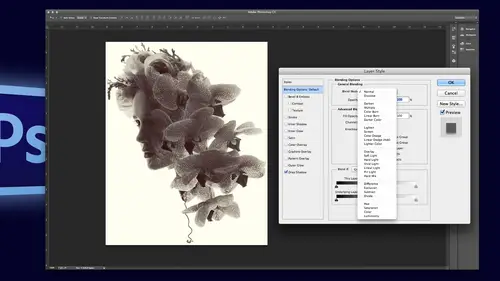
If you don't use blend modes regularly, you're going to love this and say, holy crap, I didn't know how easy that wass, um, blend modes are awesome, and honestly, I didn't know about glenn modes like, really how you could use them until maybe I don't know, maybe three years ago, um, I just didn't know they existed, so I'm going to show you what they are and how they can play a role, not just in creativity, but also impracticality I I love them, and I mean that sincerely okay, so now that I said that, what our blend modes alright, blend modes change how pixels interact with one another, which sounds really fancy, but the two main applications is it changes how layers interact with one another and how a brush behaves that's the gist of it, but then there's a torrent of ton of different things, so I'm going to go to like, not the more scientific but like kind of break it down. Really? The easiest thing to do is demo, but let's, take a look so there's blend modes four layers adjustment lay...
ers, brushes and tools there's blend modes for clones stamped healing spot like any of those brushes over there you can change the blend most and fundamentally when you're changing the blend modes on tools and brushes your changing how they function for example may be the only affect the highlights may be the only affect the shadows may be the only affect the colors and then layers that for example is this how we had textures and and it's deciding if only the light tone starts throw through the dark which doesn't mean anything until you see it in practice all right so it's like what the category's all right so I will show you where you see these menus would open up in photo shop in case you've never seen them before but I wanted to talk about them um these are the blood moans that currently exist and they're in different categories normal dark and light and contrast comparative and hugh saturation limits but what that means is darken darkens everything and light and lightens everything really what it means is if you have two layers and you put it to darken it'll in some way combined the photo to make a darker result but each one of those darker versus multiply versus color burn it does it in a different way and I can actually give you the mathematical ways for example darken whatever is darker and the top one replaces anything that's later in the bottom whereas multiply actually blends them with an algorithm there's all but you really just have to see it um but but it is there are very specific ways they all work contrast so the contrast um blend modes here they will of course play with contrast right um but they're also used when you're doing sharpening and I'll also come into play when we do our next section after lunch which is frequency separation advanced retouching your start playing with some of these contrast modes they become very important also use them for burning and dodging we'll talk about that comparative don't use very often it doesn't have is much practical application on hugh saturation luminant really the big one that I use his luminosity and I'll show you how and you'll we really really pleased with that I'm sure just a quick note to write down is when you're in the blend mod's okay south I think there's twenty seven of them it is a pain if you're trying to figure out what you want to dio to click through twenty seven to see which ones right so if you click on one and then hold shift minus it moves you up the list and shift plus moves you down so it's much easier than just trying to guess and click on different ones all right so these are five ways that blend moods have changed my life my photoshopped life that is because I'm not that foreign photoshopped this my only life I think you know, kind of okay so the categories we're going to talk about how blood would have made such a huge difference for me retouching textures burning and dodging toning and then created techniques so I am going to go ahead though and first will just cover the essentials you could take a look at what this all means I'm going to be using this photo throughout the day is kind of ah sample constant photo um but it works with anything it has like tones and dark tones is basically what I needed all right, so blend roads exist in one of two places well there's actually a million places but two main places you'll care about all rights over here in the layers palette where it says normal here are all your blend modes and when you select these blend modes you're changing how that layer that top layer is interacting with the layer below it. The other place the most commonly would be playing around with blend modes is over here with your tools and it pops up here next to mode so you change your blend modes of your tools here you change your blend modes of your layers here so let's take a look I'm going to create a new layer and I'm just going to grab a grady in I want a grady in't from black to white and I'm just doing this for demonstration purposes don't worry too mmm mmm mmm do there. Okay, perfect. All right, so we're gonna dio half black and half waits that you can see what happens. All right, so the first one is normal, right? Normal makes sense. Okay, remember how I said this whole section is darken? Each one in a different way darkens the photo below it interacts differently. So if I click darken basically what it does is that top photo wherever the radiant was darker, it makes it black like it. It just makes it darker. It's a replacement. Okay, it's not really blending you see that it's? Just replacing whatever's darker becomes dominant, but if I switch it to multiply, see how it switched to a blending a little bit more of a blended option there. Okay, but then let's switch overto lytton. Okay, so now anything that was black basically disappears, but anything that was white in the top becomes dominant screen is more blended. Okay, so though I mean, those were basically important to understand how light and dark and work, but we'll see in practice let's, take a look, however, at the contrast modes so we overlay soft, light, hard like vivid light. The ones that you use most often would be overlay soft, light and hard like and you use thes mostly and adding textures but if you ever have a photo that looks just a little flat maybe just looks a little dull and you want to pop up the contrast but you don't necessarily want to have to do it in curves if you go teo your blood modes and you change you duplicate the layer okay duplicated the layer and I change the top lor too soft light it adds a bit of contrast but what's great is that came back off the a passage e so if you want I could just make that picture of a little bit more punch I will often do this if I have a photo where I've photographed it backlit it's just a little bit flat but then I go into curves is getting too heavy sometimes just duplicating that layer and changing the soft light is going to make a big difference overlay is a slightly stronger version you didn't see too much change we see a little bit there a little bit more contrast and hard light is a little bit more contrast than that even so contrast okay let's go in to more concrete examples I am going to skip over and start with retouching because that is the first and most important way that it has changed my life okay all right let's start with going to start with handling wrinkles for example all right so when somebody has bags under their eyes eyes or wrinkles you don't really want to completely get rid of it it's part of what they look like I mean she wouldn't look like her if it was completely smooth under the eyes it wouldn't be realistic, but when you use the clone stamp, it starts to look blurry right? When you clone over just a little bit, you don't want to get rid of it completely, so maybe you use twenty percent or thirty percent every time you go over, it just gets a little softer and then you could tell that it's been retouched. So the first and most important way that I've used this for retouching is changing the blend mode of my clone stamp. This is an awesome tool have duplicated my background I'm selecting my clone stamp and I'm going to change the blend load. All right, so here is what I want you to remember. All right when you want to light and shadows, you change the blend moto lightened when you want to darken highlights, you change the blend mode to darken, so when you are filling in wrinkles or shadows under the eyes, you are trying to light in the shadows so you change your blend mode to leighton. All right, so what this does is it targets your clone your clone stamp instead of just cloning everything what it'll dio is if your lightning it won't touch the highlights it'll on ly fill in the shadows so it leaves some of that realistic detailed there and it gives you more of a realistic retouch so let's go ahead and zoom in and this works for um it works for wrinkles and blemishes and under eye so let me pick slightly higher opacity and fill in under the I c before or after seo it's still maintains some of that original texture but it fills it in it just bats off some of the darkness in the shadows there and you don't have to do I'm doing at sixty percent I mean that is an extremely high capacity but it still retains some of that original texture I'm actually in my next section for advanced retouching going to talk about a better way to do this or it's more time consuming it's much more advanced but it is a really great way of maintaining all skin detail but lightning up shadows and getting rid of blemishes and is called frequency separation okay, now another thing that I'll dio for retouching is when I'm using lightened is sometimes I'll have a subject who has a bump in their nose and the reason you can tell that they have a bump in their noses because the highlight isn't smooth I don't know if you've ever paid attention to that but you'll see there'll be a little dark spot word I'll jump over well, if you use your clone stamp on lian yu can actually just smooth out the highlight on the nose so you can't see that imperfection or that bump so if anyone has a concern about a bump in their nose or maybe um discolored skin that works great I'll also use it um if somebody has like sometimes people get a little bit darker just hear a little bit heavier if you use your clone stamp on like and it just lightens it up a bit you know it makes it look like they're a little less heavier in the face because what happens is people skin kind of pools okay, so it'll look a little darker if you like enough those shadows it makes them look skinnier so that is something I will do as well. All right, so that is light and let me go back to my my power point real quick or my keynote so I can read you. Um if you want to take a picture of this you want to write this down. These are the most important ways for retouching that blend modes come in handy so I cloned on light and under the eyes and to get rid of wrinkles I clone on darken to get rid of highlights and oily skin so if you ever have someone who's got a bright highlight on their nose or bright highlight on their forehead you could darken that down just a little bit using your clone stamp on darkened if you've ever tried before, what I used to do for highlights is I would select the highlight with a lasso tool than try to darken it down and levels and then like then the contrast is all wrong it doesn't match, so this tends to be a much more natural way to do it next one the spot healing enlightened or darken to get rid of straight hairs talk about that um screen blend mode for whitening teeth or lightning teeth contrast blend modes for sharpening and then frequency separation we're not going to demo it here, but if you watch the next section, you'll see it in practice so let's take a look at all these so we just did the clone stamp on lighten all right, well, let's take a look an instance where maybe you would want to get rid of a shiny highlight let's say for this girl you're looking and you think that highly on her nose is too bright or the highlight on her forehead. Maybe somebody just has a little bit more oily skin if you take that same clone stamp and you change it to darken now what is going to do is it won't effect like the neutral or the dark tones but just the light and I could just knock this down in brightness a little bit, but it does it in a more natural way or for example that's highlight let's go on her forehead here so I could just knocked out a highly little bit and right now I'm at forty percent you could do it at sixty percent you could do it at eighty percent whatever you need to to knock down a highlight so but have a subject who walks into my studio with oily skin the first thing that I do is I have these little oil blotters okay? And I tried to use those. The next thing is I would try to use a powdered makeup instead of a liquid makeup, but if I don't have those options uh the next thing I do is try not to use a contrast the light remember how in section one I said if you use a really harsh light source, it makes your skin look more oily if after all of that it is still oily that's when I go ahead and use my clone stamp on dark and write another thing because we're focusing um we're basically controlling the power of this clone stamp you could go ahead and get rid of the red lines in the eyes through cloning by changing until lytton because that's what you're doing you're trying to light and when you clone not just flattened out the I and clone everything I think I thought question yeah there is one uh one pai pai wants to know is there a difference between excuse me? Is there a difference changing the blend modes on the clone stamp tool versus using normal mode on clone stamp but changing the blend mode on the new retouch layer toe lytton yes, it just functions differently because it's actually sampling and pasting the result differently versus the other one is just saying okay I created this clone now change how it's represented versus when you're actually doing with the brush it's actually picking up different pixels so the results you can get similar it's just better to do it using the brush um okay so I talked about clone stamp here um I probably often would get rid of maybe the veins in the eyes though maybe not with my clone stamp but maybe with spot healing or healing if you look I have a mod right there as well so I'm telling it and this focuses it more okay as I'm tracing over this mane don't go ahead and look at the eye and see other veins and give me more veins I'm telling it I'm trying to get rid of darkness if you miss the first section um when we were using the spot healing brush whatever you trace over you're telling photoshopped that it doesn't belong but you don't want it there and then photo shop is supposed to guess and replace what it thinks should be there well in this case when you say I want it to be lightened you're saying right away okay don't give me any more veins the whole point is that we're making this later so you're targeting your brush better um and so you can trace around and achieved that a bit better say and I'm going to dio I'm also going to do normal for this over here and see how it does so does pretty well I want to see how much it would mess up not too bad but something like that where it's kind of grabbing other veins light and would be better now similarly kind of that same train of thought is you can also go ahead and do the same technique with hairs so in this case if I'm trying to get rid of straight hairs it would be the same thing I can use the healing brush and change the blend mode or the spot healing brush and I could say I want you to leighton serious skin okay, I would say I want you to lighten to get rid of this because it's on a white background if it were a blonde girl on a black background I would say I would want to darken with my spot healing so I'm saying okay, focus the point of this in so you could do that with any of these tools over here light and dark and with your spot healing your brush, your clone stamp. Those would be kind of some essentials that I would start off with this is that she's? Not that she's having but see that little darkness here too. You could just smooth that out a little bit by putting your clone stamp on light and and that's something I do whenever someone has just like, a little bit of uneven skin or a little bit of rough skin. All right, so take a look. Um, all right. So, let's, take a look at hair retouching more seriously. We're going to do some intense harry touching later, but what would you do if you saw this? Okay, it was supposed to be a big headpiece with hair, and this is what they did for me. Okay? This is fake hair in a a wad, and then this is her real hair, and I need to fill that in and it's such a hassle. So what I have found works really, really well is you can use your clone stamp on light in her dark and to fill in dark spots in the hair and that's what we're going to do with our advanced retouching later, um, I'll show you a couple things that I might d'oh all right, so for example, if I slept down here with light and what'll happen is it won't fill it in at the bottom increased my capacity because it's not light and name it's already dark doesn't make sense it's it's too dark areas there's nothingto lighten so it won't do too much but watch it fill in appear so I can fill it in and it kind of blends it in the key with this is the challenge is trying not to have too much of repeated patterns showing up so the other thing that I know I would dio is I would do a lot of copying and pasting trying to blend things in for example, I mean, I can keep going forever and ever on this, but I lay it in when I want to let in a dark area fill it in a little bit so says somebody too if they have the hair pulled back maybe in a hair tie and they have that space that shows up sometimes like thin pastures of hair or whatever it may be. This also works for people who are bolding lightly. You know, I'm kind of feeling a little bit if it's totally bald there's no hair to sample from, so that won't work all right, so for example, if I back up, I mean just what I did right there you know, kind of targets fills it in, and then, of course, I could come over here with darkened and fill in the dark area. The reason I'm not just using regular clone is because regular clone just will cover everything, see how covered there, the highlight, like, I can't just do it all at once because it'll just start layering, but if I do light, it'll just fill in the shadows, and if I go back with dark, it'll just fill in the highlights, and so it gives you more of a realistic look with hair instead of just covering and duplicating the same pattern. Um, so same thing. Um, let's, go to some of these hairs. So for example, if I wanted to get rid of, maybe you know, this lighter hair here, I changed my clones, sam, to darken, and I can clone out the lighter hair, and it keeps that hold that texture of the noise. Sometimes when you clone, you can see that it blurred it when you're at a low opacity, but when you're using more targeted tools, like the clone stamp on light in the dark, and it gives you more control than you come up here and it's like, okay, this one, I have too late, and this is not actually how I would re touch all these crazy stray hairs because it would take forever so I'll I'll give you some tips but for filling in hair I would definitely use clone step on lightning again so when would you you're going to make a lot of changes of the hair when would you add mohr layers because if like you did twenty steps toe add her hair and then you realize oh I need to go back five because I didn't like that one would you start to add more layers to that I'll do that often what I would do instead of making a huge file that was on my computer down I'd create a new blank layer and then when you when you're doing this cloning you change the sample from current to current layer and below because if you're on current there's nothing in it but if you're on current layer and blow it sampling the hair on that middle layer and then it's a lighter layer because you're not duplicating the whole thing and then you could just you know be happy emergent down or you can duplicate as much as you want if you have a strong computer I remember I used to have like fifty layers and it was less about the size of the file is just more I can't remember what I did on each layer so it's like a nice in between is probably a good idea one thing. I just have one more quick question from phil birdie, as well as a couple of folks. Well, this same thing work with hairs on the face coming into, um okay. So here on the face, what I would do is I would use your spot healing brush on light in her dark and for hairs on the face. That being said, if it is bad and I'm gonna be I photographed somebody a woman recently who had harry said it was it was fine hair, but it was a ton of it. Um and actually like it. It would be almost impossible to get rid of it that way, because how many hairs you going toe spot healing out? He says shave. But barring shaving or going through, including out every hair, the frequency separation technique that will do later would actually be ah, better way to save you time. Um, because you could either get rid of the tone. If if it's, if it's a color you can see, you can get rid of that. If it's the texture you can see, you can get rid of the texture. So it depends on how bad. Well and and easy film says that tip on removing stray hairs has seriously just saved me about twenty five hours per day talk about saving time alright twenty five hours per day that just really actually one final question about smart object layers can all these changes be done on a smart object layer the stuff I'm talking about gabby okay so far. Okay, so um retouching that's a really big one let me just show you one more thing for blend but so far I've talked about brushes um by the way just you can see the, uh, filling in this this, uh, wrinkle here let's say someone had a smile line that they didn't like you can fill in and it won't mess up the texture around it just fills it in a bit and so versus ifyou're cloning it starts to kind of blurred out but here's what I want to show you one more one more thing in the retouching realm. Okay, so looking here um she needs some help with her teeth. Um they know that I want to get rid of some of the color but I also really want to break them up and honestly, I need to even about in tone um and what ends up happening is if you go ahead and you go into like a levels and you light and stuff up contrast starts changing color start changing it doesn't give you the look that you're wanting. So another trick that I have discovered is let's, and this is not a tool it's going to be over in our layers on this side, I want to select your teeth when hit command j and I'm going to change the blend mode to screen, so when you screen the teeth on themselves, it lanes everything up in a very natural looking way now. Okay, that is much brighter, but, I mean, you know how sometimes you dragon levels, everything starts looking muddy and it looks gray or the other if you go ahead and looks great and you try to increase the contrast and there's too much color this literally just it's multiplying. So in the dark and section, this is the opposite of darkened screen and dark in her opposite of each other, dark and light in her opposite. So I'm gonna go in here and back off the a passage a a little bit, but I could go ahead and mask or erase to start trying to make these teeth look even so, let me first of all the skippers in this hard edge here, all right, so let's see for after so I'm gonna darken this down a little bit, not that much, not one hundred percent down a little bit now these look a little bit break for me and so I'm doing is a racing and I'm just trying to lightning everything up but trying to even out the brightness say and so I get you know significantly whiter teeth and of course I can you know our recent offer gums if I don't want it there all right so I could do something like that and I think it's still a little bit too white here starting down a little okay all right so that's one way that I'd wait up teeth just as another tip um related to retouching even though we're not exactly doing retouching if you want to get rid of yellow and teeth if you make a selection around the teeth it's going to feather it so it's not such a crispy edge so I don't have to go in and paint so when you select modify feather um what feathering is just to make sure I have this out of the way feathering when you set a number of pixels it's a number of pixels that that selection goes from the full effect two zero effect so for example if you say ten pixels over ten pixels that goes from that full effect to totally gone if you say one hundred it'll be much more of a gradual change that's what feathering does it gives you a softer edge eh so if I was like eleven pixels if you want to get rid of yellow and teeth, you're gonna hit on the half moon cookie your adjustment layer and go to hugh saturation well, if I just pull out the saturation in her teeth usually it just goes totally great like that, okay, do you sad treating it's just going to make it grey so instead what you want to do is you really just want to get rid of yellow so right here where you see the presets and more says master, if you click on master gives you all the different color channels you've got reds and yellows and greens and science will all we care about is yellows, we want less yellow's so I can de saturate the yellows and now not everything goes gray I'm so when somebody has really yellow teeth, I would do a screen toe lighting him up and then a de saturate the yellows to make them not yellow, especially with someone that maybe drinks a lot of coffee or smokes a lot of help that the teeth when you plot the elysee look gray, the senate has ever had that problem, the teeth just it just looked natural cause it looks grey if you do the screen, it lightens him back up to normal titone and I've done it stronger than I would hear I'd probably back off a little bit but it would still make you no significant difference and giving her whiter teeth I see a question yeah just when you were painting back the was to brighten your painting back with a brush was it set on normal or was it set on one of the blood so the brush was just normal just erasing just uh hello opacity that was the easy question is good all right um let me show you one more thing while we're at this um what I would also do if I'm having trouble trying to figure out how to clone here I would change my blood mode so here on these edges I'm tryingto lytton up those dark areas so I would change my clone stamp to light in on a high capacity really small brush and I'm able to make a pretty significant difference and I do the same thing here and clean up anything around the teeth and it doesn't mess with the highlights lindsay when you sampled and use the lighten you always sample your your source sample is always a lighter area right? Like bronze skin? Yes okay great awesome point so when I'm cloning you have to sample from something later because if you go to clone it's telling it will make something later but you didn't select something that was later so it can't yeah that's a great point so for using light and samples lance late later fusing darken sample something that's darker perfect okay, so the next thing before we move on for retouching is her eyes are they're pretty sharp but let's say maybe I wanted it I had a photo that was a little bit off of focus no personally I use a plug in um I use nick's sharpener pro that's the plug in that I think is I mean in my family is by far superior for sharpening the quality that it has I'm sure that there are other out others out there that work well I also like that it's fast it doesn't require a ton of work for sharpening our lot in the back end of the process okay but there actually is a way to sharpen using blend modes all right so here we go I'm going to duplicate the layer how many people have done a high pass sharpening before? Okay so hi pass sharpening we're going go up to filter selected on the duplicate layer filter brother high pass all right, so what this allows you to do is what detail you currently see is what will have increased contrast when you're sharpening fundamentally what sharpening is is increasing contrast around edges like that's what it is old sharpening algorithms they would find an edge they'd make it lighter on one side dark and on another and that's how it would make it pop so what you're saying here in high pass is you're seeing detail that's going to have this increased pop added to it so if you have really high I mean it's goingto over chart but everything it just won't work so you're just looking for fine details maybe just eyelashes so I'm looking for where I can catch the eyelashes they're all right well when I hit okay, it leaves new with this detail there what? You know, what do you what do you do with it? Well, you change the blend mode so the blend modes that you would use for this layer are in the contrast area the overlay soft, light, hard, light and each one does the different levels of sharpening. So if I command, let me just show you what this looks like before and after. I mean, they could do a drastic amount of sharpening. Of course it's too sharp you could back off capacity or you could go back again and use a smaller radius for for your high pass. Instead of having so much detail selected. So over lamb she softly it's going to be more subtle, hard, light and they all do something different. Um, what I would do is if maybe the eyes were just a little bit soft, I would go ahead, it would do my high pass here and I would hold the older option key and hit the ad the new lair mask so it gives me a mask that layer by holding the aul ki it just hit it because it filled it in black so ever you see black nothing in the photo next to it is applied so now what I can do is that can go grab a white brush when I paint on that mask wherever I paint, white will be sharpened so I could just sharpen selected areas so that's, another quick and easy way using a high pass, and then one of the contrast blend modes for sharpening really quickly and simply without having a plug and are doing of some other long form way of doing it. Okay, so let's, take a look at our checklist here. So we've got our clothes stamp on light and dark and spot healing on harris screening on teeth blend roads perfect. So that is re touching any questions on re touching before I move on? Are we good with that? You just blowing their minds? Most there's a lot of sort of advanced, uh, process is here, and they're just reflecting how much it's really gonna change how they work, adding an hour to the day that tracked by changing their lives. I swear moments when someone told me about the filling in underneath the eyes with light and I was like oh my gosh, now I can actually retouch bags under the eyes and not look fake so good can you still use the same techniques for, like hair over the eye or something where the textures aren't even you can, um you can do it just just still have the same problems as you would always have, but whether it's clone stanford, you're sampling from the right area, it will help because you're telling it if you have, like, a blonde hair right over the eye and you're trying to use clone stamp to darken it down and they're sampling right next to that hair, it definitely will make it more targeted, but you're still running to the normal problems, so the sharpened tool built in the photo shop is kind of a lot better over the years, couldn't you? Just rather than going through what you just did just take the sharpened tool and give her eyeballs a little sharpness? Totally, yeah, you could definitely just use that I probably from me only use this high pass when I'm I'm doing sharpening on something really fine like eyelashes or just really small details vs I mean, the sharpening tool is really good, but if it's that I just want like a quick and easy just on the eyelashes, but I like the still like next door, okay? Well, now we get to go into creative okay, here we go. So number two thing that changed my life forever and photoshopped um using blend moans is textures so you add textures to an image using blend modes that's that's how it's done typically it's multiply overlay soft light or hard light so these are the blend modes used um screen is also a way to add a texture it does it in a different way so we'll take a look at that um and so your texture layer will be your top layer and the photo that it's going to be applied to is the bottom layer and when I say texture it can mean a lot of different things texture I mean really, really loosely people always think of grunge textures but a texture khun b for example film grain maybe you want to add a bit of film green there's actually online there's so many things that you confined for free they're free downloads for example there are tons of different layers that you could download for free for photo shop that have film green built into them and you change the blend mode and it gives that grainy field to your photo there's three photoshopped files boka our book hey the blur if you want to make it look like you shot into the sun and have lens flare you can add lens flare treating the lense flower as a texture that works great you could make a photo look like it was on a canvas using this and like endless more you know grunge check for anything that you can think of if you want to add a texture one of the things that I've done a couple times and made it look like a photo was printed on a book you can use that and adding as section er um two good places to get textures one of them is it of course my store I have the textures but beyond that I actually if you go to my block and search textures I have a texture pack with like seventy five textures you can download for free so just go to my blogged and you can get that and there's more on my store and the other one which has really different ones totally different ones that I have is lost and taken lost and taken is a website that has like um old garret types and um and wet plate like, um textures that you could apply your photos and make them look like old fashioned photographs and and they have grunge textures have old like baroque wallpaper textures have a ton of stuff and it's free basically he just says, if you like my stuff contribute a few dollars help keep this going so it's pretty good deal uh and you can use it for commercial use a cz well all right, so let's, take a look at those let's start off with good old grunge photograph. Okay? All right, all right. So let's say that I wanted to add a little bit of grunge to this photo because it's kind of a grungy looking photo alright, so I could open up a texture layer um, by the way, if you guys ever shoot your own textures, the key the shooting textures is that you don't shoot on an angle because when you shoot on an angle, the focus isn't sharp throughout and then it doesn't look right in your photographs you want to shoot flat to the surface and I used to shoot up like half eleven flat to the surface I subscribe this texture I want to do is I'm gonna click and drag and place it on. Okay, so this is another point that I wanted to bring up. Um you're not supposed to stretch photographs because they pixelated and it becomes obvious. Grunge textures is often one of those exceptions because it just looks like you add more grunge. So it's actually usually okay uh, I frequently will stretch something I wouldn't do that though if I'm trying to make me be a fine canvas texture where there's something where you'd be able to see that okay that's picks elation but here it doesn't really matter you know that I've added that I can change my blend mode so let's take a look for example at screen so notice remember how I said screen or the light and modes it takes everything below and if it's later on top it makes it later okay, well it did that there could back off the a pass ity make it look a little bit hazy doesn't really do it for me this was a darker, grungy photo so my next would be maybe try multiply and multiply works pretty good but it's making it a little bit too dark for me so I have a couple things I could dio I could decrease the opacity or I could lighten up the whole photo if you could do that as well so I'm just gonna grab curves and just lighten up the photo a little bit maybe increase the contrast of it so I can add kind of that grungy texture um and and you can try all of them you could try overlaying has a different look soft light has a different look hard light has a different look um what I would dio and I've done this many times is if I photograph somebody on a plain gray background but I'm going for something with a little bit more texture a little bit more feeling if I overlay this and I add a lair mask I can get rid of the texture off of his skin enough of his clothing. So now it looks like he was standing in front of a muslim background or modeled background, even though it was just plain old gray, seamless works really well, too, if all you have on the location you're at is like a great concrete wall, no problem, you can photograph them in front of that and then add the texture and posed to give it a little bit more interest. So I'm gonna hit the all option key actually it's not hit that all this is regular mask, eso added, a mask could see their and added it to the texture, and now wherever I I grabbed thie brush and paint black figure I can remove or soften that texture and I should go back to multiply because I liked it really dark like that it does get a little bit of face a little bit more back in one a little bit on his clothes, maybe something like that and then just cause I want this look good on winning best of this and I'll show you guys later, we're going to we're going to get to this later color look up, slater this is ah, something new in, uh, the most two most recent photo jobs all right, so I would do something like that to add a bit of a nice old grunge texture to it. Okay, so that was grunge. You get the idea? Ah lot of people add grunge is teo to their hdr photographs there's so much detail and so they just add grunge. One of the reasons to do that is when you're doing an hd our composite right and you've taken, um, person from one environment and put them into another. You're doing your very best to trick the eye that it was photographed in the same place. So what you want to do so would have the light matching and then you want to have the color matching. But another way to trick the eye is if you put a texture over layer a grunge overlay on the whole thing, your eye thinks oh, there's a texture on everything. It must have been shot in the same place. So it's another way to make a composite look more realistic or more believable. All right, let's teo canvas, for example, just another example of a, uh a texture being added. So I'm going to add this this is from lost and taken and it's, I believe, and it's an old book texture and I'm gonna click and drag it on to her let's make it a little bigger and this is another reason I used my perfect re size all the time because I don't really want have to stretch a texture that much, so I'll go ahead into on one perfect resize make it bigger if this's the only an old book texture I could find, so now what I can do is I can change the blend modes, and I used you just kind of switched through things, and I think that has a really beautiful soft effect, and it makes it look like she's kind of printed on the book there, okay? Let's, do a couple other just to get your mind open to what texture can really mean? Alright, one that I used often is adding lens flare, and I've actually use this image on a creative life. Before I was photographing in this mansion that I didn't have time to scott before I showed up, and it was not so man chinni, so, I mean, I didn't really didn't really fit with what I was going for. It didn't match the pictures, and so, um, seal this blur. I was shooting through the potted plants on the table, trying to give it something like some kind of haze, some kind of atmosphere, really, what I liked best was the white wall after going to this mansion, but unfortunately, since this is supposed to be a perfume ad that was kind of light and airy and it was just have a different look I had to this is one of the few times I had to save it and post on dh so I added some lens flare this works really really well for photographing outdoors when something is already slightly backlit because then it's much more believable and I've done this for a couple editorials I did one editorial called dream catcher where photographed the girl backlit and multiple in multiple places and then just added a ton of lens flare it's like an obnoxious amount of lens flare but that was the idea of it tons of lens flare this is the same thing you would do for light leaks if you're trying to make something looks like it was taken on a whole ge or looked like it was taken on old film you would do this so I'm going to drag my lens flare that's gonna rotate it and you can take pictures of your own lens flare um I do one of two things that I'm creating my own lens flare um one thing that I'll do is take christmas lights nearly the christmas tree lights put your cameras that when it goes out of focus that the the highlights get bigger and then too this is originally like red, green and yellow or whatever is red yellow whatever the christmas light colors are and then I just changed the color imposed to be whatever I wanted teo another good one is if you have water on a windshield at night with lights behind it photographing through that can create some really nice textures and you can you can fake uh, lens leaks and self other than that but that's usually how I photograph it oh, and there's a time of free downloads online think just search if you search photo shop um was there surge a photo shop highlights on a few search grunge textures if you search boca okay like search these things and it'll pop up on a lot of people have created them really popular place where they give these away for free zon deviant art basically people make them for themselves and then they say, oh, here you go you guys can have him too dvr is a social network that has photographers and illustrators and all different sorts artists and very kind of open source community they tryto try to give back to one another. All right? So I have this layer over laid and I'm going to change it to no soft light, for example and soft light gives me a really nice hes the only one I don't like is this I think that's way too much but that's okay because I could just close it out or I could dispatch to what's on its top players I could do really whatever I want to it oh much bigger than that let's say it softer brush and I can also just kind of soften it up a bit something like that so no I've added interest my photo you might love it you might hate it but when I did a high school senior portrait when I photograph a girl out in the field it was lens flare every time okay um and it was I mean it was definitely something that people sought out yes it goes with my dress flew for okay any questions I do have a quick question from photo maker and then we have some in the studio audience what about reducing phil not opacity when working with a texture what's the difference okay great question phil and not capacity on ly makes a difference uncertain blend modes so normally it makes no difference or certain blend modes in the contrast um and also makes a difference I believe in multiply so if you look it up online it'll actually tell you which ones make a difference usually for the ones that it makes a difference on when you decrease the opacity it just makes it more see through versus the fill it makes the effect a little less intense so it's it's depends but I know like multiply and uh I went to the contrast ones do that as well I know about phil and, um, capacity it also makes a difference when you're working with, like drop shadows or any of those layer effects. That's the biggest place that that makes a difference over on the layers palate is like, if you add a drop shadow and your change a passage, he does something totally different. It gets rid of the a passage e of the drop shadow and the foot and the top layer. Chris, if you change phil, itjust decreases the opacity of the top layer. So anyway, that actually does make a difference if you needed to know, we got one more question from randy over there. Yeah, the last couple days we've been work with kim, a raw and presets do you use presets or camera? I use some presets in some actions, my biggest well, I used to create my own presets in light room once I figure out kind of the look I'm going for, but I definitely create actions to save me time. And if I use other people's presets or my own, I just make sure I know what it's doing is the biggest fly safe for most people is they just hit the button say it doesn't work, but a lot of times it would work if you just changed one thing uh, so sometimes here and it's nice too if I just don't know what to do with the photo just to click through a punch you could take a look leo that one works a point that I wanted to make about overlays and textures before I go on okay so this is a yellow ah yello wallets said this for one of the best place to get textures is the subways in brooklyn okay so just the fear in new york next time bring your camera along so here's a subway in brooklyn when you have a color in your texture it will affect the color tones of the bottom texture so now for example she's going to be yellow but if I go to image adjustment de saturate now it's just the luminosity like the highlights and shadows are affecting so there's a color hugh maybe in like a piece of paper a canvas that you don't want then just de saturated before you apply this effect so before I move on um in in blend modes and I'll definitely before move out and blind ones they just want to show you okay so you see this texture and go to normal I see how it's some darker areas in some lighter areas voice which to darken it only really is affecting the places where it was darker on top than the bottom and then multiply just does it in a more dramatic way but I think that looks pretty cool you can add textures like that, but I wouldn't I would do this and I'm doing maybe like a dead zombie not not a beauty shoot um lightened screen I would just say give them all a test they all do something a little different and we had a question lindsay just on that beautiful texture with the book cover one if you would have print that, what paper would you recommend to print that on so that you keep the texture? Um what was the one that I it's I think it's called pearl I think pearls what I use when I've done something like that because it's it's not flat because if it's flat that it doesn't hold the color but it's not glossy, so I think I used like a like a fine art pearl like a hand amiel pearl or something like that? Yeah, that's what I've used in the past thankfully, I don't print most of myself anywhere I sent it off to set off to miller's and I have to worry about him a separate male self awful and use displacement maps and would you adjust the blood moves before or after applying that? I use this place that maps um teaching that in the last section and I would apply the blend mode I usually play it before so I can see what's happening so watch the end of the day for displacement okay? But that's see, I tried to build working out all right, so all right, so next one um dodge in bern um you can dodge and burn or leighton and darkened using blend bodes and there's a couple different ways to do this. Um all right. So here's the two things sometimes if you go ahead and try to dark and down image using say curves if you notice it affects the color the contrast affects the color so let's say that you're trying to darken something down and increase the contrast and all of a sudden the skin tones like to read it they look too yellow you can change the blend mode of that curves adjustment layer two luminosity and that it only affects the the lightness and darkness values not the color values makes a huge difference if your lightning and darkening things and trying to control the and your photograph but the colors getting all messed up he's luminosity um the other one is if you create a blank layer using soft light you can light and dark and things by painting black and white so I am going to show you that all right, so for so let's do the, uh the soft light there okay, so taking a look at this this is a photograph that I took um a couple weeks ago in this beautiful location in long island city it's really, really cool it's the location where I took um the duality pictures the picture I had the girl uh twice in the photo um I love this place called the metropolitan building in long island city um but anyway I'm looking around and my eye is just going everywhere there's so much going on I don't exactly know where to look so something that you can dio and just for those of you out there yeah, you could do this like ten different ways you can also make it gray and then light in a dark and her burn and dodge I'm just gonna do this way um and create a new layer change it too soft light and take a black brush on a low opacity so when I take that brush anywhere that I paint darkens down I should use a fire so I will use this to kind of go around and just control the eye and I'm painting with a really soft brush and I like this as opposed to curves I mean I like curves but thiss just is more natural to me and painting and it builds up and so I'm darkening it down and it's building and uh I can always create a new layer and two even darker if I need to and I consume in and dark and down the top of her dress if it was a little bit too bright and I can increase the capacity a ton if I want to go maybe for more of it and yet look around the edges and kind of working down here and so if you look it's really helped me control my eye, I'm darkening down what I don't want to see so one of the rules of thumb when you're trying to control the eye in a photograph of your eye goes to the brightest part of the photo goes to the area with the most contrast and also goes to an area with the most saturation and whatever's in focus. Okay, well, everything was in focus everything was light, you know, so I really need to focus it and so I darkened it down and notice I can also just duplicate that layer and it will increase the intensity it multiplies it even more and I can always back off a passage. Um conversely, the same thing that you can do is if you needed to lighten up in area you grab white, change your blend mode too soft light and you could do the same thing I can paint to lighten him up and it brings out details so it's like dodging burn but it's completely non destructive and you can change the blend moz I could make this even stronger and make the effect different depending on the blood bone. But softly is the way to do it. So should be my burning dodge. I definitely do this when I'm looking at a scene and I'm just trying to control your eye. Okay, so this one we are actually going to do again? Um, later on, but I just wanted teo to show you something. I think this is a huge file. Okay, so, um let's say that you wanted to sculpt ah, model's face. So this is what we're going to do later for me touching something like that. But let's say I'm gonna get rid of everything let's say that I wanted to make her cheekbones a little darker and the highlights on top of her cheeks a little brighter. So, um, not that you guys out here know this, but if you take a look at how they do make up where they do make up, they take a lighter brush and they put a later brush here, here and here to bring out highlights and definition, they use a darker brush underneath the cheeks on the ridge of the nose on the jaw line. Oh, they also do ah, highlight right here, so they kind of shaped the face will sometimes, um, you know, based on how you lit affection might look flat and just need to add a little bit more well there's a bunch of different ways you could do that but one way is let's say for example I wanted teo uh darken down her cheek bones so I just created a new curves layer I'm darkening down the whole photo and I'm just gonna invert that leather mask and let's just say I want to darken better too she only hey clone okay, so if I go in right now and I start painting and let me, uh zoom in a little more if I start painting that darkness below her cheeks I just wanted to use curves so I'm gonna paint the darkness below her cheeks here you feel it kind of starts affecting color say not too bad on her butt effects color a bit and obviously I'm over on the side what you would want to do instead is change your blend mode saloon osei dy and then it keeps her original color of her skin instead of increasing thesis saturation so I could go ahead and just start shaping the face doing that or let's say I wanted to dark and down you know a major part of this photograph and I use curves if you change the blend mode it helps maintain the actual color just darker instead of shifting it I mean it still doesn't look good obviously on her butt there is definitely a market difference between normal and luminosity I'm gonna actually do this later on this photograph in detail I'm just letting you know blend modes for curves so anytime the color looks messed up because you change the contrast or the the er toning go ahead and go back there and change luminosity alright so number four you have a question yeah just just a quick clarification for you lucy had you said earlier you you were using the layer blend mode now you were using the layer blend note and before you're using the brush blend mode you were doing the opposite can you explain again? Yeah ok, so so here's the thing before when I was using cloning um and so is using the cloning and the spot healing in the patch or in the the, um the healing brush so when I'm on those blend mode, it actually changes what those brushes pick up and put down versus if I just went ahead and over on my layers if I just went ahead and when is normal and changed the blend mode there's different content there it's not the same it it won't have the same effect, okay, so now what we're over in in uh layers I'm changing how lairs interact with one another but just to make it all complicated that light and dark and thing that I just did there's a there's a way to do it changing the blood the blend mode of your brush because you put it on a grey layer and then you change the blend into the brush so you can do it both ways so that wanted there isn't really a difference with lightning darkening it um okay toning so next way that it changes your life toning photos um if you use different adjustment layers, whether it's color adjustments or black and white adjustments and you change the blend mode it makes some pretty cool different effects. Um, this kind of like fashion the look that I have sometimes with really light skin like the pure white skin but a nice pump and pop to the contrast I'm doing that using blend modes, so I'm going to show you what that one looks like. All right, let's, grab. Okay, so for example, if I could create a black and white ah lair here okay, creep my black and white layer if I change my blend mode, it'll give you a different look for each different blend mode. So for I love this one, I switch it too soft, light and back off the a pass ity and it just like, makes it pop a little bit more a little bit deeper in the shadows, but another benefit of this is that when you convert to black and white we have these same sliders as we were talking about before if you drag the red slider the left the reds get darker well, now you can control how colors look in yur color photograph using this because I can drag and make those red lips lighter or those red lips darker and I can kind of modify how her skin looks by dragging these and so I was using a, uh that grunge photo before of this guy and so for example let's say that I used the black and white on him and I want to switch it to maybe let's say soft light okay, so I like that toning much better it's got a lot of pop maybe think it's a little bit strong but what's cool is watch when I dragged the reds and yellows I could make his face lighter or darker because it's still interacting with the conversions from the black and white but but I changed the blend modes so I think this looks like a very fashion edgy it's got that kind of subtle tone with a lot of contrast that's what you see a lot of magazines and so I do that you know I'll do that one this one is well, I can light in her dark and the reds in her lips um another one is if you create a color okay, I'm just gonna take a blank layer and add, uh, orange to create a blank letter with orange going through all the different blend moe's they all do something different. Um, but if you go down here to color, this is how you could do another version of, like, a monochromatic or, like, you know, how you can make a c p a tone you pick, whatever color if you change the blend mode to color and just back off the a pass ity it gives you kind of those tones to the photographs, and I have kind of ah, a warmer toned photo and it's not affecting if you notice it didn't make the picture later darker contrast here, it's just kind of affecting the color beginning when you had your gold room and you just needed it more gold wood you have going on here, so you could definitely do something very similar to that. Um, it does change the look a little bit, because when you increase the saturation, the situation increases as you start to warm things up so it does change the quality a little bit. But I mean, I could make this any color I want and give that overlay, so I actually have a photo at the very end where it was just kind of a dull blue and so I went and I grabbed a bright blue and I painted it and added color and now I had a rich blue so I mean, I control color all the time and that would be another huge tip. I would say for people improving their photographs, most people, they just take whatever color is in that photo, you know, whatever dress she was wearing, whatever color the background is that's what it is, but color is one of the most like powerful tools you have is a photographer, so I'm constantly changing the color because that's, what gives my photos high impact and if you look at my website when I use caller, it is on purpose and in your face when I don't use color it's high contrast black and white and I let the graphics kind of speaks to you. So controlling color is huge for me, right? Say, what was my other toning? That was fine. All right, so let's, go on to the last and fun part funnest part um is some creative techniques, so creative techniques this is the other way. That blend would change my life, and I use creative blend modes all the all the all the time, um, I do creative overlays, and so this is going to be like displacement maps that were going to do later. So watch this before displacement camps. Ideally, anybody? Um, creative blending. So taking two layers and making them mixed together an unusual way. Composites, when you have shadows, I used blend boats to make the shadows look realistic and then just other stuff there's, lots of other stuff. S so now that we've kind of talked about the foundation's, I'm going to go a little bit faster through these just so you can kind of kind of see what they look like or how I might use a couple created techniques. So for example, I'm going to grab this. I bought this stock image of roses. I'm gonna grab this stock image of roses and I'm gonna drag and drop it on top of this portrait. Oh, yeah, I made it a slow rez portrait so that it was loading fast. Hence the very tiny file. Okay, all right, so I put roses on top of that, I regularly just go through and take a look at what each one does. Like, I think that is a beautiful look, but maybe I like that, but it just looks a little bit weird on her face, just a tiny bit so I can go ahead, add my, uh, gonna do the other way I'm gonna go ahead and add a lair mask with nothing in it and then just softly softly softly low opacity brush start removing it off of her face so I have something like that I think that looks beautiful I actually showed this to the people helping me with my marketing I hired a team teo help me go through my portfolio or narrow it down and they're like oh this screams perfume ad the screams you know liquor ad you know this kind of effect um whereas if I want to get really funky you know I can have it just subtle in the background you know if you guys can see it was the light in here is a little weird but it's a nice cool look in the background or I can kind of apply it to her skin to her face and have it wrapped around I mean try all the different one so that's one way that I'll get creative okay but you can go much further than that one of the examples that we talked about before all right you've got our uh our ink blot girl here well what's really nice is I don't care about any of this so I'm going to painted all white for now so I'm just gonna paint white everywhere here because I don't need any of that color okay I'm gonna come in and I'm going to get rid of these hands that I see and I'm using the polygon a lasso tool and I'm just going toe pain because I just wanted to be a graphic shape when do the on both sides ok ok here and I would spend more time on it making it just perfect but I'm just gonna clean those up right? Okay so now now that I have this um I know that I wanted to be all about really really graphic and cool shapes so for me when I say graphic and cool shapes I don't want there to be color so we just change it to a high contrast black and white so I'm going to go to black and white and I want unclip it there okay? So turn into black and white and I'm going to need teo increase the contrast of it let's do something like that. All right, so if I were actually doing this I would go in and just make sure that backgrounds pure white but it's not super essential to the point someone a flatness all right so here's how I did all these cool different funky things um I duplicated my layer and I flipped it on itself if you grab the transform control it activates those numbers up there and if I just put a negative one hundred in front of the height it flipped it upside down you know she's upset like this if I change my blend modes the two that my mind goes to our light and darkened and they'll both do something different symbol with dark and whatever is darker we'll show up on the bottom whatever is lightest basically disappears and then with white with light and it's the other way around so you could do something like that I actually did several where she had no head I thought it was cool the magazine liked it in fashion there's no rules you know what everyone okay so we're just going to shift this all down you could do that or if I switch it teo switch that top layer toe layton okay now you don't see anything so what I ended up doing in the actual photographs that I had before is it kind of dragged them to overlap something like that and then change the a passes you could kind of see them through one another so it be multiple layers interacting rotating it around I mean there's this is where the art part comes in that there's absolutely no rules but I know when I shoot a high contrast black and white on like a black object on a white background I can go ahead and use my dark and blend modes in light and blend modes for a lot of different cool effects so I'm gonna end with the really really cool one the one that I really like all right so we're gonna do this one, okay? All right, so this particular photo and I'm going to do a version of this um I decided to blend in the profile of a model with flowers you could do this with a dress. Maybe if a girl has a long dress with fringe at the bottom there with that fringe you could make those be flowers instead of fringe you can do it with, um, painting smoke of the face I mean there's like so many different things you khun dio so it does start off knowing how to shoot it. Okay, so this goes back to section number one shooting for photo shop because I didn't shoot it the right way to get those results I wouldn't be able to do it so I knew that I needed to be able to photograph a model where there was darkness on one side of her face because here's what I'm thinking in my head okay, so if it falls to darkness or two black then if I have flowers that I changed toe light and in their lighter than it will interact in the blend together that logic kind of makes sense and that I could also do something where she was really high key and the flowers were dark and go the opposite way so I photographed her like this um this one's fine summer's gonna open this up in a photo shop and uh I can increase the contrast a little bit um I really do want this to go darker because it gives me uh when I change those blood bodes it'll make the effect a little more intense so head okay, fine. All right now the same time it went ahead and in similar light I photographed flowers similar light so that it would make sense when it blended together because if one was like really high contrast look like it was photographed in the sun and the other was soft and backlit it wouldn't make sense but these are going to be brighter in the back of her head for that back up in okay, so um uh so I took pictures of these orchids roses in different positions and I just took a whole bunch of different pictures and in light room I selected which ones I like so if you look I selected this set of work it's over okay, so I want them just a little brighter with a little more contrast looks good open the image and I'm gonna drag one on top of the other so I dragged one on top of the other I can write away actually just change the blend modes if I want so I can change it to say layton and drag this okay, so the biggest problem that I run into is the color definitely doesn't work because they're not matching in tone no problem all at a top player in black and white will do that yes, that looks good all right, so maybe lighting doesn't work maybe screen works and I would just kind of click down figure out which one works best for me and I know it's going to have to be one of the late options all right, so let's try leighton cut some looking it looks good with the next thing I need is to kind of blend it in maybe increase the contrast if you look this contrast doesn't match so it doesn't make sense so I'm going to go ahead and I'm just going to go to image adjustments levels and make that contrast match. So now that looks much more like the contrast there and this is where I can start blending. All right? So this is where we get into the er the whole understanding light and dark and I can erase if I want to but watch what happens if I paint on this later okay, so I'm on the orchids lair. If I paint black, it is like erasing because my blend motives lay in and the only things that will show up when you're on light and is whatever is lighter than below so if you paint black it's just like a racing and so you can blend things together like that or you can go ahead and add masks and mass things out that is the less destructive way to do it was going to blend in with the side of her face that looks nice and blended ok, I'm looking back here and hurt that hair is just weird so let's see if I can get rid of so this hair here and I'm going to I'm just going to aries it around here and so clearly there is no right or wrong answer it's just blending and changing shapes um what I can do also is wherever I paint black you can make that flower come through and I'm painting on the background black because whatever is later on the top will show through so I would do something just about like that and keep tweaking so I have more to talk about but I'm gonna leave it there for question to see if that even remotely made sense at all. Let's start with our studio audience pick up um I hope you have a question and then we'll turn oh yep randy yeah, I'm guessing you shooting raw is easy uh school a school I mean, I have more stuff to do. I just I figured that that was a little way we do have a related question to that randy from the chat room which was about would you be able to do these types of things with lower resolution files that was from I'll go the terrible and then on and then how to maybe add the linds quality or just even work with it as a cz an option you said there's no limits with fashion, right? Oh yeah, okay with fashion and do whatever I want e you see, they shoot editorials with like old lenses that they like tape on two cameras and then shoot like that. Um so for the lens quality, if you're doing something like this where you're trying to blend multiple photos together, you would just want to have similar lens quality and similar plane of focus because if there's really narrowed the field on the flowers, but a lot of depth of field on the face that it won't blend together well, um, so another thing that I've seen like this is a model in all black clothing on ah white background and then they take another pattern change the blend mode, and now the black clothing is whatever pattern they wanted to be s o I've seen that done in some editorials where they're using that as an overlay to tell a little bit of a story there that wouldn't be too concerned but watch the depth of field, okay, holly has a question well, because you have your phone with you all the time and so you see, like, really is er good rule of thumb if like you're capturing textures say with your phone that you want to add teo is there a way to do that yeah I mean that would be the best wayto get the texture with your phone is making sure your as flat as possible to it and not shooting down like I would I would get street onto as much as possible because that will definitely mess it up um also you don't really want it to be you don't isn't it between you don't want totally flat light and you don't want really directional because the really directional um makes it a little bit more difficult to be useful so it's kind of in between um but yet you could definitely use context aside like that I've never done that I'm sure somebody out there in the chat rooms nose if you can apply textures and overlays in an iphone app using textures you've taken I'm sure somebody knows this haley our own kate haley with a employees here a creative five okay I close this out alright? Cool all right so this is actually the last one that I have for this particular section all right so I got hired to shoot um I got hired to shoot a magazine cover for this designer and they said okay we'll what we want is we see this really cool thing in magazines where they have the background match her outfit can you do that? And I said, well do you have a large piece of fabric they said no we have the dress and I said okay, well you have a larger piece of fabric that I can photograph to work with no, we have the dress so what my job was was to figure out how to make it look like she was standing in front of ah large background that exactly match the pattern of her dress and you guys have probably seen this type of effect before. Okay, so what I needed to do is I need to take a picture of her and the most important part of this picture of her is there needed to be a shadow because I mean I could could create one but I wanted it to look realistic ish I don't have a shadow behind her so I photographed her with a a crisp modifier which would be a silver reflector dish or a silver beauty dish close to a background to cast a shadow and then the next thing that I did which photograph let me open it up photograph what I did have for a background which which was part of her dress so I photograph that and I got a close of the best that I could and would open that up okay, so this would be an instance again where you'd have to make a selection and you could use you could use the quick selection tool again it actually would work really well in this because she's mostly against a white background but this is what it looks like when you send out to that place I recommended in section one the clipping past asia if you go over to pass what it does is they create an outline of that subject so you might be able to see that it just highlighted an outline when I click that when I send it out to them they also created a path for the shadow they made two separate selection so I don't have to worry about it I don't have to fake the shadow I'll show you how to if you need teo so when you have one of these um you click on it and the new right click and you say make selection because right now it's an outline it's a path that they've saved it's not actually a selection you can't really do anything with it yet you wouldn't make selection um radius just means how soft oven edge do you want it to have I want to be a nice hard edge and it made a selection for me so what I really need to do is I need to cut her out of that background so I can put a background beneath her so I'm going to use my favorite shortcut command j and so now she's cut out of her background so I can go ahead now and grab ahold of that background and put it behind her, and I'm just going to switch the layer order to know she's in front of that background, okay? Well, it doesn't look like she's actually, there it looks like it's a cut out, so we have to work on a couple things to improve that. All right? So first I'll show you what to do if you do not have if you don't have ah about a shadow, there was no shadow in your photograph, so what you can do is selected on her lair. You hit select load selection, so when you do that, you can select that layer and it will just load her, so I just basically loaded an outline of her and I'm going to create a new blank lair and fill it with black, so this is going to be her shadow, okay, so I have a shadow and I'm going to move the layer and put it beneath her and grabbed my move, tool it off, set it so it looks like it might be where a shadow would be. Okay? So here, the problems that we run into for not looking realistic, obviously it's too sharp and also it's not interacting with the background, so the blend mode that you always want to use foreshadows is multiply that's the blend mode that you using composites and so when somebody even when somebody's faking a blend mode when they are faking a shadow when they're drawing one in it's on multiply to look realistic right so I switched to multiply and as I back off of thie a pass ity you can see it on the background to the biggest thing that's not believable is of course it's too sharp so I can go up to filter blur goshen blur and that is blurts it looks realistic you know maybe there something like that and there's a few other things that bother me I'm looking in my eye is getting pulled away so what we already talked about before is what I can do is I can create a new layer change it too soft light grab a black brush on a low opacity and just paint too dark and things down a little bit and focus on my subject so something like that so that's how it would fake a shadow and make it look like she's in front this background and this is basically what the magazine cover it looked like something like this I cleaned up the edges a little bit because they were just a tiny bit um two sharp and there's a little bit of white ok the other thing that you can do as you could go ahead and they made a path for a shadow for me so I can right click on that makes selection and I could go back to that very original photograph down at the bottom and I could just coffee that shadow I did command j I've got to move it in front of the background for me to see it and then I'm going to change my blend mode to multiply and now I can you know I can blurred if I need to this is a selection they made they made a crisp selection so I could display it again funny name gives me a shadow, so just think of it if you are compositing things and environments, one of the things that you can dio is you can select that object. Okay? You could even just do quick selection, whatever it may be, you create a new layer and you fill it with black and you change it to multiply. Okay, well, that selection then doesn't it doesn't match where needs to go. So earlier we talked about the war tool and I would warp and move things around and transform it so that it looks like the shadow might actually look whether it's laying on the ground or up on a wall or something like that. So it's kind of all the tools that we have, you just kind of keep building on you guys agree that blood bones can change your life
Class Materials
bonus material with purchase
Ratings and Reviews
joanne duncan
WOW, JUST WOW!!! this is amazing, i love the non destructive methods, this really is a life changing thing for photoshop enthusiats, saves so much time, thankyou, i have loved all your classes, just amazing!!!
user-466932
Her knowledge is obviously amazing and her experience has her moving really fast; this is NOT a class for newbies....I know a little bit about blending photos; enough to make me want this class; but I was over my head. I paused, wrote, paused, wrote, etc. and came away impressed and totally over-whelmed. I can't even read my notes! Luckily I can watch again--and again and again, ad nauseum, until I can finally grasp the techniques involved. Class is for confident intermediate or higher (experience).
Ellyce Moselle
Interesting, fun and creative. Will it change your life? Well, only if you are shooting portrait/editorial. There is no material covering other genres here. Fun material, even if it wasn't as helpful as I hoped.