Lessons
Day 1
1Introduction to Compositing
19:38 2Composite Build-Ups
26:26 3Fantasy Composite Shoot Setup
24:00 4Fantasy Composite Shoot Setup Part 2
31:45 5Shoot: Fantasy Composite
27:42 6Compositing Fantasy Background Part 1
33:26 7Compositing Fantasy Background Part 2
47:16Compositing Headdress and Details
25:43 9Compositing Special Effects
28:40 10Compositing Finishing Touches
25:46Day 2
11Recap of Fantasy Image
09:37 12Soccer Shoot Background Overview
23:59 13Soccer Shoot Studio Prep
15:25 14Green Screen Q&A
15:08 15Soccer Shoot: Lighting Test
21:10 16Soccer Shoot: Test Shots & Rough Composite
38:39 17Soccer Shoot: Jump Shot Part 1
19:28 18Soccer Shoot: Jump Shot Part 2
26:11 19Soccer Shoot: Shirtless Jump Shot
16:30 20Soccer Shoot: Additional Elements
31:53 21Soccer Shoot: Portrait
22:12Day 3
22Sketching for Composites
31:52 23Compositing Soccer Image Background Part 1
25:00 24Compositing Soccer Image Background Part 2
24:44 25Compositing Soccer Stadium Lights
19:33 26Compositing Soccer Player Part 1
22:44 27Compositing Soccer Player Part 2
22:58 28Compositing Additional Elements Part 1
38:43 29Compositing Additional Elements Part 2
29:06 30Compositing Brightness and Light
13:01 31Working with Color
28:41 32Lighting Effects
25:58 33Compositing Soccer Portrait
18:01Lesson Info
Composite Build-Ups
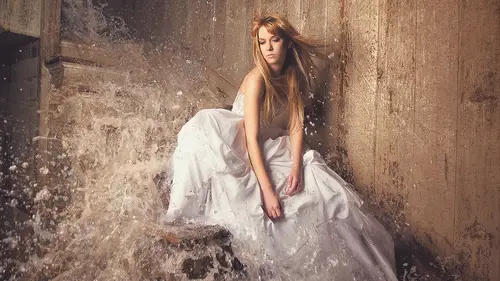
here's some buildups basically these air like going from start to finish through a couple of my images so you guys can kind of see like the process and he has have questions feel free to ask him we're gonna start off with this image baxter which is one of my favorites um this was photographed you can see the original image here this is photographed in just like a chicago alleyway and you know like really simple production we've got there two lights in this image to strobes which at this point I think we were using like einstein's or alien bees or something like that from the policy buff company one is you can see the cord here on the top left of the screen there was a large umbrella here that was like highlight was basically lighting our subject and then this guy in the background was on a light stand and this was providing a bit of a rim light to separate the subject out from the background in this car was not part of photo shoot he was we were shooting in an alley in the card room by...
like that just that happened to be the frame that we decided choose and then this guy baxter was so again I've been like a fantasy dork in my whole life and I was like I want to build a creature and put him in a photo shoot kind of like my version of where the wild things are and so I did I built him and like that kind of has nothing to do with photography but for me that's like the part of creating images that are really love like I love creating stuff like that so I did most of research on like how to create puppets and stuff like that and I made that guy so andi still in our studio today he greets people as they walk in starting with something like this so our next slide is basically just a different frame the camera again is in the same place camera's on a tripod and we we took a picture with baxter here using it is like kind of like a lighting reference I wanted to see like if we're going to the idea the end idea was to make him much bigger right so I wanted to see about the type of light that was going to be hitting him on dh then this car pulled into that garage space that was that was wind being right over there on the left so this just kind of like a happenstance I like that the garages like halfway open I think it's cool detail the next frame is bringing in so this you took about an hour to do during which time the sun got darker so I replaced the sky in the background making it a little bit lighter the next time actually I took the camera and I turned around so that side of the street that you see there is actually it's the same as this side of the street just looking the other way because I just thought it was a little bit more interesting like this there's not a whole lot I could do with that it just wasn't that interesting to me so I turned the camera around took another picture and then put it in there as the other side of the street so what you see here doesn't actually exist in real life I just made it together and you khun if I didn't tell you that I did that you probably wouldn't have known but like if you were to zoom in like kind of like look at this image like this this telephone pole just like turns into a building right there like there's it's very you know like that could never exist in real life but a lot of the time you khun khun sell those effects as long as you make your masking relatively clean and you match colors and things like that people aren't gonna tell most of the time um I added a little light shining and photoshopped did a little bit of work on our color and then we put baxter in and so how do we make baxter actually look like he's standing behind that building well I photographed him in our studio he was we built like a like an apple box we wrapped it in gray seamless paper and we actually posed baxter and tried to match the perspective which we're gonna talk about it just a little bit and we tried to match the lighting as well so we photographed him in the studio the camera was nice nice and low and he was like peeking around a box and you know one of our assistance was like standing behind them like moving his arm and like it was actually kind of fun we had to like move his head and change his eyebrows and stuff like that to make him look like he was friendly and it was kind of fun playing with a puppet but again he was photographed in the studio and then we just cut him out of the background and placed him in the scene and as long as you get your lighting decent lead correct and you know you can add shadows and things like that in a photo shop which is kind of where it ends up you can create these effects that they look really you know they come across is realistic and you know to me to be able to make something like that again with a relatively low budget and just kind of like going out in the alley behind our studio and make something like this which is as a kid like I would this is what I love you know like this is the stuff that got me excited and so the fact that I can make it now with compositing it's just it's cool it it uh it's good so good ah all right so the next one we're gonna look at it is a giant ego and this is an example of element compositing and basically the idea here was we wanted to create like a woman and really play around with scale and I think we did this image really well and we did it I think so well that I think people look at this and they can't tell that it's a a giant girl in a in a rail er size drew which is sexy kind of funny so this is a room it's that the hubbard in in chicago we've got you know that's permission and they were like yeah sure come shoot after hours which quick tip if you guys want cool locations like bar's areas that are going to be like open just a night usually like bars and lounges and clubs things like that make friends with the manager and asked to come in and shoot during the day because most of the time they they're like setting up during that time right there is not open to the public and we shoot for free in a lot of bars because there's there's no one there's no one there and as long as you make friends with people yeah come in and they used the images for their promotion stuff like that so quick tip on how you could get some cool locations for free so wait did this and then basically we photograph this and then I kind of sketched out the dimensions the room we took a tape measure and we mentioned we measure the dimensions that through because before we photographed this room I was like all right if we really want to do this right I want to build a small room and match the dimensions and match what's going on in the image as faras the furniture and everything goes in a much smaller version of this and then I want to put a model in that to make it look real so that's what we did so the next image you can see this was shot in our studio it's like a plywood box you know went to home depot and got some plywood and like a soul and drilled it together and stuff like that so this is our model like literally in a tiny plywood box and we wanted our lighting the match to which is again something we're going to talk about today they're like really three big things that you want to make sure you're paying attention whenever you're compositing and that's going to be your lighting and your perspective and your composition I'm going to say those three things over and over and over and over again and lighting is really the big one if you nail your lighting most of the work is done for you so just going back one we had you know the main light source in this image is that you know chandelier with a couple of lights hanging there and I wanted to make like I wanted to make it look like there was a huge girl like basically in this room and we needed basically the same light to be on that girl so we were like okay let's let's get a miniature version of that light of those lights which are just lightbulbs so we tried to match everything you know the camera angles and things like that basically shooting images and then lining them up using light room in photo shop during the actual photo shoot which we're going to do today as well and then placing these light bulbs in that room at about the same location even one you could see this guy here and that's basically in about the same location is this little lamp right here so it's gonna look like that lamp you know lights her leg right there and if you match the lighting that most your work is done for you so cutting her out of the background you get that because check it out like way measured this way took our time with it right this wasn't like a rush thing we wanted to make it look like she's in the room so we measured this we like figured out what height this you know like piece of wood should actually be and we had her arm actually resting on that so that in the next frame her arm doesn't move at all and we tried to match the color of the wood as well so it's literally like it just goes from this into her arm is on the table and again looks like it's just measure it right it's really not that difficult if you take the time to kind of like think about everything and before the model ever gets into this little room that we built we made sure we had our background image already said and then we made sure to photograph the room and we built it and you know take a picture and say okay we need to raise the table a little bit you know just basically put it on is the layered like fifty percent visibility and say okay we need to raise the table a little bit raise a little bit more little bit more and then you've got it good so yeah that's kind of the idea and then some color correction and uh and you're good to go with that all right so next is island of morale and are there any questions coming in or anything like that people are just are absolutely fascinated jen vasko vazquez is a regular says this is amazing and so really sort of all over my head but I'm intrigued and we're just letting folks know that once we start digging in we're going they're going to find that it's very accessible correct totally yeah and this is this is the stuff that looks super hard to do but it's actually not that difficult like so much of it is pre production and that's why you know again they folks from creative live or like us teach compositing we wanted to be a you know a software intensive workshop spend most your time in photo shop and I was like I can't do that because so much is before photoshopped so like that's these principles that we're going to talk about you know matching your lighting your perspective in your composition those things are so important do them before you ever get into photo shop like this this room we just showed you I mean like taking her in that box from that like that's literally all I did was caught her out and she was already good to go so all that work was done before I ever got into photo shop so that's that's one of the things that I want to teach you guys it's like it is really accessible it is a lot easier than we think it is most of the work is done before photoshopped and I think that that could be the most important thing that people may learn in this three days is that it's about a lot of it is about pre thinking threats and measuring we had a question from jasper saying how do you calculate the perspective in taking different elements for a composite but really measurement correct yeah totally and it really depends on what type of composite you want to build so in this one we had to build a small room that was a replica of the actual small room so what I did and I'm goingto try to say it is simply is like could we measured the original room so let's save this you know from from this wall to that wall let's say that ten feet ok so then I'm going to say I want my model to be ableto fit in this room and our model six feet tall so if I scrunch my model up like this that's gonna be from here to here that's going to be three feet okay so that's meaning that like it's going to be three feet in a box but that needs to take up ten feet of space so then we get a ratio right we we get a scale like I was just at the mp museum here in seattle and they have these like lego the skyscrapers which are really really cool but they said the scale you know the skyscrapers were like this big but it was like one inch equals twenty two feet ten inches right so like you just basically get us a scale in that place so this would be like you know three feet in the box equals ten feet in the room so now that I had that as long as I have measured the floor the ceiling let's say the florida the ceiling was fifteen feet then I would know okay that needs to be four feet tall so then I figure out the measurements of my box and then when it comes to scale and things like that in matching perspective we know that okay the camera is about six feet toll in our original image what does that look like in this new scale and that's going to be you know something about like three feet off the ground so in these things you don't have to nail them all during the photo shoot is the really important thing a lot of the time we get all this stuff right before the day of the photo shoot so it's you know it might take human hour and a half to like make sure you get the right angle in the right perspective and you know make sure all those things were correct but by the time your model gets you know actually gets on set all those things are going to be figured out so for instance on the day of the shoot when we when we photographed her in this box the camera was on a tripod the tripod was sandbagged down the room was in place and like you know tied you know sandbag to the ground so like nothing nothing nothing move we just put her in the box everything was good to go and this is how we got everything to match up perspective allies was we basically took a picture we brought it in the photo shop along with the original background which we already had we put those on layers and we took down the capacity of this and anything that was you know like okay we need to bring the camera down a little bit to change our perspective we need to bring the table up a little bit we need to shift the camera to the left or the right and doing that basically it's a long process so you have to take a picture compare it take a picture compare it take a picture comparing but going through that process it really makes it simple so when you actually get to the point when photoshopped most of the work is done for you I'm gonna move on but I want to just say really quickly this is actually it's totally accessible but this is a harder version of compositing right like this is I wanted to do this to test my skill what I have done this when I was first starting out no way I would have done something like we're actually gonna be teaching you guys today where like you're going to we're going to be photographing a person we're going to put them on the background but they're not going to be interacting with the background the background is going to be behind them so you don't have to worry about matching your angle into perspective and you're lighting in your shadows you don't have to worry about a lot of those things so what we're going to be going over today is like a wonderful place to start off with your compositing once you nail this you you khun kind of like move along with your compositing so yeah good questions all right okay next is island of morale and this is an example of frame compositing this is the easier type of compositing super super easy but most of the work we did for this image was done in camera and it was done through pre production and it was done you know the photo shop is actually very very simple in this that's one of my favorite images I love love love this photo it was inspired by it's kind of a long story when I'm doing my fantasy images I love to create stories I literally I write out a story and a lot of it's kind of like it's based on you know the stories I learned growing up kind of like based on the things that were going on in my own head so this is actually it's called the island of moral theory journal image was inspired by a moral mushrooms which kind of doesn't make any sense I just saw a moral mushroom and I was like that's a really cool shape and so I wanted to make a dress that was like in the shape of a morel mushroom which I didn't actually went up getting in the end but I was like okay a really cool morel mushroom shaped dress and I was like what would that mean I built this story like kind of somewhere between like the odyssey in like the island of the lotus eaters is and the sirens of like what if there were like witches who like lured sailors to their island and like took their souls when they when they were there and this was like in the fifteen hundreds and like iceland so it's like setting the scale and the you know the time in the place and everything like that and I was like ok cool so let's actually produce this I need to figure out what a soul looks like we need to make it we did actually yeah what is this it'll look like we need to make it look like it's kind of like an old set and things like that and we need to get some get some wardrobe so all that was kind of like that that was the pre production that happened before the shoot ever happened which dictated the look and the feel of the shoot and so we brought this and we have you know a child actor in this case and we had our subject jenna who did an amazing job actually and basically this scent is like it's super super simple so you're like oh he built a custom set for this you like that must have been so expensive and hard to do like no this was really really easy and it's it's actually so bad but you can't tell because we used them tricks with lighting basically it's just a wall that we built like we framed it up with two by forest like you know if you guys have ever seen a house before they put the walls on it's just to buy four frames could you could go to like clothes or home depot by couple two by fours like threw them together it's not hard at all I promise and then we just found like these it like a salvager these like boards and we just hammered him onto the two by fours like I have no idea what I'm doing but we still manage to make this happen we framed out a window and then behind the window that's just a soft box like there's literally a soft box right here and it looks like it's outside but it's not it's just a soft box so all these things you can do and this was this was done in like a studio much smaller than the one we're currently in now we had a regular table and I just took some of these and laid the boards on the table like it was you know really really simple we didn't rent a dress I think it was about one hundred one hundred fifty dollars to rent this really cool dress from a prop house in chicago and we had like a rope and then the rest of it was you know or characters and we went outside and grab sticks and twigs and just put him around or seen on dh then I got to be creative which were actually introduced kind of something similar today like this is a speed light with just like senna foil or you know like gaffer tape in a ping pong ball at the end so we put we put blue gels in here and then a ping pong ball in the end it just like hot glue that in so the light would come in you know from the speed like go through the blue gel to make it blue hit the ping pong ball and then make light you know kind of radiate in a three hundred sixty degree way from from that little ping pong ball and you know super chief and you can see it right there but we were able to pull this off because of frame compositing so the camera stays in the same place in the subject's moved so our next image is basically just we used the same subject we just had her move so she's just you know in a different place now interacting with this same boy and the next one we again we had our move and then I you know used masking and photoshopped to cut her out again and it's the same thing and then the same thing with the next one so we have four different versions of the same person you know and there we made the hairstyles are slightly different from image to image but we just got this together so this is rough masking and then you know I'm left with this like sadly problem area I just took a brush tool and painted over that and then added my own version of ah soul which was you know like I just I think I grabbed some pictures of like a galaxy online and put that in there so there's like little stars and stuff like that and brought that together and this is this is what we got out of it so you see this image and it's like wow how did how did they do that and that's really cool and even if you didn't know it's the same actor you know for those images but again the camera stays in the same place wasn't going out on location doing crazy you know like trying to match perspective and angle and things like that it's just I'm just moved the subject a couple times and had a cool concept the lighting was kind of cool as well and that sort of thing helps sell it so but again most that stuff was done before the day of a photo shoot all right I'm gonna move on to the next one cousin's cool alright um underwater fantasy this is another I shot to save my living room um yeah I rented a fog machine which is like I have like a regular frog wishing that you know you get during halloween I rented one which is like the industrial kind that they like phil like you know arenas with butcher their awesome by okay so this is like in my living room I turn this thing on in like thirty seconds later it was like this like you could barely see in front of you so if you have a great time go rent them they're like a hundred bucks for three days and they're just like they'll fill any side space you have in less than a minute they're amazing and but then you just like a white residue that gets on everything afterwards so just if you have any camera equipment or something like that make sure you cover it but wait did this and I went teo so I live in chicago now I took this picture just after I moved to chicago and I went to our aquarium and they had a new exhibit with jellyfish so I went to the exhibit and I took my camera fifty millimeter one point four lens on my candidate five demark too at the time and I photographed in jelly fish and I was like man it would be really cool I want to make this girl looks like she's underwater like interacting with jellyfish and I want to make the jellyfish look like they're light sources like she's kind of like reaching out to touch jellyfish and it's lighting her so like how do we do that like how did I make a person look like they're underwater like a murky kind of like bit and light it so this was I was on a camera a ladder here like looking looking down on the subject we just had you know these air I think like a white lightning and alien be from policy buff which is you know like they're inexpensive lights and you know photographing down and this is in my living room like that's that's my carpet that's my couch there my bookshelf like is in my living room I still live in the same place which is actually kind of cool and yeah just photographed er from the top down and because we use that for mission had created that atmosphere like you created that murky atmosphere that's kind of like makes it a little bit more believable so we took this picture and then basically just added this this was all around here I had a granite countertops in my in my apartment and I took a picture of those granite countertops and now that's what this is like little specks and stuff like that that's it's grand it's like black granite with a little specks in it I don't I was just like standing around my apartment like you know I was like oh that would totally work you know there was no genius behind it trust me I just like ah how do we make this I'll never work so I did that and you know basically cut her out like move her leg from a different exposure and that kind of makes her look like she's she's floating there in our next one I blurted a little bit so it's like going back into into space there and then I just I'm asked out these like I erased them and replace them with jellyfish so there's a jellyfish there and in jelly fish there and because we add these light sources that it makes it look really like this jellyfish it looks like it's lit and looks like it's hiding her in this one because I placed where the other light was looks like you know it's adding that room light to to her arm and it's just it's so simple but it it looks really and again lighting is a he's a huge part of making it look real all right and then added a little bit of like light rays and some bubbles I found online and then I made it blue and then added a little bit more light source and then you know we get this so from from photographing her in my living room and weii get something like this so I'm just really no limit to what you can do a song is you you know I kind of have a little bit of imagination and decide and again play with light because like it just makes things so cool all right we're good to go let's shoot let's hear you ready uh one more run through this wall you know I really think that this is just a quick example of ah relatively big composite photographed road and some buildings there in chicago brought in the sky and and then some stadium bleachers things like that warp I went to like a high school football game near my house and photograph all these all these lights and then photographed you know brought in these nice light rays that those were actually just done in photo shop photographed a runner in our studio this was shot on a green screen and then I built those wings in a three d modeling program really just cause I wanted to I was bored house it's not I still don't even know why I did it I was just bored and then kind of added cem cem effects like this so again all these are just examples of compositing that we can do all right so we're gonna we're gonna get back to this but yeah basically that's the end of our or keynote so I hope that helped out give everyone like a really good idea of like what you could do with compositing some of the things to look for it's really good to have that that base a lot of folks out there you guys were asking some amazing questions and I just want to let you know a lot of that is stuff that we are going to be covering during the three days a little bit later I'll talk a lot of about I'll give you a little rundown of we're going to be covering very thoroughly but you can also go to our course page and if you peek there you'll see a list of some of our topics so let's let's start shooting everyone's super excited okay really really cool so we're going to I'm going to go ahead and open up something here in photo shop and this brings up really good kind of um here we go alright this's from our test shoot here yesterday let's just cancel and then we go ahead and open our document here
Class Materials
bonus material with purchase
Ratings and Reviews
Kim
This was the Best Creative Live course I have had the pleasure to watch. Aaron was so informative and explained each technique very well. He was so pleasant to watch because he was so humble and was so happy and excited about what he was creating. What an excellent teacher. I hope he does more seminars.
Curtis Roberts
Fantastic Course! I've watched (and purchased) many courses from Creative Live, and there are many good instructors; excellent instructors, in fact. Aaron's course on compositing essentials is one of the best. In addition to being a technical expert, he is a great teacher; a real talent. Great information and good illustrations/explanations. He does go a little fast when using Photoshop, and while I was trying to find the short-cuts keys, I would find he was three more points down the trail ahead of me. (That's part of why I bought the course ;-) )
Juli Miranda
I love the class he is generous, clear an super fun!! i highly recomend it. A lot of trics and cool information. He is Great teacher and super high level photoshoper... So greatfull. thanks!