Lessons
RAW vs. JPEG
08:17 2Introduction to Adobe Camera Raw 7
10:10 3Camera Calibration
17:08 4Intro to ACR Q&A
12:48 5Cropping & Straightening
17:35 6White Balance
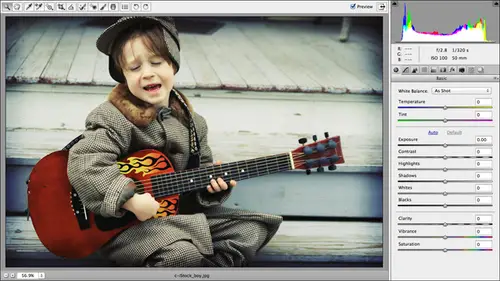
18:32 7Using the Basic Panel
1:05:33 8The Adjustments Brush
42:54Lesson Info
Camera Calibration
So what I want to show you now, when I open up a few images here in raw, I'm gonna go ahead and Enbridge shift click to activate the 1st 1 and then shift click to activate the next one that I want to open. And then I can just double click toe open both of them. Or, like I said earlier, control, open with camera raw or just press command or control. R when you open the image in camera raw, you might have noticed that exclamation point within the yellow warning triangle at the top right here. That was simply camera Roz way of letting you know. Hey, I'm still drawn The bar graph in the history. Um, give me a second. That's all that was. So you saw that little triangle appear momentarily, and then it disappeared. And if you're watching your hissed a gram really closely, you could see it move around just a little bit. Okay, So the first thing I like to suggest that you do when you start adding your images of camera raw is tell camera raw a little bit about your camera. Hey, there are such t...
hings called camera profiles that are built into the program. You can also create your own That is beyond the scope of this year class. So we're gonna talk about using the built in camera profiles to produce pleasing color to you upon opening your photos. Okay, so the way that we do that is we're going to click the tiny little microscopic camera icon. This guy right here's 1/3 to the last in the list. We're going to give that a click, and that's gonna open the camera calibration panel. Okay, This is where you can see the process version, which is a fancy shmancy way of saying the math that's going on behind the scenes that camera is using to convert your image from that wrong negative format into colors that can be reproduced on your screen. We're gonna talk more about that here in just a minute. But right now I want to focus on camera profile. So if you give this menu a click, you're going to see all the built in profiles that are included in camera raw. Now straight out of the box. It's set to Adobe Standard, and that may work just fine for you, but I do encourage you with a nice frosty beverage on a Friday or Saturday night to go through all of these presets and see which one produces the most pleasing color to you on average. And when you find that preset profile that you like, you can save it as the new default in every time you open an image there after camera is gonna apply that profile, which may give you a little bit more pleasing color and lighting to start out with. Why not, right? If it's automatic, we only have to set it up one time. So what you want to do is open up a Siris of images that have that were shot with natural lighting that are kind of indicative of the types of shots you like to take a lot when I say natural lighting, you don't want to open up a series of photos you took with with a color filter screwed onto the end of your lens, because that's not natural lighting. So let's just take a peek at these different camera profiles. So let's try to pay attention to the preview here, and let's notice the difference between Adobe standard and Camera raw 4.4. Okay, so I see my history and change appear. The color in my image changed a little bit. Looks like we have introduced a few more blue tones. So we've cooled the image off whether whereas it was a little warm to start out with incidentally, I love shooting food. It is so much fun. I absolutely love it. This particular food was my first meal in Rome the first time I went to Italy. That's why it's very special image to me. And this was my first class of wine in Rome. I shoot what makes me happy. Okay, so they're wrong. Pop up menu under the camera profoundly knew. That's what a CR 4.4 looks like. So just take a spin through these different presets that we have a big difference using the camera faithful profile. And I will tell you that Adobe created these profiles with very few cameras, probably an icon and a cannon, and that might be it. So there's not a lot of variety, if you will, within these profiles, and that's why I say you can create these profiles yourself. So there is camera landscape camera neutral and you can see how we're getting a little bit different color of life in each one of these images. There's no right or wrong setting for this pick, the one that looks good to you, on average, on the types of images that you like to shoot. Once you find the profile, that looks good. I kind of like the way portrait looks. Then you can use a little fly out menu. This little menu right here looks like three lines, a little dots next to it that the far right of the camera calibration panel give that iconic click musing Back out and you can choose Save new camera raw defaults that will cause the program to apply that profile to every image you open from here on out. Now that's not to say that that profile will always, always, always work for you, but on average, if it does, it can save you a little bit of time. You can always pop back into this camera calibration panel and change it. It's not set in stone, so when you choose save new camera, Roddy Falls. The next time we open an image that many of you will be set to camera portrait instead of Adobe Standard. So do take a spin through that. So let's take a look at this glorious picture here. See the little triangle with a warning sign at the top, right? And then it went away, redrawing your history. Um, okay, that's what's happening there. So here, because we opened this image before we saved the new camera profile default. We're still set to Adobe Standard, so I'll just take a peek down at camera portrait and see if I like the color in the lighting that I'm getting from that profile. And I do so I'm happy with that, so I will go ahead and click. Cancel now. I don't want to save my changes. So now it's opened up a few images. And let's look at the difference between the new math that camera Raw seven is using as opposed to the math camera. Ross six, with previous version used, camera underwent a pretty major overhaul. You're going to notice the differences, especially in detail preservation in the highlights and the shadows. I didn t also reordered the sliders that air in the basic panel, and once we dive into using the sliders here. In a minute, you're gonna notice that they're not only are they in a different order, but some of them are missing, and we've also got some new ones. Okay, so we'll talk about that here in just a few moments. But let's take a look at what those mathematical changes under the hood mean to our images. I'm gonna go ahead and go back into that camera calibration panel by clicking the tiny little camera icon in that list of buttons there underneath the history. And And speaking of the hissed a gram and I'm gonna turn on what's called clipping warnings. Okay, so camera raw will show you a warning If any of your shadows are being forced to peer black, meaning they are losing all detail. You can also turn on a warning that alerts you if you're highlights are being forced to pure white. So let's say, for example, you gotta image like this That's a little bit too dark soul under exposed. And if you increase the exposure here in camera raw, you might be forcing some of the upper end highlights to be blown out, which means you're destroying all detail that used to be in there, because if you think about it, clipping means forcing pixels to peer black or forcing pixels to pure white. Any pixels that are pure black or pure white could not possibly have any detail in them. So I'm gonna turn on these clipping mornings so that we can see the difference between the new math. That camera raw seven is using the way you turn on these clipping mornings. Of course, you've got a couple of options. You can mouse up Teoh the history Graham, and you can click the little triangles on the at the top right of the history and pay the one on the right, which corresponds with the right end of your history and which is your highlights, your lightest parts of your image. You can click it to turn it on the triangle at the top left of the history in which corresponds with your shadows because your shadows or your darkest parts of your image, you're gonna be on the left end of you, hissed a gram. You can click that triangle to turn on those warnings, and if you hover your mouse cursor or point your cursor to those triangles and let it be still for a second. Ben Cameron gives you and I still tool tip that remind you what the heck those triangles do. You're also seeing those warning triangles keyboard shortcut. And this is another easy one to remember. The shadow clipping warning keyboard shortcut is you for under exposed The highlight clipping Morning is oh, for over exposed. Okay, so you know. OK, so I'm gonna press you now. My shadow clipping warning is on. And I know it's on now because camera raw put a little gray border all the way around it. So that is your indication that that warning is turned on. So watch the highlight clipping warning when I press. Oh, now it's got a little light gray box around it. That's your indication that it is turned on. So now when I come over here to the process version pop up menu at the top of the camera calibration panel, I can see the three different mathematical algorithms that Adobe has been using in camera raw. So this is a great way to compare, you know, Do they really change anything or not? So here is the process version of 2000 and three. Okay, we were dealing with that math until, 0 Okay, so my read that just appeared in the image. That's the best camera raw telling me Hey, you have completely lost detail in the highlights. Okay, so any red areas that appear clipping is occurring in those areas. So that means that my pixels, wherever I'm seeing a red overlay or being forced to pure white, which means I have just stripped them of detail or means that they do not contain any detail. At this point, any areas that you see in blue are the opposite. That's your shadow clipping. Morning. So wherever I see blue on top of my image, I know that those shadows have been forced to pure black. Okay, so there's no detail in those shadows right now, Okay? So just keep an eye on the the big old swath of red in the areas of blue that we've got. And those warnings were gonna change as we go through the different process versions just to let you know that our new process version does an amazing job of retaining detail. So now let's switch to process version 2010 and see if there's any difference in the warnings that we're getting. So look for the blue and the red areas to change not very much right between process version 2000 and three and 2010 in this particular image. Now let's go ahead and choose the current process version, which is 2012 and you'll hear high end photographers. Call this PV 2012 p V 2010. Now you know what the heck PV stands for? Process Version. Yeah, baby, where's all of our blown out highlights and shadows? There ain't men. That is the difference between the math that's going on under the hood. So you're gonna capture a lot more detail. Or rather, you're gonna be able to preserve a lot more detail in your images if you use this new process version now. That said, if you open images that you have processed previously in camera raw, you do have the option of updating them to the new process version. Hey, but don't feel like you have to go through every Dad gum file you have ever processed in raw and change the process version you just don't have to do that. First of all, you may have done so much editing that the differences are gonna be that noticeable. The difference is maybe a whole lot noticeable. Meaning you may have to go through, go back through the basic panel and redo all of your edits to get it to look right to you. But the files that you might want to change from an older process version to a newer process version are the ones that you thought weren't so great to begin with. Or maybe ones that you weren't able to recover a lot of your detail. You might even have files on your hard drive that you consider to be unusable. Because maybe you had so many areas that had lost detail that you just didn't process that file. And if the subject matter is important to you, maybe it was a fantastic vacation. You're unable to reshoot it, or what have you meaningful family portrait, Then those images certainly might be worth your while to reopen and raw and apply a new process version. Okay, if you open a file that has been processed before, you're going to see a tiny little and I mean 80 biddy gray square at the bottom right of your window, and it's gonna have a tiny little blue exclamation point in it. And I mean, it is so little that you might completely miss it if you do see that little exclamation point come up and we may encounter that at some point during this class, then you can just click that little exclamation point without having to come into this camera calibration panel to update your process version to the new one. Okay, so if you spy a little exclamation point in a tiny little gray box at the bottom right, that means that images using an older process version and you can simply click the exclamation point to update. But again, don't feel pressure to go back through your whole library unless somebody is paying you to do it by the hour. Then heck yeah. So seasoned users of camera raw may experience a little bit of frustration, a little bit of a learning curve as they learned these new tools because, like I said earlier, the basic panel has been completely reordered. Some sliders or gone. We've got new sliders, so it's gonna take. There's gonna be a little bit of a learning curve for you seasoned users out there, but I think hopefully this demonstration shows you how much detail you can retain in your images. So just to convince you even further, let's go ahead and click on another image that is seriously blown out. This is an image that I got. Uh, I've been like George. I saw this old restored Jaguar, and I just could not wait to get it into camera. Raw are Photoshopped To make it a c p. A. Get a nice brown tent for a little dark and edge around. It just couldn't wait to make it vintage, cause it just begged it. So let's take a span through our process versions again and see what the new math will do for us in our image. So we have our clipping warnings turned on when she turned those clipping warnings on. They stay on until you turn them off. So let's look at the Matthews in and see what kind of highlights clipping damage we've got going on in shadow damage. So 2012. Okay, that's with no adjustments in the basic panel whatsoever. Let's look at it on one more image. This is a fire island in a Long island. So 2003 we've got a lot of detail loss in the shadows here. 2010. Still a lot of detail loss in the Shadows Zip. So it's a good upgrade. I know a lot of professional photographers who feel that the changes in camera raw seven process version are worth the price of the Photoshopped upgrade, because that's the only way to get the software.
Class Materials
bonus material with purchase
bonus material with enrollment