Lessons
RAW vs. JPEG
08:17 2Introduction to Adobe Camera Raw 7
10:10 3Camera Calibration
17:08 4Intro to ACR Q&A
12:48 5Cropping & Straightening
17:35 6White Balance
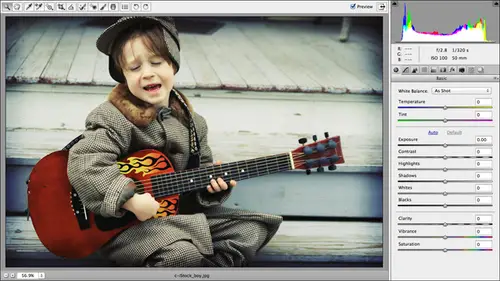
18:32 7Using the Basic Panel
1:05:33 8The Adjustments Brush
42:54Lesson Info
Cropping & Straightening
So now let's talk about cropping and straightening exciting stuff, right? Cropping is training. Now, this is the first thing I do to my images, because why bother messing with pixels that you're not gonna use anyway right around the edges. So let's take a pic of this image right here. I was a really good girl one year and I was invited to shoot both the Albuquerque Balloon Fiesta and the Adirondack Balloon Festival in the same year was so much fun. It was great because they fail at different time to the year one was in the spring was more towards fall. It was fantastic. So you'll see several balloon pictures throughout this this day today. So I'm gonna go ahead and double click to open this image camera thinks about my history and for just a moment, to process it and to crop. The image works a lot like it doesn't photo shop, so the crop tool looks exactly the same, so you can grab it up here by clicking its icon. Or you can just press C C for crop. Same shortcut as you got in photo sho...
p. If you click and hold down your mouse button to expand the menu. You're going to see a list of aspect ratios, which basically let you change the shape of the image aspect. Ratio is a fancy way of saying the images relationship between width and height. You know, is it more y than it is tall, Um, like a three by by three aspect ratio and so on and so forth. If you don't see the aspect ratio that you want to use, you can always click the custom button. You can enter your own dimensions There. You'll want to turn on the show overlay options that's going to give you that gloriously handy rule of thirds grid that's gonna help you compose your image a little bit better here in post. If you didn't get it composed perfectly or the way he wanted Teoh in camera, then you can turn on that show overlay option and you'll get that handy rule of thirds grid. So go ahead and zoom back out so you can see that so simply click and drag to draw a box around your image. Now why the crop tool in camera raw didn't change in similar ways is the crop tool in photo shop. Six did in that you get an automatic crop box is anybody's. Guess why Camera Raul didn't get a new paint job like Photoshopped did is also anybody's guest. Because if there was any visa software that I thought for sure would go dark grey like Photoshopped did to reduce eyestrain and also help you focus on your images so that theoretically you're able Teoh get more accurate color correction, I would have thought for dang sure that camera raw would have gone dark, just like Photoshopped did, but it did not. Maybe camera raw eight will go dark Camera raw doesn't have any preference, is that you can try toe tool around in and set because it is a plug in that runs inside a photo shop so we don't get a coat. A dark grey paint. All right, so this is the rule of thirds grid here. Now that I've turned it on, you will have to turn angst. I believe it is off by default. But even if you click and drag diagonally downward to draw crop box and you don't have that overlay turned on, you can still try to appear to the Crop tools menu. It's still accessible. Even after you, you have an active crop box on your screen so you can always turn that on. You can move the crop box around on top of your image. The rule of thirds principle states that if I place my focal point focal point on one of the intersecting lines in this tick tack toe grid, then I will produce a more visually pleasing image. Okay, so this is how I should have framed up the shot in camera. But as you can see, it was stupid early in the morning, and I was doing good just to be vertical eso. Once I get my crop box positioned correctly, I can simply press, return or enter on a PC to tell camera raw two. Crop that image. But again, everything is nondestructive and camera wrong. So if at any point you decided to go back and change that crop, it's a simple matter of going back up in activating the crop tool and see how your my edges came right back. That will always happen. It's really amazing. And if you decide you want to bail out of the crop altogether, you do not want Teoh, apply it. Then you simply click and held down your mouse button on the crop tool menu, and you can choose clear Crop and that gets rid of your crop box. Yes, we have a question from the audience. Lisa in camera. Is there also a place to cycle through the different overlay choices? I don't know of a keyboard shortcut that will cycle through the overlays. Jim, do you happen to know of a short cut? I mean, I actually get put then on R W wish list for Came right? Just another note on the clear crop menu item. If it any point you straighten an image and we're going to do that in just a moment. The straighten tool lives to the right of the crop tool. There is no, uh, contextual menu, your papa and then you rather that you can get from this tool so there's no clear straighten button. If you've ever straighten an image and you want to unstrap in it, you have to go to the crop tool and shoes clear crop so that clear crop command is also tied to the straighten tool again For reasons I know Well, actually, under the reason because straightening your image is really just a rotated crop. That's what it's doing. So that's why the clear crop is is helpful for that. Okay, so now let's take a look at the icon that we get Enbridge after we crop our image. So we'll say That's perfect. Drive there as really proud of that photo so I can go ahead and click Done. If I click done, came here off. Simply gonna make that sidecar list of my edit requests. It's gonna store that near the the camera raw file and let me get back in bridge. We're going to see a little crop icon appear at the top right of our image right there. So now it's open up a couple of images and let's crop them at the same time, so we'll shift Click to activate these two files, and I'll use my keyboard shortcuts to open the files in raw command. Our control are on a PC. I can see that they have indeed both opened over here on the left hand side to apply my crop to multiple images. At the same time, we're going to click the select all button at the top left of your camera. Wrong window press see to grab the crop tool. My aspect ratio is fun. At 3 to 4, click and drag diagonally downward to draw a crop box. This time we're going to go portrait instead of landscape and aspect ratio and click and drag to position the crop box wherever you'd like it And that's it. You can see the preview over here. Of the files that I have open, they both changed. Okay, so if I press escape to bail out of this crop, you'll see these go back to the way they looked when I first opened them. Case will apply that again. This was a file I got. Actually, some of my files that I have got I stopped photo and my stock photography account, or actually, in these exercise files. I own the copyright so I could do that right show. I was trying to be all clever. This is a photo shoot we did in Calgary, and it was my first experience shooting models, and I was just absolutely amazed how they do anything you told him to do. I couldn't believe it. I was like, OK, sit on the ground. Yeah, yes, it on the ground. Actually, that lighting that's falling on the on the floor there? Yeah, your hands are underneath. Yeah, Yeah, that looks good. If you look down, look sad if she was doing all this stuff, I like this a lot. A whole lot. So while I was trying to be creative and catch the beautiful lighting that was coming through that we were shooting in an old warehouse. So we had a nice old windowpane in the morning. Light was coming through on the floor and I thought it was real pretty, but in post, you know, if you wanted to add text over here, maybe this was going to go in an advertisement then that that kind of composition might have worked well. But I think the image looks a lot better crops so that the beautiful blonde is the focal point and not the big wooden floor. So that's the beauty of being able to do this kind of stuff in post. So to accept the crop, we're going to go ahead and press return. And to me, that's so much more visually pleasing image All right, So now let's take a look at straightening because straightening does use the crop tool. Like we said a moment ago, I'm gonna go ahead and put cancel. So we'll open up a couple of images that needs straightening, albeit in different ways. So we'll use our keyboard shortcut again. The open the images in Rock Man or Control R Here we go. I was also real proud of this image. So when I was shooting one of the balloon festivals, the pilot of the balloon was behind me, and I had my elbows down on the edge of the balloon basket because I was watching another bullying. So we're up in the air. So I'm watching another Belene drop down and I've got my camera all set, my elbows air in. I'm holding my breath to try not to introduce camera shake just like I do. When I'm target shooting, you hold your breath and then you pull the trigger, right? So I'm just waiting for that balloon to drop down. And I am really concentrating hard, but not to let my camera fall out of the basket in to get the shot. And the pilot is tapping me on the shoulder saying at least at least turn around like a just give it. And after I got my shot, I turned around and this is what I saw. He was actually taking me down for what he called a touch and go landing where I think he been seven blades of grass when we touch, and then we went right back up. And so that's my shadow or our shadow in the balloon that I caught it. I thought that was a neat shot, but it is a little bit cricket, so let's go ahead and straighten it. So the straighten tool lives next to the crop tool. Looks like this guy right here. Command keyboard shortcut is a so give it a click and the deal is you want Teoh. Draw the line across the part of your image that really ought to be straight. If you've got a horizon in your image, that's usually a good thing to draw the line across. If it ought to have been straight and it isn't in this image, the edge of this pasture right here isn't exactly straight, so we're gonna go ahead and click and hold on our mouse button, and we're gonna draw line across what really ought to be straight and camera is gonna look at the angle of the line and it's gonna put across box on her image, and it's gonna rotate it at that angle. So once you release your mouse button finals in back out. Now you can see how camera raw straightening the images. Just doing a rotated crop is always doing, but easier to let the software do. Then you try toe. Figure out the rotation that you need, just like the crop tool. When you want Teoh except the straightening, go ahead and click return or press enter on the PC and camera raw Straightened your image. Now. I mentioned earlier that you have to use the Clear Crop Command to get out of a straighten. Okay, so let's say, for example, I click done and I close this image and I decide in the future to come back and open it, and I decided that I don't really need to straighten it, or I want to back out of that straightening so you can come over here and grab a straighten tool and we get that same straightening box on our image. There's no way to get rid of it from right here. So what you can do is come over here to the crop tool in shoes, Clear crop, and then we get out of that straightening situation there. So let's take a look at straightening on another image. This is from the Albuquerque pulling festival and see how when I was saying earlier how raw images don't have any kind of processing processing so they look flat. I haven't corrected this image it, so it looks flat. We could click the auto button and let camera. I'll have a go at it, but let's go ahead and straighten it. So here again, you simply grab the straighten tool and draw line over part of the image that ought to be straight. Now I've got you probably can't see it on screen, but I've got a little bit of ah horizon back here in the background. That I can see is at a pretty good angle, someone to click and drag to draw a line across what really ought to be straight release. My mouse button camera was gonna put across box on my image If I'm happy with the angle, just go ahead and press return in your image straightens right up. That's an amazing thing to see. This is called Mass ascension at the Albuquerque Balloon Fiesta, and it's just incredible to see that many balloons in the sky at one time to really incredible, very surreal. So that's cropping and straightening. Do we have any questions on cropping and straightening? Try the easiest thing you'll ever do. We do have a few questions on bond question from bad coconut. Who is in Sacramento? You were showing us the rule of thirds. But did you say that there were no other overlays like a spiral? I don't know of any other overlays in camera raw that the new golden spiral and golden ratio and diagonal and all that kind of stuff is only found in photo shop. Think weird, huh? You think of that stuff would be in here, too. Black Room has a bunch of other overlays. Helios imaging from Tacoma is wondering. Are their perspective correction tools in the crop menu like in No. But there is a lens correction panel that you can use to correct in camera distortions like you know, geometric distortion and so forth. And a question from Dutch in New York City. Not in Mr name. Um, New York City is a longer line drawn with the straighten tool. A little bit more accurate than a shorter one. I don't think so. Not in my test. I mean, I don't think it makes a hill of beans difference How long you draw that line, cause camera was only looking at the angle that would you draw it? If it's helpful for you to see the line, you might make it longer, but I don't think camera rock years, I mean from New Zealand. Who is, by the way, awake at four. AM right now. You join again. I mean, is wondering do those aspect ratios have any relation to print size? No, no. Just the shape of your photo and a question from a O. L bites. Can you expand the crap box after straightening? So the image is slightly bigger on. Can you use clone or another tool to fill in the white areas? You? Yes. To the first question. Uh, no. To the second question in camera raw, you'd have to open the image up and Photoshopped Thio Thio fill in. And that would be a great use for content aware scale over in photo shop, which, if you don't know how to use that we talked about in the last class this week. That's right. That's right. And the CS five intensive Antoninus IUs six engines that we looked at that. Yeah, so absolutely, You can change the size of that crop box when you do a straighten. But what camera is trying to do is give you the largest result image with the rotation angle that you gave it without introducing any transparent areas around the image. Because when you rotate, you know you're losing a little bit of pixels just to keep your image at the aspect ratio in a rectangle, rather so you can change that. But there's no way in camera raw to make it filling, and you'd have to pop the image open and photo shop, which is what the open image button is all about. So you could do your straightening here if you wanted Teoh if you were using camera to do other corrections T. But if you were just going to straighten and that use content of wearing a maze will destroy Eaten in Photoshopped. See a six with a new straighten aspect of the crop tool. So Mary from Costa Rica is wondering, says, I noticed when you open the crop tool there were different aspect ratios guessing those are only available on camera. Ross seven. Is that a new feature on? Is there any other new feature differences between the old and the new version? With this particular I think the aspect ratios. Are you in camera raw? Seven. I don't know of any other changes with the crop tool specifically.
Class Materials
bonus material with purchase
bonus material with enrollment