Lessons
RAW vs. JPEG
08:17 2Introduction to Adobe Camera Raw 7
10:10 3Camera Calibration
17:08 4Intro to ACR Q&A
12:48 5Cropping & Straightening
17:35 6White Balance
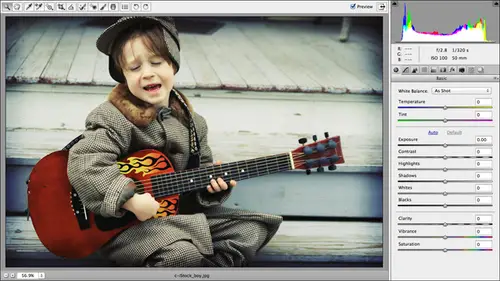
18:32 7Using the Basic Panel
1:05:33 8The Adjustments Brush
42:54Lesson Info
Going Grayscale
So the next thing we're talking about, we're gonna spend the next little while creating creative color effects in camera raw, and you just won't believe how easy it is and all the different things that we're gonna dio. So we're going to come down here and open up another folder of images. This one folder number 10 is called Going Gray Scale. And that's where we're going, baby. So we've got several images here that we're gonna turn into black and white, and I'm gonna go ahead and address this because I know there's gonna be questions, especially from the graphic designers out there. The gray scale image that we're gonna create here in camera raw is not a true gray scale. It is still made up of RGB red, green and blue. Okay, so you pre press folks out there, this is not a way to save on print costs. Okay, unlike in photo shop where you can make your photo shop document a true grayscale document, meaning you don't have any color channels anymore. And when you send that file to professiona...
l printer to be put on a press, then you've only you're only dealing with black as the ink. All right, that's not what we can produce here. In camera raw. It is still an RGB image. So let's go ahead and open up the shot of this vintage Jaguar nose and wheel that I got in like George two years back. All right, so let's go ahead and make a few color adjustments here in the basic panel This So we're starting out with the most beautiful image that we can. So I'll go ahead and reduce exposure just a little bit. A lot in my shadows. Some and we're going Teoh dark in our highlight. It's just a bit Let's warmer up and now it's add some clarity and let's add a little vibrance. Okay, so here's our before, and here's our after. So what we're gonna do is we're going to create a grayscale image, and I want to start off with his much contrast and good looking color as I possibly can, because that's just gonna help my grayscale look look much better. So in camera raw, the way you create a grayscale image, did you go into the H s L slash grayscale panel? And that is this guy right here Nope. Is the next guy over Like a Siris of lines is the fourth fourth button in that roof. So go ahead and give that a click and going gray scale on camera is tough. So you guys pay close attention here because this is really involved in hard. We're going to click. We convert to grayscale button the end. No, If you've got great contrast, that might be the end. But we want to tweak our contrast. And this is very similar to a black and white adjustment layer over intro to shop in that you can click and drag these sliders so either lighten or darken that particular color wherever it appears in your image. I'm gonna switch back over to the basic panel real quick, and I'm gonna get rid of my shadow clipping warnings by dragging the shadow slider and the black slider a little bit. There we go. So now come back over to the grayscale panel. So here we can tweak the contrast to produce a really nice looking image. So, for example, if I click and drag the ribs slider to the ride, I'm going to be lightning red wherever it appears in our image. Since I'm not seeing any change, I don't have very much. If you need read in that image, Okay, my drag read to the left, then I would be darkening. Oranges have been a little bit orange in my image. You can see that changing as I drag it from right to left. I've got more yellows in my image so you can see how easy it is to tweak this to produce a nice looking black and white image. Again, there's no right or wrong way to use these sliders. You're just trying to produce an image that looks good to you, and that's pretty much it. Instead of trying to point directly directly at one of these little bitty triangles, you can never point your cursor to one of the text labels and just click and drag once you see your cursor turn into that scrubby cursor and that is it. So here's I before shows us the before view of our image. Our the previous view of our image when we entered this particular panel is still showing me the changes that I made when I was over in the basic panel. Okay, so there's are nice. Grayscale it again, completely non destructive. If we print the sucker out or give it to our client or we change our mind, we've not harmed the original image. Weaken to simply go right back in here. It's a camera raw Choose camera, Roddy Falls. Or we can come into the age of cell grayscale panel and just simply turn off that check box and go back to the changes that we've made in the basic panel. So let's go ahead and click done, and then we'll take a look at a couple of images that have a lot of color. And you may be thinking, Wow on Earth. Would you ever want to turn these images into a black and white? Because you can, and this one is going to make a really interesting image once we really lighten up the Reds. Okay, it's got a lot of red in the middle of that leaf shot, this one in a mallie a couple of years back. I love shooting flowers and Maui and plants in Maui because they're just so different. Okay, so the color and this one is pretty good. That's another tip for you. If you don't ever wanna have to color. Correct your images discussed shooting Maui. The lighting is perfect. So now we're gonna come over here Teoh the hse l grayscale panel. And again, if you forget what these icons are, First of all, just click. Um, until you find the right one. Or you could just hover your cursor and wait for that little tool tip to come up. So now we're gonna click, convert to grayscale and watch what happens when we lighten the Reds in this image. Okay, so this time I'm gonna point my cursor at the text label and click and drag to the right, And that's something. So do play one of these sliders again. Fabulous excuse. Pop up on your favorite frosty beverage on a Friday Saturday evening, Go through and play with all these sliders and see what kinds of interesting contrast you can introduce into your images. And there was nothing in the world wrong with you coming in here and converting it to gray scale playing these sliders. Can you go back to the basic panel and continue to make changes? Maybe I want to introduce some clarity. Sure, Absolutely. So here's our before, and here's our after is completely different looking image. So I'll click it done on that one, and we'll open up another one, and then we'll take questions on going gray scale. So I'll go ahead and pump up my clarity on that when I see how clarity just makes the image look more clear and that incredible even got more texture in the clouds. Now pump up the vibrance a little bit. Now it's coming here to our great skill panel. Turn on convert to grayscale and an image like this. You could really have a lot of fun with changing the lightness or darkness of particular colors in that image, because these balloons have a slew of different colors in them, so the different effects she can create there's just no end to them. And again, if you're not seeing any change when you're dragging a slider, left your rights because you don't have that much of that particular color in your image. So here's our before and our after but on that one, Any questions on going gray scale in camera raw, incredibly easy, innit? Single check box
Class Materials
bonus material with purchase
bonus material with enrollment