Lessons
RAW vs. JPEG
08:17 2Introduction to Adobe Camera Raw 7
10:10 3Camera Calibration
17:08 4Intro to ACR Q&A
12:48 5Cropping & Straightening
17:35 6White Balance
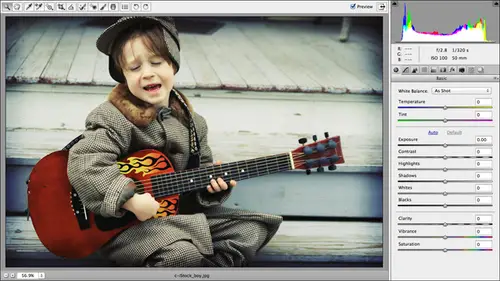
18:32 7Using the Basic Panel
1:05:33 8The Adjustments Brush
42:54Lesson Info
Gradient Filters
So let's close this image and let's talk about graduated filters. Graduated filters in camera raw do pretty much the same thing as the adjustments fresh. You've got the same list of adjustments that you can make. But instead of painting to apply those adjustments, you're going to create a Grady int. And it looks exactly like the interface that we see in the new tilt shift filter and Photoshop. It's exactly the same so you can see exactly where that feature came from. So let's go ahead and pop into another folder that is cleverly named using graduated filters. So here we've got a couple of images that are primed and perfect for using the graduated filter. So I'm gonna go ahead and click this photo and press command or control art. Open it now, this one I've already adjusted. So what, we're gonna dio when camera raw figures out its history in there. I'm gonna turn off the previous so you can see the before. And it will help explain a little bit about what we're going to do with these gra...
duated filters. All right, What I meant to say was that I'm gonna reset. Thats image back to the camera raw defaults by using the fly out menu at the top, right of the basic panel. Now you're going to see the original horrible, horrible image. So if I temporarily turn off my highlight clipping morning, my pressing ofer overexposed cause that's my problem that I'm having here. You can see how truly, truly awful this image is now. The subject matter, I think, is most excellent because it was my view from the front yard of that ancient stone house that I ran it in Umbria in Italy, where I finished my first CS four book and I just thought this was beautiful. There was this big old tree and the silver trees back here, olive trees. Then you have that quintessential Italian backdrop, with the pointy cedar trees in the background and the other ancient stone farmhouse and the golden lighting in the blah, blah Well, what happens is that me exposing for the foreground completely blew out the the background and exposing for the sky would completely make the foreground dark. So this is a perfect example. We can apply some adjustments, but apply them in a gradual way as a Grady int so that we don't get a hard transition between our original and the color change that we're about to energies. So let's go ahead and turn our highlight clipping back on by pressing Ofer overexposed. And let's go ahead and do a few adjustments here in the basic panel, we can click audio and see how good of a job that's gonna do not get it all. So let's go ahead and fix our highlights. Try to recover some detail in that area by dragging the highlight slider all the way to the lift. And look at that. There's my detail back in the sky that I might have really thought didn't have any pixels in it, just pure white. So I did bring some detail back. But I still want to introduce some color in that perfect way to use the graduated filters. While I'm here, I'm gonna go ahead and lighten my shadows up a little bit more in the bottom area, given a little clarity, and now let's use our graduated filters. Graduated filters live right next door. The tool rather lives right next to the adjustments. Freshen the tools panel at the very top of the interface and it's keyboard shortcut. Is it using one to remember it's G G for graduated, and it really works like the graduated filters You can screw onto the end of your lands, which is basically just a Grady int of color. It will be a color to translucent that you screw onto your limbs that you can do this kind of thing in camera. So once we press g or click the tool to activate it, I'll zoom back out and you can see we've got the same set of ciders over here with graduated filter that we do with the adjustment brush. You just don't have any of the cursor controls that you have because we're not going to use a brush cursor. Okay, we're gonna use a radiant again. You can change these sliders before you have a go with the Grady int filter or after. So I'm gonna go ahead and click and drag to apply my Grady in. And then we'll go back in adjustable sliders. So you click within your document in you drag in any direction. Okay, you can twirl the filter around. So in other words, if I want to apply a filter in a vertical fashion. I can lock it to vertical by holding the shift key as I drag. Or let's say my sky isn't horizontal. Maybe I've got a little bit of an angle going on that I can simply rotate this filter in angle. My adjustment. Okay, I'm gonna go ahead and stop here and explain some of what we're seeing. This little green dot right here tells you where the adjustment is Starting. Okay, That green and white bar, That's where the adjustment actually stars. This area right here is the width of the Grady in in which that adjustment is being applied. Okay, the red dot tells you where the adjustment is ending. We're stopping. Okay, so you can think of that as green light means go. Red light means stop. So this is where the adjustment stars. This is where the adjustment ends. And this is the width of the adjustment or the width of the Grady in that's being applied in the background camera. Just making ingredient mask. So if you've ever used the radiant tool inside a layer mask in photo shot, which is a fabulous way to create a soft fade from color to black and white using a an adjustment layer. This is exactly the same thing. It's a Grady int mask that's being created in the background so you can click and drag with in the adjustment the middle part to move it around on your image. So for this particular image, we wanted to start at the top of the sky and we wanted to come down just above that farmhouse. Okay, so we're gonna position it about like that. Now we're going to come over here and we can adjust our sliders. So they're sticky, Of course. So it's picking up the changes that I made for the last image. So I'm gonna come up here and I'm gonna decrease the exposure. And as I do, see how the it's a Grady in. So the expo, the exposure changes being applied more so near the red or near the green dot in the green dashed line in less so down here near the rid. So it's fading the adjustment for us as ingredient. So when a little too far with exposure, what I'd really like to do is introduce a little bit more color up there so I might do that with my new temperature intent. Slider. So those two are new. The graduated filter pale in camera raw. Seven. If I wanted him introduce a little bit more color, I could use those sliders. And I could also come down here and increased saturation. Just like with the adjustments brush, you can have several of these graduated filter adjustments within the same image. Okay, you've got the same new radio button over here is you do with the adjustments fresh, Same keyboard shortcut. So if I want to add another graduated filter, I can press in. And this time, let's say I want Teoh warm up this area down here in the foreground. So this time I might click and drag from the bottom up. So where you start dragging, that's where your adjustment begins and where you stop dragging is where you're just ends. So let's say I've got that positioned pretty well. They want to turn off for zero out my white balance changes that I made in the temperature intent slider and for exposure not when a dark in that just to hear. But what I really want to do is pump up clarity and saturation a little bit, and I might actually warm that up a bit by dragging the temperature slider to the right. Then you can temporarily hide all of these dotted lines and dots by pressing the wiki. No, you cannot hide that, my person to be key. Is that the why he No, it's not The Y key isn't the h key, is it be? Why is it not working anyway? Imagine that those dotted lines have been temporarily hidden. He can also toggle the show early button down here at the bottom and the proof is in the pudding. Approve is in the tool tip. It really is V. But for some reason, my wiki has been angered and is no longer functioning. Okay, so here's a before and after, we're gonna toggle the preview button often on by pressing P. Now, my p, he's not working. That's fun. All that will be fixed when I come in and out of camera raw G and let me close this image. So here's our before, and here's our after so you can see I did indeed introduced some color into areas that really didn't have a whole lot, and we did it in a gradual way, an ingredient, so it's very subtle. Here's our before, and there's our after. So let's go ahead and click done and will have another go with graduated filters and another photo of Santa. Any grease. So we'll click to activate the photo, and then press commander control are to open. It came a raw. So this is another good image to display the usage of the graduated filters. Because this area of my sky I want to be darker. So what I'm going to do is create a slightly rotated graduated filter that darkens just that area. So let's go ahead and press G to grab the graduated filter tool with a graduated filter tool. It does feel easier to me to go ahead and draw the radiant and then tweak the sliders with the adjustments fresh depending upon when I'm fixing, I'll go at it both ways, you know, either or, but with this particular tool graduated filters. I always draw the the grainy it first. And if you decided you need to tweak the width of your grading, all you have to do is click and drag. One of the one of the buttons either the red dot or the green dot Okay, and rotating is a simple as just twirling here a mouse button or twirling your mouse. Rather. Okay, so let's say that is fine. Now, I'm gonna come in here and again, zero out all the changes that we made before. Here we go. So now let's decrease our exposure little bit or dark in it. And then we're gonna take the highlight slider, and we're gonna drag it quite a bit over to the right. Now I'm starting to see cloud back there. I didn't even know there was a cloud back there and maybe pump up the saturation just a little bit, make our skies a little bit more blue. And because the graduated filter is fading this adjustment so much down to nothing. By the time you get to that, a dash red and white line. I'm not really seeing much of a change on these buildings. Okay, this image is a little bit if he because really we be up somewhere like this because we've got a different height of sky here than we do over here. But it still works very well. So let's see if our wiki is gonna work for our show. Overly. Now, there we go. See? It was just tired. Had a big old piece of pizza for lunch. So here's our before, and here's our after where they're overly hidden. So you can see how the change in the skies Very subtle again. Good. Freaking like doing that that quickly. It absolutely can be done, but it takes more steps in front of shop. Okay, Any questions on graduated filters and the audience? One thing I noticed is Lisa. You said that on on this last one. You like to draw your graduated filter first and then make your changes. But when I have, when I'm zeroed out already and I go to grab it, it will let me do it. It says you don't have any adjustments, so therefore you can't do it. Try zero in years out. Dragging it. That's your everything first. Okay. And now try going up and pulling down a graduated filter. We'll scroll down on the panel, make sure everything set to 00 it's clocked at us. Yeah, it won't let you do it because you don't have anything you're not doing anything isn't that interesting that we don't have that problem with the adjustments fresh? Actually, I did. Oh, really? Don't let you do that and we'll let you do that either. Means you must have had something was set a little bit. So maybe that's why there's no keyboard shortcut for sending all that zero. That would still be incredibly helpful. All right, we're learning here live at creativelive words again that I loved in these classes so much because there's no possible way I could know every single thing about this program. Nor would I want Teoh, you know? So I always love learning from you guys and from the from the Internet. It's just wonderful. So you're about as close as we can get to knowing all you seriously, your check is in the mail. That's what I like to hear. Uh, let's see. So again, sugar from Washington is wondering, says, Looks like you can take the starter endpoints off the image area. Can you really? And if so, how far? As far as you can see, I guess, if you could, you zoomed away far in and we'll go ahead and make a change so that we can use the graduated filter. So I don't think there's a limit to how far off the actual edges of the document that you can drag those. But that's certainly a way to make it even more subtle. So, for example, if we had the green got down here, maybe that was making this area a little too intense for you. Then you could make it even more subtle and gradual by grabbing that green dot and pulling it up. It's a great question. Thanks, sugar. Caution from Ron Me In late room, you can double click on the slider name to reset it to zero. Can you do the same here? Oh, sure can double click the slider itself to reset it to zero nice. Or this actually, that person inside the cider name. So maybe that's the way to do it is actually on the slider. I think it Yeah, I'm not having any change on the spider name, but if I double click the slider itself, it doesn't go to zero. Also, I'm glad he brought that up. If you point your cursor at the label of the text label of these sliders, you get that handy, scrubby bar. So instead of trying Teoh, grab that little bitty triangle on dragging around. You could just point your cursor to the word and then click and drag either left or right. It's right. Fashion TV from Singapore always has wonderful questions. Thank you. Are we able to feather these graduated filters or is just the graduation? The only filter are feathering that we could do. Yeah, the feathering is happening because of the grading at Mass is being created in the background. So there's in this case there's no need to feather because that's already happening. And from D just D. Can you have ti? Can you have multiple graduated filters with different settings on each? Absolutely. So let's say, for example, that we've got our sky all fixed up. Now we want to dark in the ground area a little bit, and I am in between zoom levels sold a safe, it in view. There we go. So now let's create another graduated filter. So if we've already got one going on, we need to put the tool in new move by pressing in or by clicking the radio button underneath. The words graduated filter in the panel, and now we'll go ahead and make a change. So let's dark and our exposure just to touch. And then let's dark in the highlights. Okay, so this time we're going to click and drag up, and I want angle that just a little bit and dark in my shadows. This a little bit in that area and so will press the wiki to turn the overlays of the filters off and then press P for the before and after, so you can see the foreground is being darkened just a little bit. So we've got to graduated filters going on in the same image. I'm not aware of a limitation, but if you if you add in several of those things to your image, that would get a little bit out of control, right? Stephen Sylvester asks. Can you erase part of a Grady in with a brush? Maybe negative, and I'll add Good Betty That and that's the same question I think for Mary in Asbury and another fashion TV question, the color of the graduated filter is determined by the sliders. Any recommendation at any recommended presets before we start sliding? No, because we'll happily in camera raw. They're all set to zero, you know, Now it just depends on what you want to do, and that's gonna change. All right. Image by image basis. Yes. The changes that we're introducing are coming from these sliders over here. So any color changes that you're picking up our is happening because of the changes we're making to these fighters. Um, one last question. Photos by Johnny from North Carolina asks, Can you flip the graduated filter to make the bottom of the image darker than lighten it up towards the top? I don't know how to flip it with a keyboard shortcut, but you can spin it around by rotating. Yeah, And if you press and hold the shift key, I believe the spin will happen. And, like, certain angle increments. Okay. Okay. I think we could move on. All right. Thank you. The next thing we're gonna do. Oh, and just in case I didn't tell you, you can delete any of the graduated filter just by clicking to activate them in pressing the delete key
Class Materials
bonus material with purchase
bonus material with enrollment