Lessons
RAW vs. JPEG
08:17 2Introduction to Adobe Camera Raw 7
10:10 3Camera Calibration
17:08 4Intro to ACR Q&A
12:48 5Cropping & Straightening
17:35 6White Balance
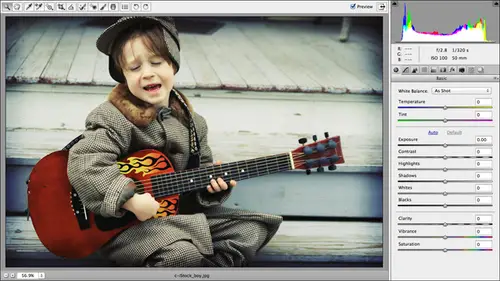
18:32 7Using the Basic Panel
1:05:33 8The Adjustments Brush
42:54Lesson Info
Sharpening
So the last thing that I want to cover here since we kind of jumped ahead and did presets already, let's take a look. A sharpening. So gas and images prepared for you in the cleverly named sharpening folder. So we're gonna open it both these guys by shift clicking to activate them. And then we're gonna press Commander Control are this is another shot from Olympia, Greece. I tell you, such a trip to see these ruins like this and just imagine what they look like. What, 1000 years ago, Olympia is 1000 years olds crazy. But anyway, so this is a good image to show you a sharpening preview because we've got lots of texture in this very old stone. So what we're gonna do is we could make our adjustments here in the basic panel. At some contrast, everything else looks pretty good. I'm gonna bump up the clarity a little bit, and we're going to add a little vibrance. Here we go. So now let's go into the sharpening panel. We've looked at selective or local sharpening with the adjustments brush alr...
eady, but we haven't really talked about, um sharpening the whole image. So If you take a peek at the buttons above your basic panel here, the 3rd 1 is called the Detail pale, and you could think of sharpening, as you know, fine tuning the details in your image. So if we give that a click, we get some of the similar controls that we might be used to seeing over in photo shop if you've ever used the n sharp mask filter for your sharpening before. But here's a rundown of what these things do. Thea amount slider controls the strength of the sharpening helmet sharpening is being applied, and again, we're applying it to the whole image. And what did we say about sharpening before? You're not going to see a decent preview of the Scharping unless you're zoomed into about 100% and cameras even happy to tell you that right here at the bottom of the detail panel. Former accurate preview. Be sure your viewing the image at it at 100% so we'll zoom in a little bit more. There we go. So now if amount controls intensity town, that sharpening intensity do you want, try 40? Okay, that's kind of a basic number, so try 40 as your starting point and then toggle the preview often on again. I need to be 100%. I didn't go quite high in this, so we'll scroll down a little bits. We're seeing all kinds of rock there. So toggle your preview off and on and see what you think about a setting of 40. Then next control down is called radius, and that determines how far out from your edge pixels are you affecting the image. So sharpening, if you think about it, is just like sharpening one of your kitchen knives. All right, Sharpening an image Scharping Kitchen knife your your ex situating or emphasizing an edge? That's all you're doing. And what's an edge in your image is an area of high contrast. Were light pixels, meat, dark pixels and all sharpening is doing is lightning the light pixels a little bit and darkening the dark pixels a little bit, as you can imagine. If you sharpen a bunch, you're eventually gonna introduce sharpening halos so it's gonna look like a white gap in between the areas of high contrast edges in your image. You don't want to do that, you know, sharpening halos or bad. So the radius lets you tell camera raw. How why you're willing toe let that sharpening halo or the how how far out from the edge pixels you're willing to change, so you want to stick with a very low radius number. I cannot imagine the image that would need over a radius of two. Unless you want to create sharpening halos, you can see from outer space. I would not raise the radius over to four general sharpening. I would stick somewhere under one, like maybe around 10.5 or so under one. Okay, if you're sharpening a photo that's going to be used at a fairly small size or it's only gonna be used on the Web or in a slide show or in a video, then you can use a sharpening radius of one if you need to apply emergency sharpening. If your image looks visibly blurry and the subject matter is really great, maybe it's your you know, your year old kitty. Then you can pump this up to 1.5. But just if you go above 1.5, you're gonna start creating images that look obviously over sharpened and they look kind of fake. But again, if it's for your own personal use, who cares? Make it look at the but do try to be cognisant that you really don't want to raise that radius over 1.5. Really ever detail controls the level of detail that camera is bringing out. Basically, it's how much lightning and how much is darkening. So how much is it? Emphasizing the edges? Feel free to crank that one up, you know as far as you want. You can crank it all the way up to 0 90 or so, and you'll be fine with That's not as destructive as the Radius. Okay, masking is really interesting. What it lets you do is it lets you see the edges in your image that are being affected. All right, But if you just click and drag, you're not really seeing anything like what is that slider doing isn't doing anything at all? Well, if you hold down the option key on a Mac or alter my PC, you can make it show you the edges in your image. So as you drag that to the right, you can see which areas of your image of being sharpened. So if you use this in conjunction with these other sliders, then you can control to a very great level of detail. What parts of your image you're being sharpened? What parts aren't so you can actually use that option or Ault trick on all of these sliders. It just It doesn't really tell you much information on the other ones. It gives you a live preview of the areas it's affecting, but only on the masking slider. Do you get at least what I would consider, in my humble opinion, a useful preview of anything so feel free to do that. This next section down here, noise reduction deals with noise. So if you've shot in a little light situation, or if you had your eyes so setting pretty high on your camera, which is your camera's sensitivity to light, then you can use these sliders to try to get rid of some of the noise reduction. Luminous noise reduction just means that the the noises in the brightness or lightness information you'd use these sliders down here. If it looks like you've got colored speckles, eso that'll help get rid of that. Basically, Luminant is black and white noise or grayscale noise and color is colored noise. So So just another word on sharpening here. You want to be careful. If I had more editing to do and Photoshopped on this image, I don't know what that would be, but let's say that I did. I would not want a double sharpen it. So you need to really decide when and where you're gonna do. You're sharpening. Don't really want to do a whole lot of sharpening in both programs. For example, if you want to do global sharpening here, which is sharpening that applies to your whole image through this detail panel. Then when you get into photo shop, you don't want to sharpen the whole Dagon image again because you really risk destroying the image and introducing sharpening halos. But what you couldn't do if you had to bring in photo shopped for whatever reason is you could do your selective sharpening over there where your localised Scharping. So you want to do global sharpening one place. I really just want to do global sharpening and selective sharpening. You don't want to double up on either one of those things, so just be aware of where you're sharpening isn't curry. Now, I will tell you that this sharpening panel is set to 25 right out of the bath. So every time you open an image in camera raw, there is sharpening that is being applied to the whole image. Okay, so we will go ahead and choose camera raw defaults on this one just to show you that. So these are the default sharpening settings that are being applied to every single image you open in camera raw. Now, if you don't want any global sharpening to occur here in camera raw, then you need to set that amount slider to zero, and then you need to come up here to the detail, plan off detail panels, fly out menu and shoes, save new camera, raw defaults, and that is gonna turn off the automatic global sharpening that's occurring. If you plan on doing your global sharpening over in photo shop, I don't want to be applying around the sharpening everywhere, Ugo. And especially if you're a stock photographer, that is bad. Bad, bad, bad, bad that will get you your images rejected quicker than anything is too much sharpening. So it's more of it. You really need to be aware of it more of a problem if you are a stock photographer and you're selling your imagery to agencies like that less of a big deal on your own images, but still you don't want to be doing. You don't want to over sharpening your images. So think about where you want to do that, sharpening any questions on that course. We looked at selective sharpening earlier with the adjustment brush. We've got a couple, our Garafola from Sac Town asks sharpening. Is this affecting raw pre sharpening, or is there any sort of pre sharpening that's going on when you loaded into camera? That's what this is. This is. You can also hear that called as input sharpening because it's automatic and it happens the moment you open the image and wrong. So if you want to turn off input sharpening, this is where you do. You just want to set the amount slider zero. You set the amount to zero. You don't have to mess with these other sliders because make it all be pegged it they're far end. They're not gonna do anything. If that amount slider set to zero. So and I mean fashion TV. He had a good so just clarify. So So that masking sledder is just a preview together with the bunch button. It does not affect the sharpening of the image in any way. It really well, it does. It does affect the sharpening. What it does is it It makes camera raw, take a closer look at the image, and it tries its very best not to apply sharpening Teoh anything that isn't really an edge. Okay, so using that option trick what? You determine what camera raw considers to be an edge. So over here, more sharpening or less sharpening is occurring. Rather over here, more sharpening is occurring. So yes, it does change. Yeah, it does affect your sharpening, but that option trick is really only used for all trick on the PC is really only useful on that masking cider because he gives you a good preview of of what you're seeing that said in using the masking slider myself in my own images in camera raw. It's just not that noticeable, at least not the images that I've been using it on. Deborah, Ann and Kristan, both have questions about whether the images should be sharpened again on export for print or wet. Gosh depends on what you're going to do. If you're finished with the image of this point and you've let a little bit of input sharpening happen, you might want to do some selective sharpening on output. Um, but you wouldn't have to. I mean, it just depends on on what you've got your global sharpening set. T you just want to be careful not to over Scharping. And do you remember that You're really not going to see a sharp ring preview here in camera unless you're viewing at around 100% that trip so many people up. I cannot tell you. Now we know now you know a question from D G I. What about for portrait's for people? Any suggestion on the amount Good amount to sharpen. I don't really have any magic numbers for you with this, other than the ones that I gave you before. Try and amount of about 40 trying not to go over a radius of one. Try to stay under one for radius unless you're images blurry needed emergency sharply and go up to 1.5 and then for the detail feel free to crank it up to about 90 90 would work well if you got a whole lot of texture in your image, so this particular image would work well at a detailed level of 90 because got so much texture in it. But for portrait, it's you really don't want to be accentuating every piece of detail. She really want to highlight all the imperfections and somebody skin. So maybe you would leave the detail set too much lower number, but you're gonna have to experiment with these. I think we're good for questions on sharpening all right and again if you find a sharpening value that you want to have applied every time you open your images here, you can tweak thes sliders and choose that fly out menu and then say that as a new camera raw default so you don't have to go in and set that every time. And then, of course, anything in any of these panels that we've been playing with can be saved as a preset. So when you do figure out magic, sharpening numbers for let's say, texture and architecture and things like that. Then you can say that I do have an image kind of like that. But I taught for a week at the Santa Fe Photographic Workshops a couple of years ago, and I took my crew out hiking, which is hysterical. If you know me. I loathe hiking. I find the exercise makes me smell my cocktails, and I'm just not really that. So here's an image I shot at 10 Rocks National Part. We took our photography class up there. And so let's say I go through and I find I change this image and I've got I like shooting rocks and things with with a bunch of texture. Then it would be great to have a preset, but you could apply to photos like this over and over. So he come over here to our sharpening panel. And if I want quite a bit of sharpening because this is a, uh, texture riddled shot, I might do something like that and then say that is a preset. Okay, so I could come over here to my presets panel, click the little piece of paper icon at the bottom right, and I could name this texture or rock things like that and you could save several different sharpening presets. You know, that way, whether or not you you let the preset capture any of the other changes that you made in the basic panel or wherever else that you sliders that you tweak. But you could have magic settings and presets is, ah, the perfect place to store those if you shoot a lot of similar images.
Class Materials
bonus material with purchase
bonus material with enrollment