Lessons
RAW vs. JPEG
08:17 2Introduction to Adobe Camera Raw 7
10:10 3Camera Calibration
17:08 4Intro to ACR Q&A
12:48 5Cropping & Straightening
17:35 6White Balance
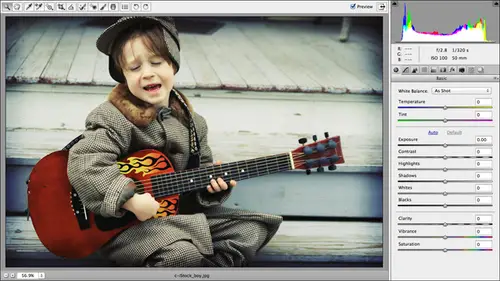
18:32 7Using the Basic Panel
1:05:33 8The Adjustments Brush
42:54Lesson Info
Spot Removal
next thing we're gonna talk about is spot removal in camera raw. This is a great feature. If you take a bunch of pictures and you bring them into camera raw and you find that you had a speck of dust on your lens, so you have a spot in the same place on every image. This is a great way to get rid of them in Mass. So if we did have a slew of images that had a spot, we would open them all up. Maybe not. If there's maybe you wouldn't open. Ah, 100 at one time, But you might go in batches of 10 or 20 depending on how much memory or ram you've gotten your computer. But I have one image here of pyramids in Egypt. Did you know that's what they really look like? There are chunks of rubble. These blocks are so huge. If I was standing at this pyramid, I'll zoom in a little bit. My head would maybe come up to here. These blocks are so massive you can't even believe how huge they are. I had no idea that that's what the pyramids really looked like in Cairo I thought they were smooth and I did not k...
now the stones were that large. And I did not know that there was that level of decay going on on the pyramids there, 5000 years old. So I guess some of the stone has been worn away. Rain, wind. But anyway, I was really shocked to see the best little life. Nevertheless, we've got some sensor. We've got some spots right here. So whether that's a spot on my sensor where there's a spot on my lens, what have you We've got spots. Nevertheless, those air, not speculate, highlights their dark. So what we can do is use camera Ross, uh, spot removal brush to get rid of those that also works really well on Portrait's. If you've got moles or blemishes that you want to get rid of in your portrait, you can use camera raw spot removal brush as will and again. Like I said, it works on single or multiple images. You just have to open the multiple images and use that select all button at the top lift that you see when you first open more than one image celestial ahead and grab the brush so the brush lives up here in the tools panel. It's a paintbrush icon with little spots, and it's keyboard shortcut is be for spot removal. I would rather have had be for the adjustments fresh, but no. Okay, so we're gonna press be for the spot removal brush and you've got a little panel over here on the right hand side that lets you tell camera what you want to do. Do you want to hell, in which case there's blending occurring or you can clone, In which case it's a straight copy paste with noble ending, I find in most situations, at least on my own images. He'll works a little bit better than club because there is that little bit Blanding going on, and you can also adjust the opacity of it and the radius. So let's come over here. Let's leave it set to he'll come over here to our image, and as soon as we click on the spot, my brush is really, really small. We see a whole lot of things here. Okay, so I'm getting that, uh, the red and white dotted line and the green and white dotted line as soon as I click. What you can do is you can use those to tell camera raw where you want it to look to fix the spot. So I go ahead and leave those a little bit bigger and zoom in. And now we're gonna come here. You can click in drag to change the size, and you can also change the point at which you're sampling from. So right now, the red circle or the red and white circle needs to be on top of the area you want to fix. Okay, So the green and white dotted circle is you telling camera? Hey, copy the pixels from here and paste them inside the red and white dotted line and blend them around so that the retouch looks really? But when you first click, you may get a situation where you can't see all those circles like we did because your brush cursor is so small. So let's try that again. I'll come over here to our other spot and I'll click. And now, since I started out with a little bit bigger brush in the Microsoft microscopic when I had in the beginning, I can actually see both circles, but If I need to move the source point, all I do is click and drag within the green and white dotted line, and I can move that to another area. And then Cameron's gonna copy paste from that spot and paste it into the red and white dot Okay, and that's all there is to radius can be controlled with the keyboard shortcut that I'm using. The left and right bracket keys, right? Frankie to go up in radius, which is this brush size or the left bracket key to go down and breast size, and you can see the power in that. How do we opened up a whole series of shots that had the same spot? Those spots would go away instantly on all those other shots, so that's a huge time saver. So let's go ahead and revert and do that again. So come back over here to my basic panel. Choose camera raw defaults. We get our spots back, so we're gonna try it up to the tools panel here. Impressed be to grab the spot removal brush. I'm gonna go ahead and make my brush purser a little bit bigger, said. I can see the dadgum thing, and then click. And if you need Teoh, drag the green and white circle elsewhere to set a new sample point or copy paste point from your spot, and then we're going to come up here to the other one and do the same thing. And like I said, in most situations, you're going to get better results, obviously the type of fixed set to hell, because their symbol ending with clone there isn't any blending going on, and we should have our same keyboard shortcut. Don't here at the bottom to toggle show overlay, check box, often on. So if we want to see how good of a job camera raw did, we might want to get rid of those circles. See compressive veto. High them temporarily, and now we can press P to toggle are before and after preview often on, and we see that it did an amazing job of removing those spots so it would work the same way. That was a mole on somebody's face and you had 20 shots of that same face and you could zap that one mole just like that. Yes, Jim, if you weren't doing this on multiple pictures. Would you do it here or would you wait, You got in the photo shop and do it? They're great question. If I had to go in Photoshopped, that's a really good question. Obviously, if you don't have to go and Photoshopped from or editing, do it here. But if I had to go into photo shop, I don't know a six and 1.5 dozen in the other. I almost think it does a little bit of a better job here, but that might be just the particular images that I've tried it down on, so I think that's a personal preference thing. Any other questions on spot removal? Small removal Questioning from question from fashion TV? Uh, spot removals will only work in images of the same orientation. Not sure when Probably, I mean, if you're dealing with a vertical shot in a horizontal shot, then the spot's gonna be in technically a different place and you think about the spot having X Y coordinates. Then it would be in a different spot. The spot would be in a different spot. We're very technical here. Hold the fashion A J is wondering, Can we make a spot removal profile, especially for dust spots in cameras. We don't have to select the spots over and over on multiple images asking that from Dubai. Can you make a profile? I mean, I'm sure we could make a preset with these settings, but you mean like it was hard to tell the software you have to tell camera where that spot use in some way. So he was part of a camera profile. Something along those lines may be just a preset that you apply every time would be the option to go for. I can't think of a way to do that. I think he's asking you because you've been talking about doing it on multiple pieces. Can you make one where it would always hit the same place? And what one of the things you're removing here is pretty much stuff that's on your sensor, and it's always gonna be in the same place on the horizontal photo on your center. So just open up all all the ones you know, like 10 of them. Let's say on the left, do this on the 1st 1 tell it to do it on all of them. It'll just do it automatically in all 10 and remove it cause it's on your center. It's not in the sky, it's not on the it's in the sensor, and it's always gonna be in the same place. It will get rid of them all. You may have to go in and tweak them, but I don't see a reason necessarily for a pre set as per se. Just do them all together. Yeah, and again, the way you do that, you'd open them in Mass and camera rock, and if it's 100 he might not. You might do them in batches, but then you would click that select all button that you see at the top left when you do have more than one image open and let me just show you that will open both of these images. See, once I have more than one image open, I get this drawer and then you can click the select All that, and then any changes you make with that spot removal is that it happened. All of like Jim said, if it's on, the sensor is gonna be in the vaccine place, right? And Mary from Costa Rica asks on the picture that you showed earlier that had power lines could you use? Could you have used the spot removal instead of going into Photoshopped? No, you could not know the spot removal on camera is for around things, things that you can fit inside that cursor. Maybe if it was a bird, you could still use that because you could make the the brush first or large enough to encompass the bird. But it doesn't work with you clicking and dragging its, which we needed to do with the power lines. Now that one power line at the top right corner, we might have been able to get rid of that one because we could have made our brush big enough to encompass it, cause it was really shortened. It was in the corner, but you would have been able to get rid of the longer line toward the left side of that photo, using the spot removal in camera raw. One way to do it would be to do multiple spots along the line, and that could help. You could try to do multiple spots, a line I still don't think you would get near the that you, the result that you would over in photo shop T hawks is wondering about spot removal for glare on someone's forehead. It depends if you've got if you're dealing with a large four hit, very small spot. If you've got a good chunk of pixels next, Teoh are fairly close, similar in tone and texture to the area you're trying to fix. You could certainly you could try to fix a hot spot, and then you could use the spot removal brushes, opacity setting, or is it the opacity setting here, Teoh trying to make it get rid of that shiny spot. But in that situation, you might want to change the type to clone, because if you think about a forehead is gonna have texture right. So if you changed it to clone, there wouldn't be any blending going on. So you would still retain the texture that you would have, you know, expecting skin so you might try switching it to clone and then tweaking the opacity. You might not be able to completely remove the hot spot, but I bet you could do a pretty good job of reducing it, so it's not so distracting unnoticeable. Thank you. And just to add on to that meals from Germany. So it was skin in general. Is it a problem to use this? That this but removal? Is it a problem to use it on skin? Yeah. You can use it on skin. Absolutely.
Class Materials
bonus material with purchase
bonus material with enrollment