Lessons
RAW vs. JPEG
08:17 2Introduction to Adobe Camera Raw 7
10:10 3Camera Calibration
17:08 4Intro to ACR Q&A
12:48 5Cropping & Straightening
17:35 6White Balance
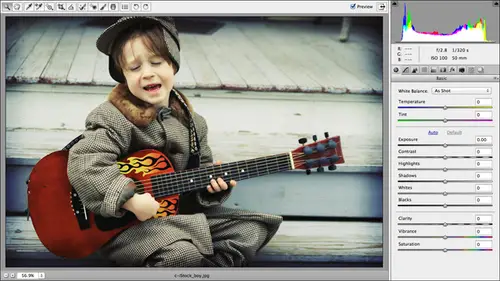
18:32 7Using the Basic Panel
1:05:33 8The Adjustments Brush
42:54Lesson Info
The Adjustments Brush
So in this segment, we're gonna talk about using cameras adjustment brush, and it lets you paint how the same types of changes that we've been making in the basic panel that you paint them onto your image selectively. So you're only altering the portion of your image that really needs that particular adjustment. So if you are, if you've purchased the course or if you're going to purchase the course, we're gonna be working in folder Number six, which is called using the Adjustments brush. So we'll give that a double click, and the first image I want to open up is our pretty little blond girl that we saw earlier. And we're just gonna do a very simple adjustment just to start off so you can get an idea of what you could do with the adjustments brush. So we'll click to activate the image of an open it by pressing command or control R P C. The image opens in camera raw from a zoom in by pressing command, plus on the Mac or Control plus on a PC, and then use the space bar to move around with...
in the image in camera raw. Yes, you can do that here too. So what we're gonna do is we're gonna paint a saturation boost onto this rose. Okay, That's a That's a good use of the adjustment brush. You can also use the adjustment brush to fix skies to fix problems in coloration of skin. But to really, Can I give you an idea? We're just going to make the hot pink in that brush. Stand out a little bit for that rose. Rather So the adjustment brush lives in the tools panel on the top of the camera. Wrong windows, The sky. Right here. You can also activated by pressing K que is in the adjustment brush. What? Why isn't it a I wasn't a so go ahead and click to activate it or press K, and I'm gonna leave my cursor zoomed in here for just a moment, you're gonna notice that there is a I have a familiar brush cursors the round brush cursor. So it's kind of like a painting metaphor, but you'll notice that there's a dotted line around the cursor. What in the heck is that dotted line? Well, that dotted line is telling you the whip of the feathering that's being applied to make your adjustment that you're about to paint onto the image, blend in with pixels that are around it. You can change that feathering amount when I zoom back out and you see the sliders on the right hand side of the screen, there's a feather slider towards the bottom that lets you change the width of the feather, the feather radius rather that is occurring. You can also change it with the keyboard shortcut, a little hard to remember, kind of convoluted shift control or shift right click, uh, drag left to decrease feather drag right to increase further. So the wider the gap you've got between the dotted line and the solid line, the more feathering you have going on, which theoretically means in the more blending that you're going to see between the area you're adjusting in the area. You're not adjusting. So depending upon what you're doing, you may have Teoh fiddle around with that feather amount just to make that retouch look real. And again, the keyboard shortcut is shift control or shift right click and then drag left to decrease feather amount right to increase feather amount. Okay, so now let's zoom back out a little bit here and here is our adjustment brush panel, so you'll notice pretty much the same set of ciders that we had in the basic panel are available here. The new ones that are in camera raw seven include the temperature intent in case. So now we can actually selectively change the color of lighting in certain portions of our image. This is incredibly handy if you've got a color casts in a certain part of your image. But the whole image doesn't have a color caste. Then you can go in, and you can fine tune the color of light in just that one spot. You've also got again the same set of sliders we saw in the basic panel, and if I use the scroll bar on the right hand side of the window, you can see how many adjustments we now have. There's twice as many in camera raw. Seven is there were in camera raw six hey, other new ones include things, noise reduction and more ray reduction. Noise reduction lets you get rid of some of the graininess or colored speckles that you can get when you're shooting in extremely low light conditions or if you screwed up your eye, so setting in camera in your eyes. So setting is simply your way of telling your camera how sensitive you want it to be to the light that's coming into it so typically when you're shooting in low light, if you want to see anything other than the color black, you pump up the I. So but it's it's It's kind of a fine line you're doing a tight wire dance between allowing in meth, sensitivity to the light that you can actually like your your composition and the graininess you're going to get from bumping up. That s oh, so if you have that going on, you can use this adjustment noise reduction. Teoh. Try to get rid of some of that greatness, and it does a pretty good job. More a reduction is new. Also, noon camera all seven, and it helps you remove the repeating or swirly patterns you can get if you shoot fabric. So interior design photographers or architectural folks will probably be excited about that. You can also get a more a pattern if you scan a printed image. So, for example, if you grab If you've got a printed image and you scan the printed image, the frequency of the dots in the digitized virgin versus a printed version may not line up exactly. And if that happens, you'll get kind of this weird, swirly, slightly off registration look, so that will let you selectively fix those areas. I tried for hours to find a picture that had a more a pattern, and I just could not find a raw image that had one in there. And I should have called my buddy Jim over here in the audience. I'll do that next de fringe. Let she selectively paint away some of the color fringing that you can get between areas of high contrast in your image. You can get kind of an odd halo. I don't think we've got any of that going on in this image. If we had any, it would be going on in the stripes. I've heard dress, and actually we do have a little bit going on. See how there's a little bit of a blue tent but Pierre or purple tint, where the area of high contrast the dark pixels make the light pixels that's called the fringing or fancy shmancy term for is chromatic aberration, so you can paint away that in a selective manner. I've got a better method for you to do that, but nevertheless, if that does happen in just a tiny just one part of your image, and you can paint it away selectively with the adjustments brush color over here on the right hand side that leads, she paints a color tent onto specific part of your image. Don't think you can really colorize a grayscale image with that. It's not gonna give you the kind of affect your looking for. It's very subtle. It's also a way to help neutralize a color caste in that you can apply the opposite color on the color wheel. What's a color? Will you apply an opposite color? You can neutralize the color casts. Or, for example, if I've got a blue color caste, I could set this swatch to a very light, orangish color. And since oranges opposite blue on the color wheel, it would neutralize that blue cast. If I couldn't get rid of the castle in here the way. So I'll zoom back out by person command or control minus and What we want to do on this image is we want Teoh boosts the color intensity of that. Rose knows he meant a little bit. So nobody fesses it may for being zoomed in on specific parts of Are pretty blonde here. Nobody in this crowd would do that. Some conferences you teach at They're all freaky breasts way. All right, so we'll keep scrolling on down here and we will come across some or sliders. These sliders of the very bottom of the adjustments. Fresh pain will control the cursor. So here's where you can change brush size. You can also change birth size with keyboard shortcut so the left bracket key goes down and brush size or right bracket key goes up and brush size, just like in photo shop and again keyboard shortcut for this feather slider Over here, IHS shift control or shift right click on a PC, drag left to decrease feather drag right to increase feather, and you can see the feather slider zooming back and forth, you know, and that's also a fun thing to do. Just sit there and do that. Not really. Not at all. Okay, Flow determines how much paint is being laid down. OK, so what's the strength of this adjustment? And density is fairly similar control. He probably won't have to miss those very much. Two very important check boxes at the bottom are auto mask and show mask. So what's gonna happen in the background as we paint on an adjustment is camera raw is going to create a mask. It's like a layer mask K and Photoshopped that is only going to reveal the adjustment on the area that you actually paying across. So if you turn on auto mask and I would suggest turning it on and leaving it on, it almost works like a selection tool by color because it sees the color, your painting and cross, and it helps you include similar and contiguous pixels to try toe help. You, you know, get a good It's not a selection, but I'll call it a selection to help you get a good selection of the area you want to change. So let's just go ahead and put it into practice. So I come over here and what you want to do is you can either turn on the show mask if you do that came around is going to show you your brush strokes in the form of a very light white overlay, so you can either turn on the show mask, come over here to your image and paint the portion you want to change. Okay, see how I'm getting a quiet overly on that rose. And as the plus sign, I'll zoom in the plus sign that appears within that brush cursor. That's what's really determining the colors that's being automatically included in our mask here because we turned on that auto mask check box. Okay, so show mask lets you see an overlay of the area you're painting across of your brushstrokes. Rather, so there's two ways to use the adjustment brush. You can either create the mask first and then a gesture sliders. Or you can adjust your sliders first and then paint the change onto the image. Six and one hand, half dozen in the other do whichever method feels best to you. There's no right or wrong way to do so. If our goal here is to boost the saturation of the Rose, then we're going to come up here after we've drawn our mask and we might turn off the show mask icon right now, because if we leave it on, it's gonna be tough to see our change. But you can also toggle it often on by pressing the Y key. Okay, so why toggles that mask often on? You can see how arose here is changing from Pinkston fights, the white being the overlay of the mask. And now we're going to come back up here using our scroll bar, and we're simply going to increase saturation. And if I press the Y key to toggle my mask off and on, and then I press the peaky to toggle my preview often on, and I'll zoom in a little bit here, too. Then we could see the before and after of that saturation change, so we haven't changed a saturation of anything else. The image on Lee the Rose. So this is a way to selectively a gesture images. You'll also hear that called localized adjustments in a professional photographer circles adjustments that you make to the whole image or often refer to as global adjustments and adjustments that you make toe. Only certain pieces in parts of the image are often called local adjustments action to call them selective adjustments. That makes a little bit more sense to me. So that's how you use this tool. So as soon as you paint a top, your image straight from the factory camera is gonna place a little pushpin kind of in the middle of the area that you adjusted just to let you know. Hey, there has been an adjustment that has taken place in this vicinity. You can have a slew of different adjustments using the adjustment brush on the same image you want, Teoh. So let's say, for example, that I wanted to try to darken my sky up here. Well, I can create another adjustment on the same image. Camera is gonna drop another pin in that area, and then I can use those pins to activate one adjustment or the other in order to keep fine tuning these sliders over here on the right hand side. Okay, so let's go ahead and create another adjustment. Assumes you create one adjustment With this tool, camera automatically puts you in what's called ad mood appear. So this radio button automatically changed itself from new toe ad once I completed my brush strokes during the first adjustment. So now if I pay anywhere else on this image camera is gonna think I want to apply that same saturation boost to another spot. That's not what we want to do in this particular situation. So I'm gonna click new. So that way, my next bro stroke is gonna drop another pushpin, allowing me to change these sliders even further to create a completely different kind of adjustment cells in back out. In distant case, folks are wondering. I'm zooming into the interface here using a Mac OS zoom feature that's found under under universal access preferences in your system preferences. So I'm sure you could do the same thing on a PC, but I'm not real sure how to do that. Okay, so now let's come over here and again. You can either paint across the area where you want the adjustment to take place first, and then change these sliders. Or you can change these sliders first, and then paint depends on which way you want to do. So. Since we painted first the last time, let's go ahead and change our adjustments. This time, the's settings are all sticky. They're going to stay changed until you change them back. So if we don't want to apply a saturation boost than we need to reset saturation back to zero, these little plus or minus signs on either side of the sliders just lets you access presets. Eso, for example. If my goal in this next adjustment that I'm going to make is too dark in our sky, darken the exposure, I might click the little minus sign to the left of the exposure, and you're going to see it jump in increments that are preset into the program. So these plus and minus signs let you adjust that slider in preset amounts in like increments of 10 or 15. Or what have you, depending upon which, when you're changing, So now we can come over here and paint the adjustment onto our image. And again, since I've turned on the auto mask button, the ray bottom left to that panel camera is trying to help me in my painting. She how my brush is actually touching her hair, but her hair is not changing. That's because I've turned on that autumn ass. So camera is helping me by trying Teoh include pixels in the mask that it's creating behind the scenes that I touch with that plus sign. It doesn't matter quite so much with the auto master non what I touch on the outside or the if I don't touch it with a cross hair that's inside the brush, it's not gonna get included in this mask. Basically say so. Even though I'm the brushes touching her hair, her hair is not changing. When I'm using this tool, I tend to keep my left hand or your right hand if you're left handed on the bracket keys so I can change brush size so I can quickly come down here. And if you make your brush too small, you're going to get that extremely unhelpful across here. Okay, so let's say there's our mask and I can continue to tweak the sliders even after I've created it. So if I don't like that exposure change, it's too dark. Then I could come over here and I could lighten it, and then I could press my peaky to toggle the preview, often on to see my before and after. So it's a super handy way to change only a portion of your image now Let's say I had accidentally come in here and I'd gone down into her skin's. I've darkened her skin to remove that from this adjustment or remove it from the mask. Do I have to start over? Heck, no. All I have to do is put the brush and erase mode two different ways. You can do that. You can come over here to the top of the adjustments panel and click the erase radio button. Or more simply, I'll zoom in so he can see my cursor a little bit easier. You can simply click and hold the minus key hurt in the minus. Keith E Option Key are all on a PC, and then you can. That puts the brush. Subtract ary race mode automatically. Okay, you're not going to see that reflected over here, um, on the radio buttons. But that is what's happening. So options are all on a PC to erase, remove, subtract in an area from that particular adjustment. So it's really, really handy to do selective adjustments to your image, so I might try pumping up the saturation of a little bit just to get some blew back into those clouds. But since There's really no information up there. I'm gonna have a heck of a time trying to do that. I could change the temperature of light well, but if I want so here's our before in Here's Our After that shot probably wouldn't be accepted for for stock, but for a client or for yourself that that change on this guy might be, you know, good enough to make the photo usable. So since we've got that second adjustment that we made active, and I know that it's active because there's a big old black dot inside of our pushpin that denotes at that particular part of the adjustment that mask is active at this time. If I decide I want to go down here and change, let's say maybe I want to change the master. I want to change the adjustments that I've made to the other area. All you have to do is click toe, activate that other pin, so the pins not only let you know that there was an adjustment that took place in that area, but it also lets you till camera which one you want to work with at that particular point in time, so Now that I've got the pin on the Rose active, I could come down here and I could continue to change that in any way that I want. If I want to introduce even more magenta, I could change the tent of light, the color tent of the light that's being used in that area and there's our before and there's are after. That's a great way to draw your viewers attention to one particular spot in your photo. Other adjustments we've got down here. A sharpness isn't new. The sharpness allows you to just like you would think selectively sharpened. So let's say, for example, you've used the sharpened panel to sharpen the whole image. We haven't looked that yet, but we will in a little while. So you would do global sharpening in the sharpening panel or the detail pain rather of camera raw. But let's say you've got an area of texture that you want Teoh accentuate near your focal point. Let's say we wanted to really accentuate her hair than we could come in here, create another new adjustment, and again, you can either zero out these sliders before you start to paint, or you can change them after. So I don't want any change in these other areas. I'm gonna go ahead and zero those out just by pressing tab and then typing zero and then I'm gonna bump up my sharpness. I'm not making a change to my image yet. I'm just setting at my ciders. And now I could come over here and I could begins a paint. But if you remember what I told you earlier, you're not going to see a sharpening Previ unless you're at about 100% zoom level. So we need to come down here and make sure that we are 100%. Houston, we've got pores. And now when we come in here, if we wanted to sharpen her hair, it's subtle. But I think I think you guys can see it on screen that we really are sharpening just that area of your image. And again you'll hear highfalutin photographers refer to that as localized, sharpening local shopping as opposed to global Scharping. It seemed back out a little bit. There's our before there's our after I can see a little bit of the sharpening of 50% but not much, so just be aware of that. You're not as 100% level of zoom. You may not think that the sharpening is happening, but it is. You just can't see it. So from here, I can determine well, is that too much sharpening or not? So I can tweak that slider. And if I want Teoh, do any other kinds of changes to that same mask, I continue to tweak Seasiders down here at the bottom of that panel. You can tell Photoshopped, Teoh, hide or show those pans of those pins drive you absolutely nuts. You compress the wiki to hide them from view. And that's a good thing to do when you're assessing the changes that you've made. You know, I don't you know, it's a bit of a drag to have to look at that image with all those pins on their while. I'm trying to assess. Do I need to continue fine tuning my adjustments here Am I finished? So just press the wiki to temporarily turn him off. And if you forget what keyboard shortcut that is, just trot down here to the bottom left of the adjustments panel and hover your cursor over these show pins check box and Cameron tells you with keyboard. Shortcut is That's the V in the prince sees. And if you play around with your image here, makes them adjustments and you decide that you've completely lost your mind and you don't want to apply any of them. You can choose clear all, and that gets rid of all the pounds, all the masks, all the everything. One of the biggest tips that I can give you for using the adjustment brush is to turn on that auto mask and leaving on that. Do adjust the size of the feather of your brush cursor to make the blending a little bit more extreme to make the changes blend better. So if you get any kind of weird lines when you're doing exposure changes, especially then you might want to increase the feather of that brush to make it blend a little bit better. And remember that all these settings are sticky. So if we close this image and we come back in and we open another image and we've got a few more images that we're going to use, the adjustments brush on, then all of the changes and I made are still gonna be there. OK, The settings I used rather. So the next time I come in here and use the adjustments brush, I'm gonna be applying an extra round of sharpening just because the last time I used it, I applied the next round of sharpening. So do be aware of that. Scroll through here and make sure that they are all set like you want them for each individual image. What's going and cancel out of that one. This is another good image to show the adjustments brush, so we'll go ahead and make a little bit of an exposure change here in the basic panel. So all dark and my exposure a little bit pump up the contrast I don't have. I've got a little bit of clipping going on in the shadows here, but I don't see my warning anywhere. But I know it's happening because I've got a colored clipping morning up here, so we'll increase contrast a little bit. Increased clarity. See what a big difference clarity makes. I just love it. I just love it. All right, so let's call that good. The balloons look OK, but my sky is still over exposed. OK, so now let's go into the adjustments fresh by pressing K or by activating in the tools panel. Once again, you can either create your mask first and then use the adjustment siders. Or you can use the distant sliders first and then paint on the change. So what we're gonna do here is immediately zero out that extra round sharpening. We did a moment ago and all the rest of my sliders are set to zero. So I'm good on that. And what I want to do is decrease the exposure a little bit, and I want to warm up that sky. I want it cool off that sky. Rather, I want to add a bit more blue, and then I want to saturate it a little bit so we can come over here. And if I want to use my keyboard shortcuts for my feathering amount, I can press shift control or shift right click drag to the left, A decrease drag to the right to increase. Increase it just a touch here and then use your left and right bracket. Keys to change. Brush size right bracket key goes up in size left record, he goes down and then you simply paint. And since I've turned on that auto mask, it's doing an amazing job of helping me grab all the continuous continuous blue pixels. And contiguous is just a fancy way of saying they're next to each other. They're touching each other. In other words, if I've got a blue over here in my balloon that matches my sky camera isn't gonna go grab it and included in my mask, the pixels have to be next to one another. So if we toggle are preview often on look at the difference in this image, there's are before and there's our after. Had I tried to fully correct the sky over in the basic panel, I would have messed up my balloons. Okay, so do as much as you can in the basic panel and then use the adjustments fresh to find tune those settings in specific areas. Now I could reduce my brush size, and I could come over here to the parts of the bowling that are a little bit overexposed. I might increase my feather amount by not doing that. I could increase my feather amount of my brush by pressing shift control shift, right click. Unlike shift option, which is what I just did, I might increase the feather so that I've got a little more blending. Increase my brush size and then I can come in here and fix part of the balloons that might be a little too overexposed for my liking because they were facing the sun on that side que before and after and after looking at the image. If I decide I'd like to lighten at this area right here, we can create another adjustment. So remember to put the adjustments brush in new mode by clicking the new radio button or by pressing in in for new Now again, you can either change the ciders first or paint first and then change them. So this time I'm gonna zero out the temperature adjustment. I want to increase my exposure cause I wanna lighten the shadow area just a bit. And then I'm gonna light in my shadows. I could probably fix it just by lightning shadows. And then I'm gonna go ahead and zero out the saturation change I made. Come over here and I could paint that part of my image to try to affect that shadow a little bit. And if I can't get it or if I what I just did didn't fix it enough for me that I can come back in here, continue to tweak these sliders, see by dragging the shadow slider to the right. I'm knocking out some of that shadow again. If you pain over an area that you don't mean to change, let's say I come up here into the red area of the balloon. Did you all know this is called an envelope? The balloon itself is called an envelope. I did not know that you heard it here on creativelive. See how much you learn in this class. He learned about armadillos, beer cans in their in their hands and you learned about balloons. So if I want Teoh, subtract this area from my mask or erase it. Rather, I can either click the erased radio button appear, or I can just press and hold the option key on a Mac or alter on the PC and then paint the area that I didn't mean to include in my adjustment to being with so before and after. So let's take a look at another image here. This one we need to do a little bit of darkening and a little bit of lightning. Okay, so my balloon that's in the foreground is a little under exposed, and my sky in the background and other billions, especially down here toward the bottom portion of the image are over exposed. So no way. No. How can I fix that with a global adjustment in the basic span? Okay, so we'll do what we can in the basics panel to fix our lost detail that we're seeing in the yellow building in the background cause I can see that red or relay of the highlight clipping warnings going on. So here we are in the basic panel, so I can try toe fix the exposure. As best I can lighten the exposure a little bit to take care of this balloon. And my energy is a little bit of contrast dark in my highlights as much as I can here with a highlight slider. See, that helps that background quite a bit as I drag the highlight slider to the lift dark in them. But I'm still gonna end up with a lighter sky toward the bottom left of this photo that I really want. So now I can darken my shadows a little bit. If I want Teoh, that's just gonna make the balloon in the foreground darker, and I can also drag it to the right toe, lighten them a little bit increased clarity. So I've got a little bit of clipping still going on in the highlights, so I might have to back off of my exposure a little bit or drag the white slider to the lift. Change the point at which that clipping is occurring. So once you get rid of all the clipping warnings, now let's go into the adjustment brush by pressing K and for this particular image we're going to set two pins were going to do some darkening over here, and we're gonna do some lightning on the balloon in our foreground. So again, either start painting and then changes sliders or changes sliders and then start painting. So let's go ahead and create a lightning exposure again. Look at the sliders because they're still going to be set to what you have them set the last time you use the tool. So I've got a little bit of, ah, lighter exposure going on here. And then I could lighten my shadows to, and now he'd come over here and paint that part of the balloon, keeping your left hand or your other hand on the bracket keys if you want. Change the feather amount if you need Teoh and we can lighten those shadows right up. So here's our before Here's our after you can see how they're a little bit lighter and then you can just continue to tweak the sliders even actually painted the mask. Now we're ready to add a new mass to handle the darkening of this area. So let's press in to put the brush in new adjustment mode. Take a peek at our sliders if we'd like to do that first. So I want to do the opposite of what I did last time. So I want Teoh decrease exposure a little bit, and then I want Teoh dark and my highlights. So I'm gonna set my shadows back to zero and pull that highlight slider down a little bit. You can afford to make much bigger changes with highlights and shadows, then you can with your exposure slider. So now let's come over here to the image and start painting. And as I paint, you can see that I'm darkening that area. But because I've got us, I have such a wide feather amount or a high feather radius on that brush. You're not really seeing the transition point of the lightning in the darkening that I'm doing. If we didn't have much feathering going on, it looked like a hard line around that area that I'm painting. So do play with that feather amount to get the kind of blending that you want to make the retouch look riel and I might darken those highlights. Just a touch more. There we go. So now here's I'm gonna hide my pins by pressing V Oh, I turned on the mask high my pins by pressing V is in Vin and we're going to press the peaky to see a before. So now we're seeing the changes that we made in the basic panel. And now we're seeing everything you made here in the adjustments brush. So pretty amazing, huh? Lots of power in this. Can you imagine how many steps you have to get you to do that? In photo shop, you'd have to create an adjustment layer, make the change and then use your brush tool and paint within the mask. The automatic mass that comes along with every adjustment layer to hide the changes from one portion of the photo. Or you'd have to create a selection of the area you want to change first and then create the adjustment layer, at which point Photoshopped would fill in the mask for you still 100 times easier and way more intuitive over here in camera, Raw again used the programs for their specialties, but they were built for camera was built for this kind of thing. Use father shot for heads walking power line removing. Okay, so let's go ahead and click done. And do we have any questions on using the course we do These, uh, Internet loves ask questions. So, uh, going back a little bit, Fernando had asked, Do I lose sharpness with the moray control? And Fernando is joining us from Portugal. Hello for single question. One more time to hear. Do I lose sharpness with the more a control? I don't know if you do or not, I can tell you with the Moray Control. I can tell you what more repentance were caused by, but I'm not real sure what camera is doing in the background. Teoh, take them out. It seems like there might be some blurring going on, But not knowing the math that's behind that particular adjustment. I'm honestly not sure. Okay, um, question from fashion TV from Singapore and also from Red Mango. A couple questions about history with the adjustment brush. Thanks. MP files keep track of our tweaking and our raw images. Do they keep track of these pins or areas like we did like what we did to them earlier. Are those tweaking saved in a different file extension or in the ex MP? It is being captured. Everything you do in the camera raw plug in is being captured, either stored inside the negative or it's being stored in that sidecar X and P file. So you can always go back and change Change. Those are get rid of the adjustments altogether. Fantastic. So yeah, red mango then says, Can you delete only individual pins and not clear all of them and then bring the image back into the adjustment brush to redo these after the images saved. Absolutely. So we click done a moment ago to close this This image of the balloons, Selous, press k to pop back into the adjustments fresh and you can see the pins are still there. So again you can click to activate the one. And as I mouse over the pan, I'm getting a preview of the mask. So those are my brush strokes. Okay, So if I click it and I decide I don't want that adjustment, I just press the leaky and that That didn't change my other adjustment over here. But don't let that Why overlay through you if you're mousing around things? Ho, My gosh, my photos getting overexposed. What is going on? That don't panic. That's just the mask preview being turned on and off. And if you want your mass to be another color, you can just scroll down to the bottom of this panel and right next to the show mask check box is a tiny little color swatch. So if you click that you're gonna open a kind of an odd version of the color picker and you can use that to change the mask color by default it's white, and you can also tell camera raw what you want that color to indicate. Just like you can change over in Photoshopped The quick mask options when you're using quick Mass, which is a great way to find to you in a selection or to create a selection by brushing, like with a brush tool, you can tell it whether you want that read or really quick. Mask, too. Denote areas that are in your selection or are not in your selections. You can do the same thing here in camera raw. You can say camera instead of that. Why own Relational and me? The areas I've painted over Show me the offices. So the affected areas versus the UN effective areas Cool and a quick follow up question. Speaking of pins from fashion TV in Singapore is there and limit to how many pins or areas we can adjust. I don't believe so. If there is, I'm not aware of that magic number. Okay, let's see Chilled er from Washington. Can the mask be inverted? Oh, that's a good question. I do not know of an invert mask. Command here in camera, on foot, a shop is shift, commander. Shift Control, I. But I don't know that command for that in camera. Rajan, do you happen to know if you can flip flop a mask like that? Okay, so the consensus here is probably not a great good question. And a question from Vegas got the age old question of the difference between density and flow when setting your brush density and flow. Gosh, that's a good question. I'm honestly not sure. To me and my test, the difference between the tea is fairly undetectable. And you know that flu, how much paint reeling down density probably confers, refers to the opaqueness of the mask itself that's being built so kind of like in a layer mask. If you were to you know how black conceals and why it reveals in a layer mask and Photoshopped. If we were to paint with gray in a layer mask, we would be doing a little little concealing in a little revealing. So I think that's what we've got going on over here with a mascot Density. But they are very similar in their control. Thank you. Sure on, Betsy asks, Can you mascot 40% 60% or only at 100%. Yeah, that's how yes you can. And you would use thes flow and density controls to get that done. Um, you might have already mentioned this, but I think I missed it because all these controls air sticky. Is there a short cut to zero them all out? Or do you have to go in one by one? Yeah. So no current way, Teoh. In one fail swoop set all of those settings does Euro. You couldn't make a preset. I suppose you could set them on a preset Seth Hamilton zero. Say that as a preset, and then you could do it that way. But they are sticky. And that's the funky thing to remember. You know? See, you really do have to scroll up and down and pay real close attention to those settings, or you're going to be adjusting in ways that are unexpected. We got one more question here from lemonade. Sounds really tasty right now. If you clear all to clear out those adjustments, can you recall those adjustments? In other words, they're regretting clicking on clear. All I think undo will just undo the last step. So if you haven't touched anything else since you clicks the clear all and we'll just give that a test will say clear all. And now we'll do the Universal Undo Comedian, arguably the most important keyboard shortcut in our lives. Command Z or control the an IMac and that will bring back the pin. So if if If you click it and then you freak out and you remember and you haven't touched anything else than you can definitely bring the pins back by Commander Control Z.
Class Materials
bonus material with purchase
bonus material with enrollment