Lessons
RAW vs. JPEG
08:17 2Introduction to Adobe Camera Raw 7
10:10 3Camera Calibration
17:08 4Intro to ACR Q&A
12:48 5Cropping & Straightening
17:35 6White Balance
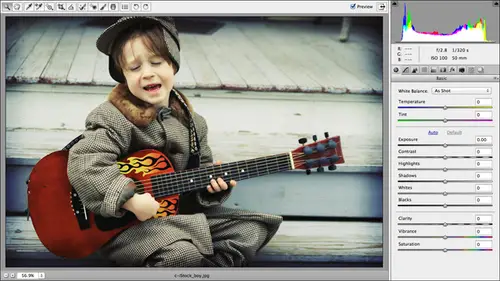
18:32 7Using the Basic Panel
1:05:33 8The Adjustments Brush
42:54Lesson Info
Using the Basic Panel
So we finished up the last segment with changing white balance. So now I'd like to jump into all these wonderful sliders in the basic panel here. I'm gonna open up another image, but this is a J peg that we're messing with here, so I'll click. Cancel. And when you purchase the course, she get all of these wonderful downloads. So for this portion, we're going to go into the cleverly named using the basic panel folder, and we find a bunch of images here that have different problems. Okay, so we've got some images that are too like two dark, overexpose under exposed and so on. So let's go ahead and start with the 1st 1 so I'll click to activate it. And then press command or control are to open in camera raw, and we can see that indeed, this image is seriously under exposed. Okay, so here we are in the basic panel, and I'll do man just a little bit so you can see these sliders a little bit better and camera raw seven. Adobe made some serious changes to this panel is actually the first chan...
ges to this panel since 2000 and six Okay, So what you'll notice here is the sliders have been reordered, for example. Contrast used to be way down. Yeah, but it's up here now because Adobe recommends you use these slaughters in the order in which they're presented here, which is a handy thing. Thank you. Don't be for that. Really appreciate that. So what they've done is they basically removed a few of the sliders that worked in a redundant way, for example, exposure and an old slider that we used to have called brightness did pretty much the same things you can think of. Exposure is changing the overall image brightness. Right. So it was confusing. You had an exposure. And the brightness slider, which which one are you supposed to use? Okay, so they did away with some of the controls that were redundant. So another thing that they did was you'll notice is that all of these sliders now have a consistent starting point of zero. Before the black slider was set to five, the brightness slider was such a 50. Contrast was set to 25 automatically when you first went into this panel. What does that mean? And should you leave him there. Should you continue to adjust the sliders? It was very confusing. So camera Raw sevens, Basic panel. It is a lot easier to use. Simplified. You'll also notice that there is no recovery slider. Okay, The new cider for that is really this white slider right here. There's no fill light slider. Okay. And there's no brightness slider. Okay, so this highlights shadows and why it's sliders. These three right here, all brand new. This section right here. You'll notice that there's a little dividing line above the auto in the default little hyperlinks here. And between these last three sliders, you can think of these sliders in this little section as correcting the tone toning of your image. So basically is called tone mapping. So when camera is interpreting the negative, you know the file that you shot and remapping those colors to what could be reproduced in a digital form print rather as well, then that's what all these controls are are doing is they're changing the way that tone mapping is happening. The slider stand here towards the bottom are really fun. Okay, they let you boost contrast this clarity slider right here to call it my contrast booster. So if you drive that sucker to the right, you just won't believe what it'll do to your images, so we'll look at that in depth in a little bit. Vibrance is gonna allow you to pump up the colors of everything in your image except for skin tones. Okay, so it's great when you want to make your colors vibrant, but you really don't like the look of fluorescent skin. Saturation does nearly the same thing, but saturation boosts the saturation of all the colors in your image, even skin tone. So if you want alien looking skin, then by all means use that on Fortress may be for Halloween. So let's go ahead and zoom back out. If you tuned in earlier, you're clipping warnings should already be on. But if they're not, let's go ahead and turn them on. Once again, clipping is just your way of knowing that you forced some of the highlights to pure white, meaning they now contain no detail, and you can also for shadows to pure black, meaning your shadows don't contain any detail, so it's good to see where that is happening in your image. So if you're clipping warnings or not on Let's go ahead and turn them on. You can turn the mind by clicking the little triangles at the top, left and right of your history and at the top, right of the camera. Raw window. I was immensely. You can see these guys. Here's the warnings right here. This is your highlight clipping Morning. And this one is your shadow clipping Morning. My warnings air both on. But I'm gonna toggle them off by pressing you for under exposed for the shadow warning and O for over exposed for the highlight warning Just to show you that when those warnings air on you see a tiny little light grey outline. So I'll press you again to turn on the shadow warning. Or you could just clip, click the triangle game will press Oh, to turn on the highlight warning. Or again, you could just click the triangle. Now, when these triangles are black, no pixels are being clips so you can take a peek up there and that will let you know if you got in clipping going on right now, we do have a little bit of clipping going on in the shadow area. Okay, but if either triangle turns a color, you've got a little bit of clipping going on. But if that happens to you, don't panic, because you can use thes whites and blacks sliders down here at the bottom of the total controls in the basic panel to recover A a lot, if not all, in most cases of your detail to get rid of those warnings. So I like keeping the warnings on. They can drive you a little bit crazy, but you can toggle him often on with the in the U keyboard shortcut. So the first slider that we're gonna play with actually, let's talk about these hyperlinks first. If you just want camera Roditi what it thinks is best to your image ing going and click the auto button. Depending upon the image, that may be all you need so that there's nothing wrong with just clicking that, especially as a starting point, you know, and then Teoh get out of what it just did. You can either click the little fly out menu and choose camera raw defaults, or you can simply click default right here, and that will set all those sliders back. They look like little hyperlinks. Okay, so let's say the first thing we did was adjust our white balance. And let's say for this particular shot are white balance is fine. Okay, So you do want to use thes controls in the order in which they're presented in the basic can start with white balance, move on to exposure. Resist the urge to go straight down to the fund. Color contrast. Boosters. Okay, video camera, raw police are not going to show up on your doorstep if you do. Okay, So the first thing we're gonna do is we're going to you tweak our exposure and again, exposure. Is this the images? Overall brightness, which is controlled by how much light your camera sensor captured. It's measured in f stops. Zoom in a little bit, so you can see it ranges from negative five. She plus five. Okay. And for you non pro photographers out there, the F stop is simply a number that indicates how much light your camera's lens let in. Okay. How wide that aperture is open. Be careful not to drag the slider too far in either direction, or you will start to introduce clipping So, for example, the slider itself shows you what happens if you drag to the left or right. If he drags the left toward the dark area, you're gonna what dark and the exposure. And as I do that with my clipping mornings turn on, I can see areas in blue are now being forced to pure black, which means I have lost all detail in those areas. If you drag that exposure slider to the right towards the lighter end of it, you are lightning. Your exposure you're letting more light in. And as a result, if you drag it too far, you definitely will be forcing some of your upper and highlights to pure white meaning you have strips them of all detail. Not really what you want to do, you unless you're trying to produce a creative, perhaps high key effect. So what you want to dio is you want to make subtle adjustments with the exposure slider. Okay, So if I need Teoh brighten up my exposure lightning a little bit, I'm gonna drag it slightly to the left. I try not to make any exposure adjustments over one, but, you know, depending upon the image Sometimes you need Teoh over one of stop rather. So we'll stop about their The next slider down is contrast. Basically drag it to the right to increase contrast or drive to the left. A decrease, contrast and contrast simply means that you're looking for areas of contrasts. The areas where light, dark light pixels or next to dark pixels. Okay, that's contrast. Quiet against black light against dark, that kind of thing. Drag it to the right to increase contrast, drag it to the left, Decrease, contrast. And as you're playing with these sliders, you will see your history. Um, move. So an ideal hissed a gram is rather wide. Okay, because what this is telling you, it's a Siris of tiny little bar graphs that represent the data that was captured by your camera. So a really good exposure will have a lot of information across the whole with of the history. Um, okay, So you want to kind of make your history, um, is why does it can possibly be so now we've tweaked exposure and contrast, and we're cruising down in the order in which we want to use these sliders, the highlights and the shadow sliders replaced the old recovery and feel like sliders. Okay. And you can use them to dark in your highlights or light in your shadows. Basically, and they all were kind of the same way, dragged to the left of dark and drag to the right to lighten. So we're going to drag our shadow slider Since we need to lighten our shadows a little bit. Let's drag it to the right now to produce natural looking images. You really don't want to pull your shadows or your highlight slider beyond about 50. And either direction. Okay, But again, if you're going for a creative look, then do what you want to with it. But to produce natural looking images, you want to stay within the range of plus or minus 50 on both of these sliders. So as I drag my shadow slider to the right, look how I'm opening up that image. Quick keyboard shortcut for you is to press the peaky, which stands for preview, and that toggles this preview check box off and on at the top, right of the camera raw window. So let's take a peek at our before and after at this point before we go any further. So right now we're seeing the adjusted image. I'll press P. That's our original. Can I get a holy cow? Thank you, Jonathan. Really well today. Like that. Sit on the floor. Hold your knees. Look sad. Look down So you can see the control that you can have and how easy it is to affect serious change with your images and notice that I have not yet caused any clipping. So I don't have a anywhere that I've lost detail. As via now, we're gonna cruise down Teoh the hi work crews back up to the highlight slider. Rather. And if you want to darken that, these highlights just a touch. Then you could drag them to the left. And as I drag, you can see the windowpanes. The dividing would between the panes of glass begin to show more prominently on our floor. Here and again. You're trying to make the image look gives you. You're the one that shot it. Your eyeballs are the most complicated, accurate, amazing camera in the world. There is no camera that can reproduce. What? Your eyeballs, conceit, e. So you want to use these controls to make the image look good to you. Now if I had begun to introduce him clipping into the image, and we're going to come across some images here in our exercise files that we will introduce clipping on as we change these exposure and contrast sliders. Then you could use the whites and blacks sliders. Teoh recover some detail that highlights and shadows. Sliders let you recover detail, too. The whites and blacks sliders let you fine tune the clipping points at that point at which you're forcing your highlights to pure why or your shadows to peer black. So what we can do here is we can drag the white slider to the left to darken the why it's a little bit or weaken. Drag it to the right. See how, as I drag it to the right, I start introducing clipping because I'm changing the point at which that clipping is occurring. Black cider works the same way. Drag it to the lift to dark in your blacks, and you will begin to introduce some clipping in those areas. So between these last four sliders highlight shadows, whites and blacks. You really ought to be able to recover an amazing amount of details using the new process version of 2012 which is available only in camera raw seven. Let's keep going on down the list here. Little little tip on how far to drag the whites and the blacks sliders. Both of these air really meant for fine tuning your images so you don't want to make huge changes. But again, camera police are not going to show up on your door. Another little tip for you involving the highlights in the shadows. Slider if you're lighting, okay, and you just want to even it out. Gonna make your lighting looks even across the image. Set them to about 25. Okay, so you'd set the highlights at perhaps negative 25. And you can either use the slider to just those numbers or you can simply highlight the number and type it in. And then you can set your shadows to plus 25. And that's a nice little magic set of numbers to remember. Minus 25 year highlights plus 25 for your shadows will even out the lighting across your image, so you might want to kind of keep that in mind. really, At the very least, keep in mind that you can produce pleasing effects by entering a negative number for the shadows and a matching positive number. I said that backwards negative number for the highlights and a matching positive number for the shadows to even out the lighting. So give that a shot on your images and do try to keep your whites and blacks adjustments to the minimum because they are meant for find chaining those clipping points. Okay, so down here at the bottom, we've got our color boosting and contrast, boosting controls, clarity, vibrance and saturation clarity boost the contrast in the mid tones, and you would be hard pressed to find an image that would not benefit from dragging the slider at least halfway to the right, if not further. I The new process version 2000 and 12 made big changes to the positive end of this slider, meaning that as you drag to the right, even if you drag it all the way to 100 you should not produce any weird looking white colored halos around the areas of high contrast in your image. If you try that in the old process, version. You really couldn't drag that much beyond about 50 plus 50 you know, on the plus side here. Or you would start introducing what almost looks like a high dynamic range type of multiple exposure look, which looks a little surreal due to the light colored halos you get around the edges. And what are those white colored halos there really a sharpening halo if you think about it, because when you're increasing contrast, you're making the shadows a little bit darker in the highlights, a little bit lighter along the areas of high contrast and again, areas of high contrast is simply where, like pixels air up against art pixels. Good example of that is the black black numerals on a clock face on a white face. You've got black against white that's seriously high. Contrast, poor where tree branches me to sky so on and so forth. So those halos come from the dark pixels getting a little bit darker along that edge, the light pixels getting a little bit lighter. And as you do that, you can introduce what looks to be like a white halo only because you're increasing the contrast along those edges. So We don't have near the problem that we did with 2000 in 2012 process version, as we did in 2010. So feel free to play with that clarity slider. And I've got some images in your exercise files that we're gonna force this thing all the way to plus 100 Teoh kind of fake a pseudo HDR situation. And again, HDR stands for high dynamic range and comes from the merging of different exposures of the same shot. Vibrance is really, really handy. I use is when all the time. I cannot tell you single image that I don't pump up clarity to at least around 40 and drag vibrance at least her around 20 if not higher. Vibrance is going to go through, and it's going to intensify the colors in your image, but because it's going to stay away from the lighter tones, which tends to be what skin, especially on pasty people like me. So definitely use vibrance. If you want to intensify the colors of a portrait, don't you dare to saturation because saturation also intensifies colors, but it does it across the board light tones, too. So I've got a great example of the difference in a portrait between vibrance and saturation. Saturation is going to use on things like landscape shots, things that don't have humans in them. Okay, use vibrance if your photo has humans in them. All right, so that's just a little bit about, uh, that panel. So we're going to keep using all of these controls for several images here for the next few minutes and again to see a quick preview of your before and after. Just press the peaky to turn off the preview check box at the top of the camera wrong window, and then press the peaky to turn it back on and you can see that I produced a have a lot better image. This is actually when it's in my istock photo database. I've got a little bit of clipping going on in the shadows here, but I can fix that easily by dragging the black slider ever so slightly to the right to change the point at which that clipping is occurring. Okay, just a little note on these buttons at the bottom of the interface. We've been using the done button so far, and that's basically saying, Hey, camera, I'm happy with my changes. Go ahead and store them either in the raw file or create that sidecar dot x and p file and store my list of changes there. Thank you. Very much connected. Okay, so that's what the done button does. The cancel button, as you might suspect, cancels out of everything, right? Don't make any changes raw. I can't believe I opened you up. You did not see me. The open image button will send the image straight into Photoshopped. So we've got some images that will use here in a minute that have some power lines. So we're going to correct the exposure in the tonality, make it look really fabulous here in raw. And then we're gonna pop that image, open up in photo shop and use the spot healing brush set to content aware. Fill two that are power lines so you can do all of your color correction. Even you're sharpening and your creative color effects here in in raw and Onley go into Photoshopped. If you have Teoh, say you've got a shot from a family or a union or you with your ex and you want to do a little quality head swapping. That kind of thing definitely has to be done over in Photoshopped. So to do that, you can click the open image button. Now, if you shift, click the open image button. Noticed how it changed to open object that will open. That photo is a smart object in Photoshop. Okay, so if you're gonna say, run a filter or do anything that you would not want to apply to the actual image when you open it up is a smart object in your filters or run non destructively. You can do all kinds of fun things with smart objects. And you can learn more about smart or objects by purchasing the CS five intense over the CIA. Six intends, of course here created by. So the shift key changes that object. Okay, uh, what other buttons do we have done here? We've gotta save image button at the bottom. Right? That process is your changes. Okay, So if we click the save image button, we're going to get a dialog box that lets us tell camera rock what we want to do with her image. What kind of file format we want to create eso at the very top here. We've got destination. Where do you want me to put your file? When When I change, it's what cameras saying to you You can set your file naming right here. You can set it to be the document name. Plus any kind of extension that you want attack onto it. And you can just click these little triangles here, open up a handy menu of pre says of some some good organizational type names. So if you'd like, you could change the name of the file to the month, year and date. I do that a lot or something else. That I do a lot is from my first field right here. I will type in something that identifies either the location, uh, the family name of the people that I'm shooting, something that gives me a clue of where the heck I was or who the heck I'm shooting, you know? So, for example, when Jay and I, my husband, Jay and I used to teach at Macworld all the time Macworld Expo in San Francisco, every day, anywhere, we would come back with hundreds of pictures from Macworld, so I would typically do in W and then tab over and you get the same preset naming schemes in that second field. So then I would come in here, and I would set this one to be the month, year and date so I could quickly do a search on my computer for MW know that those were all the Macworld files. And then just by looking at the finally and I could tell what date they were shot. So this renaming stuff is is pretty handy. You can tell the program what kind of file extension you want to give it. Okay, so D and G stands traditional negative J pigs Jay picked if stiff PSD is a photoshopped file And here in the format pop up menu. This is where you're actually changing the format of the image. So right now we're dealing with the digital. Negative is a camera raw file. Most folks, unless they are professional photographers and have photo shop installed or another camera raw editing programs such as Adobe Light Rumor Apple's aperture are never gonna be able to open these files. So if you need to share these files of somebody else, then you're gonna have to change them into a different format so you can choose J pick you comptel camera raw. What to do with all of the super secret information that is tucked in your file? By using the metadata pop up menu, you can enter copyright information. You could have it save all of your metadata except for the changes that you just did. And Cameron camera raw and so on and so forth. You can have it. Remove your location information. If you are in the national Protection program, don't tell us if you are. And if you do choose J Peg, you'll get a quality setting here so you can tell it how much compression you're willing to live with. You know how much detail are you willing for it to throw out in order to compress your image a little bit? These images will change according to what file format you choose here. If you just want the photo shot file, you don't get the quality setting because you all know that Photoshopped files are maximum quality. There's no compression going on with those, So that's the same options, all right, and we have a keyboard shortcut for the save button. If we click the option key, you can bypass that dialogue box that we just saw, and it will just save your images. Okay, see how the little ellipse goes away Anytime you see an ellipse next to a commander about and that means that it's going to open a dialogue boxes, it needs to have a conversation with you. They're setting the questions it needs to ask you. So you know that you're gonna bypass that dialogue box when you hold down the option or Ault Key because that lips goes away. Okay, so now let's go ahead and click. The done button and we see are some Nail is updated in bridge. And we had the little icon saying, Hey, you used the basic panel. We just say no. So now it's open another image that is over exposed that we dealt with one that was under exposed. Now that's deal with one that's over exposed. So press command are after you've activated the image to open it in camera, raw camera will think for a moment redraw your history and at which point that exclamation point within the triangle goes away and of course, you've got your clipping warnings turned on, and immediately we see that we've got clipping in the sky area. This was a little farmhouse I rented in Umbria in Italy to finish writing my very first book, which was Photoshopped CS four, The Missing Manual and as a carrot to get me through to the end process of writing that book. I had this picture printed out and taped onto my screen at home so I could keep remembering. While I was writing this book, I was like, Come on, girl, you'll get to Italy. Come on, is worth it. So I had to, you know, Once I got there, I took another picture of the little farmhouse, said it, but I rented and stayed in. So once again, let's start out at the top of our basic panel. I don't particularly want to make any changes toe white balance with this photo. Feel free to make your own changes at home. Now it's come down here, and you could start out with just clicking the auto button and seeing how good of a job camera raw does on its own. If we click it, everything goes to heck in a handbasket. All right, so we're going to go ahead and click a default and have a go with this ourselves. So if you're dealing with an over exposed image, what do you want to dio drag that slider to the left to dark in your exposure a little bit. And as soon as we drag it, I dont even a 0.45 of a stop on the negative side, all those clipping warnings go away, which means we just recovered lost detail just in that tiny little drag of that one slider. Okay, now we can come down here and drag rightward to increase the contrast a little bit, if you like a little bit more of a higher contrast image, I happen to you. Then we can come down here to our highlights and our shadows to further try to recover any clipped areas. So if you need to, you can drag your highlight slider to the lift to darken them a little bit. And I do want to do that on this image you can see on the stones of that farmhouse. I'll drag it all the way to the lift. So we get, uh, something that's extremely noticeable. And then you can start dragging it back to the right until it looks good to you. Okay, so if I press my peaky to toggle my preview button off and on, I've only messed with three sliders and look at the difference in that image. Okay, so now we can come down here and we can open up our shadows a little bit if we'd like my shadows around this. This big wooden door in the bushes are very dark. So I'm gonna drag that cider to the right to open those shadows up and again, I'm gonna drag it all the way to the right so that you see a significant change and then we'll back off of it. And I do that a lot, too. Especially with the highlights in the shadows. Slider. Drag him all the way, one direction or the other. And then I start coming back because I like to see what's possible. How far can I push my highlights without introducing clipping? How far can I push my shadows without introducing clipping? So we'll start backing off of that and we'll stop when it looks good to use. And now we can toggle. Are Previ often on again in the shadows in the door, in the bushes are starting to open up. But I could probably stand going up to about 50 on that particular photo. Another thing you might want to do when you're editing your images in camera raw, zoom in and you've got several different ways to do that. Of course, you can use the zoom tool, which is automatically activated when you open camera. Raw lives up here the very top left of the toolbar. It's command or keyboard Shortcut. Rather, is easy Z for Zoom. See that when I can figure out. You've also got a a little field down here at the bottom left of your camera window. As you might imagine, clicking the minus sign reduces your zoom level. Clicking. The plus sign increases your same level, and of course, you can just click the little poppet menu. Teoh, open your candidacy in presets or you can say, Hey, camera. If you don't mind, would you please this? Make the image fit within the viewable area. If you want to do that, click fit in view, but you can also use the keyboard shortcuts for zooming in zooming out that you haven't Photoshopped. That's what I do most the time because I am a big old creature of habit so you can press your command plus or control plus on a PC to zoom in and then press command minus on a Mac or control minus on a PC to zoom back out. And that can be very helpful when you're editing your images. When that zoom control is absolutely crucial is when we get into sharpening because you will not see any sharpening occur on your image unless you are zoomed into 100%. So it's important to keep that zoom percentage in mind because you may be over sharpening your image. But since you're not seeing the sharpening reflected in the preview area, you may think, Well, holy cow, nothing's happening. But you're not going to see especially a sharpening preview unless you're zoomed into 100%. And if you are a stock photographer in your submitting any images to a stock agency for approval especially, I saw a photo dot com, you absolutely have to edit your images and 100% because the inspectors are gonna look at your images at 100%. So you need to see exactly what they're seeing. If you're submitting to stock agencies, so do you keep that zoom percentage in mind? All right, So we finished correcting our exposure or contrast. We missed with our highlights and shadows sliders. I'm gonna zoom back out just so we can see the whole image. And I don't have any clipping going on, so I really don't have to adjust the whites and blacks sliders if I don't want to. But if you want Teoh, you certainly can lighten up your highlights just a tiny bit more by dragging it slightly to the right. Or you can dark in your shadows by dragging that slightly to the left and again with the before and after. Previ, with the peaky, were producing a much more visually pleasing image than we had before. Now let's use our scroll bar on the right hand side of the basic panel, and let's have a go with clarity. This is a fantastic image to use clarity on because it's got so much texture. But because that area of texture is not high contrast, this is an ancient farmhouse so over 500 years old to me, that's Agent. Yeah, really, really old. So those stones were very faded, so we don't have a lot of contrast in that area. So rather than using this contrast, slider appear I would go with clarity and watch what happens to that stonewalls. I start dragging it to the right and that beautiful, so oppressed, the peaky to do our before and after again. And we're really changing this image in huge ways. Now, as you can see, I did introduce a little bit of clipping in the shadows when I dragged the clarity slider to the right so we could come back up here to the blacks, and we could change the point at which that clipping occurs by dragging it slightly to the right. So now I don't have any clipping in my shadows now, but I've got some nice texture going on that we introduce to you the clarity, slider. And of course, you can pop back up here to the contrast slider, and you can drag it a little bit to the right to maybe increased. That contrast is a tiny bit more next slider down that we're gonna just is vibrance. I'll zoom back out so you can see the difference between vibrance at 100% and saturation at 100%. Not a whole lot on this image. But I tell you, I reached for vibrance 95% of the time, even if I don't have people in my picture. This particular image has so many light tones that might be similar to skin that vibrance is not going to completely destroy those colors or introducing a weird color shifts so you might drag that slider up a little bit. So here's our before and our after none of the video of levels. None of the video of curves corrections here in camera are infinitely easier in simpler. They're easier to understand. OK, so again, if you like the images, click done to close it. Or if you need to go into photo shop, let's say to remove that power line right there, you could click open image. We're not gonna do that on this one. I've got a better power line shot for you, or you can click canceled a bail out of this all together. We'll go ahead and click. Done. Okay, so the next image will click to activate it and press coming in order to open it. This is when I got in Olympia, Greece. This is the grounds for the very first Olympics took place, talking ancient, ancient ancient ruins here. So much fun to shoot. I had a really hard time not getting a 1,000, people in the shot because the grounds were very crowded when I was there. So I did a lot of shooting up above heads because I didn't want to have to remove all the All the images are the heads of people. So this particular image, if we click the auto but in here in the basic panel, Kameron does a fairly decent job of fixing the detail that we're losing here in the highlights. Remember, the rid overlay is highlights that are being forced to pure white. So let's go ahead and click the auto button. So here's our before, and here's our after That's a little bit too dark that camera raw didn't do that bad of a job. So what I can do is use its settings as a starting point. So now I can come back in here if I decide that that exposure is too dark. I can simply click and dry the exposer slider back to the right until the exposure part of it looks good to me. Now, I have introduced a little bit more clipping with my highlights. But you already know we can fix that using the highlight slider here. Okay, so all I have to do is drag the lift to darken my highlights a little bit and try to reduce that clipping if I can't get the clipping completely fixed with a highlight slider than I can simply come down here to the whites and adjust the point at which that clipping is occurring. I'm gonna dark, innit? My shadows just a little bit more. There we go and then come in here with the whites and drag that slightly to the left. Remember, in this case, I click the auto buttons, so I'm dealing with what camera raw thought were the appropriate settings. And I'm just fine tuning them to produce the image that I want. It doesn't appear that I have any clipping going on in the shadows. I don't see any blue areas. And a quick peek at my shadow and highlight warning triangles at the top left and right of the hissed a gram confirm that I don't have any clipping going on. And how do I know that they're confirming that I don't have any clicking going on because they're black. Okay, when these triangles or black, you don't have any clipping. If there any color other than black, there is some clipping occurring. So now I can come down here to my clarity, vibrance and saturation sliders. We can drag clarity a little bit to the right to increase contrast in the mid tones, and we can try the vibrancy slider Teoh. Boost the colors a little bit. You don't like the way vibrancy leaves the lighter tones alone. Then you can have a go with saturation. OK, but as we drag saturation, we start to introduce clipping again, which means we'd have to trot back up here and play with our highlights and or quiet sliders to try to get rid of it. So you don't get as much of that problem with vibrance because again, vibrance is leaving. The lighter tones highlights alone, for the most part because they are found in skin so Here's a quick peek at our before and after by pressing the peaky. What a huge difference that made in this image. Arguably one that was unusable to one that now I wouldn't mind, you know, actually showing people so we can click, cancel or done. And we're going to go through a few more of these images and the multi questions on on using the basic panel here. So I'll scroll down a little bit. This particular image I got in Siesta Key. I was quite proud of it until I opened it up and saw how blown out the area where the sun waas then going, I thought it was the perfect stock shot. Oh, yeah, I can sell that sucker, but alas, it was not to be so again. Start out with a white balance. Come down here and start adjusting your exposure. My exposures pretty good. It's not really overexposed or under exposed. My problem. It was the sun, okay? It was just so bright that that particular area is blown out. So even if I don't really change the exposure much, I can decrease it just a little bit to darken it up. I've got nice contrast already. So I don't really have Teoh change the contrast slider. But what I really want to show you here is how these this highlight slider can recover those details. So I've got a red warning over here, which means they're blown out there to light. So all you have to do is think about what camera is telling you once you've got those clipping warnings turn on and that tells you which direction that you need to drag the sliders. So if it's too light, I simply look at the highlight slider and I look at the coloration of the slider itself. It's darker on the left in, and it's lighter on the right end. Pretty obvious which direction you need to drag in, which to fix those highlights. I'm gonna drag it to the left and look at that. Amazing. When I dragged the highlight slider all the way to the lift, I have almost completely eliminated the clipping, which means I have recovered all kinds of glorious detail in that area that was completely blown out. Had I opened that in photo shop, you know, good luck trying to fix it. You could, but way easier and here in camera and completely non destructive, so that maybe all this image needs. I might pop up the clarity just a little bit in the vibrance, just a touch as well. And here's our before and here's our after so that the sun even changed shape. Now I can see this wonderful kind of star pattern that that was not visible in the original image, So we'll go ahead and click. Done. Now let's open up an image that's very flat will click it to activate it in bridge and press Commander Control are to open it in camera raw. Now this one, Let's go ahead and adjusted manually. Our problem with this one we don't really have clipping going on in the shadows or the highlights of this point, but it's flat, and I really want to make those glorious speculum highlights that we're complete accident to capture. I want to make them show up, and I want this to be this column to be more warm and tone. I wanted to make more of a statement. This is also in in Olympia, Greece, again shooting up because they were 5000 heads had about have level. Okay, so let's go ahead and drag the exposure slider just a little bit to the lifts. Not very much, because our exposure isn't that bad. But sure does make Artal speculum highlight show, show up a little bit more. We can drag our contrast to the right because our big problem with this image is that it's flat. Okay, there's not a whole lot of difference between the light and the dark pixels. Except where the column of Stone is meeting the sky. That's about it. So we could come in here and we could perhaps dark inner highlights a little bit dark in our shadows, just a little bit. But what I really want to do, this image is warm it up. So this is where a custom white balance change can come into play. And if you know you want to do that when you first come in here, Yes, you should go ahead and change it first. But again, the camera raw police, they're not gonna show up on your doorstep. So look what happens to this image. As I start dragging it to the right, I introduce some wonderfully warm tones. Looks like the sun was out a little bit more. So here's a before and here's an after it's now can come down here to clarity and dragged back to the right and really increase the contrast again in the new process. Version 2012 in camera raw seven. You're not going to get the kind of halos that you would in camera Raw six or process version 2010. And I can also pump up the vibrancy a little bit. Make that sky pop, and now look at the difference between the before and the after again personal preference. I like my images to look more golden hue. It's funny, cold natured. I'm always cold, so I'm always wanting to get up next to a fire and warm things up. So maybe that's why my brain likes warm toned images, cause I'm always cold nose. All right, so click, cancel or done done. If you like changes. Now let's look at a couple of images that we can use clarity on to create an almost HDR high, damn high dynamic range look. So I have shift click Tonbridge to activate two photos at the same time, press command or control are on a PC to open them up in camera raw. So here's our first image so we could go ahead and fix the exposure. This one's overexposed. I'm gonna drag the exposure a little bit to the left. I'm gonna drag contrast little bit to the right to increase contrast. I don't really need to mess with my highlights or shadows slider. My highlights look pretty good. I might lighten up my shadows just a little bit by dragging it to the right. I'm not having any clipping, so I really don't have to change the whites and blacks sliders, which changed the point at which clipping is occurring. But what I am going to do is drag the clarity slider all the way to the right. Now I introduce a little bit of clipping so we can come back up here to the either use the whites and blacks to change the clipping point or the highlights and shadows. To try to recover that detail, You can use a combination of of both of them if you need to you. There we go. But you can see with dragging that clarity slider all the way to the left I'll do before and after we get what almost starts to look like a high dynamic range image. Okay, And again in process version 2012 or not getting those halos that you might get if you dragged that clarity slider to 100. Uh, in a previous version, I can drag the vibrant slider up to predict to produce a creative effect. Let's look at that on this image right here. This is when I shot in Fire Island this funny. The first time I submitted this one Teoh stock agency. I stopped pro in this case. They rejected it because they said it over filtered it cause they thought this coloration in these tall grasses was fake. So I appealed it. I said, her snake filter going on in this image. And so then it got accepted. So that's nice. So if you ever had a stock photo rejected for some reason, I'm sure most stock agencies have some kind of ah method for process for appealing it. So let's go ahead and look at this one. Let's go ahead and increase our exposures. Little bit toe. Lighten it up. Increased contrast a little bit. L dark in my highlights just to touch and light my shadows just a little bit coming here to clarity and drag it all the way to the right. This one is a little bit more obvious than it looks toward an HDR image. Now I'm not saying you can produce really HDR here in camera. Wrong, you can't. Of course, you can only do that by capturing multiple exposures, emerging them using feature like merged HDR pro in Photoshop or 1/3 party plug in that doesn't better job than the merged HDR pro and finish off. But anyway, you can't produce something that is toward the HDR. Slightly surreal look by dragging that clarity slider all the way to the right, and we'll add a little vibrance to that and interesting creative look that we've made here using those sliders. So I go ahead and click. Done. Now let's take a look at this image, and you will really appreciate the difference between using vibrance and the saturation sliders. Okay, so let's go ahead and dark, and the exposure just a little bit. Increased contrast lightened my highlights a little bit by dragging that to the right, darkening my shadows a little bit by dragging that slider to the lift. And now let's say that I want to boost my color. Well, we've been talking about using vibrance that because it stays away from the lighter highlights lighter tones in your image versus saturation. So here's a really clear indication of what the sliders do. So I'm gonna drag vibrance all the way to the right. Okay, All the colors in my image, except for the lighter tones, have been intensified, but her skin still looks like skin, right? It's not bad. So I'm gonna take that slider back down zero by simply typing zero. Because I've highlighted the field cell press the tab key to go down to saturation. Now look what happens when I drag saturation all the way to the right at some nasty skin right there. So unless you like that florescent skin, look, then I would stay the heck away from saturation on photos that contain humans. In the that Those cases, you're gonna want to use vibrance instead because even at 100 it doesn't completely destroy her skin. Even at 70 it's not destroying her skin. So here's the before, and here's the after. Yes, it's changing the skin tone, but it's not completely destroying it, making her like an alien. So go ahead and click done on that one. And here's the image that we are going Teoh. Actually, this one here is the image that we're gonna correct in camera raw, and then we're gonna take it into photo shop to remove the power loans. So this is the image I got in Santa Rini. Santorini is Ah, Greek town and is on the A, G and C, I believe, which is basically the crater of an old volcano. And on the tippy top, the edge of the volcano rim, which is huge, is this tiny little city called Santa Reaney. And everything is white rushed. Okay? And so everything is perched up there on this little bitty room of this honking big volcano. And because the the edges of the the crater in the room are so steep, the houses have doors up top. So you go through the door and then you walk downstairs to actually get to where the dwelling space of the house is. So it's a real trip, because when you're up there, you see all these doors and you're like it's just a door, or the rest of the structure will. The rest of the structure is down the side of that very seat. Cliff. It's a real trip. So anyway, this, uh, is a shot of the image with the power lines that we're going to take out Okay, after we adjusted in camera raw. So there's a power line. There's a power line, so we're gonna use a spot healing brush. That content aware field is f those suckers just like that. But wait till you see the color of the original image. Won't believe how crappy this So getting close this one, because we're gonna open it straight from camera raw after we fix the exposure. So go ahead and click to activate the image and opening up in camera raw. I've already applies some adjustments when I was playing with it a few weeks ago, so I'm gonna go up here to the basic panels, fly out many and shoes camera raw defaults. Now you can see the image in its original glory. It's pretty awful in it. It's pretty awful. I know you look at that on the back of your cameras LCD, and you're like you not like I was going to go back there and retake that shot anytime scene. So let's go ahead and use our basic panel at play around with the white balance if you like. Let's see what auto does to our image. Warms it up a little bit. So let's go on down here to exposure. We are way overexposed. Got zero contrast going on. So I'm gonna go ahead and dark in the exposure a little bit and we're gonna drive the contrast Slider Teoh the right. And I might go ahead and pop back up here under white balance and warm it back up. Just a touch Come down here to highlight My highlights are pretty dark. I want to drag that to the to the right toe, lighten them a little bit, lighten my shadows a little bit. Brighton at my whites, dark in my blacks. So we're getting there. There's our your preview. That one almost looks worse. All right, so we're gonna have another go at that. And it's so much fun to play with this stuff. It's just a blast. So this one I'm gonna cool off a little bit more cause we introduce a little bit too much yellow in there. So use our scroll bar to slide down and do be Congress in that you do have that scroll bar there. So if you don't see some of the sliders, don't panic. Just know that they're down there. You just gotta scroll to get to him. All right, So now let's add some clarity. It's really gonna increase the contrast in this image that looks so much better. And let's go ahead and increase the the vibrance. There we go. So now this is a perfect example of an image that you really do you want to take into Photoshopped? Because while camera raw has a spot removal tool and we're gonna look at that later in the day, it doesn't have near the tools that Photoshopped does for removing things from the photo itself. So this is a perfect situation when you would want to use the open image command and open it up in photo shop that don't be tempted to open it up is a smart object because you're healing tools don't work on smart objects, so you just have to rest arise. A smart object should you have to do that, or should you choose to do that? So let's go ahead and click the open image button. Here we are in Photoshopped Hammer and a zoom in Pressing command plus or control plus on a PC. Use the space bar press and hold the space bar to move around within the image and photo shop while you're zoomed in and you just want to position the document so that you can see those two power lines. So the next thing we're gonna do is we're gonna create a new empty layer onto which we're gonna do our power line zapping, and we can do that by pressing the new layer icon at the bottom of the layers panel. It looks like a piece of paper with a dog eared corner. Or you can use a keyboard shortcut that also opens a naming dialog box because thou shalt named their layers right practice. Get a layer pain lab. It's so you can press, shift, command in on a Mac or shift control in in for a new document, a new layer rather on the PC, and when you do, you get this new layer dialog box so we can say we can call this one. Remove power lines. So that way you know what is happening on that layer. Go ahead and click, OK, now we can go grab a spot. Healing brush lives on the left hand side of your screen and the tools panel. You compress J, activate it or commit or shift J press shift J repeatedly, and that will cycle through all the different tools in that particular tool set. And then we're gonna come over here to our image. There's several different keyboard shortcuts and Photoshopped that you can use to change breast size. I like using the left and right bracket keys so the left bracket key goes up and brush size the right racket. One does the left bracket goes down and brush size, so the deal with the spot hailing brushes. You want to try it up to the options far and make sure that is in content. Aware now, content aware was an option for the spot healing Russian CS five. So if you happen to be running CS four, then you're not going to see that. So you want to make sure, content aware. Ease on and then you want to turn on sample all layers because the sample all layers check box really does says is your way of telling Photoshopped Paper shop. I fully realize that I am on an empty layer that does not contain any pixels. If you would be so kind, please look through it to the layers below where the information actually lives. If you don't turn that on and you try to use the spot healing brush on empty layer, photo shop will squawk e You cannot do that. So now we're going to come over here and you want to make your brush just a little bit bigger than the thing you're trying to remove, and you're gonna simply click and drag to paint away that power line. And while you're still holding on your mouse button and foot shop highlights the area you're painting across in this kind of slightly translucent, dark gray color. When you release your mouse button, Photoshopped looks at the pixels on either side of the area that you highlighted in it. Does it copy paste in a little bit of blending to make the retouch look riel and wowser, huh? That's pretty amazing. That worked really well because we had quite a bit of sky on either side of those power lines. So now we'll come over here and just paint on this other power line. I'm gonna get into a little bit of a problem area as I get close to the stone of that door. But nothing that can't be fixed by zoom and weigh in and I mean weight in and then using a seriously small brush to paint out the last little bits of that power line. Now, something like this may not produce an image that would pass a stock photography agency inspection, but it certainly would pass a client inspection in for your own use. Other opportunities for healing with this particular shot would be these funky numbers that air on the door down here or the door area. So I'm doing this just to show you how you can use camera raw in conjunction with photo shop. You can think of this as well. You wouldn't go to a general practitioner for plastic surgery, would you? No, you would not. You would go to a specialist. Well, what we're doing here is we're using camera raw for what? It's a specialist at, and we're using photo shopped for what it's a specialist at, and this is a prime example of that kind of thing. So I hope now you can see how easy it is to use the two programs together. And of course, at this point you would save this file as a Photoshopped documents so that your layers remain intact in case you print this photo out and you've got a little bit of a power line left over or so on and so forth. And then, if you are gonna send this file off to somebody else or send it to in pics to print, then you would export the highest quality J pig that you could from this Master Photoshopped document. But you always want to keep your master Photoshopped documents around in case you need to go back and change something. So that is a little ditty on how to use the two programs together. And on that note, we can pause in take questions if there are any on what we've covered in the basic panel so far. But we definitely have questions. There's no question there. Let's go ahead and start. See through art is wondering which sliders is auto changing, ISAT, changing clarity and vibrance? Or is there some sort of define, noble ideal that auto is using? When you click the auto button closed? Open this one right here. When you click the auto button, it's changing all of the sliders in the tonal section. It's not messing with clarity, vibrance and saturation. So those are those are more creative kind of super duper contrast color boosters. So when you click auto, it's only changing these sliders right here, and you can see the little dividing lines that separate those guys. It is changing white balance to you, but nothing below that. That other line and several folks were asking that same JB and Julie Pressphoto Can you review again? Which sliders replaced specific sliders? Going from under became a raw to 7, and then to follow up is Are those the same changes that were made in light room for Yes, yes, on the last question. So the changes to the sliders in the basic panel are the same changes that are in light room now. So what? We've got here. New sliders are highlights. Shadows and whites. Okay, so you're highlights. Replace recovery. Your shadows replace feel light. And what's the last one? Yeah, those three. You know, brightness has gone away because it was really redundant to the same thing as exposure. So these three right here, hot and highlights shadows and whites are your new sliders, and they replace recovery and feel light. Remember what whites replaces? Brightness, I guess. Yeah, because it wasn't so much that the brightness slider did exactly the same thing exposure. It was more the case that it was named, you know, in an odd way that made it confusing to use because brightness really is exposure. Exposure controls image's brightness. But, um, yeah. So the white slider here really dis controls at which point clipping begins to occur, so you'll use it to fine tune your highlights. And the black slider has been around. So you would use that to fine tune your shadows. But if you've got a little bit of clipping occurring, you can drag that white slider to the left dark in those upper end highlights. All right, we have a couple questions about clarity. John Hernandez to who is from the Canary Islands in Spain, is asking, What exactly does clarity do? Is it like applying the curve just on the mid tones? Does it add contrast to the Midtown? Yes, exactly what it's doing. It's adding contrast to the mid tones, only perfect, which makes the image look like it's more clear. Certainly not. It's just increase in contrast in the midterms. Okay, And then just to follow up, my two daisies from Newark, Ohio, is just confirming. So it is clarity and a CR compared to bumping the mid tones with the tone curve in CSX. Similar? Yeah. Great questions like that. Clarity about clearly. All right, uh, question from Rob Barnes in Reno. This kind of a long question so I can shoot one f stop under exposed to saturate color in my camera as a standard practice. Do you think that lowing the exposure one stop in India became a rah will do the same thing versus increasing saturation in the control panel? Gosh, that's a great question. You're gonna have to test it on your images. It seems logical to seem that it would be similar, but gosh, he knows because the the math behind camera raw. You know, it is a little bit different from the math going on in your camera, so you just have to do some tests. Fantastic. All right, let's Let's go. One more question before we regulate. Sure, Okay, Bill F is wondering, Can you apply the adjustments you made on a previous shot in camera one? You just open like I know that we were doing multiple changes or changes to multiple images at the same time. But can you then copy from one to another? Absolutely. It's a little bit easier to do Enbridge than it is here in camera raw. But I'll show you both ways. We're going talk about using camera raw presets later on in the day. So if you if you've got a slew of shots that were shot under similar lighting conditions, you could correct one of them and save that as a preset. Okay, the presets panel is right here or right here a second to the last in the list of buttons, so you can use that to save all of the different changes you did. Okay, an easier way to do that. My humble opinion is to do it over here in bridge. So here we have an image that we've adjusted, and we know we've adjusted in rocks. It's got that little icon at the top right of its thumbnail, and then we're going to right, click or control. Click on a mat in. What you can do is you can come down here to develop settings and you can choose copy settings. And then once you've copied settings, we'll apply it over here, and it will look terrible once you copied settings. Then you have the ability to paste settings, okay, and this little dialog box will open, which is actually the same dialog box you get in camera. Wrong. When you save your settings as a preset, it's saying, Hey, I've got a bunch of settings in here. Which ones do you really want to save? So, depending upon what you're doing, you might leave these all turned on, or you might turn some of them off. Let's say, you know, you've got a bunch of images shot under the same light and conditions, but they may need a different values of sharpening, so you might turn that off if you didn't want a copy and or pace that one one command, so that's another way to do it. And if you're not a fan of using the little shortcut menus or contextual menus, and you can also get to the developed settings command under the Edit menu in Bridge. So choose edit developed settings and then you can copy in or paste with a keyboard shortcut here. There's also some pretty powerful batch processing stuff. Enbridge as well. Most of that's under the the Tools menu, so you can find all kinds of wonderful time saving things.
Class Materials
bonus material with purchase
bonus material with enrollment