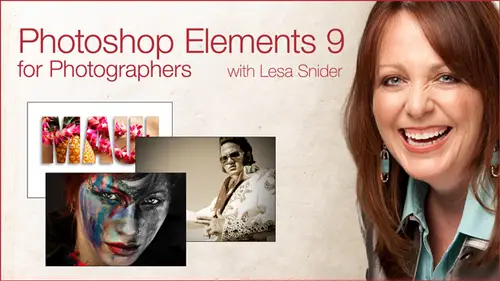
Lesson Info
19. Placing Text Behind an Image
Lessons
Day 1
1Introduction
16:10 2Intro to Elements Workspace
15:32 3Guided Edit Mode
39:35 4Quick Edit Mode
19:26 5Full Edit Mode: Layers and Masks
1:03:29 6Smart Brushes pt 1
17:30 7Smart Brushes pt 2
31:27Portrait Makeover with Detail Smart Brush
37:39 9Retouching Techniques
39:53 10Recompose Tool
12:27 11Gorgeous Grayscales
36:32Day 2
12Gorgeous Grayscales Continued
55:54 13Quick Color Tints
09:15 14Adding a Vignette
07:05 15Correcting Color and Lighting
49:07 16Fixing a Stubborn Color Cast
15:36 17Lightening Wrinkles and Shadows
18:47 18Selective Softening & Sharpening
25:47 19Placing Text Behind an Image
30:48 20Pushing a Photo Through Text and Other Shapes
41:18 21Blending Images Together
38:31 22Deleting Backgrounds with the Magic Extractor
27:51Lesson Info
Placing Text Behind an Image
All right. Welcome back, everybody. So we finished out the last segment with a spot of selective softening and sharpening. That's those are both very useful techniques. So we're going to continue on into arguably the most exciting and creative part of our two day workshop here, and that is collages and special effects. So we're going to start off with another very useful technique, and I'm gonna be using image number due to do 22 called Text behind. And that's actually what we're going to create. So I'm gonna open up this image, and it is a type treatment that has been used on every single issue of rolling Stone I've ever seen on the cover. So the technique is how did you place text in the photo where it looks like it's behind an object. And the way you do that is with a layer mask in an elements nine, we actually have real layer masking abilities, so we can actually do this technique. It's a lot of fun. So let me show you how I did it. Not quite sure what fonts are installed on this s...
ystem, and I'm gonna go ahead. And since I created this layer in probably another version of elements. I'm gonna go ahead and double click it to see if I can copy the ticks. There we go. OK, so now I'm gonna cheap. I'm gonna throw that layer away. And I've already got my text copied onto my computer's clipboard so I could just paste it in with the same font size. Okay, so here we are with the picture and let us say that we want to put text behind this little boy's head. How do we do that? Well, we can't go back to the shot and hang the text there. That would not be very efficient. So what we're gonna do is we're gonna add text after the fact that we're gonna use a layer mask to hide the parts of the text that look like they might need one behind the little boy's head. So to do that, this is the first time we've used text in this class. So we're gonna grab the text tool, and it looks like a big old T cannot miss it. Okay. There are other text tools hiding in that tool set so it would give the tool a click we can see that you can create horizontal type that goes straight across. You can create vertical type that goes up and down and these other guys we won't worry about they actually create a selection of a letter, a selection in the shape of a letter. They don't actually create a letter, so to speak. So we want actual type. So we're gonna choose the horizontal type tool, and we're gonna come over to our image and your cursor turns into a little I bean. So once you see that you are ready to click and the point at which you click is where your text will start in the moment that you click Elements is gonna create a type player for us type or text layer. So we're going to give the documented click. And now I've got the flashing I bean just like in your word processor. Okay, this part of elements works exactly like Microsoft Word. Arguably little better because there aren't so many text formatting features toe wade through. So we've got the flashing ibeam. So now I'm gonna go ahead and paste my my text that I copied. You can resize your text very simply, you do need to highlight it, just like you do in your word processor. To change the size of text. You gotta tell the word processor what ticks you want to change. So you have to highlight it so you can do that by clicking and dragging from the left to the right to highlight the words. And really, just picture this as if it were this little segment like Microsoft Word. So don't let the color changes or the size or anything like that throw you. It works exactly like anywhere processor. If I wanted to change the size of just a single letter, I could highlight a single letter. Or you can select words by double clicking. If you have the dexterity to give the mouse quick triple click. You can highlight everything on that line of text. Okay, so it doesn't matter. Six and 1.5 dozen on the other. Once you have the text selected, you can use all of the wonderful options in the options bar. And I feel a sneeze coming on here. Okay, Waiting. Okay. So in the options bar, we have font family, which is a fancy way of saying typeface. What font do you want to use? What family? Okay, so you've got a pop up menu here of all the different fonts that are installed on your system. Those, of course, will vary. Years may not match mine here. Other things that we have going on here is the style of the fun. And by style, I mean, it could be a metallic style, a bold style, so on and so forth. Whatever is built into the fun. If it has those extra style, such as a light or a heavy, bold version, they'll show up here in this menu. The next pop up menu over is for setting the font size, and it's in points. So if you know the font size, you can highlighted here and type in something else. If I wanted 52 point type, I could type in 52. And if you're washing over here in the background, my text is enlarging as I'm doing that, or you can use this little downward pointing triangle to bring up a list of the most commonly used font sizes, and you can choose one from there and then your text will also change. OK, But if you don't see the size, you want that list, always know that you can type it in. Okay, Other tools of note Over here. This is your bold, your italic underline when she should never, ever, ever use for anything people think it means hyperlink on the web. So underlying Texas out, find another way to emphasize it. And this little guy right here lets you set the alignment for your text. And you've got the usual suspects left, right, and center align. And this little guy right here is for setting the leading, which is thes space between lines of text. How much space that line actually takes up on a page. And this will color swatch right here, just currently white lets you set the color of your text. Okay, so you can, uh, give that little iconic click and you'll open the color picker. You can change the color of your text. We're going to go ahead and leave ours. I could leave it set toe white, but while I have this dialog box open, I want to share with you a little secret that I use any time I'm adding text to a photograph the question becomes, Well, what color text should you add? While I have had color theory back in college and we won't say what year that was, I don't necessarily want to be forced to remember all the rules and color theory at this one moment in time. So a surefire way to pick a color that's gonna look good is to snatch a color that's already in the photo. So the way I opened this color picker was I created my text. I highlighted it. And then I clicked with little color swatch in the options bar that opens the color picker. If I mouse away from the color picker onto the document, look what my cursor changes into and I drop her. That means you can snatch any color that already lives in the image. And if it lives in the image is gonna match. That's my little trick for picking colors like that. So I'm gonna cruise on over here and I'm gonna pick up. I was try a color that's in one of these boards and you can see the color change happen over here in the color Picker doesn't actually show it to you on the text, which is bit of a drag, but that's okay. So that's how you can snatch a color from the image to make it match. So we'll go ahead and say, Okay on that. Now I'm going to share with you a keyboard shortcut for changing text size because I rarely know what point size I wanted to be. There is no way that I could look at this photo and know the words, and I want to type and say, Oh, but of course, it needs to be 83 points in size. That's never ever gonna happen. But there is a keyboard shortcut you can use, and it is shift command greater than on a Mac or shift control greater than on a PC. Shift control, less fan goes down and brush size or type size rather shift control. Less than so. Basically, it's shift commander control and then the comma or the period on your keyboard. Okay, less than which is the comic. He will go down greater than which is the period key will go up in size, and that's how I size my text when I'm gonna add a two photo because I could not tell you See, here we are 66 points. I would have had no clue. Actually, I make a little bit bigger now. The next thing I want to do this text is I want a position it on the photo where I actually wanted to be. Well, yesterday's workshop we talked about using the move tool over here in your tools panel to move layers around independently of other layers in your image. Ah, lot folks think that you should change to the move tool at this point to move your text around. I'm here to tell you you don't have to. You watch what happens to my cursor. All zoom in. So I'm I've got my cursor positioned kind of inside the highlighted text area and it's still on. Ibn cursor is still in text mode the second that I mouse away from that block of text, I get the arrow key, the arrow tool rather than move tool so you don't have to switch tools to move your text. Just mouse a little ways away from the text, click and hold down your mouse button and you can move it around on your image wherever you want somebody go ahead and zoom back out so we can actually see where we're positioning this. Now, you'll notice that on. Lee worked while I had the text highlighted because right now, since I don't have anything highlighted, it thinks I want to be in edit mode. Actually, you can still mouse away from it. Moving around. Here we go. I'm gonna make my a little bit bigger again. There we go. See how nice it is to experiment with keyboard shortcuts, Things like that. It really allows you to quickly change, especially your text, without really having Teoh refocus on switching tools and all that other kind of stuff. So now it's time for us to add our layer mask. Okay. So again, this is only an elements nine. We're gonna cruise on down to the bottom of the layers panel and click that circle within the square. It's at the very bottom. Give it a single click. Now we've got a layer mask on our text. Now it's simply a matter of painting with black because black conceals white reveals the areas that you want to hide the text, which, if you do it around the shape of an object. It will make the text look like it's behind that object. So I'm gonna go ahead and move my text up a little bit more. There we go. Okay, So now, since we're were in the realm of adding layer mask manually whereas yesterday we spent all day using the mass that came along with adjustment layers. Okay, remember how I said at one point it was going to be important for you to really pay attention to what is active on any given layer? Because when you start adding layer masks manually, you really have to pay attention to what is active. Because the next thing you do with the next tool use is gonna happen to the part of that layer that's active at this very moment. Because I just added that layer mask I had get an extra bracket around the corners of the layer mask that lets me know it is active at this point in time. So the next thing I do is gonna happen to the mask. Now, if I click on the t the layers thumbnail, that means the next thing I'm about to do will happen to the text Okay, So before when we were using adjustment layers, you couldn't really activate the adjustment layer thumbnail icon because that's all it is, is it's an icon. Okay, but when you start adding layer, masks manually toe layers, you have to pay attention. To which part? Or which thumbnail is active at that time? Okay, is it what's on the layer? You know, in this case, that's text. This could be an image. Or do you have the mask active? See how that bracket is changing as I click on the to, and just to illustrate, let me show you what it looks like with an adjustment layer. They'll close that seam back in. When you're working with a mask on an adjustment layer, you cannot click that icon and change the focus of what's active. Does that make sense? But since we added this layer mask manually to a text layer, you can change the focus of what is active on that particular layer so I can choose to make the mask active or the text itself. That kind of makes sense. So when you're adding a layer mask manually, pay attention to where that extra corner bracket is Okay, so I'll go ahead. Delete this. Sure. So me. Throw away that adjustment layer on, and I'll go ahead and delete the layer mask. This is actually great opportunity. Show you how you delete a layer mask. So let's say I didn't want this layer mask anymore. You can right click on it or control click on it either way, and you'll get this little shortcut menu in. One of the options is to delete the layer mask, so I'll delete that. So now we're back to our text that we just created Soto. Add the layer mass. We're going to click the little circle within the square icon at the bottom of the layers pale, this icon right here. And if you don't see it, that means you're not using elements. Version nine. So now we've got our layer mask, and because we just added it, it is automatically activated. So it has that extra corner bracket around it. So now it's just a matter of grabbing a paintbrush, the regular brush tool that we've been using. And if we want to hide the text, black conceals, white reveals. So let's go grab our brush tool. You can also press B. Take a peek at your color ships at the bottom of the tools panel and think about what you want to do in the mask. So if we want to hide the text, we need to be painting with black. So I'm gonna press the X key to flip flop my color chips and then come over to the text. Zoom in by pressing command or control plus user little space bar trick to position the image where we can see everything. And now we're gonna start painting the area. We want to hide the text. So it's a real funds tightening to do, and it tends to make the text look like it's part of the image instead of tacked on as an afterthought. Okay, looks built in, if you will. So I'm gonna zoom in a little bit more to make sure I get all of the text here. So what's happened here is I've hidden a bunch, but I've hidden too much of this letter C right here. So when you're in a layer mask to split flop your color chips, it's easy to suppress eggs and then I can come back in with a smaller brush to reveal that letter. And of course, if I was doing this for Klein, I take a whole time getting it just perfect making sure that I don't have too much of the letter hidden. But you can see as I'm doing this how easy it is to go from concealing too revealing when you're working with layer masks here and how wonderfully useful that space bar trick is as you're moving around toe one part of the image that you're really zoomed in on. So since I've got a pretty big area Teoh paint across right here, I'm gonna make my brush larger. And I need to flip flop my color chips on painting with black to conceal. And it's gonna keep hiding these letters until it looks like they are completely behind our little boy Allah Rolling stone covers. Okay, so here I've erased or not erased. Rather have hidden too much of the letter. So I'm gonna go down and brush size press X to flip flop my color ships and reveal that letter again and reveal the corner of this one up here so you can see how fast you can get with this by using your keyboard shortcuts. So now we can cruise on over to the neck of the guitar and again glancing at my color chips. Painting with black conceals flight reveals I'm gonna keep hiding. And eventually we will get it so that it looks like these letters were in the shot. And that's a real fun technique to dio add some artistic spice to your image. Yes, you on the letters from your other picture. Could you show how you create what? Type it in the first place? Oh, yeah. So let's just turn the visibility I off on the type player that we just created, so we're back to square one. So to add text, you simply go and grab the big old T the type tool from the tools panel. Come over to your text roughly about the place you wanted to land. Of course. You know now that you can always move it around and just click, and you could type it in exactly like a word processor. Yeah. Elements creates the text layer for you. Great. Yes, All the stand do. Here we go. Give me. Okay. So I've activated the text tool and we come over here to the document and his clique ones, and just the click makes elements create the new layer for you. And now you can talk in anything you want. So it's very, very simple and again to change the font or the size of the text has to be highlighted. So you can, uh, do a quick or quick triple click to highlight everything on that line and then come up here in experiment with funds. And as you change the fonds, it changes in your document as well. And here's a good example of a fund that has styles built in. So see, we've got a Talic media metallic bowls and my bold condensed those kinds of things. Not all of the funds will have them. Some of them will, and that's really it. Now, this text layer, I'm gonna go ahead and throw this one away. Go back to the one we added the masked you. This text layer will stay inevitable as long as this is a PSD file. Okay, so another argument for always saving your your master editing file as a native flower shop documents so that things like text stay edible in case you ever need to go back and change it for any reason. Now, if I decided I wanted to change the color of this What? I have to start over. Absolutely not. All I have to do really is double click the tea over here in the layers panel that will also highlight everything that's in that text block. Whether it extended several lines or if it was just a single line. Then I can come back up here to the options bar single, click the little color swatch, and either choose another color from the color picker or mouse away from the color picker and pick up a color that's in the photo itself. Okay, so we can see what that one looks like. Press okay. And unfortunately, you won't see the color change on the photo until you press, OK? And then you can click again on the text, uh, thumbnail right here to get rid of the highlighting so you can actually see the letters. Okay, so we'll change that back. I'll go back up here and double click it again. The highlight it Click the color picker and I'll come back. Teoh, one of these lighter colors that looks better. You can also hide this text, highlighting by pressing commander control. H no, that one must work and photo shopping, not in Ellen's. Oops, I tried, but to get rid of that highlighting, you could just click again on the layer thumbnail or switch to another layer. You want to you any other questions on that part? We do have a few questions. Uh, say first question is from Katie Photo books. Can you add shadow to the text? Absolutely. This do that itself. It's a lot of fun. So again, you need to pay attention to the layer that's currently active. Okay, whatever you're gonna do to, it's gonna happen to that. So we've got our text layer active. That's good. We all know from the color tinting tightening fit would did earlier that the drop shadows live in the effects panel. Okay, full edit mode in the effects panel. So our effects panel is collapsed right now, so we're going to give it a double click to expand it. Now we need to change the category of effects because remember, elements is trying to keep you from being overwhelmed by squirreling away all the options into various categories. So the layer styles, I believe, are the second icon right here and layer styles. You can think of those at any kind of special effect or embellishment to a layer to something that's on that layer. So a drop shadow bevel and boss and inner shadow glow stuff like that's gonna be a layer style. Okay, but effects that you want to apply to an entire photo are in the cleverly named photo effects category. Okay, but we want to add a layer style. So we're going to click the second icon right here and again by default. You're not gonna see all these. You're only going to see devils using back out. So click layer styles and then immediately cruise over to this poppet menu and choose if you just want to see drop shadows, you can choose, Just drop shadows, OK, and that will eliminate everything else. But don't don't panic. If you go into layer styles and you don't see drop shadows here. Just remember you got to tell it what category of effects you want to look at, and I'm repeating that 100 times because I cannot tell you how many emails I've gotten about? I don't have that. I don't have drop shadows. Yes, You did not know. Yes. You dio calm down, Click Pop it. Meaning so we're gonna choose Drop shadows and it works just like that CP attempt that we did with the effects you can click. The icon wants to select that style and then click the apply button Or you can simply double quick the preview thumbnail. I tend to go for this low shadow over here. It's going to create a soft shadow that isn't too far away from the item. But you could find tune that tube. I'll show you how do that here in a minute. So let's go ahead and double click the low shadow and immediately we see the shadow was applied. And now let me zoom in here in the layers panel. See this little F X right here. Elements added that which lets you know that Wu, there's layer style somewhere going on on this layer. Okay, If you want to edit that layer style in this situation, maybe we want to change the drop shadow. We want to make it further away from the texture closer. Or maybe we want to make it softer or make it a little bit more changes. Opacity. So it's not a strong You can double click that little effects icon right there to open up the dialogue box for whatever effect you just added. So I'm gonna give that a little double click. Is Zuma well? And you can see that we have a style setting style log box. A lot of folks don't realize that you can customize your drop shadows and elements to So here's the controls that we have. I'm gonna move this style log a little bit out of the way. If you want to change the angle of your shadow, you can absolutely use this funky dial situation or you can type in the angle of the shadow. I can't imagine knowing the angle of the shadows. So what I do instead is I just mouse over to the image itself and you can click and drag shadow around. And this left that angled I'll go crazy. Okay, so that's how you can move your shadow. Maybe you want it a little bit farther away from the letters are a little bit different angle you can just once you've opened this style settings dialog this mouse over to your image. Click and hold down your mouse button and drag that drop shadow around. If you want to make it bigger, you can drag the size slider to the right as you do that, it will kind of soften and spread out so you can spend some quality time adjusting these settings to get it just like you want it. And again, if we wanted to make it a little bit lighter, we could reduce it's opacity. Or if we wanted to make it a little bit more noticeable, we could increase the opacity a little bit. You can also change the color of your drop shadow. You're inclined to do so. That's what this little color swatch is to the right of the size slider. If you click that little square, you'll open the color picker again, and then when you're finished, you can click OK, and that is all there is to adding a drop shadow on that. Any other questions on that or shall we live on? There was a question from J. C and P V, who asked, Could you create a selection around the boy to use in conjunction with the layer mask to hide that part of the text absolutely could if he wanted to create a selection of the little boy. Then you could do that after you've created your texts layer. And then once you add the layer mask, photo Shop sees that there is a selection. When you click that layer mass button, it's gonna fill in the mask according to the shape of the selection. So you absolutely could do that if you wanted to. You I find it's easier when you're hiding just a little bit of the text. Uh, in my personal opinion is, it's faster to just add the layer mask and and hand painted because you're gonna have to switch to a selection tools you're gonna have to create the selection. They're going to have to create the layer mask, and then you're probably gonna have to fine tune the selection. So, in my opinion, this method is faster will save you at least one step, and another question from scrapper Girl is well moving. The text then require re revealing of different parts of the photo. Yes, absolutely. That's a good point. If we decide we want to reposition this test, we've got to start over on our mask. Okay, so let's just do that. I'll go ahead and collapse the effects panel. I've still got my text layer active. Okay, so I'm gonna grab the move tool and moving around, see how we can move it around. The same areas were being hidden. Okay, So you would have Teoh fine tune your mask if you decide to move the text around so that as a good argument for you know, make sure you get your text in the right spot if you're going to do this technique first and make sure it's exactly where you want it and then start fine tuning the layer mask. And Bob Ls had asked what? It helped to reduce the opacity on the text layer temporarily so that it's easier to see where to conceal. That's excellent. That's the absolutely excellent tip. Thank you so much for that. The Internet always has great tips. So, for example, I'll go ahead and delete this layer mask by control or right clicking on its thumbnail. And I keep hammering on the point of watching where you're clicking in the layer because it makes a difference. You'll bring up different menus. OK, so if I, you know, control clicked for right clicked on the layer, thumbnail the t indicating the text. I get a completely different mini, which has nothing to do. You know, there's some of the same options, but it's a completely different menu. So you do have to be Congress and where you're clicking. So if I want to mess with the mask, then control or right click on the mask and I can delete it. And so the tip is that if we reduce the opacity of our text and then add our mask, then we can actually see where we need paint. Okay, which is absolutely a great tip. Okay. And then when you're finished painting the mass, he could simply pull the capacity up to 100%. So that's a really great tips. Anything else you think we could go on? All right, so that's a real fun one. So I'm gonna go ahead and close this and again, I'm closing my documents by pressing command w your control Debbie on the PC, And then I'm triggering these buttons by clicking the first letter on the button. Son clicking D for don't say
Class Materials
bonus material with purchase
Ratings and Reviews
a Creativelive Student
Amazing class, Lisa is fun to listen to and she knows her stuff. She made the confusion over so many parts of PSE march in straight lines so I could understand.
John Carter
Because Lesa did such a good job showing off the new features in Elements 9, I just had to buy it. And here I thought I would be happy with Elements 8 forever. Thanks, Lesa.
a Creativelive Student
A very useful course. I enjoyed it and hope I get time to go through all of it again to cement everything in memory. Hopefully, it will stay available long enough for me to do it slowly. I've already been able to use some of what I learned in the first session, but there was so much! It will take awhile!