Adding Digital Make-up and Text
Lesson 21 from: Adobe® Photoshop® Elements for PhotographersLesa Snider
Adding Digital Make-up and Text
Lesson 21 from: Adobe® Photoshop® Elements for PhotographersLesa Snider
Lessons
Day 1
1Difference Between Adobe® Photoshop® Elements and Adobe® Photoshop®Creative Cloud®
54:22 2Creating an Album and Connecting to Lightroom
25:48 3Guided, Quick, and Expert Edit Modes
32:36 4Layers Options Overview
40:52 5Guided Effects
24:13 6Puzzle Effect
18:26 7Resolution Dicussion
22:26Resolution Discussion Continued
20:20 9Canvas Resizing in Adobe® Photoshop® Elements
22:47 10Color Correction in Expert Mode
27:55 11Layer Masks in Expert Mode
16:33 12Correcting in Adobe® Camera Raw
12:24Day 2
13Creative Color
25:37 14Partial Color Images
25:13 15Converting Color to Black and White
29:10 16Custom Gradients and Vignettes
30:01 17Removing and Replacing Backgrounds
43:43 18Cookie Cutter Tool
17:17 19Retouching in Expert Mode
44:14 20Recompose Tool and Color Select
21:46 21Adding Digital Make-up and Text
23:10 22Creating Photo Collages
22:19 23Sharpening Your Images
20:16Lesson Info
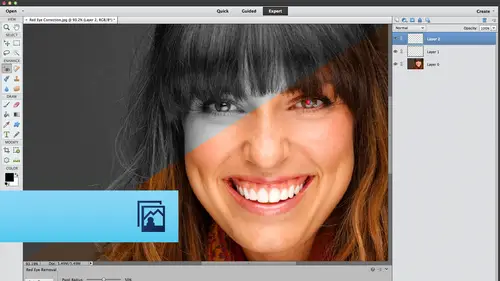
Adding Digital Make-up and Text
Now this image is one that you can use to play around with adding digital makeup. We've looked at this technique all day long, so I'm not going to repeat the technique. But what you can do is look at this file and see what I've done here. So we have added paint on individual layers, so I'll just use our options. Are all click visibility? I trick to turn off all those other layers. You can see the original image. Now when you are adding digital makeup, it is important. It's important. It is important that the model have some kind of makeup on. It's important it's not a deal breaker. But if your model has a little bit of makeup on like this one, it's very, very subtle and very natural. That's just going to make the makeup that I add look more realistic because we got a little bit of a shimmer going on here. The cheeks have a tiny bit of color, and it looks like we've got this the slightest slightest amount of lip gloss on the lips here, so that when I do start adding my paint on these se...
parate layers and changing the blend modes. Then it began to look more realistic. So all I've done here is use the brush tool and added some purplish pinkish color where the lips are on an empty layer. And then I've changed the blend mode toe overlay over late, like works really well for adding makeup, though you could try any of these layers. Soft light makes it even more subtle. Hugh also works. Color also works. So one of those again frosty beverage Evening trot through all of these. I've got this file set to use overlay, but experiment with other mo's on your own, and that's absolutely all there is to this technique now. The other thing that I did was I did run a blur filter on each one of these layers, and that just blurs the paint a little bit more so it looks distant, hair more realistic. So to do that, all you do is turn up to the filter menu, choose blur, Gaussian blur, and in the resulting dialog box, you just want to ratchet that down to Oh, I say around 00.5 or so if you're working on a fairly small dimension image. But if you're working on a really big honkin image. Then maybe you go up Teoh, perhaps one or two, so that number is going to change depending upon the size of image that you're working with. But I do like blurring the make up just a little bit makes it look a little bit more realistic. So as I turn on these individual layers, you'll see that I've been very specific about putting each piece of makeup on its own layer. So right here we've got a shadow. See how that shimmer of just the neutral that she had on makes it look even more realistic. And then we've got a hue saturation adjustment layer here that's clipped to the layer underneath, which is the upper lid makeup. This is how recon experiment with the color change, just like we did when we were cull, arising the little girl's dress. And then we changed the color with the hue saturation adjustment layer. That's exactly what's going on right here. So lay down your paint on the individual layers and then to tweak the color of it, use a hue saturation adjustment layer that is clipped to affect only one layer down, and how do you do that? You just make sure to click that little button at the far left of the bottom of that panel. So here is a little touch of makeup on the outer edges, and then I changed its color using the hue saturation adjustment layer. So that's all there is to adding digital makeup, but it is helpful if your model has a little bit of makeup on. Of course, if they don't and the shoots already done, you can't do anything about it. But feel free to experiment with these techniques nonetheless. So I'm gonna let you play along with that one in the exercise files. The next technique that I want to show you just really great for postcards, greeting cards, things like that is how to place text behind an object in your photo. Obviously, this text was not hanging out on the ocean during this photo shoot, but what we've done is used a layer mask to hide the edges of the letters where we want to make him look like they're behind the object. This technique has been used on every cover of Rolling Stone magazine since issue number one very first issue and they've used it ever since. The rock star de jour will be on the cover, and the masthead looks like it's sitting behind their head, and this is exactly what they're doing and photo shopped to get it done. So I'm gonna delete this layer mask that I've already made for you so that we can add it back. So I'm control clicking or right clicking to activate the mask, and I can choose delete layer mask. So to add text, I'll just temporarily turn that off toe. Add text described the T tool over here in your tools panel. Click atop your image elements. Create the type player. So then you can add your text. So the Nelsons, while my text is I still have a blinking cursor right here. I can press command A or control A on a PC to highlight my text so that I can use the formatting options that automatically opened in the Text Tools Options Bar. Why are you having to highlight it in this way? It's just like a word processor. You have to double click a word to do anything to it insofar as formatting changes, so you have to do that here and elements as well. So once you highlighted the you can change the fun, you can change the color. You can change the alignment. You've got bolding and italics and underlining and letting controls space between lines of text so you can play around with those options till your heart's desire. I'm gonna go ahead and delete this type player in turn, the one that I created for you back on in my graphic design for everyone. Course three day course that I highly recommend. We learned how paring thin fonts with really, really thick fonts increases contrast and makes your text more visually pleasing, especially if you're doing what I would consider a headline situation, which is what we have here. I'm not typing out a book here, so you wouldn't want to do that on large blocks of text. But in a situation like this photographic announcement postcard greeting card, the technique works really well. So remember to pair thin with thick. Now all we have to do is add a layer mask by clicking the circle within the square icon at the top of the layers panel. Now we're going to do what we've been doing all day long, which is grabbing the brush tool by pressing B. Take a peek at the color chips at the bottom of your tools. Pain will make sure that you're painting with black. Make sure you've got a soft edged brush. We'll close the little options bar and zoom in so we can see what we're doing and they'll start to paint. So we've been using layer mask all day long, but this just gives you an idea of how you might use a layer mask in conjunction with text to create a special effect. Now, I'm not gonna take the time to make this look perfect, but if you mess up, all you have to do is press X to flip, flop your color chips or click the little curved arrow down next to those color ships. Don't move the text, so by pressing the X key, you can flip flop those color chips. And when you are working with masks, you'll do a lot of flip flopping between color chips. So use a large brush for the larger areas to paint over them quickly and then reduce your brush size and come back in and finding the edges so pretty quickly, we're gonna be able to make this text. Looked like it was in the shot, which is pretty cool. This is gonna be my husband and I come next Friday. Where's my drink? Indeed. All right. So let's look at that on another image. This is another fun thing to Dio They build. You want to throw out a question quickly? Was any, uh, soft edged brush Erhardt ege depressed? Yeah, Great question. So I'll go ahead and toggle the visibility often the layer I made for you and this one. I've included another text layer without a mask, so you can see how toe do that looks like. I've got an errant layer style, Sirio. So just add your text by using the T tool over here in the tools panel and zoom in. Use your space bar trick to reposition without a layer mask. Put the circle within the square icon at the top of the layers panel. Grab your brush tool. Make sure that you're painting with black for your foreground color chip. If you're color chips or anything other than black and white, you can either click little icon beneath um, to reset them or press the D Key D for default in a course. Like we said, you can use that arrow or press the X key to flip flop them between black and white. And while the brush tools options were open, which you can toggle often on using this whole button down here, just make sure that you got a soft edged brush. Just click that brush preset picker. Point your cursor at any one of those brushes, and just pick one that has the word soft in it. Close the options bar. Use your bracket keys next to the P key on your keyboard to paint the large areas quickly and then go in with a smaller brush to fine tune the edges. Now I've already revealed a little bit too much of that one right there, but I can bring it back just by flip flopping. My color chips go down and brush size foot. Flock them against that. I'm painting with black again, and I could take a lot of time and fine tune that to the point where it looks realistic so that you'll end up with that, which is pretty cool again. the ability to do this kind of stuff extends far beyond, or the benefit from knowing these skills extends far beyond just you creating this kind of artwork for clients. But it starts toe really ratchet the level of your promotional materials up to the point. Where isn't be impossible for people not to notice something like that. If they got it in the mail, saw it and a newspaper ad, etcetera. Any questions on that was pretty straightforward. Just add a layer mask to a text layer. Now let's take a look at pushing photos through letters, and this is a fabulous technique for website art. Or if the letters that you want to shove the picture through make a really short word like Maui like that, you could even get away with putting that on a business card. The longer the word, the more difficult it's gonna become to read. So try to restrict yourself to using this technique on really short words. I'd say six letters at the most, but it is a nice technique toe have in your bag of tricks, so we're going to see it here in a couple of different ways. So here's a little ad for sport. Backtrack time dot com, which is a real website, and I highly recommend it. If you are into motorcycles and you want to learn how to race, it's a fabulous way to rent track time. I did it a couple times. Scared the fire out of me. Glad I did it. It was a lot of fun, Really scary. So for an ad like this, you know, you want some of those some of the action in the shot. So since the word speed is really sure I can get away with shoving this photo through it. So you start by creating your text, and I'm gonna go ahead and undo the effects so we can do it together. So add your text and then bring in the photo or open the photo in an ad. The text, It doesn't matter, but the layers stacking order is what I want you to see. I'm gonna go ahead and turn off some of these other layers, so it's not so distracting. There we go. So all we've got here turn on or visible is our shot of our bikes racing and we've got our text. So the text is hiding behind the image, and that's really the way you want your layers panel to be arranged. So when you're going to do this effect, the photo layer has to live above the text layer in your layers panel. If the photo layer is beneath the text layer, it ain't everyone work. So you've got to put the photo above the text layer. And then we're gonna use a keyboard shortcut to tell Photoshopped to group or clip this layer to the layer underneath, which is what we've been doing all day with those adjustment layers. How we make them effect, only one layer down we're clipping or grouping them to that one layer down. That's what we're going to do with this photo. But the way to do it is to use a modifier key. So we're gonna press and hold the option key on a Mac or Ault on a PC, and you're gonna point your cursor at the dividing line between those two layers. See how my cursor changes to two intersecting circles when I point it right at that dividing line. I've got my option. Key held down right now, but the cursor has not changed its on Lee going to change when you point it at that dividing line. Once you see that double, circle, intersecting cursor, click one time and that's it. Yeah, We're all prepared for this to be some long, drawn out bay, and you're like, That's it. That's terrible. And as you can see here, I've also got some layer styles on this text. That doesn't matter. Is the text editor ble? You bet You double click it. I can type whatever I want. Pretty flick. Yeah. So let's do that on another image. So here we go. I'm gonna undo the effect innocently. You undo the effect exactly the same way you create it. Press and hold option on the Mac or all on a PC. Point your cursor at the dividing line between those two layers and that unclip sit or ungroomed sit from that layer. So the key to this technique is layer stacking. Order the thing you want to shove through the shape has to live above it in the layers panel. So create your text. Use a really big thick font for this technique that those letters have to be fat to see the photo through them. If we used a script E font for this, you would be able to see anything. So you want to make sure you use big, beefy fonts for this particular technique, so we'll turn the visibility of the photo back on. And then just make sure that the photo layer lives above that text layer in your layers panel pressing the whole option on the Mac fault on the PC and then point your cursor at the dividing line between those two layers and give it a single click. If you want to move the picture around within the text, go grab the move tool. Make sure that you have the layer active that you want to move, and then you can just drag it around to reposition that photo within the text. Now if I wanted to move the text, not the photo that I would click to activate the text layer. You know why it's not working that Dad Gum auto Select option. Now if I click the text layer, I'm moving the text around and off image. So just be cognisant of that Dad Gum auto select layer option that you're going to see any time the move tool is active. If you're working in guided edit mood, you're gonna want to leave that on because it's necessary to do some of the movements that you will be asked to do in those guided edits. But over here, in expert mode, just be cognizant of it. In turn, turn the darn thing off when it's keeping you from doing what you need to do. Otherwise, you could probably leave it on. Okay. Easy, huh? Really, Really, really easy. Great technique to use to showcase apprised photo and a promotional piece on the business card on a website. This particular layout right here would be great. If you have, like, a landing page that you want folks to use to enter a a gallery of photos. You might put your prize winning photo through text like that. So about a quick question. Sure. Um, Cloud nine ass. How do you choose a text layer? When I click on a new layer, it gives me a transparent layer. Maybe just a little clarification. Sure. Any time you want to create text, you need to grab the text tool, and that tool creates the layer. So I'll turn off all of this stuff. So we're just dealing with a white background layer so you'd click to activate the text tool in your tools panel. And then once you click on the document to begin typing, that's when elements creates the text layer. So you're not creating a text layer. It's creating it by you clicking atop your document with the text tool. Thank you for asking the question. Any questions on that? Any further questions on shoving a texture shape? I want to show you one more thing for it didn't close. These guys turn a couple of these back on unclip our photo. This technique works on any layer that has transparency. In other words, you can shove a photo through anything so long as there are some trance payer areas on that layer. What does that mean? What if I created a new layer and I grabbed the brush tool and I'm just gonna lay down a paint shirt on a new empty layer. But what I'm gonna do is go grab one of elements more fancy shmancy brushes by clicking the brush preset picker in the options bar, while the brush tool is active it. Sorry about that frog. And then from the pop up menu at the top of that panel, give it a click. And there are oodles and gobs of really awesome brushes down here. So let's choose. Uh oh, gosh, maybe a faux finish brush something that's got some texture to it, or some funky edges to it. Maybe that one work work so well, maybe a natural brush natural. Okay, surprises me. Teoh. So from the natural brushes preset category, we can get some brushes that really looked like real world paint strokes. So let's just grab one of them. Click down here in the panel, Close at that option. Make my brush pretty big. Hello? 00 this is a good one. So I'm sitting. I'm sitting here tapping my right bracket key to make my brush cursor larger, but nothing's happening if the cross hair you know why my caps lock key is on. That's a good practical joke to play on people. If you work in an office while they're out to lunch, turn on their caps lock key, and when they get back in the photo shopper elements there brush cursor will be across here and they will be able to figure out what has gone wrong. So now what we're seeing on the screen here is just an outline of the shape of the brush. So it doesn't matter what color repaint with, but if I make some paint strokes like that and then I come over here to the layers panel and I press and hold the modifier key, which is option on the Mac Alton on a PC. Point my cursor to the dividing line between those two layers and click. Now, my photo is coming through that shape. Pretty sweet, huh? So my photo edges are not. My photos, not is wide is the breast stroke that I drew. But I could easily just click to activate the photo layer, come up to the image menu, choose transform free, transform, cheat and make my photo bigger so that it is the size of the breast stroke that I drew. But we did all that or I did all that to show you that this shoving a photo through a layer trick works on anything that has transparency. So we created a new layer. I grabbed one of elements more realistic looking brushes drew a brushstroke in any color. It does not matter what color it ISS because the color is gonna drop right out as soon as you shove that photo through it. So this trick will work on anything like that, which I thought was useful to share with you.
Class Materials
bonus material with purchase
Ratings and Reviews
a Creativelive Student
Creative Live has opened my eyes to education on-line and out of all the on-line resources I have come across, Creative Live is the best and there's never a catch. Creative Live is one company I trust 100%. They never would take adavantage of anyone. I love Creative Live.
a Creativelive Student
Every workshop I have watched LIVE is absolutely FREE! And... there is a rebroadcast that follows that is free. It is only if you want to go back again and again and again - that there is a purchase price. The knowledge of the instructors is phenominal..... well worth the cost if you choose to buy the workshop.
a Creativelive Student
Love the class and have been thoroughly enjoying it. One question- has anyone else had issues downloading the files? It seems to only go up to folder 13 and most of day 2 is missing?