Converting Color to Black and White
Lesson 15 from: Adobe® Photoshop® Elements for PhotographersLesa Snider
Converting Color to Black and White
Lesson 15 from: Adobe® Photoshop® Elements for PhotographersLesa Snider
Lessons
Day 1
1Difference Between Adobe® Photoshop® Elements and Adobe® Photoshop®Creative Cloud®
54:22 2Creating an Album and Connecting to Lightroom
25:48 3Guided, Quick, and Expert Edit Modes
32:36 4Layers Options Overview
40:52 5Guided Effects
24:13 6Puzzle Effect
18:26 7Resolution Dicussion
22:26Resolution Discussion Continued
20:20 9Canvas Resizing in Adobe® Photoshop® Elements
22:47 10Color Correction in Expert Mode
27:55 11Layer Masks in Expert Mode
16:33 12Correcting in Adobe® Camera Raw
12:24Day 2
13Creative Color
25:37 14Partial Color Images
25:13 15Converting Color to Black and White
29:10 16Custom Gradients and Vignettes
30:01 17Removing and Replacing Backgrounds
43:43 18Cookie Cutter Tool
17:17 19Retouching in Expert Mode
44:14 20Recompose Tool and Color Select
21:46 21Adding Digital Make-up and Text
23:10 22Creating Photo Collages
22:19 23Sharpening Your Images
20:16Lesson Info
Converting Color to Black and White
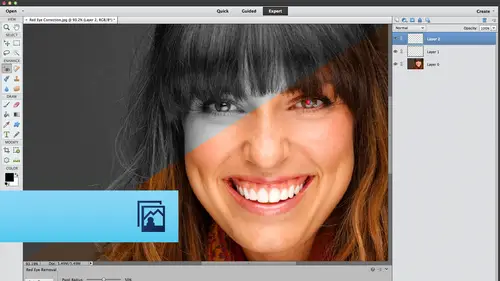
So here's our cute little Halloween Bulldogs Super Super Cute and there are a couple of different ways to go from color to black and white in elements. One method is to choose the enhance menu and choose convert to black and white. So let's just take a look at that method first, and then I'll show you my favorite method. This very petite dialog box that takes over your whole entire screen is really kind of neat because you get a nice before and after preview. See, this is this elements being happy, soft, warm and friendly again helping you out? But a shop would never help you out in any way stab you in the back. So what elements wants toe? Make sure that you are successful. So you've got some tips that appear here in the middle, and what we have down here at the bottom left is a Siris of black and white presets that you can then customize over here on the right hand side. So if you're familiar with Photoshopped all the way back, Teoh Photoshopped CS three, then this command. This conve...
rt to black and white dialog box is a whole lot like a black and white adjustment layer over in photo shop, but it lacks the ability to add a color tint like a black and white layer. Photoshopped does. So let's just trot through the different presets. And if you've got dual monitors, then this will be a great opportunity that grab this dialog box and get it out of the way so you can see what's happening to the color in your image. You can see it here in this preview area, Teoh and it's a decent size preview. But let's go ahead and scooped him out of the way. And as we click each of these presets, you can see how the contrast is changing in the image. So depending upon the look that you want to start with a preset and then you can come over here to these sliders and you can customize that you confined to unit. So your own liking, there's no right or wrong with this. It's all subjective. So what looks good to you may not look good to me. Doesn't matter is your image. So when you dragged these sliders, you're gonna affect that color wherever it appears in your image, so elements is having a hard time previewing this, but you can see that my images getting darker, so we must have quite a bit of ribs in there. So as we dragged the green slider, wherever green appears in the image, it's either lightening or darkening. So that's how you confined tune the contrast to make it your own. Unfortunately, if you create a setting that you absolutely love, you cannot save it, darn it. But that's okay. Click OK, and the change applies to your image. So what I would do? I'm gonna undo what I just did. A couple of different ways and elements. You compress commander Control Z, or you've got a big old honkin undo button at the bottom of your elements interface. Don't see that in Photoshop. So then you could just click that undo button. So what I would do is duplicate your image layer first, if you're gonna go with that dialogue box So Commander Control J and then trot up to the enhancement you and shoes convert to black and white. That way, the change happens on a whole nother layer, which gives you the ability to drop the opacity. So if we drop the opacity of this black and white layer, then we create something else entirely. A partial color ish situation. So that method one when a delete that layer and I'm gonna show you another method that happens to be my favorite method. When I started teaching out at Photo Shot World back in 2000 and five, whenever it was, it was really the first time that I've been around a slew of seriously high end pro photographers like that. And, boy, did I act like a sponge in the soca. Everything that I possibly could and what I learned was that the photographers who had not purchased 1/ party plug in for photo shop to create black and whites used the method that I'm about to show you. And at that time, light room wasn't a big deal, so you could make some pretty amazing black and whites and light room and in camera raw as well. But let me show you the method that is just full proof and fast. So Step one is you want to reset your color chips to the default of black and white, and I'm stressing the word default because the keyboard shortcut for that is the letter D. So watch what happens to my color ships down here When I press d they flip flop too black and white. If you don't remember that keyboard shortcut, you can simply click the little icon underneath the color ships and that will reset your chips to the default of black and white. Then you want to make sure that you've got black on top. Next, come up to the top of the layers panel again. We're still an expert move and you're gonna choose radiant map and instantly you get a fantastic black and white. Very nice contrast. Now, with this method, you can tweak the contrast, but talk about foolproof black and white. This method and I have tried this on a 1,000,000 images, I swear it creates the best contrast right out of the gate. I mean, it's just beautiful, so you'll have to try it to see what you think. So either method works. Fine. This is the method I learned about years ago. That is just really kind of foolproof. So here again, you've got layer opacity, so if you want to drop that layer opacity, you can. So let's say that you create that effect, but you forgot to reset your color chips to the default of black and white. Let me show you what would happen, which is a completely different effect, which might also be useful to you. So I'm gonna set my color chips. Teoh. Oh, I don't know. I'll do a gold color. Then I'll click my background color chip and maybe will make that gray or something, just something other than black and white. So now when we go up to the top of the layers panel and shoes, Grady, it map from that little half black, half white circle. We get something else completely. But don't panic because there, when this little panel pops open automatically and it will if you click the downward pointing triangle next to that preview, which is showing you what color's the program is using for the radiant that third preset in that top row, This one right here will always, always, always be a black delight. Grady Int. So I don't think you've got to start over. If this happens to you, just click that third preset, and that will use the correct colors you might think that you could click this first preset right here. But this is calling your foreground to background color ships, and they won't always be black and white. So what you want to do is reach for that third preset in the top row. Now why is this working? Let's talk about that for just a second here. What's really happening is that photo shop elements is applying ingredient to that adjustment layer, so it's affecting what's underneath. Keiko's adjustment layers affect layers underneath him. So what's happening is that a grade Ian is a soft fade from one color to another color. Yes, a Grady Int Matt Adjustment layer is remapping your shadows to the left hand side of your radiant. So with black toe white, I've got black on the left and white on the right. Right because I had black is my foreground color ship. And why is my background color ship that's this preset right here? So that creates a black on the lift to a white Grady in fainting from black to white. So what elements is doing is it's remapping the shadows in your image to the color on the left and it's remapping the highlights of your image to the color on the right. So that's why this technique works to create a black and white. So Grady in map your remapping, your shadows toe one color in the radiant and your remapping your highlights to another color in the Grady in. So that's why it works. And you can create some really nifty effects using some of the other Grady Int presets that are built into elements to get to them. Just click this little downward pointing triangle next to the word radiant and you've got a slew of presets. Let's just load color harmonies. As I click on these guys, I can create some pretty outrageous stuff Now we can't tell what the subject matter of our images anymore. Let's just go down to simple So right now, the if we look at my Grady, it here. If you know that your shadows air gonna be re mapped to the color on the left and your highlights are gonna be remap to the color on the right, then you can begin to experiment in a little bit more intelligent way. So right now we've got what looks like a photo negative going on. Well, if we click away from that menu to close up that little pop up menu again, we got it from clicking that downward pointing triangle. If we just click on the panel itself to close it. Look what you've got right here. You got a reverse check box. So let's turn that on. Now we've got the dark color on the left end of the grating, which is where we want it, because that's the color that your shadows they're going to read be re mapped. Teoh. So now that we've turned on reverse, we can experiment with all kinds of other things. So the darker the color on the left side of the Grady in, the better this technique is gonna is going to come out. But think about all the experimentation in that beautiful. Now we're in the realm of really beautiful color overlays, which is kind of like a bonus technique here. All right, so once you do, turn that reverse check box on, just remember that you've turned it on because if you go back, if you do this technique later and you do remember to set your color chips to the default of black and white. Then you're gonna end up with what looks like a negative because you've turned on reverse. So you're grading colors or flip flop. So just all panic. Just come over here to the grating at map panel that opens and just check out your settings. Click this down reporting triangle to get at the other presets when you want to you and to get back to the presets that we started out with. Just click click Default from that menu. And then there's your preset for black and white. But see, since I've got that reverse button turned on, it did the opposite of what I want. So again, frosty Beverage Friday, Saturday night all kinds of enjoyment, container entertaining opportunities here. So now that we've got this adjustment layer and you can either scoop this pain allowed the way or you can close it, then we can experiment with all kinds of stuff capacity. But look, what we've got right here or in Texas is, we'd say, right, that's a layer mask. Yes, If black conceals and white reveals, what do you think is gonna happen if we paint with black inside that mask. It's effectively going to cut a hole through this layer, so you see through toe what's on the layer underneath. So let's do that. So our mask is active. We know it's active because it has a little light blue outline around it. Now we're gonna come over here to our tools. Pain on. Grab my brush tool. Take a peek at the options bar. Make sure we've got a soft edged brush now from our color ships at the bottom of our tools panel. We need to paint with black black conceals, fight reveals, so you can either press D to reset your color chips to the default of black and white if they're anything else, or click that little icon underneath them and then either press the X key so that black hops on top. Or click that little curved arrow above the color chips. Now we consume into our image and close my options bar. Wherever we paint, we're gonna be revealing the original color. Now it looks like I'm painting with orange, doesn't it? Looks like I'm adding orange to the image M. I look at my color chips down here. I'm painting with black inside a layer mask. So all I'm really doing is hiding the contents of this layer, which is where our black and white is coming from. Doing so is the equivalent of cutting a hole through that layer so that you can see through it to what's on the layer underneath, which happens to be Where are full colored images? So this is a really great technique to have in your bag of tricks, and it is a sellable technique that you can use in your photography business. Your clients can't do this, but it's beautiful. No better way, in my humble personal opinion that you can draw the viewer's eye to a certain spot in your image so we could keep doing this and to spring back the color on the dog's outfits. And again, if you were doing this for real, to sell it to a client or to submit a stock photography, you would zoom way far in use a teeny tiny brush and you'd be super duper careful about it, just like you, just like I showed you when we were color rising the grayscale image and again, since you're using a layer mask for this if you mess up and you you reveal a little bit too much of the original color. All you have to do is press the X key to flip flop your color ships so that you're painting with white because black and seals white reveals. And then you could come in here and touch up your mistakes. When I'm working in a layer mask like this, I'm right handed. So I always keep my left hand on the keyboard and I keep a finger on that X key because you're going to do a lot of flip flopping between painting with black and painting with white for this particular technique. Pretty slick, huh? Let's do that on another image. Now we're in the just a quick question Number two. Do you pre conceptualize this type of work before, as you're taking the photograph is, we're think had about selective color or is it kind of for clients, or is it sort of after the fact I do a little bit about Sometimes when I'm composing a scene, it just hits me smack in the forehead. Oh, partial color. Fantastic. But then sometimes it won't be immediately obvious. It will only be after after the shoot. When I'm in post that, I can see the opportunity for that it seeing the opportunity is important because you don't want toe you don't want, in effect to take away from the image that you've composed. So I only do this partial color effect if it in the hands is the image, great opportunities with weddings. I've got three more examples to show you, which can give you some ideas of when you might want to do this and in different ways to apply this technique. So here's an idea. We actually use this. We created this greeting card in both Photoshopped and and elements in the Holiday photo gifts class that is also on sale right now, which is fabulous for the holidays. So here's the original image. Now that one. I didn't shoot that image, but that's a no brainer for a partial color effect right there. I mean, that is just super cute, and then when you tie it in with text sampled from that color, So now your text that you add to that image is matching the color than it really dislikes, put together and sharp. So this is one of the greeting cards that we made in that class. Another opportunity for partial color. I'll turn off those layers is weddings. Now this one? Definitely. I didn't take the shot, but if I had taken the shot, this shallow depth of field effect with a focus on the flowers seems like you could shoot that on purpose to do a partial color effect. So even though the bride and groom are out of focus what you think? Oh my gosh, it's a wedding and they're blurry. But look at the whole composition, though it's really quite beautiful. So flowers in the foreground. That's a great great excuse to do a partial color technique, and it really becomes effective. And you can sell this. You know you can absolutely sell this in your photography business. Here's another idea. This is fading color from black and white. And how is that working? Well, look over here in our layers panel, so we've got a great map adjustment layer. So we use the second method that we were talking about, and inside the layer mask, look how we've got a soft transition from black toe white, which is what gives us the soft transition from color to black and white over here in our image. And how is that done? We're gonna do it together here in a minute. But you can use elements, Grady int Tool, which lives over here in the tools panel inside a layer mask. So that gives you a soft transition from what happening on that layer being concealed and what's happening on that layer being revealed. And when you use that in conjunction with ah, Grady, it map adjustment layer like this, then you can create some really nifty nifty effects. All right, so let's do this one again, shall we? Okay, so here's our original image. So painful he keep. So we're gonna use method number two. Click the half black, half white, circle the bottom of your layers panel. But first, remember to set your color ships to the default of black and white by pressing the D key and take a peek and make sure that black is on top. Now we'll create our great map adjustment layer. There we go. Beautiful black and wine. Not something. I mean, I don't even want to adjust the contrast in that thing cause it's so good now with the layer mask active and you know it's active cause it's got that little blue outline around it. Then, with the brush tool active and your foreground color chips that to paint with black because black conceals and white reveals and we can come over to our image and user bracket keys. And everywhere we paint, we're gonna be bringing back the original color. Were just chopping a hole through the currently active layer by using the layer mass that tagged along with that adjustment layer, and you can create this beautiful partial color effect. So if you're doing a photo shoot, you might even think about setting up some of the shots so that they work well for a greeting card. With these kinds of techniques in mind, I mean, just think about how useful that would be in your photography business and to be wanted to. You could even create the greeting card for them and using online lab like in picks dot com to order the cards for the client. Have them sent right to them. That could be just another service. You know, it's hard. Be a photographer these days. It really is because so many people are doing it. You know, the field is a little bit over saturated and you've got stock imagery out there. And people don't want to pay the kinds of money for your art that maybe they used to etcetera, etcetera, etcetera. So it's really important tohave, you know, to diversify your business in this way. So hopefully the things that you're learning this week, and especially yesterday and today in the Elements class will give you some ideas of how you can enhance your business in those ways. And it's really not that hard. You've already got this software, so why not learn how to use it? You know, squeeze every ounce of productivity and every buck out of it that you can and take. Take your services to the next level and do things like this, you know, create a greeting card used in picks. And again, that's not you being evil. Your client doesn't know how to do all that stuff. Your client doesn't know how to use elements, doesn't know how to use add text to something like that, and you have years of experience your clients doesn't They don't know how to upload images in picks and how toe to create a card that way, and you can mark that stuff up a little bit and be doing your clients are really great service. So that's one idea. I'll get off my soapbox now. All right, so here we are. Here's an example of ah, wedding shock that we might do this technique on. Now you are seeing a black and white light your name in here. That's because I did this over in photo shop and you can open files from Photoshopped in elements. And even though elements does not know what a black and white adjustment layer is, I can still open that file. I can't do anything to that layer because elements doesn't have that kind of layer. But that's just to show you that you can go back and forth between Photoshopped and elements. So let's do this one real quick. I'll just go ahead and turn off the visibility that layer that I made for you. So to use our great map adjustment layer, we're gonna take a peek at our color chips, and if there anything other than black and white, we're going to press D for default to reset them to black and white. And then we're gonna press X until black hops on top or click the look curved arrow. Now we're ready to create our Grady it map adjustment layer Not radiant radiant map because you're remapping your shadows and your highlights two different colors. Now we've got a beautiful black and white going on. The mask is active, the brush tool is active. Black is my foreground color chip. Now I can come over here and reveal the color Onley in certain areas and then zoom way far in and adjust those edges. And then, if you want Teoh, another effect that you could do is drop the opacity of that layer down just a little bit. So now all we've got is the original color from the photo revealed at full strength right here and then on Lee. A little bit of the photos original color being revealed in the other areas. So that's another look that you can get from just using these adjustment layers like this. So I'm gonna show you one more technique that will take a few questions. So let's do that Faded color technique is This is a giddy T, so I go and turn off the layer visibility of the new layer that I made for you and do keep those layers hanging around. Be sure not to save over these files when you're practicing at home. So a quick peek at our color chips reveals that they're already set up just fine for our adjustment layer. So we'll go ahead and add that now, instead of reaching for the brush tool. Lets go grab the grading tool so it lives over here near the brush tool, and it looks like a grading in a soft fade from one color to the other. So it's easy to spot. Go ahead and grab it, and then from the Options bar, you just want to make sure that this first Grady in style is active, and it will be unless you've changed these options at some point. But this is a linear Grady in style, and that's what we want for this particular technique to work. So will collapse our options bar, and now we mouse over to our image and our cursor turns into a little cross here. All you have to do is click and drag. I'm still holding down my mouse button and you're seeing a line appear on my image. That's a temporary line. That's your way of telling elements. How Why do you want that transition to be between the Grady in colors? So when I released my mouse button Elements is gonna fill that mask with that radiant, and I get this kind of faded color effect Now, if you are not pleased with your first professional Grady Int dragging attempt, then just keep on click in, click in different areas, click from the corners and drag in, click from the bottom and drag up. The great thing about this technique is that the layer mass continues to update itself as you click and drag with this tool. Now I've been dragging a pretty good distance. But what if I just drag a little bit with it? Then the transition point would be more abrupt. It won't ever be a hard edge because we're using the grading and tool so it can't make a heart is, but it can get close. So typically I drag it around an inch and 1/2. I know it's not a real inch and 1/2 but it looks about like an inch and 1/ to get a nice soft transition. But all kinds of different effects that you can create. And you know parents would buy this stuff. You know they will. If you want to constrain your Grady and to be perfectly vertical, then you're going to press and hold the shift key as you drag that line and then over in your layers panel, your Grady's gonna meet perfectly up a noun instead of maybe at an angle. But that's just a visual thing. You know, you could be as precise about it as you want. So just to repeat that one, let me delete thes two layers. So we started out by having your color ship said that properly. For a great map adjustment, layer black on top. Flight on bottom half black, half white circle at the top of your layers panel. Choose Grady It map, and now go activate the grading and tool in the tools panel. If the options bar doesn't open automatically, you can get to it by clicking that tool options button at the bottom of the elements interface. Make sure that that first radiant style is active, and again it probably will be. Unless you've changed it, then you can collapse the options bar, and then we're gonna mouse over to the image. And if you want to create a perfectly vertical transition between color and black and white, then shift drag to create your radiant or just experiment. However you want any questions on that one, it's fun in this I love created color effects in your image with the bride and groom. You said you did part of the edit in Photoshop eso can you use photo shop and elements like light room and photo shop, where you can open up an image in photo shop and then commands save and it takes it back to elements? No. OK, no question. So, Lisa, I had a bunch of questions, but then you answered them all, which you always tended todo
Class Materials
bonus material with purchase
Ratings and Reviews
a Creativelive Student
Creative Live has opened my eyes to education on-line and out of all the on-line resources I have come across, Creative Live is the best and there's never a catch. Creative Live is one company I trust 100%. They never would take adavantage of anyone. I love Creative Live.
a Creativelive Student
Every workshop I have watched LIVE is absolutely FREE! And... there is a rebroadcast that follows that is free. It is only if you want to go back again and again and again - that there is a purchase price. The knowledge of the instructors is phenominal..... well worth the cost if you choose to buy the workshop.
a Creativelive Student
Love the class and have been thoroughly enjoying it. One question- has anyone else had issues downloading the files? It seems to only go up to folder 13 and most of day 2 is missing?