Lessons
Day 1
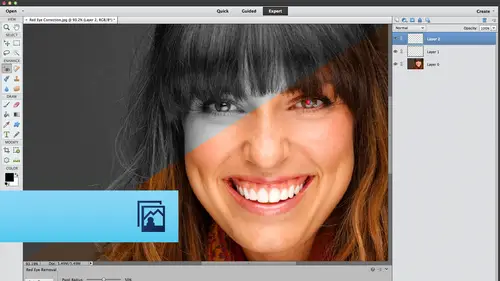
1Difference Between Adobe® Photoshop® Elements and Adobe® Photoshop®Creative Cloud®
54:22 2Creating an Album and Connecting to Lightroom
25:48 3Guided, Quick, and Expert Edit Modes
32:36 4Layers Options Overview
40:52 5Guided Effects
24:13 6Puzzle Effect
18:26 7Resolution Dicussion
22:26Resolution Discussion Continued
20:20 9Canvas Resizing in Adobe® Photoshop® Elements
22:47 10Color Correction in Expert Mode
27:55 11Layer Masks in Expert Mode
16:33 12Correcting in Adobe® Camera Raw
12:24Day 2
13Creative Color
25:37 14Partial Color Images
25:13 15Converting Color to Black and White
29:10 16Custom Gradients and Vignettes
30:01 17Removing and Replacing Backgrounds
43:43 18Cookie Cutter Tool
17:17 19Retouching in Expert Mode
44:14 20Recompose Tool and Color Select
21:46 21Adding Digital Make-up and Text
23:10 22Creating Photo Collages
22:19 23Sharpening Your Images
20:16Lesson Info
Guided Effects
so we left off with learning how very important layers were in our editing careers. Hopefully, we have driven that point home. So now let's go ahead and talk about creating edits and guided edit mode. So for follow along at home with the exercise files were in folders number four, cleverly named Guided. It's. And if you've got the images open in a folder like this on your hard drive, you can simply click and drag them into the elements workspace to open them. Or you can use the file menu and choose open and navigate where those images live. So let's go ahead and click the guided button at the very top of the elements workspace and then down at the bottom at our little photo. Ben, I'm gonna go ahead and choose to collapse it. So we get more screen real estate here, and then we're gonna go ahead and choose to see a before and after a preview of this image so we can appreciate how far it it's get us so you'll choose the either before and after horizontal or before and after vertical depen...
d upon the aspect ratio of your image. From that view, pop up many. So this is a pretty subpar image, a k a crappy. And I check this one, my shelf, and you're thinking she's a star photographer. Seriously, now I took this one in Lisbon, Portugal, when I was teaching over there a few years ago, and this was taken at the Port Wine Institute. Which what that means, folks, is that about 500 varieties of Port Porto are available by the glass very inexpensively at the Port One Institute in Lisbon, Portugal, which may have something to do with the Kirk iveness of the image. But nevertheless, this is a great image to trot through guided Adama because there's a lot of things wrong with it. So that, of course, is why I took it that way. Why were using it? So the first thing we're gonna do is straighten it so overhearing guided edit mode, you're going to use the scroll bar that's kind of hidden over there on the right hand side of your screen to cruise up and down throughout all the different guided it is. And if we want to start out by straightening the photo, we can simply go down to the rotate and straighten edit so we'll just give that a click and immediately elements takes all those tools that we would need to straighten or rotate the photo and plops them down on the right side of your screen. Our toolbar disappears, so we're not overwhelmed by too many choices, so we don't need to rotate this one. But if we did, we can use either one of these buttons to quickly rotate it big. Nice, friendly, fluffy happy buttons to straighten the photo. We're going to go ahead and click this straighten tool and again and guided edit mode. Photo Shop Elements tells you exactly what you need to dio. Eso are directions are click the straighten tool below and then draw a line on top of your photo. And then Elements is going to rotate the photo according to the angle of the line that you drew. So let's click the straighten tool. Now it's mouse over to our image. Now I will give you a little bit of a troubleshooting little moment here if you've got a before and after image showing on your your viewing area right here, don't try to drag the straighten tool over here. I can't tell you how many times I've sat here and tried to do that before you saw the little before I saw the little You can't do this here button and realizing that Oh, I'm on top of the before image. So of course I can't change it. So on the after version of the image, you get a little cross hair. Your cursor turns into a full across here, so we're going to click and drag across what really should be straight in the image. And we're just going to use this little label on the wine glass here, and as soon as we release our mouse button elements is going to rotate the image just enough where that area is now straight down here towards the bottom of this guided edit, you can see that you can turn on the auto fill edges, and if you do, that photo shop is going to try to fill in the transparent areas with actual pixels. But on an image like this, it's gonna look terrible. If the image, though, had quite a bit of free background space, or let's say it was trees or grass or blue sky something that wasn't so detailed. It probably would do a great job. So just be cognizant that that option is down there. Auto feel edges. So if we like our straightening, we're finished with that guided edit so we can click the done button and then we're right back to our list of guided at it so we can continue fixing that image. The next thing we wanted you to, this one is correct. The color caste. So we're gonna find what looks like would be the right guided at it for that. So it's cruise on down our list of guided, and it's here and we find lo and behold, remove the color cast. So if I give that guided at a single click, then I get another set of directions and elements of saying, Please tell me what should be white, black or grey in your image, and if you can tell me that, then I can fix the rest of the colors. So what you're really doing for those of you who may be have been editing your images for a while or using photo shop, you're really resetting the white point. You're resetting the white point or the Black point or the mid tones. And when you do so, then the whole range of colors in your image changes. So we don't even have to click on a tool with this particular guided edit because elements went and grabbed it. And because it's the only tool or button offered in the panel over here on the right, as we use this guided at it, then it's not necessary first to come over here and try to click that button, and that's why it darkens. That's letting you know, Hey, that that tools already active. You don't have to click the button so you can just go ahead and mouse over to your image, and we're going to click on something that should be white, gray or black. I'm gonna zoom and a little bit to the image so we can see a little bit larger by pressing Commander Control plus on your keyboard. Couple times there we go. So all I have to do is find an area that really should be white, black or gray on the image. What you don't want to do is click on a white pixel in the image that's white due to reflection. That's not a true white, so you wouldn't really bring your colors back in line if you did that. So, for example, I wouldn't want to click on this area of the wine glass because that's a reflective area. Nor would I want to click on this area of the silverware, because that's also just a reflection. But I do know, at least I think I know. I think I remember that that plate was white, so I'm gonna go ahead and click in area on that plate and immediately Elements is going to reset the rest of the colors in my image. So it does a pretty amazing job. I can undo that step if I want. Or I could just keep clicking around until I get what looks like accurate color. And there's no right or wrong on this. If you took the image than only you know what the color really looked like when you shot it or what you really want the color to look like, so it's subjective, but it's neat that you can just keep clicking and elements will keep resetting the colors in your image, according to the area in which you click. And that's all there is to get rid of a color cast using the guided it. It's so now we can click. Done. Now it's Cropper image, and you can do these in any order you want. I'm kind of hip Scott skipping around here so we can click the crop guided at it to you back in if we want to you. And when you do that elements goes and fetches, the crop tool draws across box atop your image and then gives you a couple of pop up menus that you can use to restrict the crop to certain size or a certain aspect ratio. If we want to preserve the photos original aspect ratio than we would choose. Use photo ratio. But you've got a little scroll bar here, so you've got a lot of commonly used crop sizes. So if you're cropping the fit into a picture frame, let's say five by seven you're gonna print at home, then go ahead and choose spy by seven right there. And no matter what you do to these handles on the crop box than your final result will be five by seven in elements you can also change the overlay that you're seeing right here. We're seeing a very handy rule of thirds overlay, which helps you create better compositions, more visually pleasing compositions in your photos. But you can change that to all kinds kinds of other options. We've got a grid, see how inside the crop box that changed. We've also got a golden ratio. Okay, Goes back to the days of Leonardo da Vinci. But I like leaving this on the rule of thirds just for my own preferences. And now I can come over to the image and click and drag the corners of that crop box. If you want to resize the crop box from the center out, then you press and hold the option key on a Mac or alter on the PC. See how now all four corners. You're changing uniformly rather than one corner at a time. And when you're when you've got the crop box just right, you can either press return on your keyboard or you can click the little check mark and then photo shops gonna crop out all those extra edges so we don't have the transparent areas, and we can click done So that's how easy it is to use the guided edits. Pretty amazing. So let's close that image and will open up another one again. I'm closing my images by pressing commander control W and then triggering Don't save with the D key. Sure. Awesome. Um, Robert. Roberto, I would like to know, um, if the food doesn't have any area that should be white or should be black, do you just, maybe just hunting pack a little bit? Yeah. I just have a clicking party like that. Click, click, click, like, Oh, that looks good. Great. Next. But now there there are gonna be shadows and highlights in your village. So you're just trying to find the ones that are, you know, really should be as close to the color black as you've got going on in that Okay, Particular image. Great question. So here's another image here, And if you're following along were on, uh, unfolding before image be. And we're gonna add a vignette to this photo, and we're also going to make it look vintage. Just another idea. Things you can do with guided edits. We've already chosen or before and after view from our view poppet menu here in guided mode, and we're going to come over here and find the vignette. So there's all kinds of useful edits here, so we just keep scrolling down and remember, you can grab that scroll bar. Don't forget that it's there. So here's our vignette effect. So we're going to give that a single click Photoshopped gives us or elements rather gives us a preview of what that's gonna look like. So if you mouse over, I'm not clicking anything to this image shows you before, and a few mouse away, it shows you and after. So that's what we're gonna create. We're gonna add a nice, soft, dark edge Minya atop this photo, But you can choose whether to use ah, black vignette or whitening. Yet can you guys believe how easy this is? And just look at the control you've got will go back to black. You've got more control with this technique. Then you do by adding an edge vignette using the lens correction filter in photo shop. It's amazing, so we can control the intensity other than yet, see how, as I drive that cider to the left, it gets, it lowers in opacity or intensity, rather, and I can also change the shape of the vignette. Now this is what you can't do in the lens correction filter to try to add an edge. Been yet a lens correction filter and photo shop is a common way to add this kind of incident yet, so if we click the refined shape button, we get this wonderful dialogue box that allows us to very precisely dial in the feather amount of the vignette. So you can see is as I increase the feather amount this edge. If you can call it an edge, it's not much of one, but in this area it gets softer and softer and softer as I drive that feather slider to the lift. Then it gets a little less soft and a little bit more noticeable. So you confined to in your edge vignettes in wonderful ways. Now this slider with around the slider also lets us change the shape of the vignette so you can see how that's changing as I'm dragging that slider and even in this dialog box right here, you've got instructions. Use sliders to make changes to the applied effect, amazing and just saying, if those of you who are watching at home you're not gonna have this green circle around the cursor that's just an overlay so that you can see where my cursor is on my screen. So if we're finished with that dialogue box, we can click OK? And that's it and click done. And now we've got our edge vignettes really, really quite easy. So now it's take this image a step further and give it an old fashioned photo effect. So we single click that guided it again. As we roll our mouths over the preview image here, we get an idea of what that particular guided edit is gonna do to our image. This one is pretty complicated to use. You can see as I scroll down through this list. No, zoom in a little bit more, my pressing commander control Plus So the first thing we're gonna do is apply a preset. So these presets, we're just gonna drop the color out of our image and give us a black and white and depending upon which, when you click, you're gonna have more or less contrast. So depending upon the image, one of these will look better tea than the other. I kind of like vivid for this one. Incidentally, this is Akaka Falls on the big island of Hawaii. The next thing we're gonna do here step number two number in a big old, happy, fluffy member that you can see we're gonna give this button and click and elements is gonna just the tones in the image. Okay, so we can see this. A little bit of a change there with that one. Now we can click to add texture because of vintage photo would maybe look a little grainy so we can click. Add texture. If we want to add even more texture, we could click again. So some of these buttons are cumulative and elements will let you know if they are like, for instance, click again to intensify the effect that lets you know you keep clicking, it's gonna keep adding. And now the last step in this particular guided edit is to change the colors. This is where we're gonna add that color overlay and hue saturation. So we're gonna give that a click and move the dadgum dialog box so we can see the engine. And here's where you can determine exactly what color overlay you're gonna apply. Hugh is a word for pure color. So, in other words, pure color. Before it's been had, White added to it to lighten it or had black added to it to darken it. So you can think of that as color to switch it in your brain. And as and you drag the hue slider, you're going to be changing the color tint that's applied to your image. Now I love, love, love, love, love, adding a subtle blue tint to my black and whites. It just gives them a little bit more depth, a little bit more richness, a little bit more visual interest, in my opinion. So I would tend to go for maybe something in the blue round if it was me, and then you can lower the saturation of that color, so it's just barely there. If I were to print this picture right here, you probably wouldn't be able tell that I'd added a little bit of blue to it would just look like it was Ah, nice, rich black and white image. But it's really not, so you can control the strength of the color here with saturation in the lightness of the darkness of the whole photo. This way with the lightning slider. Pretty cool, huh? Click OK, and you're done. So it's click done. Now we can pop over to expert mood and see what elements did to create this effect. Look at all those layers it created. Oh, my goodness. We've got a ah levels adjustment here. We got another layer with what looks like a layer mask, all kinds of stuff going on here. I'm gonna make one change in my layers panel that I would suggest that you make it home. This also could be worth the price of the whole workshop right here. And that is to increase the thumbnail size of the items you're seeing in the layers panel. So to do that, we're an expert mood click The little layers panel fly out menu. It's a a little icon at the far right and from the resulting. Then you were gonna choose panel options and we're gonna choose this large thumbnail down there at the bottom. And when I click OK, you're going to see the size of these things increase. There we go. Makes a little bit more visible. So as you can see, elements created that effect non destructively. Because if we use our option or Ault clicking the visibility eye of the background layer trick, we'll see that we're right back. The original image so nondestructive editing right here through guided edits. So that's a great way to learn. And when you begin to understand what elements has done to perform the edit, then you might spend a little bit more time an expert mode, because you know how to do it all by yourself. But there's certainly nothing wrong. There's no stigma of being and guided edit mode. You know, don't let people see it. It don't have your clients over while you're editing DeLay. But I see you do it. Nobody's gonna know what programmer using your what mode Duran. And so if we want to see all those layers turned on again, then we can option or not click that layer. So at this point we would say the file as a photo shot file, so we keep all those layers intact so that if we print this image and we decided not so much on that little subtle blue tune then we can simply come in here popping expert mode. Find when that layer lives by turning the visibility's off and on. And then maybe you would just delete that one layer, and then you're back to where you were before you added the color tint. So saving your files as a native Photoshopped document is the way to go. So we're gonna choose file save as. And you would just make sure that you choose Photoshopped from that format pop format poppet menu. Now, as faras workflow goes, when I when I import my images, I typically make a folder with the event name and perhaps the date. And I'll have all of my original files in there, you know? And when I begin editing and either Elements or Photoshopped, I'll create a folder inside of that event folder called In Process or Processed. Something like that, something that lets me know that there are things that have happened to these photos in the folder that have not happened to the other photos. And that just lets me keep my PSD files kind of in one place, that I can find them quickly and easily because, like were saying earlier. You will always have to come into elements or Photoshopped if you are doing your corrections in another program like light Room. So that's how I organize my files. And then, if you need this to be in a flattened file format, let's say J. Peg or PNG. Then you simply choose file Save as. And you can change the format from the pop up menu. And when you do that, you're going to get a different file extension, which means you're not gonna be overriding that PST file. So that way you can create the correct file format for you know, the delivery that you need to make with this image while still keeping your native Photoshopped fully layered coffee around her future. Edits. So we'll close that one up for Saffron. Sal, would you mind showing how you accessed the vignette? Sure, one more time. So what we did was we went into guided edit mode and we used our scroll bar. Remember, there's a lot of guided edits, so just because your scroll bars at the top don't think there's nothing underneath her. There's a bunch of stuff underneath there, so use that scroll bar to find the word vignette and elements has categorized. The different guided it. It's, you know, a little bit over here. So here's the vignette effect right here. So give it a single click. A lot of folks get into the habit of double clicking everything. Don't do that. So here's where we added that vigna so we can add a black or white vignette Willis at a black vignette and click done. The next thing that I did was we did an old fashioned photo effect, and I always go through that really fast. See a quick you can get with that. Just click, click, click. And then we use the hue slider in the dialog box that automatically opened for us to change the color of the overlay. And then I used the saturation slider to drop the intensity of that color and then click OK, and then we popped or woman clicks done to get out of that guided at it. Then we popped into expert move to look at what elements had done in the background all by itself to keep for messing up our original image and by using the visibility eyes that are next to each layer. I can tell where the color overlay happened. I can tell where the vignette occurred. Elements created it using a combination of these layers right here. So by toddling the visibility eyes off and on, you can begin the Scud to discover how that effect was created in doing so. If you decide well, I like part of that effect, but not all of it. Then you could turn off the visibility or delete that layer. Let's say if we don't like the color overlay, we could just activate that layer. And we know it's active because it's a different color than the other layers. See how they turn blue when I click them. So any tool command or key on your keyboard that you press is gonna affect on Lee, the currently active layer. So if I press the delete key, that's why that one layer is going to get trashed instead of all of them, cause it's the one that's currently active. And by all means. When you get this dialog box and it asks you not to show it again, go ahead, click Yes and say please, for the love of Thor, don't show me this again, but it's just helping you make sure that you're not believing that layer accidentally
Class Materials
bonus material with purchase
Ratings and Reviews
a Creativelive Student
Creative Live has opened my eyes to education on-line and out of all the on-line resources I have come across, Creative Live is the best and there's never a catch. Creative Live is one company I trust 100%. They never would take adavantage of anyone. I love Creative Live.
a Creativelive Student
Every workshop I have watched LIVE is absolutely FREE! And... there is a rebroadcast that follows that is free. It is only if you want to go back again and again and again - that there is a purchase price. The knowledge of the instructors is phenominal..... well worth the cost if you choose to buy the workshop.
a Creativelive Student
Love the class and have been thoroughly enjoying it. One question- has anyone else had issues downloading the files? It seems to only go up to folder 13 and most of day 2 is missing?