Guided, Quick, and Expert Edit Modes
Lesson 3 from: Adobe® Photoshop® Elements for PhotographersLesa Snider
Guided, Quick, and Expert Edit Modes
Lesson 3 from: Adobe® Photoshop® Elements for PhotographersLesa Snider
Lessons
Day 1
1Difference Between Adobe® Photoshop® Elements and Adobe® Photoshop®Creative Cloud®
54:22 2Creating an Album and Connecting to Lightroom
25:48 3Guided, Quick, and Expert Edit Modes
32:36 4Layers Options Overview
40:52 5Guided Effects
24:13 6Puzzle Effect
18:26 7Resolution Dicussion
22:26Resolution Discussion Continued
20:20 9Canvas Resizing in Adobe® Photoshop® Elements
22:47 10Color Correction in Expert Mode
27:55 11Layer Masks in Expert Mode
16:33 12Correcting in Adobe® Camera Raw
12:24Day 2
13Creative Color
25:37 14Partial Color Images
25:13 15Converting Color to Black and White
29:10 16Custom Gradients and Vignettes
30:01 17Removing and Replacing Backgrounds
43:43 18Cookie Cutter Tool
17:17 19Retouching in Expert Mode
44:14 20Recompose Tool and Color Select
21:46 21Adding Digital Make-up and Text
23:10 22Creating Photo Collages
22:19 23Sharpening Your Images
20:16Lesson Info
Guided, Quick, and Expert Edit Modes
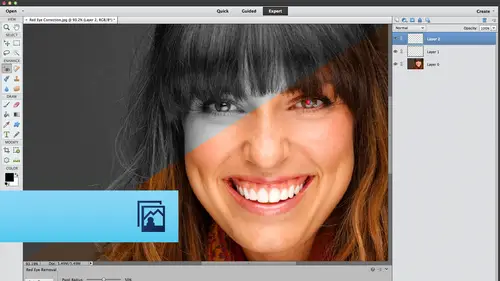
Now let's take a look at the actual editor. We've not seen that yet, so let's have a picket that if you're in the organizer, it's eat is easy to pop open photos in the editor, simply click them and then you're going to click this editor button down at the bottom that will pop them open in the separate application of the editor. So if you're not going to use the organizer, let's say you're using I photo or light room for your importing and database and organizing. Then you don't ever have to open the editor. They're not, too. They're not. Two faces to the same piece of software. They are two pieces of individual software getting it installed on your computer. So if you're not going to use the organizer, you simply don't have to ever encounter it. But if you are using the organizer than a quick way to pop open, the editor is from within the organizer. So we're just gonna click the organizer button and we're gonna pop open the elements editor. So this is the editor. So here's that toolbox...
that we were looking at earlier will meet it are side by side comparison. A photo shop CC versus elements 12. So we've got our tools panel here, and the way he figure out which editing Motor inn or change ending moods, rather is by using these three large buttons appeared the very top. So, as you can see, there are three different modes to editing here. So an expert mode. You can see your whole tools panel if we come down here to the bottom of the interface and click the layers button. Then we get our layers panel, just like we have in Photoshopped. However, if you're new to the program, then a fabulous place to start out is in guided edit mood. So when you click the guided button, see how our tools panel on the left hand side is now hidden. We've only got two tools available to US Zoom Tool, which we can use for magnification changes and the hand tool, which we can use to move around within her image. Once we have zoomed in, here's the View menu. Here's that before and after view many that I was talking about earlier so we can choose to say to see an after only before only which I'm not really sure why you'd ever choose before. Only you wouldn't see any of your It is you can choose the before and after in a horizontal display or ever foreign after in a vertical display. So, depending upon the image, one of those is gonna work better for you. We've gotta zoom slider over here so we consume very far into our image. If we're doing some detailed retouching. So you would use that in lieu of this zoom magnification glass over here and then on the right hand side, we've got all the tasks that elements will hold our hands and walk us through seriously, step by step by step by step. It is absolutely amazing. We can, ah, fix brightness and contrast. Creek skin tones crop the photos run levels. And when you choose any of these commands, let's just say we're gonna choose levels here. The elements goes and finds that command wherever it lives in the interface, whether it's buried in the menu somewhere or if it's a tool from the tools panel, then it goes and grabs it, and it plops it down onto the right hand portion of your screen and it gives you step by step by painful step instructions on how to use it. So, for example, in this levels adjustment, first it says step number one, click the button below to create a levels adjustment. All right, go ahead and name it something else if you like, or leave it set to be named levels one. So Elements is going to create a new levels adjustment layer for us right here in this guided edit move So we can say OK, and there's our levels adjustment. And then we've got instructions on how to use the darn thing right over here in our interface. And I'll just read just a little bit of it so that you get appreciation for how detailed it is to ensure that your image uses the full range of tonal values. Drag the black slider to the right so that it is just below the left point of the graph. Then drive the white slider to the left. So that is just below the right most point of the graph, and it gives you a visual of what it's talking about. Amazing. So we could do that. This this particular image doesn't have any gaps. on either side of this graph, which is a history Graham. But we'll just go ahead and make a pretty dramatic change anyway. And if I scoot, this levels dialogue out of the way, and I've still got that before and after going on, I can see the effects of my changes versus the original right here in guided edit mood. It really is quite amazing if I were to click. OK, even if you mouse over this little instructional image here, it shows you before and after. So it's given you really an amazing level of detailed instruction on exactly what to do. So this is fantastic. If you're just getting started with editing your own images. As we scroll down, we get even more instruction. Now it's saying, if you're photo is too light or too dark, dragged the middle gray slider to adjust the brightness. And finally, step number four click OK to close that dialogue box, which we already did. When you're all finished now at the bottom, you gotta cancel button in the done button. If you're happy with this edit and you want to apply it to your image, then go ahead and click done. If you have opened this image from the organizer than elements is gonna create another copy of this image so that you can always get back to the original. If you have not opened the image from the organizer, that will happen. And if you want to bail out of this edit completely, just click the cancel button, the very large cancel button. If you want to reset what you did in this guided edit, then you would just click the little button right here. Reset image. And as I point, my cursor at these little icons than elements tells me what that icons going to do in the form of that little tool tip. You can see it underneath my green circle. You're not gonna have a green circle around your mouth That's just toe help. You follow my mouse around on my screen so you won't have that. But that little reset image tool tip comes in and tells you what the heck that button does, so it's really quite amazing. So we'll just go ahead and click, cancel. And as we scroll down this list of edits, there are slew of them one of the most complicated. Is this Restore old photo edit. So just look at all the different things that it walks you through here. For example, if I'm mouse over to this a preview of what this effect is gonna build and even tells you roll over this image to see the before So that little image of the little girl there is reminiscent of something that we could create with this guided edit. But if we roll over that image, it shows us what the original might look like. So if you're scanning old photos, which is another side business or an offering service that you can offer in your photography business is to restore old photos, you could use this guided at it right here, and it will walk you through every step of it. So let's just scroll down and see what we would be in for. So it tells you that this guy did it is going to transform your old scan photo to give it a fresh and flawless look. With these simple steps, first thing you're gonna do is grab the crop tool, because why bother retouching pixels that you're not gonna keep hanging around anyway, So you could click the crop tool button, and it would bring up the crop tool. Then the next thing would be to use the spot healing brush to get rid of the tourney up areas in the photo click that it walks you through doing it. And then you can actually have access to a healing brush tool right here in this little button, and then it walks you through using the clone stamp tool, and then it walks you through using the blur tool. So if there's areas of imperfection that you can't get rid of with other the spot hailing or the healing brush tool, then you can have a go, which is blurring those pixels. And then finally your walks through, using a uh, reduced noise filter right here with the dust remover feature. And then last but not least, you can improve the color and contrast by running an auto levels, auto contrast or auto color correction. Or if the color just looks terrible to you, you can drop it out by clicking the convert to black and white button. And then last but not least, you get walks through, sharpening the image, so that is a seriously complicated series of steps right there and in guided edit mood. It walks you through every single piece of the process, So I'm gonna go ahead quick, Clint's cancel for right now, we're going to run through some of these guided edits. But in a moment I want to show you what quick edit mode looks like. So here you can see all the different things that you can create with a guided edit mode, which is really like having a teacher sitting next to you and walk you through it, step by step by step. So over here in quick edit mode, we have a few more tools available to us and those areas commonly used tools here. So we've got the zoom in the hand tool, but we've also got a quick selection tool. So let's say if you've got an image that has teeth in it, and you need to brighten those teeth real quick to make a selection of those teeth, it's even got a little toothbrush. Icahn here that actually lightens the teeth. Is your painting over them? You've got a red eye fixer upper. You've got a text tool. You got a spot healing brush. You've got a crop tool and you gotta move tool. So in quick edit mode, you have a few more tools available to you than you do in expert mode and a few more a few more in than in guided mode. Rather, you got all the tools available to an expert mood. Also, in quick edit mode, you've got that handy before and after menu right there in on the right hand side. You get what Adobe believes to be the most commonly used correction tools or adjustments in the program. And again, when you click one of these buttons than elements, goes and fetches that item and explains how to use it right there for you, it's really quite incredible. So just to recap, expert mode looks like photo shop. You gotta layers panel in all of your tools right there. Guided Edit mood is like having a teacher sitting next to you. So when you click one of these buttons, elements goes and grabs the tools and explains how to use it. So this would be like your beginner mode, or you would use this mode to create complex tasks such as a puzzle effect or out of bounds effect, which we're going to do here in a little bit, where a portion of your subject looks like it's hanging outside the edges of the actual photo itself, and then quick edit mode is great for correcting the color and lighting in your image and sharpening. And what it does is it takes the most commonly used adjustments and plops them right here on the right hand side of your screen. We were to use that on this image. Let's just click the smart fix area, and this smart fix is the same kind of button that we encountered over in the organizer, where it's basically a saint. Hey, elements, I don't mess with this image, but I want you to do whatever you think is necessary to make it look good. So if we click to expand that panel, what we get is a super easy to use slider along with a series of thumbnails. Now you'll notice that as I point my cursor at one of those thumbnails, I'm seeing a preview over here in this area of what that strength of a smart fix would look like to see the slider how it moves as I point my cursor at these different thumbnails. So I get a preview of a different strength of fix before I even clicked to apply it, which is really incredible. So you pair that with the before and after view, and I can see what would happen to my image. Should I choose that particular strength of smart fix compared with my original right here with one document open in quick edit mode. So it's insanely useful. And if you don't wanna take time to decide which of these thumbnails that you like best, and you can just click the auto button now, the way this particular editing modus set up, Adobe would really like you to dio an either or situation here. It thinks that if you use smart fix and you should not need to come down and use any of these other little sections, so in other words, the smart fixed section will change the exposure, change the color, change the color balance. So but there's no smart fixed police that are gonna show up on your doorstep. So if you use smart fix and you decide you want to come down here, and tweak into these other settings. By all means do it. But just to let you know that in adobes mind you would use smart fix or the rest of these adjustments right here. So just keep that in mind when you're finished adjusting something in one of these little areas here and you move to the next panel than whatever you did here is applied to the image. But again, if you've opened this image from the organizer, the organizer has a copy of your original tucked away. So now let's come down here and look at what's in the exposure panel. So here again, we've got a slider along with a slew of thumbnails that show us what our image would look like. Should we choose that level Oven exposure fix and we can keep cruising down. We've got levels right here again with those handy thumbnails that show us what our image is gonna look like. And within this particular little panel area, you can choose to correct the shadows, the mid tones or the highlights right here in quick fix mode. So you can think of quick fix mode as your intermediate mode. Perhaps it's great for beginners to really. And of course, you can run an auto levels adjustment from here or an auto contrast adjustment from here. Your color panel is gonna let you alter the color of light in your image as well as saturation. Here's a vibrance control. So why we didn't have a vibrant adjustment layer available in elements you can still get Teoh it right here in quick mode in the color panel by choosing vibrance. So viruses fantastic when you got already saturated colors in your image, but you want to pop the ones that are not already saturated. So, for example, look at the difference in the thumbnails when we're dealing with a saturation adjustments. See how these colors air really kind of going off the chart into alien alien hot pink land. Whereas if we switch to vibrance, even if I point my cursor at that bottom right from now, which is 100% strength of a vibrant adjustment, we haven't completely destroyed our image. So I tend to reach her vibrance more than saturation because, like I said, it will boost intensity of colors that aren't read that aren't already so intense, and it tends to leave skin tones alone, which is really nice, unless you just like alien hot pink skin. Which Halloween as we keep coming down the list of quick fixes and I keep colonic quick fix because that's what it used to be called Quick Fix Moon. We've got color balance. So here's where you can change the color of light in your image so I can change temperature and tent right here. I just love these thumbnails. They make it so easy to preview what would happen to your image should you apply that actual adjustment and then last but not least, we can click on the sharpened panel, and we've got a nice preview of what our image would look like. Should we choose to sharpen it at different strengths. And we can also click the auto button and run auto sharpening on it. And that's all there is to quick mode, so very accessible, very user friendly, very helpful, great for learning or great forest exploring the program's capabilities of what you can do both guided edit mode and quick edit mode, or just fabulous for that. Okay, so now let us take a look at expert mode I want to show you just a little bit about dealing with panels and work spaces. So over here in expert mode. So now we're to get into just a little bit of a comparison with Photoshopped again. Here, you'll notice that I don't have a bunch of panels open over here like we do in photo shop. How the panels were kind of nested together with their little tabs, and you can collapse and expand them. We kind of do the same thing in elements. You can get two different panels from the window menu, so there's the different panels that you could open. We've got actions as fry actions and elements. Adjustments, color swatches, effects that's where your layer styles are going to be, is in the effects panel graphics. We've got a history panel info panel, just like we do and Photo Shop, a Navigator panel just helpful for finding out where you are within an image overall, if you're zoomed in really far, but you can also access panels from these buttons down here at the bottom of the workspace. So, for example, if I want to open the effects panel, then I can just click the effects button. And here are my effects panels. Now, this particular one has three different categories, so we've got filters, styles and effects. So if you choose filters, this is the equivalent of that filter gallery over in photo shot, where you can actually see what the filter would look like at different settings before you actually apply it to your image. So you've got that same kind of thing right here, and from this pop up menu, you can see all the different filter categories that we have. And if you want to see all those thumbnails in that panel, then you can click show all. So now we can scroll down and see all the different, or see a sample of all the different effects that we could create using elements, filters, bunch of stuff down there. Same set of filters, almost that we have over info shop. If we click the styles button and again, we're in the effects panel. How do I know that we're in the effects panel? Well, it's buttoned down at the bottom of the interface, looks slightly depressed. It's a sad but way should give it some Prozac or whatever they give people for that these days. If we click the styles tab at the top of the effects panel in expert mode, then this is where we can access layer styles. So same kind of stuff. We've gotten Photoshopped, but a little bit different placement of those items in the interface. And the whole reason that elements is a design this way is because you'll notice things were a little bit tucked away that just keeps you from being completely overwhelmed by having 100 million options or settings facing you. So things were a little bit tucked away. So as a photo shop expert myself, I have to route around a little bit to find the things that I want to do. But when I said that I could make elements to almost everything Photoshopped can do, I'm serious because it really can't. I could make it get up on this table and dance. So if we click the styles, but then we have access to all the different categories of layer styles, so we've got complex. We've got our drop shadows. I can tell you how many people say, Well, I've never use elements because you can't add drop shadows like you're not looking in the right place. You've got drop shadows and elements and their their customizable to you can change the placement, change the distance, change the opacity. So here's our drop shadows. It's just things were divvied up into categories and a little bit hidden until you go hunting for them. Here's layer style so you can get that jail effect. Look, if you like, we've got a slew of image effects in here. Here's all our inner glows in her shadows, outer glows same kinds of things that you can create using the layer styles or fix dialog box of a room photo shop. The photographic effects are nice, so here's where you could do some color tinting these guys right here strokes. So there's our outlines. Some wow effects here, owner of those air from Jack Davis, Jack Davis wrote. He started a series of it was called The Wild Books. And then, if you want to choose, show all than you can scroll through all the different layer styles that you can add all kinds of good stuff right there. And if we click the effects button and then we see that We've got a slew of different categories in here. So for the effects when I use this one quite a bit when I'm an element, So go ahead. If you have the program, click the effects button and trot down here and choose show all because there a lot of useful effects in there. And these are just a double click affair here. Some color tents down here. So if we wanted to create a sepia fancy, fancy way for saying Brown overlay on this particular image, we would open the effects panel. Click the effects tab, come over here to the pop up menu, and she's show all Now that's going to stay set up this way until you change it again. Then we could come down here and just double click the thumbnail of the effect that we wanted to apply. And that's it. I can use my command plus in control, plus on the PC tricks to zoom in and out of the image, just like you can in photo shop. So now we apply this effect, but let's see what happened in the layers panel. How do I open the layers panel? Click the little layers button down here at the bottom of the interface, and we can see over here in our layers panel, the elements made a duplicate of the background layer in order to protect our original image and on the duplicate layers where it changed the image to black and why, and then added that brown overlay so pretty neat, huh? So we're going over this kind of stuff right now just to show you how you kind of get around in expert mode. Now, if you do want to have floating floating panels or you want to dock them in different ways, you can do that and elements. But it does require that you switched to a custom work space, and that's easy to do. All you do is click the little more button down at the bottom and you can see a a bunch of different panels here, so that's like saying more panels. But if you click right on that little downward pointing triangle, if you switch to custom workspace, see how that floating panel is now kind of docked up at the top of our interface, and it looks a little bit more like photo shop. So if you're switching from Photoshopped two elements, or if you're a little bit familiar with photo shop and you're going to start using elements, then I would highly recommend that you click that little downward pointing triangle next to the Mormon you down there and switch to custom workspace. And that is going to allow you to have these panels in a tab situation where you can skip him around and customize them a little bit more like you're used to over in photo shop. And if you don't care about that, then we'll just click that button again and go back to the basic workspace. And that's where you can switch between the open panels. Using this big friendly, happy, soft, warm buttons down at the bottom of the interface, I talked about the Options Bar being at the bottom of the screen versus at the top of the screen. You haven't seen that yet. Where does it live? Right here. Click a button and it'll pop right open. So depending upon the tool that you have active over here in the tools panel, just like Photoshopped, click tool options in all the different things that you can do to that tool appear down here in a very large option bar. Look how big that options bar is. It's so large that you can actually see the icons, and they've put actual words next to the icons that let you know what the icons do, which is helpful. So just for example, we have the rectangular marquee tool active in the Tools panel, and down here in the options bar is where I can change it from rectangular marquee to an elliptical marquee. I can change the mode of that tool just like I can in photo shop. I can change it from being an add to selection mode to subtract from selection mode and all the same keyboard shortcuts that you're used to in photo shop work right here in elements. So any of the modifier keys Let's say you're creating a selection, and you want to add more to that selection. You would hold down the shift key that put the tool in ad mode, or you press and hold option on the Mac or Altana PC to put the tool in subtract from selection mode. All those kinds of modifier keyboard shortcuts like that work right here in elements. So if you've spent any time at all in photo shop and you picked up a few keyboard shortcuts, rest assured that work right here in elements to which is really handy. And like I said, I know a slew of people that have been using photo shop, and they just hate it and I can get him into elements and they enjoy editing their images again. So we got a feather slider right here where you can feather the edges of your selection just like he can and Photoshopped. And we've also got a refined edge button, which is how we're gonna create some really complex selections. I believe that's what we'll start out with in the morning. So that's how you access the options bar in expert mode. You're not going to see that in the other two modes, and the thing I love about it is you can use this little down were pointing bracket to close the options bar, so you're not losing any screen real estate by having that big old honkin thing open. You've got an undo button. That's an easy step back. If you can't remember the keyboard shortcut, Commander Control Z, we just click the big old honkin undo friendly happy software and button at the bottom of the Elements interface. If you wanna step forward, if you want to redo that thing that you just did well, just undo the C p A c over in our layers panel. Now we're back to square one. If I clicked it by accident, if I change my mind, all I have to do is trot down to the bottom of the interface and click Redux. It's so easy. If you need to rotate any of your images, you gotta rotate button right here, which is just really incredible. If you've got several images open and you want to see them, let's say you want to combine several images in the One Elements document to make a collage. Then you've got a photo. Been right here. So if I had more than one photo open, they would all be showing right there, and you can drag from one document into the other. Straight from the photo been it should so friendly a lot of this program. So that's just a overview of the three different editing mode. So again, experts most like Photoshopped guided would be most for beginners or just to explore what the program is capable of. And the special effects down here are really incredible. We're gonna trot through several of those today and then over in quick edit. Mood is great for correcting the color and lighting in your image because it grabs all those frequently used adjustments that plops them right down here on the right side of your screen. And you can choose what you want to apply to the image with these easy to use thumbnails. Pretty incredible stuff. You need general workspace questions I assume you can use to monitor and move the panels. Absolutely. Yes, Absolutely. Yeah, because if we go back to expert mood, you do that. An expert mood. Yeah, And then if you cook the more button now, all those other panels come up in this little floating panel so you could scoot those to the other monitor. I think you can liberate them to Yeah, you can just click and drag them out of that set. And then you can set up your workspace just like father saw. So now it's starting to look a lot more like photo shop. So great question. Thank you for bringing that up in the course. If you close these guys, you know, get him back again. It's easy peasy. You can get him back from going up to the window menu or just clicking the more button. So forgiving, much more so then Photoshopped, which is how it was designed. This is designed for mortals. Foot a shop designed for wizards and sorcerers. Seriously liberate your menus. Yeah. Okay, so we said, um, Doug asks when I open elements. It presents me with a choice between elements organizer and elements editor Can this can turn off this choice? What automatically just goes directly into the editor? Do you happen to know? I believe there is an option at the top of that box that says, Always show when launching the programs because I think you would turn that off is at the very top. But you would just, let's say, go into your application folder on your hard drive and you would make an alias or a short cut to just the one that you wanted to open. Editor versus organizer. So I can I've got them in my dock down here so I can just click and then launch whichever one I want. Also using the Mac, you can use spotlight so you can press a command space bar, toe open spotlight. And then I can just type in the first few words of the program I wanna launch. And then I could pick. Oh, I want the the organizer or the editor, but that welcome screen. You can turn it off so it won't come on every time you launch the program. Awesome. Thank you. And cloud nine asks, um, they have elements in light room, but not too clear about adobe camera. Are we going to get into that later or absolutely great? Perfect. Yeah, but if you're using light room, you don't need it to use it over and elements because the develop module of light room really is camera, and you've got all the features of camera over in light room in the elements, the version of camera raw that is installed as a plug in, which is not accessible if you don't have the editor open. The one that's installed in elements as a plug in is a has slightly pared down features, so you wouldn't care about using hammer raw over in the elements room. You would use the develop module of light room
Class Materials
bonus material with purchase
Ratings and Reviews
a Creativelive Student
Creative Live has opened my eyes to education on-line and out of all the on-line resources I have come across, Creative Live is the best and there's never a catch. Creative Live is one company I trust 100%. They never would take adavantage of anyone. I love Creative Live.
a Creativelive Student
Every workshop I have watched LIVE is absolutely FREE! And... there is a rebroadcast that follows that is free. It is only if you want to go back again and again and again - that there is a purchase price. The knowledge of the instructors is phenominal..... well worth the cost if you choose to buy the workshop.
a Creativelive Student
Love the class and have been thoroughly enjoying it. One question- has anyone else had issues downloading the files? It seems to only go up to folder 13 and most of day 2 is missing?