Lessons
Day 1
1Difference Between Adobe® Photoshop® Elements and Adobe® Photoshop®Creative Cloud®
54:22 2Creating an Album and Connecting to Lightroom
25:48 3Guided, Quick, and Expert Edit Modes
32:36 4Layers Options Overview
40:52 5Guided Effects
24:13 6Puzzle Effect
18:26 7Resolution Dicussion
22:26Resolution Discussion Continued
20:20 9Canvas Resizing in Adobe® Photoshop® Elements
22:47 10Color Correction in Expert Mode
27:55 11Layer Masks in Expert Mode
16:33 12Correcting in Adobe® Camera Raw
12:24Day 2
13Creative Color
25:37 14Partial Color Images
25:13 15Converting Color to Black and White
29:10 16Custom Gradients and Vignettes
30:01 17Removing and Replacing Backgrounds
43:43 18Cookie Cutter Tool
17:17 19Retouching in Expert Mode
44:14 20Recompose Tool and Color Select
21:46 21Adding Digital Make-up and Text
23:10 22Creating Photo Collages
22:19 23Sharpening Your Images
20:16Lesson Info
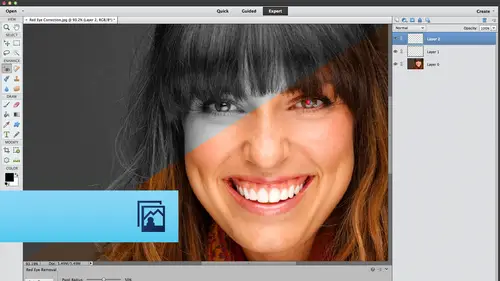
Layer Masks in Expert Mode
so these things over here are layer masks, layer masks or simply like digital masking tape. Just like you would mask off the base boards in your bedroom before you paint your walls. Don't get the paint on the baseboards. You're gonna protect them or hide them rather with masking tape. You wouldn't know the trouble of removing the baseboard, because what a pain that would be a way of paint dry. Put the baseboards back so you're just gonna mask them with masking tape. We have masking tape in elements Info Shop, for that matter. The only difference is that digital masking tape is black in color and real world masking tape is what beige or bright blue. Something like that. So what we can do is hide this. Whatever is happening on this layer doesn't matter what it is. We can hide that layer content from anywhere in the image that we want. So let's say that you've got an image that part of it needs to be corrected, but maybe this area over here is just fine. So how do you restrict that adjust...
ment from Onley being visible in certain areas, you use the layer mass that tags along with every single adjustment layer. So every time we made one of these levels adjustments, we have a mask. And if if digital masking tape is colored black, that would mean that whatever you put black paint on top of in this mass, this Basque is a miniature of your document. So wherever I paint in that mask with black, whatever is on that layer is gonna be hidden from that corresponding area over in the image. Well, if black hides 100% why reveals 100%? So right now, these adjustments are visible across the whole image. Because our layer masks are white, they always start out white, the kind of empty. But there's a rhyme that creators have memorized to help us remember what's going on inside of a layer mask and what color we should paint with. Win and that is black conceals. White reveals black conceals, white, reveals black conceals, white reveals. So right now, if you run the rhyme through your head, black and seals, white reveals, Oh, so all of these adjustments were being shown across the whole image because the layer master filled with white. So let's take a look at this on another image. Go ahead, delete this guy. So in this particular image, we can see I've got two levels adjustment layers. So it's talk of the visibility off on that one and toggle the visibility off on this one. So here's our original yet another stellar image from yours truly, So we can see that this first levels adjustment. We've got a little black paint over there in that mask. So if this is a a miniature of this document, well, that black paint would be somewhere around this area. So that tells you that Oh, that adjustment is being hidden from that area. Now we've got another levels adjustment here, which is a duplicate of this layer. So if one levels adjustment layer doesn't get you the kind of look that you're wanting from your image, why not duplicate it? Then you've got, like, a double levels adjustment. So if we click on this image layer, I can see that, OK, we've got another levels adjustment. But, boy, it's being hidden in most of the image. So looking at a layer mask knowing that it's a miniature of this image, if black conceals and white reveals that tells me that the Onley place that that particular layer content is being visible is in this area of the image that's it's being hidden from the rest of the image completely. So if we toggle it off and on, you can see that to be true. So that's another great power that you get from using adjustment layers is that these layer masks come along for the ride, no matter what s. So let's go ahead and delete both of these guys by shift clicking toe. Activate them, impressing the delete key. So now let's start from scratch together. So we'll choose the half black, half white circle levels. This is really a nice hissed a gram except for the dead again, prairies on either side. So course, if you were doing this for real, right, you would trot through the individual ones. We're not gonna do that now, cause you're gonna how do that? So I'm just gonna go ahead and scoot these sliders into where my information startups drive the great slider a little bit to the right for a little bit of the contrast boost. Now I e. I can preview before and after Well, I think that change looks pretty good, except for man. My shadows, a really plugging up right over here on these grapes. So let's make sure the mask is active and it will be unless you've clicked somewhere else, like clicked over here or here. Click to make the mask active and you know it's active cause it has an extra little outline around it. Tiny like a sigh in light blue outline. Once that mask is active, we can use any tool we want. That'll lay down black paint in that mask in order to hide that adjustment from that area. So if we come over here to the tools panel and grab the regular old brush tool, or you could just press be to grab the regular brush tool, then from the Options bar, make sure you've got a soft edged brush. So let's click this little brush preset picker, and as long as you've got one of these has a little bit of a fuzzy edge. You're fine. You just don't want one of these guys that has a hard edge. And if you point your mouse to these different brush previews, it will tell you if it's a soft brush or a hard edge brush. So we've got a soft brush active, so we're good. Now. You can use the size slider at the bottom of the panel to change your breast size or uses keyboard shortcuts that we mentioned earlier, which is right bracket key to go up and brush size or left bracket key to go down and brush size. The next thing you want to do is take a peek at the color chips at the bottom of your tools panel, and you want to make sure that they are black and white. If they're not black and white, you can click that microscopic little bitty black and white icon down at the very bottom to reset your color chips to the default of black and my or You can just press the D key for default. That's what I do most the time. Then you need to make sure black is on top. If for whatever reason, black is on bottom like that, you can either click that little curved arrow to flip flopping or press the X key on your keyboard to flip flop them. Now we're finally ready to mouth over to our image and I'll zoom in a little bit. Skit over with our space bar. Now, wherever we paint with black, we are hiding that adjustment. See how that area is lightening up now. Now let's say we go too far and we hide that adjustment from this whole area. We don't mean to do we have to start over? Absolutely not. If black conceals and why, it reveals if we flip flop are color ship so that we're painting with white. Press the X key so that white pops on top or mouse down to the bottom of your tools panel includes the curved arrow. Then you can come back over and reveal that adjustment where you didn't mean to hide it to begin with. So that's how you really leverage the power of these adjustment layers is by using the mass that come along with them in order to conceal or reveal the change that you made in very specific areas of your image. That's the precise power that you don't get over in guided mode or quick move, so you have to be an expert mood to get at these layer masks. So we're gonna do that again on another image. You're actually, we're going to duplicate this levels adjustment layer, because if I zoom out, go ahead and hide that options panel down there by the mouth. This is still looking a little over exposed to me down here. So what I'm gonna do is duplicate this levels adjustment layer by pressing commander Control J See how now we've got double levels adjustment layer. So a couple of different things you could do at this point if two of them is too much. What on earth would keep you from dropping the opacity of 2nd 1 until what? Good, there's that, Or if you need 100% of that second levels adjustment layer to bring this part of the image back in line, why not use the mask to hide that duplicate levels adjustment from the rest of the picture. So with the mask active and you know it's active because it has that blue outline around it. If it does not have that blue outline around it, click it. Give it a swift click. Now we're gonna come over to the tools panel, make sure the brush tool is active. Go ahead and click the tool again. Or click the tool options button at the bottom. Make sure you've got a soft edged brush picked from that brush preset picker. Just give it a click. And as you point your cursor to any of those brushes the programme tells you, if they're softer hard, let's make sure you've got one of the soft ones active. And then either use the slider to change size or use a keyboard shortcut. Right bracket key to increase size left bracket key to go down in size. I'm gonna hide that tool options there, and I'm gonna make my brush really big. And now I need to take a peek at the color chips at the bottom of my tools. Pale because black conceals white reveals. But what is on top right now? What color chip is on top? It's white, so I could paint all day long and have absolutely nothing happened. So I'm gonna press X to flip flop my color chips so that I'm painting with black is black, conceals white reels. You are gonna have that in your hands now for at least a week. You're welcome. And now we're just gonna paint to hide that second levels adjustment across the areas of the image that don't really need it. And again, if we end up hiding too much of it. We press X to flip flop are color chips so that we're painting with white, maybe go down and burst size a little bit. Here we go. Maybe to reveal a little bit more, the larger your brush, the softer the edge of the change is gonna be the transition point between hiding or concealing that layer content and allowing it to show the softer the brush that more gradual the transition between the two areas are there. But that's why you want to use a soft edged brush to not make it a harsh transition between full on levels adjustment right here and completely being hidden. So let's do that on another image. Uh oh. I don't think I give you another one. Well, let's do it again on that one. Here we go. Go and delete these two layers. Now we're gonna create a levels adjustment. Adjust the shadow slider just the highlight slider. Drive the midterm slider to the right for more contrast to the less to the list to the left, which is near the lift for less contrast, and then hide that adjustment wherever it needs it. Our shadows. We're getting plugged up right here a little bit. So we're going to grab the regular brush tool. Make sure black is our foreground color ship. We already know that we have a soft edged brush and I want to come in here with my with a small brush. And I'm just gonna paint with black across that area where the shadows we're really getting plugged up. So here's our before Here's our after now, your next question will be Well, well, what if I don't? What if I want to hide some of the adjustment? Maybe you don't want to hide it 100%. Well, if black conceals and why it reveals, what do you think painting with gray would do little bit of concealing a little bit of revealing. So we'll just go ahead and switch to painting with white. So we kind of undo what we did in that layer mask. Now, how do you set a foreground color ship to gray? Couple of different ways You could either keep black is your foreground color chips and pop open the brush options. Drop the brushes. Opacity. So if we paint with black at 50% capacity, we're gonna be painting with gray. See how now we got gray over there in our layer mask, So we're partially hiding that adjustment from that area. So now there's the before, and there's the after. So just to repeat, how did I get there? We had the brush too active. There's several different ways you can pop open that options bar. You can either click the tool again, and that'll pop it open. Or you can click the tool options icon at the bottom of the interface, and all we did was drop the opacity of the brush. But when you make these changes down here in the options bar, the next time you go to use the brush tool, it's still going to be set to 50% opacity. So if you're painting, painting, painting and you're thinking dead gun, the program has lost its ever lovin mind. Just take a peek at the options and make sure that there's not something that you've changed, that you haven't changed back. That's the only downfall about using that method. But that is a great method to really be extra precise, with where you're allowing these adjustments to be visible across your image and exactly how much of the adjustment you're allowing to be visible in any one spot. Now your next question obviously will be that well, if I start painting with gray in a layer mask, Do I have to keep painting with gray? Absolutely not. Imagine the power that this gives you so you hide a little bit of the adjustment over there. Well, now maybe you come down here in you adjust the opacity again, and you keep painting elsewhere so you can paint with all shades of gray 256 of them here in a layer mask in in a single layer mask. It's just that by looking at the layer mask, you need to understand that if black conceals and white reveals than shades of gray of depending upon what shade or tent of grade is, they do a little of both. So if you look at this layer mask, I can see that ah, 100% of the suggest mint is being hidden through the middle kind of diagonal swath of this image, whereas over here on their right, only a little bit of the adjustment is being hidden. So it it sounds a little complicated, but the more you start using layer mask, the more you earn. Absolutely the fall in complete head over heels in love with them.
Class Materials
bonus material with purchase
Ratings and Reviews
a Creativelive Student
Creative Live has opened my eyes to education on-line and out of all the on-line resources I have come across, Creative Live is the best and there's never a catch. Creative Live is one company I trust 100%. They never would take adavantage of anyone. I love Creative Live.
a Creativelive Student
Every workshop I have watched LIVE is absolutely FREE! And... there is a rebroadcast that follows that is free. It is only if you want to go back again and again and again - that there is a purchase price. The knowledge of the instructors is phenominal..... well worth the cost if you choose to buy the workshop.
a Creativelive Student
Love the class and have been thoroughly enjoying it. One question- has anyone else had issues downloading the files? It seems to only go up to folder 13 and most of day 2 is missing?