Removing and Replacing Backgrounds
Lesson 17 from: Adobe® Photoshop® Elements for PhotographersLesa Snider
Removing and Replacing Backgrounds
Lesson 17 from: Adobe® Photoshop® Elements for PhotographersLesa Snider
Lessons
Day 1
1Difference Between Adobe® Photoshop® Elements and Adobe® Photoshop®Creative Cloud®
54:22 2Creating an Album and Connecting to Lightroom
25:48 3Guided, Quick, and Expert Edit Modes
32:36 4Layers Options Overview
40:52 5Guided Effects
24:13 6Puzzle Effect
18:26 7Resolution Dicussion
22:26Resolution Discussion Continued
20:20 9Canvas Resizing in Adobe® Photoshop® Elements
22:47 10Color Correction in Expert Mode
27:55 11Layer Masks in Expert Mode
16:33 12Correcting in Adobe® Camera Raw
12:24Day 2
13Creative Color
25:37 14Partial Color Images
25:13 15Converting Color to Black and White
29:10 16Custom Gradients and Vignettes
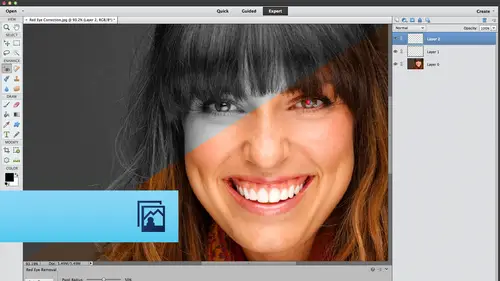
30:01 17Removing and Replacing Backgrounds
43:43 18Cookie Cutter Tool
17:17 19Retouching in Expert Mode
44:14 20Recompose Tool and Color Select
21:46 21Adding Digital Make-up and Text
23:10 22Creating Photo Collages
22:19 23Sharpening Your Images
20:16Lesson Info
Removing and Replacing Backgrounds
So what I've done is I've given you the layered file with e effect complete. So this is what we're going to create. If you look in my layers panel over here, you can see that we've got the Eiffel Tower shot on the background and then we've got another layer in the original photo has a white background. But now that you know about layer masks, you can see that we've hidden that original white background with a layer mask. So what we're gonna do is we're gonna paint a selection onto the mom and the little girl, and then we're gonna use the refine Edge dialogue box to fine tune that selection around the difficult areas of the hair in order to produce a really accurate layer mask. But I've also given you the original source file so that you can start from scratch with this technique. So that's what we're gonna do right now. The first thing we need to do obviously, is get both of those images into the same document, but on separate layers. Super easy to do that in elements way easier than i...
t is to do it in photo shop because you have this mighty photo been down here. So give that button and click is that the far left bottom left of your elements interface? And what that allows you to do is to see all of your open images, all of your open windows, rather as little fun nails. But more importantly, and can't do this in photo shop is that to combine images into a single document, you can click and drag from the photo. Been right into that other document seriously, so easy when she released her mouse button, that image lands in that document. So now I've got what I want both images in the same document, but on separate layers. So that is really released, like we'll do that again here in a second. So I'm gonna close up the photo been now. So my first job is to make elements, create a selection or grab a selection tool that will select the majority of what I want and then go back in and fine tune it using the refining dialog box. So since we've got such great contrast between our foreground in our background, or rather the item we want to select and what's behind it we can use a selection by color tool, and that will really do a pretty good job. So in elements, that tool is at the top of the tools panel, and it's this little guy right here, the quick selection tool. When you give it a click, you're going to see its options appear down here in the options bar. We're going to turn on the auto enhance button. That's just gonna help elements do a little bit of a better job and trying toe trying to guess what we're selecting so that it helps us create our selection a little bit faster. So now let's close that options panel, and this tool works. It uses a brush cursor so you can use your left and right bracket keys to effect size. But it works by clicking and dragging across your image. And as you do, click and drag across the colors that you want to select elements, goes and grabs similarly colored pixels that are contiguous, which means they're touching, connected to the original pixels that you mouse over. In other words, if we had a green tree way over here, that wouldn't automatically be included in our selection because those pixels aren't touching some of the pixels that I painted over. You can also just single click with this tool. Sam is doing a really good job of creating the selection. Now I'm changing breast size as I come down here and get into these narrow areas because the the volume of pixels that elements tries to select is directly proportional to the size of the brush cursor. So if I have a big old honkin brush, then Elements is gonna select a big old honkin area. But if God got a teeny, tiny brush that it's gonna select a teeny tiny area. So I like to keep two fingers on those bracket keys as I'm doing this technique. Or if you've got a wake on graphics tablet, you can set up your some of your buttons to change birth size. But you're gonna do a lot of changing brush size when you're doing this technique, and again you can single, click with it or click and drag. So when I come down here into these more narrow areas, I use a smaller brush and then you can use a larger brush for the larger areas, and we've almost got a pretty decent selection. That's gonna be about as good as we can get. Now. We need to further fine teen our selection around the hair. That's really difficult areas to select. So what we can do is pop open the options bar again by clicking the tool options button down here at the bottom of the interface and the murder. Gonna click that refine edge button and up pops a truly amazing dialogue box snatched straight from the depths of Photoshopped. We got refined edge back in CS four, I believe, and it's just continue to get better and better and better and better in every version and back in elements. Gosh, 10 or 11 might have been 11 was when the programmers always picture them sneaking over, like in camo and stuff to the offices where there Photoshopped programmers are like in the middle of the night and, like snatching that blocks of code and then running back to the elements offices, sticking it in Pretty sure that's what goes on. So that's how we got this. And it is the full, on full amazing version that we've got over there in photo shop. So how are we going to use this to fine tune the edges around the hair? Well, first we need to set up the view mode so that we can actually see what's currently in our selection in what might be hanging outside of the selection that we need to get into the selection. So a great way to do that is to turn on overlay mood. So just give this little button and click, and then she's overlay mode, and that gives you a red overly and you can still zoom in while the style of boxes open. So I'm gonna press command plus command, plus use my space bar to move around So that red overly, let's me see clearly that Oh, man, you know, I've got some serious hair in here that is not yet in my selection. That needs to be. So when you choose overlay from this view menu areas that are not yet included in your selection appear in red areas that are currently in your selection appear in full color. Now, if you've got a whole lot of red in your image, that particular overlays not gonna help you, but you do have other possibility so I could view the image on Black. That doesn't help me because I can't see what's not yet in my selection. That needs to be. I can preview it on. Why it? I can preview it as the mask. That doesn't help me either. I can preview it on layers. Still doesn't help me. So that overlay is the one that's gonna be the most useful for this kind of technique. Now we're going to turn on the smart radius check box. Turning on that check box means that you're telling elements to scurry around the edges of your selection and take another look and see if it may have missed something, so it's gonna automatically analyse the edges of that selection. How far out from the selection is it gonna look? Depends on what you set this slide or two. So as I drag the slider to the right elements is gonna look further and further out from the original selection to see if there's something in there that might need to be included in this election. Sometimes this may be all you need to do to get a good selection, depending upon the particular image, but in our case, we're not yet to pay dirt. So what we need to do is grab this little brush right here, which is really the super magical option in the style log box. This little brush right here and then we're gonna mouse over to the image and we're going to begin to paint across those edges that we want elements taking them to look at. And it's gonna be especially useful in areas like this where we can see some of the white background picking through the hair. So I'm gonna grand my brush tool here. It's automatically active because but this tool does use a brush cursor so you can use those left and right bracket keys. So see just how I'm painting across those hairs. Look around now I've got the red overly in that in between area. That's great, because I didn't want that white in my selection. I only want the hair in the selection. So just right here, just with that couple of brushstrokes I made elements is already doing a better job of seeing the in between areas of that white background and removing them from my selection, which means I'm only going to end up having the hair selected and not the white background. So what all you do is just paint over the problem areas. Paint into the hair as's faras. You need Teoh. I'll zoom in a little bit more. See how this area right here is still in full color. That's that white background peeking through. But as I paint across those areas now, I'm fine tuning my selection so that when we add our layer mask, I'm not going to see the bits of the original background between her hair. Isn't this incredible? Now you're going to get different results, depending upon what size your brush is and there's no magic setting. You're just gonna have toe paint, see if you're getting the results you need. And if you're not, then you can fine tune the size of your brush. The smaller the brushes, the more precise it seems to be. See how now some of those hair strands of hair now showing up in brown? That means they're now included in my selection. Now most often are most likely. You're not going to be able to get this perfect, perfect perfect, but look what we've done already now that the hair is dark. I know that that's included in my selection. So you're going to be able to use this to get far closer to the desired results than you ever would be able Teoh. Anyway, I mean, this is probably the most difficult kind of selection to make in Look how good of a job Elements is doing with this dialogue box. So we're gonna finish painting over the areas that need to be refined, and then straight from this dialog box, we're gonna be able to create a layer mask. And then when we get back over to our layers panel and we see the composite image, then you're gonna be able to appreciate how far we've come using this particular tool. And I've got a couple of images for you to play with. Both with really difficult hair, really fine strands of hair. You see, analyses are commander control minuses. Zoom back out to see where we are. We're doing good. So even if I switched the modes, then you can you can kind of begin to see how far we've come. See how now I've got those wisps are actually in the selection and they were not before. So now we can use our space bar trick to move around, mouse over to mom's hair, zoom in a little bit, and still with that refined edge, refined radius tool in the refine edge dialogue. Gosh thing we can continue to paint around the areas that need to be fine tuned. And again, you are going to get different results depending upon the size of your brush. So if you've got really little wispy hairs like this, then you want to zoom in and make that brush small by using your keyboard shortcuts of the left and right bracket keys. And you're just gonna paint over all those strands, which is just telling elements. Hey, elements really, seriously reanalyze this area that my brush is painting across and it's gonna look for contrast. Ing pixels and tryto make a its best guess on whether they should be included or excluded from our selection and do paint into the hair. See how that's all changing as I'm painting over it. It would probably do a better job if I did this a little bit more slowly, probably zoomed in a little bit more, used a smaller brush, but again, we don't want to be sitting here next week still working on this image. But in your own tests, do you try zooming in and using a really super small brush? But as the strands or darkening, you can see the difference right between a strand that solid red and one that's not so. Now this strand right here is included in our selection, and it was not before pretty amazing. And then we can come down here, catch those areas between the strands of hair. So let's see how far we've come now. Now let's come back over here to this dialogue and a couple of other useful sliders that we're not going to use on this image. But I want you to know what they do is smoothing. So if you ever make a selection with the tools, say, like the magic wand is notorious for making jagged E, it's another selection. My color tool mixed jagged edges. If you want to smooth those edges of a selection, this is a great slider to reach for right here. Smooth. If you want a feather, the edges of the selection. We're gonna do that in a little bit when we start making collages, we're gonna use that slider to soften the edges of our selections. If you want to adjust the contrast of the selection edge, which can help you in images like this, and you can adjust this slider, it really is a trial and error kind of situation. So use this refine radius brush, go all the way around the edges, and then if you need Teoh, then you can adjust This contrast slider right here. The shift edge slider lets you expand or contract the selection. We're not gonna do that on this image, but it is helpful if you're selecting an object, but you don't get quite tight enough, or if you got it too tight, then you can pop it out a little bit or contract it using this slider right here. Decontaminate colors is going to try to remove it in color. Fringing za color fringing just means little partially transparent pixels that are loitering from the original background, so it'll try to help you out if you turn that on. But what we're going to do is tell elements to create a layer mask from our newly refined selection. And we do that by choosing layer mask from this output menu. So we're gonna choose Layer Mask and then we're gonna click. OK, and now look. Look at that selection. People, look at that. Look at that. Look at that. Look at all that hair. Really? All that here in that often Now, I do have a little bit of problem right here. But what would keep me from clicking To activate my layer mask going and grabbing the brush tool, setting its paint with black massing over to the image and continuing to fine tune Oops, paint with the right color. Lisa, There we go. Continuing to find tune my mask in the areas that are easy for me to do so within a layer mask You do not want to tackle that kind of business by hand. Do you want to let that refinish dialog box do the heavy lifting for you And then if there are other areas in the image that the selection isn't perfect then find him that layer mask using the brush tool set to paint with black to conceal or white to reveal. But let me tell you on hair you're never gonna get a selection that good with with any other tools. And when that refine edge dialogue box came around, it truly was groundbreaking. And CS for when we got that pretty amazing, huh? Absolutely. A to this point, if you didn't see some stuff that you wanted to go back, could you then could you, at this point, re do your mask and go back to the river? Fine edge as well? That's a great question, Jim. So it's impossible to reopen its impossible to go back and fine tune that selection again just by, like, double clicking to open that dialogue box. But what you can dio is load the mask as a selection, and you would do that by command or control clicking the mask itself. Then you could click to activate the layer and then with a selection tool, Active doesn't matter which one, because that refined edged button is only gonna be illuminated when two things were going on on your screen. When you've got marching ants somewhere selection and you have one of elements selection tools active in the tool box. That's the only time you're gonna see that button down there. I think you can get to it. You can get to it in the Selectmen. You, too. So So you load the mask as a selection. That's just telling elements. Hate. Look at the shape that's inside that mask and give me a selection of it. That's all that happened there. And then when you open the refine edge dialogue, then you could continue to use it again. And this time from the output menu, you would say new layer with math. So that's how you could kind of get back at it without having to start over. Thank you. That's a great question, General. Glad you asked that. Thank you. So let's take a look at that on another image. Pretty cool, huh? You can also offer this kind of thing in your photography business. I'm gonna scoop them over by activating the move tool. Let's say you bought a green screen for your studio or just agreeing Backdrop, and you can shoot your clients in front of that. Then you can download some stock photography, and you could swap out backgrounds. Prequel idea. So let's do it again on another side of images. This time, we're gonna make Supergirl fly across the Golden Gate Bridge. So here's our final composite. So we've got the Golden Gate Bridge on one layer and then we've got a Supergirl on another layer here and we can see we've got lots of wispy hair going on. So let's recreate that again. So we're gonna start with our Golden Gate Bridge photo. Now I'm gonna come down here. That's only because why am I starting with that one? Well, I know that I want the Golden Gate Bridge to be on the bottom of the layers panel. So if I drag and drop Supergirl onto the bridge document, then she's gonna land above the bridge and layers panel to save me the hassle of changing layer stacking order. So let's pop open that. Oh, so useful photo been. And now all we have to do is click and drag from the photo. Been into the document that you want that image toe land into, and there she is. Now we can close photo been, zoom in, and now we're going to use a tool that's gonna allow us to create the selection, the fastest that we can. So since we've got a decent amount of contrast between item we want to select and its background, then using a selection by color toll makes sense. So let's go grab the quick selection tool from the options bar at the bottom of your screen. Turn on auto. Enhance. That's just gonna make the tool. Do a little bit better of a job. Create a little bit smoother edges. So now we can collapse that panel and using your left and right bracket keys to change brush size. You can make your brush fairly big to select the large part, and you can either click or click and drag. And then when we get down here to the smaller sections, like her arm and her hands here that we want to make the brush tool or the brush size rather a little bit smaller over here, too, because the area that elements automatically selects when you use these tools directly proportionate to the size of that brush cursor. If you've got little bitty brush, gonna select little bit, very big honkin brush going to select a big honking area. So now we're ready to pop open the refined edge dialogue so you can do that by popping open the tool options at the bottom of the workspace and then clicking refined edge. Or you can choose select menu and choose refine edge from there. How do you remember what menu that's in? Well, you can think of that. Your refining a selection. So the Selectmen, you kind of make sense. Now, from this dialog box, you're gonna choose a viewing mode that's gonna let you see the areas of the image that are not yet in your selection that need to be. And that's going to be the overlay of Quick Mask. It's the quick mask mode and photo shop, but it's the same red overlay here. You can just press the wiki if you want. That's a keyboard shortcut for that mood. But once you change it to that mode, it will stay changed. We change it back. So now we're gonna come down here in turn on Smart Radius, and that's just gonna make elements. Take another look at the edges of that selection. How far out should it analyze from the selection that you drew? You determine that by dragging this radius slider, so that just says, Hey, elements. Do you mind taking a peek. Oh, about eight pixels away from that original selection. See if there's anything I might have missed. In some cases, this may get you to where you need to be, but it doesn't on this particular image. So the magic happens when we scoot the style. Log out of the way and we use this little brush tool right here. Come over to your image. Zoom in using commander Control Plus and you can use your bracket keys for brush size again. So now, as I click and drag to paint across that strand of hair, some of it has now been included in my selection. You can also use this contrast slider right here to increase the contrast of the edge just a little bit. And sometimes that can make a difference and help you get an item in your selection that you can't. Otherwise, so you really will have to do some experimentation with this and again, it won't end up being perfect perfect, but it will get you most likely to the point where it will work. So as I'm painting across these areas, some of those wisps of hair now being included in my selection case analyses Air space bar to move around. We've got a little bit of a problem area here, so I'm just gonna paint within that area. And when I released my mouse button, that's when elements is going to take another look at that area. So now some of that sky is not included in my selection, and it was before. There's just no way he get in between like that, because these really what's happening is those pieces of hair almost like partially transparent pixels. They don't hold enough color for you to really be able to get a good selection of them. So just paying across all of the problem areas. I don't want that blew in between those hairs to be in my selection. So I paint across it and elements, takes another look at it. So that's pretty good. And that's probably going to be about as far as we can get with that image. So now we come down here to the output, pop it in you, and we're gonna choose layer mask. Now there is one more little tool that I want to point out. Let's say you're painting around the edges with this tool right here. And let's say all of a sudden you completely screw up that area. This eraser tool right here will let you undo the fine tuning as you brush over it so you can switch to that If you if you need to. You now we're gonna click. OK, look at that. Just enough of that piece is in our selection to make it look real. Even over here in this area, we're seeing the bridge through those pieces of hair. Now you're probably thinking, Gosh, she looks so excited about all this. It really is groundbreaking magic stuff. Because until you've tried to do this, you know, swap a background on somebody who's got wispy hair like that, then you probably won't be able to appreciate the magic that we just saw it happen with its tool. But it absolutely is magical. If we turn off the Golden Gate Bridge, you know, you can tell a little bit more about our selection. But look at Look at this over here. Isn't that incredible? Elements did that. I mean, this is amazing. Really, really amazing. Look, that it's like the heart of that wisp is in there and it's even. What elements did was create like a partially transparent. It selected partially transparent pixels in there. So we've got just enough of that wish to make it look really Look at this area. That's insanity. Like she's on drugs. I mean, look at that. It's in between. We got a selection in between the lists of hair. All right, now stop. So, boy, that is really, really super powerful video for making complex elections in order, Teoh swap a background. You know, this kind of stuff is really eye catching, you know, in in advertising we have about, 03 seconds, if that to catch somebody's attention. Because in today's world, we've got so many things vying for our attention. You know, add audio, video, audio, all kinds of things, vying for our attention when advertising the best way to grab attention, especially in kind of an unsolicited situation in a magazine ad or direct mail, is to do it with striking imagery. So having me skill set to do stuff like this just means that you're gonna be able to take your own promotional materials for your company or your photography studio to the next level. You send out a photographic postcard like that to clients to promote. Oh, I don't know. An event or to give him a coupon for their next sitting, etcetera. That kind of image is going to stick in their mind. They're going to see it in the pile of mail. It's going to be striking enough where it grabs your attention. So actually pick it up and read about your photography studio or your company or what have you in order to get more business. So this kind of stuff is really, really powerful, not only for doing it for clients, but for creating your own promotional materials. Any questions on on that? We've got some questions over here at the Internet. Okay, Okay. First question is from Sneaky Pete and wants to know Is there an undo option for brushstrokes while inside the refined edge tool? Yes, there. Is that that little eraser tool that we looked at? So let me pop open that dialogue. And remember, you can Onley pop open that dialogue when you've got an active selection on your screen. Otherwise you won't be able to get to it. So we'll go to the Selectmen you choose refine edge. So the tool that you'd want to reach for is that little guy right there looks like looks like this tool, but it's an eraser instead of a paintbrush. Great question. Thank you. So you then. So if you paint something, then you go to the eraser and erase it. It's not. There's no like Command Z or anything. No. So as you're painting around the edges with this refined tool, if if some of that painting causes bad things to happen, then you can undo that by grabbing that eraser tool and going back over that area. Perfect. Awesome. Thank you. And a couple of people would like to know, Um, Molly, Mom and Marie, do you use other techniques to take this even further to make her sort of feel more like she's like in San Francisco flying around like you do it in color, work or color temperature or stuff like that? That's a really great question and a great idea. I certainly could, so we can use, let's say, levels adjustment layer. If the lighting on the subject was just completely different than the photo, we're in pretty good shape on this particular sample image. But if you weren't, you could create and an adjustment layer of some kind. So a levels adjustment layer is gonna let you change the levels of brightness in your image. So it depends on what kind of fix you're trying to make. Do I need to make her lighter or darker to match the new background? If you If that's the case, then reach for a levels adjustment layer or brightness and contrast adjustment layer. If I need to change the temperature of the color of light, then I would reach for a photo filter adjustment layer. So let's just look at that one real quick. When you do that, it adds a very, very subtle warming or cooling to the image. It's not so much a color tent, even though it is a color tint, but it's like an incredibly subtle color tent. So what you can do is if the the If Supergirl needed to be warmer to match the Golden Gate Bridge, then I would choose one of these warming filters, and there's a slew of presets in there. But you can also tell elements what color you want it to use in the warming or the cooling. And then you're going to click this little button at the bottom left of the adjustments panel that pops open here. And that's just going to make that one adjustment layer effect one layer down so it would only affect Supergirl and not the Golden Gate Bridge. So that's a fantastic question. Thank you so much for for asking that. And you can see as I trot down this list of presets how it changes the colors but on Lee on one layer underneath so it doesn't affect the color here. So just depends on which layer you need to change. That's how you position this adjustment layer. But this photo filter adjustment layer is a real handy one tohave around when you're doing compositing like this, because often times like the lady said, you are going to run into where your color and lighting doesn't match between those two items, so this is a great way to fix that. But if it's more a brightness problem than instead of the photo filter adjustment layer, you could do either a levels adjustment layer or brightness and contrast to just kind of tweak that. But just remember that the way to make those adjustment layers affect only one layer down is by clicking that button at the very bottom left of that panel. And when you do see the difference between the thumbnail of this layer, let me activate something else. So it's not highlighted. See how the layer thumbnail on this layer is farther over to the left than that one. That's because this one is on Lee affecting one layer down. It's clipped or grouped to that layer underneath it. So the thumbnail scoots over to the right and then you get this extra little who hall right here. This little square with a downward pointing arrow saying Hey, I'm attached to this thing underneath me. Great question. OK, so rail Runner and Gary would both like to know, Can you enlarge or, um, uh, resize Supergirl? Absolutely. Let's do it. We skip this panel out of the way, they're just deleted. So the first step is to activate the layer that you want to effect. And you want to make sure that that little blue outline is now around the layer Thumbnail of the image and not the mask. Okay, so click to activate the thumbnail of the thing you want to resize, and then you can do one of two things you can, either. If the move tool happens to be active and you've left on that show bounding box option, then you can. Then you'll have re sizing handles automatically. We're not seeing them because my zoom percentage is a little bit too high. Someone a press command zero or control zero. See, now I've got those bounding box handles, but those drive me a little bit crazy or crazier has we should say so I leave those turned off, but that's gonna be your own personal preference. So what I would do since I don't have that turn on, would be to summon the free transform tool by going up to the image menu, choosing transform free transform or just by pressing commander control T T for transform. What? You're just gonna have to flip in your mind to think resize. So now when I do that, I don't even have to hold down the shift key to constrain the size changed to be proportional. All I have to do is click and drag on one of the corner handles to resize her drag outward to make her larger drag inward to make her smaller press return Or click the little green check marks when you're finished and you could have all kinds of fun with this. Why don't we duplicate the layer? It's duplicate the layer skewed her over duplicated bunch of them. It's a party now. All right, well, let me see if we can squeeze in one more thing before we break for lunch. The next thing we're gonna do and this kind of a neat Segway, because we're still going to create an interesting edge. And I'm gonna show you two different ways to do it. One of which the 1st 1 I'm gonna show you is using that refine edge dialogue box. So how on earth you're saying to yourself, Did she create those edges? Look at that mask that's pretty out there in it. It's more impressive if I turn off the visibility to other layers and we zoom in and you can see Look at those and is isn't that insane? How on earth How did we do that? You might ask, We use the refining dialog box on a rectangular selection, So let's do it together. I'm gonna turn off the visibility eyes of the players that I created for you. What you're gonna do to create an edge like that, I'm gonna zoom out to about 75%. There we go. I need you to see the edges of the document for this technique. So we're going to start by. You don't have to duplicate the layer is going to completely nondestructive cause we're gonna do it to a layer mask. So we're gonna grab the rectangular marquis, the top of the tools panel, and I'm just gonna make that options bar go away by clicking that little control. What we're going to do is dragged draw box Oh, at least about what looks like a physical inch in from the edges of your the edge of the campus there and release your mouse button. So now we're gonna add a layer mask, and what this is going to do is it's gonna affect the area outside the box. So depending upon how why do you want that edge effect to be? That's how much space that you would leave around these edges. So if I wanted the edge effect to be really super wide than I'd do something like that. But for this one, it works pretty well to draw selection about right there. Now we're gonna add a layer mask. So let's click the circle within the square icon at the top of the layers panel. Actually, we're not gonna do that yet. We're gonna leave that selection. Do as I say on his I d draw the selection and then and then trot out to the select menu and choose Refine Edge. You got that nice overlay going on for this one for this particular technique, I would try it. Using the view of a black background or a white background is gonna give you a little bit more idea of what the final piece is gonna look like. So let's just preview it on black. Now, let's turn on the smart radius check box and drag that radius slider nearly all the way to the right. That's it. Isn't that cool? It is awesome, isn't it? Now you can use thes sliders down here to further fine tune that this is where the contrast slider really slide really shines for that. So just depends on if you want partially transparent areas back yonder. Or if you just want you no more of a hard edge, you can use the shift edge to expand the selection. You can contract the selection. There is no end to the different looks that you can create with this. Now for this particular technique, I tend to stay away from the feather slider. That's just my own personal preference. But if you did click and drive the feather slider, it's gonna soften those edges, which almost which might be need. If you're adding a creative edge to a painting, kind of gives it like a watercolor relooking edge effect just in shape, not in color, anything but for this one. I don't want the feather slider to be on at all. So now from the output to menu, here's where we're gonna choose Layer, mask, click. OK, and that's it. Yeah, let's do that one more time on another image. So we use the exact same effect here, So I'm gonna turn off the visibility eyes of the layers that I created for you. We're gonna grab the rectangular marquee tool, come over here to the image and depending on how wide you want that creative edge effect to be. That's the space you're gonna leave outside of your selection. Now, trick for you while you're using the selection of the rectangular marquee selection tool like this is, I'm still holding down my mouse button. Let's say I want to scoot that selection up, but I'm not yet finished drawing it while the mouse button still depressed. You can press and hold the space bar, and that gives you the ability to scoot that selection around. So now I'm gonna make sure that I got her sunglasses in that and then continue drawing a selection when you get it just right now we're going to click to open the refine and dialogue, set up your preview color depending upon the colors in the image. One of these is gonna work better for this one. Previous on White lets you see the most detail and then come down here in turn on Smart Radius dragged the radius slider as faras. You want to drag it to create the effect she won. There's no right or wrong with this. This is all subjective, and then you can continue to use these sliders at the bottom to fine tune effect however you want. Shift the edges if you want, and when you're finished from the output menu, choose layer, mask and click. OK, now I've got transparent edges. So all I did right here for this layer as I just added a solid color feel layer, it's a quite drag it below that of the layer. That way, I'm not looking at the transparency. I'm looking at the actual image. Cool, nicely done. That was quickly to It was quick and easy, so that's good. I like to pare really, really hard, really, really easy.
Class Materials
bonus material with purchase
Ratings and Reviews
a Creativelive Student
Creative Live has opened my eyes to education on-line and out of all the on-line resources I have come across, Creative Live is the best and there's never a catch. Creative Live is one company I trust 100%. They never would take adavantage of anyone. I love Creative Live.
a Creativelive Student
Every workshop I have watched LIVE is absolutely FREE! And... there is a rebroadcast that follows that is free. It is only if you want to go back again and again and again - that there is a purchase price. The knowledge of the instructors is phenominal..... well worth the cost if you choose to buy the workshop.
a Creativelive Student
Love the class and have been thoroughly enjoying it. One question- has anyone else had issues downloading the files? It seems to only go up to folder 13 and most of day 2 is missing?