Free Preview: Different Ways to Play
Lesson 3 from: Playing with Pinwheels in QuiltingCheryl Arkison
Free Preview: Different Ways to Play
Lesson 3 from: Playing with Pinwheels in QuiltingCheryl Arkison
Lesson Info
3. Free Preview: Different Ways to Play
Lessons
Lesson Info
Free Preview: Different Ways to Play
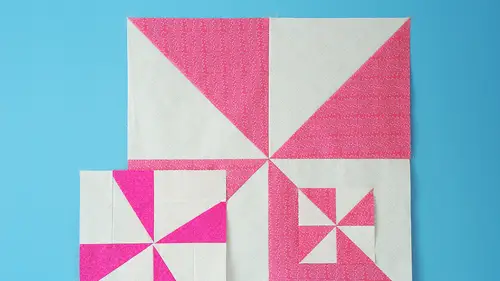
So now we get to think about playing right over the quilts that's their beautiful yeah, it's not a finished one, so I don't want to bring it, but you can see in here how I've done some fun things with the play I've extended, right? Pinwheels sometimes I've done even longer it's cut off, but this one, you know, has more triangles, but they're not all the same color, right? There's variations in this and I just, you know, sometimes you have blue and the idea goes and it's an incomplete one and there's another incomplete one, that one is extended, but the other ones aren't right that's just a basic half score triangle that that I played with, um and put it, this was another quote that was fun. I just made a whole bunch have scored triangles with no plan in mind I was going to ask, does that mean that you're not? You're doing your play with the fabric and not necessarily with your sketchbook at this point? Absolutely, absolutely. Okay, this is a bundle of fabric that I was generously given...
by cloud nine who's a company, they were launching a new brand of solids, and so they agreed to give it to me and I they're beautiful fabrics. And so I thought well what am I going to do and I didn't want to I improv is my language so I go I'd automatically default to that but I felt like I wanted a little bit more structure but this still gave me the chance to play so I literally split up my fabrics into two piles and made a whole bunch of half square triangles and then it was like now what I didn't know and I just kind of threw them up on my design wall and I said what can I do with these and I started randomly cem pinwheel shapes happened to get up on the wall and I thought oh I like that let's go with that and started to play with them that way and it became this quilt top which is not finished so you know you can see a picture of it but I'm not going to pull it up here in this studio right I'm going to show you another idea though for play this comes from my second book called a month of sundays and I will show it here on the table this is one giant pinwheel I'm showing it purposely off center one giant pinwheel right there's our pinwheel that that we've done right except each one of these is the half square triangle but that what would be the dark is made up of additional half square triangles where you get a pinwheel where you get a pinwheel where you get a pinwheel right? So this is an entire play on the whole thing you can see right one of the giant half square triangles and it not a difficult call to make and it's more play for that concept right? I really feel like I'm saying play a lot it feels kind of cheesy but but that's what this is right like I'm not going to use a euphemism or a senate him it we're playing let is have fun and get at it so let me suggest to you a number of different ways that we can play and again these air on lee suggestions no one says that you have to do this so whether you're at home or whether here in the studio with us I'm going to make all of these suggestions we're going to take a break you can mull it over think about what you might want to do and then we're going to come back and it's going to be a frenzy of sewing right? I don't want any like I don't know what to do it's like okay let's just cut some squares and see what happens, right? We're just going to see there's no consequences to what we're doing you don't have to use the fabrics you used before, right? We're just going to play, so let me show you a couple of ideas okay, so we can scale up or scaled down with our side simon and take your guys is blocks off you'll get them back right there is my initial block here's one much bigger right? This one is twenty four and a half inches as opposed to twelve and a half inches it is in proportion actually might be a little bit smaller because you know what I probably did is cut it to twelve and a half inches because that's what size ruler I had and then when it squared up it came a little bit down that's ok there's no final destination for these so I don't care what size they end up I'm not thinking about how they might match up you know down the line I'm just like well that's the size room where I had done right if this is the only size ruler I have than you can do that too if this is the only ruler you have while it's eight and a half inches cut them to eight and a half inches I have designed and made many a quilt solely based on what was the closest ruler at hand I am nothing if not efficient slash lazy so s oh yeah change up the size you can change up the size in other ways there was a smaller one here there we go right and I mean a smaller one too that finishes at six and a half inches the key to doing this is if you have a specific size in mind if you're not going to go with whatever size really you have the first squares that you cut should be ah half a nin inch larger than what this quadrant would be right so when we made our first blocks this we squared up at six and a half inches because to six and a half inch blocks gives us a twelve and a half inch right so this one I would have to measure again but if I start if I wanted it to be twenty four and a half inches I know this quadrant has to be twelve and a half so I would have started with a thirteen inch square to square up to twelve and a half to make twenty four to make a small block like this that means I'm starting this needs to be three and a half so I started four inches right does that all makes sense that that sort of progression in the math okay so then the other thing you can do is change direction right this is already a different direction these air the same direction yeah no there we go right these two are the same direction these were the opposite direction and that's what we talked about is which way is your pinwheel spinning right clockwise or counterclockwise different ways to do it all right. I like the photo that's up here because it starts. It got me thinking. Can I start now putting a pinwheel within a pinwheel? And then it becomes that positive. Negative thing right again. I started going off on tangents as I started to do things right. Here's the direction comment on things which it up rotated. Rotate the block, crop it smaller. What about doing something like this? I'm going to take one of these one change direction. Let's, turn it forty five degrees and make it smaller, right? Or turn it just a portion, right? I can crop it and I can change the direction in do different things by doing that who's to say it has to stay that size that shape, turn it into a rectangle, right? Your ruler is just a cz much of a tool in changing and manipulating a block. As your sewing machinists, you can change up the fabric. It doesn't have to be all the same. Right, there's. Another one. I've kept the background fabric, but that's. Not to say that. Every there's what? Eight pieces in there? Every piece could be something there. Different. Right? You could make it a minor, all very high contrast, you could go very low contrast. Right there's nothing saying that this pinwheel has to be high contrast maybe you want to be subtle maybe you're going to make subtle with with not try it if you like it, you don't know if you don't like it right until you try it in there. What about directional prints, right? You had directional prince in yours, tracy, right? You can do this where your direction is very intentional. Maybe your stripes are going to go this way and you're going to get a whole bunch of movement as it as it goes around. Don't be afraid to use directional prints. Don't also, I would recommend if you're using directional prince. Don't be upset if they're not all going in the same direction that gives you movement, right? And what is a pinwheel if not something? The inspiration is something that moves so if your directional prints like oh, you have a little fun dog and it's upside down. Well, you don't always view your quilt vertically. You view your quilt on your lap, right? So it goes in different directions all the time. Fussy cut fabrics, that's another thing that you, khun d'oh right is you. If you have something with a specific design or the repeat, maybe there's a large flower and you want to make sure the flower is on every single one totally play with that you can have fun most of the prints that I've chosen are kind of small all over designs but it's not to say I couldn't use something larger uh in there as well shape go beyond the half square triangles I want to show you a couple of examples of this because there are a couple of tips if you want to do it this way okay him together a taped together so I did this once I'm going to give you my progression and did it once and I made that and well I like the look of it I don't have points meeting up in the center and I thought I was being all smart ingenious I was like oh and I just have to do a triangle you know when I was making it I thought oh I just as long as I have the point here all right sorry what I meant is I have to leave a quarter inch and then all my point I won't be cutting off my point but what I did was that quarter inch gives you half a niche once sewn together and so I because this seem cuts off that quarter inch in moves it over right? So I that was a lesson I learned and if I hadn't played I wouldn't have known that but then I looked at that block so what I wanted to d'oh was this and even then I wasn't perfect at it, but I'm ok with that that's what? I was trying to d'oh, right? And because I'm making rectangles with this, I have to add on to make it square, right? Um, what you need to do is when we're doing a half square triangle and you cut an extra half an inch, cut it, cut these an inch bigger and you'll cut corner to corner, so I'm going to show you with the rectangle here. Hey, where's, my rotary cutter, this is one of the harder ones, so I'm more than happy to demo it for you. I'm just going to a random size triangle. I'm not measuring at this point, but I've cut, you know, foreign a quarter by a little over seven, right? And you're going to cut corner to corner, all right? We're going to cut before we so this does not go together like a half square triangles, ok? So we're gonna cut before we so and you've got to pieces and they would have in the gray as well right there, going together well about that, I guess of them almost identical to what I have not quite, but we can deal with out in squaring up if you just sew them together along that line. It doesn't work and I'll show you what I mean it was going to sew them together right corner to corner on there we'll show you what happens see I've done some of the play for you but you can certainly go ahead and do this on your own if the way I'm explaining it isn't making sense because then you'll see it right because it's the doing that gets us most of the time until we actually do it we're like what right I've done that and I get it but I've lost a lot of that background you can do it that way let me press that and squared up and I'll show you the difference because I'll do the other pair keeping in mind that my gray was a slightly different size so I need to square up anyways in this case so I've got that one way I prefer to do this is to actually offset these like that so you can see how I have little ears little tabs on the end okay give that a press press it opens so that we can see the difference they become different sizes this one is longer this one is wider let's see what we square it up too his tape for like the outside of your field did you know I like you have to make allowance for the quarter and seem right you can offset it's what that quarter inch seam is yet absolutely that's how I think about anyway, sometimes if you have these larger rulers, they have the angle that you need. So this is a sixty day review roughly, so I'm using that, but see, when I do this, this is what I meant by cutting off the corners. I thought I was so smart, I'm following this angle and I go there, but if I were to square up to here and then go to so that block together oh, this is what happens, right? So I need to go I need to ignore those angle lines on there, you're not going to notice slight variations in the angle, and I'm going to go to here now. I'm quite lucky because that's going to more or less, I want to have a point there and wherever I square up here, which is going to be a six and a half by three and a half, so I'm going to adjust that I need point I'm going right to the point, just like in our house, we're triangle where we had the point, so I'm going to play with my ruler until I'm there, so I'm going to be a three and a half by six and a half right there I'm covered everywhere, so it's kind of a weird squaring up that you end up doing, but it works okay, so that's what we have for that one this is the one with the ears and let's see what we get from this I'm still going to get six and a half look at that that's awesome just I'm ever so slightly in the one corner abel teo and three and a half so look at that I got the same way but I get that and I know that now from playing right um a really experienced quilter who's made lots of these kind of blocks may have known that already but if this isn't something that you've ever done before, you're not going to know it unless you play but see now I'm not on that corner see right over there I don't have a point so I really don't have the length that I wanted or I shifted this some way all right? So I'm going to end up cutting this just a little bit or I'm gonna have to stretch it and fudge it but you can see there's different ways to the end of it the key is just to know that you need points right when you want to start playing around with different shapes let me rephrase that if you want points on these right you may not want points that may be part of your play is that you're not having a sharp point in there so what happened when I saw this? I kind of liked this little bit that went there so I went, what does it look like when I get quite intentional inputting space in there right? So I did the same kind of idea for a pinwheel block but made my house were triangle smaller and literally added stashing in between plan on it was something to try I don't love it but but I got this got me to that right and we could play different ways another way that I love if the play is improv I've said it before that improv is my language so this is what I meant by sometimes the points don't always come together so I improv my half square triangles right just kind of guessing on my line not being consistent and it looks totally different right? Because and then I had to square these up they ended that being whatever I could get the size was I don't think this block is quite I think block might actually be bigger with this one smaller and they don't all meet in points but it gives a different look and I think a whole bunch of improv blocks could be kind of fun together but it was to try I the pinwheel block to me I like the points right so I want to go back to how I can get points but I played and then tried that I default to improv I love tio improv interestingly enough not as much of a fan for this or I need to find a different way to do improv right? So one of my ideas was well as I've been making blocks I have scribes cut up could eyes so all those scraps together and that's how I get my improv love but then I turned them into regular half square triangles right? So different ways to do things on dh then finally to other things is in your piecing of things that you khun d'oh right? I thought instead of necessarily playing with stripes this goes with that idea about things being subjective right? So what's my foreground what's my background so I took the same fabric as my background and peace to strip set and then turned that into something this becomes like super minimalist and like, is there a pinwheel there? I'm not quite sure but it's still got the construction of it, so why not? But it didn't quite work maybe if this we're different colored stripes or something that's was still got it but it was different was worth trying and then I thought, well, what about if I cut off part of my pinwheel so I took some scraps of my background and put them on the other side of my house? You know, it's that part is this corner covered up in a square so I'm still getting the pinwheel shape but something different, but then I looked at this and I thought, well, wouldn't it be easier if I made strip sets then and cut my half square triangles? All right, so one idea leads to another, leads to another, and you go off on tangents. So what I want you guys to do here in the studio and what I want you guys to do at home is to start exploring playing with those tangents, you know, how to make the basic block once one of these ideas or another idea that you have maybe the first one that you do that it's, like, try doing that, right? I'm just going to see what happens and then as you make that you're like, oh, well, let me try that then if that one didn't make me go this way, we're all going to end up with a different set of blocks in this class, but we're just going to go for it and see what happens, and we're gonna play we're gonna push that block up the hill over and over and over again with a big smile on our face the whole time because the challenge is part of the fun.
Class Materials
bonus material with purchase
Ratings and Reviews
Sondra
I have taken all four of Cheryl's classes and she is an excellent instructor. Amazing. She is clear, engaging, non-judgmental, informative and has a ton of quality suggestions. Can't say enough about her! I hope that she does more courses in the future. Thanks very much, Cheryl and Creative Live. Very inspiring.