Lessons
Class Introduction
20:10 2Creative Photography Path
22:57 3Importance of Personal Work
15:25 4Concepts and Inspiration
12:04 5Choosing Your Environment
05:03 6Research and Mood Boards
06:58 7Finding Your Style
09:34 8Establishing a Team
10:44Jobs on Set
28:38 10Production Hurdles
13:45 11Working with an Art Director
07:01 12Pooling Resources
03:43 13Casting
17:26 14Wardrobe
11:24 15Set Design and Props: Interview with John Lavin
35:06 16Gear
09:59 17Lighting
29:10 18Technical vs. Flexible Lighting
07:56 19Creating Environment
07:59 20Gear Essentials vs. DIY Solutions
07:02 21Lighting for Your Subject
04:10 22Lighting for Your Environment
05:17 23Q&A
08:36 24Directing Your Subject
34:03 25Tips for Directing Talent
09:58 26Pre-Lighting and Test Shoots
05:08 27Shoot: Stylized Portrait - Close Up Part 1
49:55 28Shoot: Stylized Portrait - Close Up Part 2
20:19 29Shoot: Stylized Portrait - Close Up Part 3
17:19 30Set Tour and Lighting Set Up
05:41 31Shoot: Building Environment & Lighting Adjustments
33:13 32Shoot: Building Environment Part 1
18:45 33Shoot: Building Environment Part 2
18:39 34Photo Critique
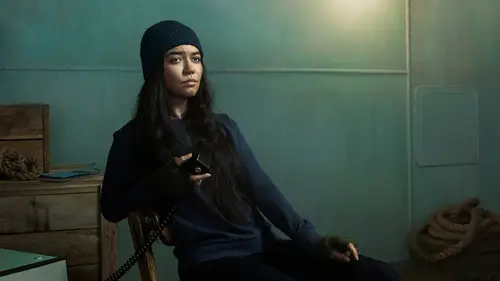
26:06 35Shoot: Row Boat in Fog Set Tour
03:54 36Shoot: Row Boat in Fog Part 1
42:19 37Shoot: Row Boat in Fog Part 2
28:34 38Shoot: Row Boat in Fog Part 3
24:34 39Shoot: Row Boat in Fog Part 4
04:10 40Shoot: Scuba in the Hull Part 1
44:27 41Shoot: Scuba in the Hull Part 2
21:50 42Shoot: Scuba in the Hull Part 3
16:40 43Image Selection: Stylized Portrait
30:53 44Image Selection: Building Environment
10:52 45Image Selection: Row Boat in Fog
11:53 46Image Selection: Scuba in the Hull
06:38 47Next Steps: Create New Work
05:44 48Next Steps: Share Your Work
12:03 49Next Steps: Marketing and Branding Consistency
12:52 50Final Image Reveal - Concept and Casting
13:20 51Final Image Reveal - Retouching: Communication and Direction
14:13 52Final Image Reveal - Final Q&A
34:52Lesson Info
Lighting
I like to think of lighting, as I mentioned earlier, is just a kind of a tool to create a mood. The first part of my career, as I said, I studied light a lot. It was, like, all I thought about. I would stay up all night for days on end studying other photographers' images and trying to understand how they lit things and trying to understand, is that something I'd want to incorporate into my work and then trying to mimic that. It was just, you know, it was all I thought about, and as I also mentioned, it was also something I prided myself on and I kinda got off track, I started thinking that the more lights you used, the better you are, or the better your work is, or the more impressive. Who knows. Whatever my reasoning. But I started just building all these lights and it was like, if you had asked me at the time, why are you using this light and this light? Probably answer was just because I can, or something, 'cause I have it, or whatever. But it wasn't really with a thought of like, ...
this actually adds something to the image, it looks technically, maybe more interesting to me. But the thing was, as I notice now when I do portfolio reviews, I saw in myself back then, I would be real proud of these images as I was showing them in a portfolio review to a potential client. But the reason I was proud is because, like, I achieved a new look. And this, I had figured out this light I had been studying for so long. And again, there's nothing wrong with this. You've gotta do all of this. But you can't stop there. You've gotta grow off that. And, but when people who are, buying photography for a living were seeing it they we're like, ah, I don't know. They don't care about lighting. They care about an image that's gonna speak to them. And say something. And also, they're thinking about how could I use this to, you know, in my job. Whatever it is that I'm doing or trying to sell or something. And so, I was so confused why is there this disconnect? These pictures are so awesome. I'm so proud of them. But no one is getting them or whatever. It's because, I'm focusing on the wrong things. I'm getting too hung up on lighting and the technical details. And I'm totally neglecting the entire process of making art or a photograph. And working with people and all that kind of stuff. And basically, what it led to was just stepping back and realizing my work had no soul to it. I'd gotten to a point where, no regrets, I've learned a lot about lighting at this point. But, it's time to start thinking about something else. And what is that? And for me, I finally, once I figured it out. It took a while. It was a soul searching process. I realized I'm locked in on people sitting in a certain way so the light looks good on them. I'm letting the light dictate the entire image. And I realized I need to start experimenting with emotion and movement. And reframing things. And that was so, so scary. It was like, one of the, still to this day, one of the most uncomfortable transitions I kind had to make. And it wasn't because this is what clients want. I knew I needed to do it too. I knew it was part of my journey. There was more to discover. And I needed to, I needed to figure this out. So again, it's easy to, I mean lighting is easy these days. We have access to it. I see people in portfolio reviews, and I'm like, how long have you been doing photography? And they're like, oh about three months. And it's like, wow, like, your lighting is on point. So, it's easy to do light now. Not to take away from anything. But what I think is hard is creating work with soul. Creating work that says something about who you are. I'll walk you through a few of these, a few of these lighting setups. Again, to kind of give you a little more context of some of what we'll be seeing in the photo shoots coming up. So this was the, my uniform series. As I mentioned, you see John there, who you just met. Basically here, who knows what a key light is? Is anyone familiar with a key light? All right so, maybe half of us. Anyone, have you guys, anyone heard of what a fill light means? Okay. So, a key light is basically, it's, if you're photographing, whether you're photographing people or products or whatever it is, a key light is generally the main light that's kind of casting the pattern. It's setting the tone. I don't, it's not always. But typically you could consider it the brightest light on set. It's, you know, the sun so to speak. And then we're filling in around there. So the key light for me, is this small, little gridded, beauty dish right above John's head. I don't know, maybe not small. But, it's the smallest one there. And then right behind it, is a large five-foot umbrella. And basically the key light is setting the tone. The problem, or issue, with this particular thing was everyone's painted solid green. So it's very flat. And so we're trying to create depth. At least for me. You could shoot it flat. And that'd be fine. But, I wanted some depth in these characters. And so, we use that small, hard light source to kind of create some highlights on their faces. The problem with doing that was then it created some really hard shadows. And it felt a little too heavy for me. Again, personal preference. You might like that. And that's great. That's your style. But, I used the bigger one right behind it at a lower power to kind of accentuate and fill in around the key light a little bit. So you could consider that also a fill light essentially, even though it's slightly mimicking the key because it's under-powered. It's accentuating but it's not setting the tone. And then this umbrella over here on camera right I guess on screen. Now, that was our true fill light. And that's coming in from either straight on or slightly to the opposite side. And it's filling in all of the shadows that the key light is not reaching. So, it's kind of like if you image if there's a tree and someone's hiding behind the tree, and you're shinning a flashlight at them, you can see the tree, but there's something on the other side. There's a person on the other side that is not seeing your light. So a fill light is someone coming in from the side and shining a light and illuminating them from that different angle. So it's those two lights working together. And it's, and I'll show you the final image here in a second. And then, the second thing that we did, was, I didn't have any light on the subject from the background. I generally don't like edge lighting. For me it just feels a little too flashy. No pun intended. Or, too heavy handed. I prefer lighting to be a little more subtle and moody. But what I did want to do is control the background light independently from the key light and the fill light. So, we have lights behind these two v flats, which are basically just foam core, big foam core pieces taped together so it forms a v. And you can just stand 'em up. And usually we like to use foam core that's black on one side and white on another side. So, the black side is facing the subject. Which prevents light from bouncing on them. And so we're not adding light where it's not wanted. And the other side of the v flat is shinny white. And so we're bouncing our lights into the white. And it's bouncing off into the paper. And so that's how we light the background. And then, the cool thing about that is if I want to change the intensity or the brightness of the background light, I can do that independently of the light on the subject. Whereas, in the past before I started doing this, I would just put a subject up on a wall and light them. And whatever falls off on the background that's your background light. You can do that too. That's nothing wrong with that. But you just have to understand what is it that you're looking for? What's the goal here? And then this is the finished image. And you can kind of see, on camera right here, on this side of his face and little bit on the jacket and the helmet where there's like little tiny, like kind of highlight spots, that's coming from that hard light source that's bouncing off and reflecting off there to kind of give it some depth. If we didn't have something like that in there, if you didn't have any highlights, you would really lose the depth of that image. With that particular image, or that particular set, were you able to, did you actually do any testing with that beforehand? Because I mean, you just not gonna get somebody to just paint 'em green just to do the testing or whatnot. Or I don't know if you did or not, but. But would you actually test that? Or would you have just been doing that on set? Well, I, yeah, that's a great question. And it ties back into what we've been discussing. We did the testing day of. And the reason for that was because this was a personal project for me that I was funding. And I couldn't afford to do a pre-light. A pre-light is basically, it's just like a fitting. We talked about you can do it the day of, or you can do it earlier. Pre-light is awesome when you can do it. It means you go in day before or whenever it is, you set your lights, and you work through all that stuff. And then when you come in the next day, it's set and you're ready to go. I didn't have that option. I just, I couldn't afford it. It wasn't in the budget. So we did that the morning of. And we sat there and kind of worked it out. What we did do was I had Jay Pop, our hair and makeup artist, come over, you know, a couple times before the shoot. And she was mixing green paint and just trying it on skin. And we were kind of looking and trying to get a color and stuff like that. John Laven and I went out, and we, once we had that color set, we found the props and items and stuff. And then he painted everything to match that color. So we did prep work. But in terms of actually lighting we didn't have the benefit of pre-lighting it. And that was tough. It was a long day. And we did everything in one day, including pre-light. So it was asking a lot of people. But, it's kind of the way it had to be so. Yeah. I had a thought about gear, backtracking briefly, it terms of when you talked about wardrobe styling and lots of extra clothing. It's not so easy to have an extra Hasselblad at your fingertips in case you drop it, or it malfunctions. So, how do you prepare for that for big shoots? Yeah, that's a good question. So I always have a backup camera. It's not always a Hasselblad. But it's a camera that I know will do a good job if needed. And then sometimes on, depending on the job, like, depending on the budget and like how, you know, what the risk factors are and all that kind of stuff, then I'll rent an extra one as a backup. So, it's not worth owning for me. But it's worth having when I need it, you know? So those are just kind of decisions that, you know, you have to make. If you were a photographer who, let's say used a Hasselblad and you travel all the time and you're constantly gone, maybe you're doing like landscape work and stuff, you may need to bite the bullet and you can't risk what happens if, not if, what happens when. Or maybe you decide that you're gonna find a less expensive camera and get two of those and that will work. I mean those are just all choices that everyone has to make for their own work flow. But, no matter what, I'm never gonna be caught with my pants down, so to speak. There's always gonna be something, when something goes wrong, that I can rely on. I'm wondering because you're talking about the lighting and the studio, and I mostly of my photograph is on location. Which, do you use a porty? Or what are you using on location if you photograph there? Do I use a what, sorry? A porty? A portable light? Oh, portable lighting? Yeah. Yeah, I mean, again that depends on, that depends on the situation. Like, you have to figure out, and this is all, this all happens in pre-production. Once you decide where you're gonna be, if you're on location, is there access to power? If there is, then maybe you plug in. You have, and then you have to figure out where is the power? Like how long is it? Do we need to get 100 foot stinger? Or 50 foot or whatever it is? How long do we have, you know. And so, but if you're shooting in the field, in the middle of a national part let's say, and there's no power out there obviously, yeah, you're gonna have to either use natural light, you know, diffused, or bounce. Or you need to get battery-powered strobes. And you probably wanna start thinking about having backup batteries. You know? You don't wanna go out with just one. And, do half the shoot, and then your battery runs out. And you don't have backups. So you need to kind of think through all of that kind of stuff. I wanted to know, which portable are you using? I use, I generally use Profoto lighting gear. That's what I know and like and comfortable with. Sometimes like when traveling, you're at the mercy of the rental house. Some rental houses don't carry certain brands and so, there's always that. Sometimes then you have to decide, okay, do I need to travel with my gear? So again it's just all problem solving. It's taking a situation and breaking it down and trying to decide what do I want this to look like? What are my restraints? What can I work with? And that sort of thing. You know, also things like if I'm shooting outside, well, really if I'm shooting anywhere, I'm always wanting to shoot tethered, which means connected to a computer of some sort because there's no camera back that's accurate. And, it's even worse when you're outside 'cause you've got reflections and stuff. When I started out early in my career, I would just shoot and look at the back. And it's like, ah, that looks awesome. And you get back, and it's like, oh, I cannot work with this. The contrast is not at all what I thought it was. Or there's no depth here at all. Or, the fill lights actually brighter than the key. How did that not register on the camera back? You know, so, especially outside when it's bright and stuff, you gotta make sure that you know what you're getting and you can see it clearly. Yes. So as opposed to a super complex scene, like we've seen you know with your family shots or whatnot composites, this is relatively straight forward, your subject's sitting, with the lighting that you showed us. And, two lights. How different is this as a final version from what you gave to your retoucher? So how much work was done on it in post? Oh a lot of work was done in post. I mean, it was just, it was muddy and gross. 'Cause it was raw, you know? We really did paint everybody. It was important to me that this, I wanted this, I wanted this project to be something that was practical. I wanted the actors to feel the paint on them. I wanted them to be able to, feel the weight of that. And I wanted to be able to respond to it visually, myself, 'cause it affects me and how I'm directing them. And, I thought it was also just important in terms of an art project to kind of experience that in as many ways as possible. To bring, you know, new life to this idea. I mean of course we could have done it, I could have photographed a person and just done it in post. But I felt like that was just a shortcut that I didn't want to take. Just cause you can do something doesn't mean you should. That's something that I repeat to myself and my team all the time. But yeah, I mean, it didn't, I guess, it looked like that in some ways. Except for it was probably more red and yellow. 'Cause that's the nature of raw. And there wasn't as much depth. I think we pushed a lot of contrast into this in post. And the other big thing was, there was a lot of blotchiness. You know what's interesting that we learned throughout this process is the particular paint that we used it takes on different color tones on different color skin. So even though, you would think, you can just paint anyone with it, and it should look the same. But it doesn't actually look the same. Someone with really light skin, it reads different than someone with really dark skin. So that was another lesson that we learned as we were going. We also had to hand mix the paint. So there was some variation throughout of all of that kind of stuff. So there was a lot of unifying color in post and stuff like that. This was probably the most difficult and time consuming and frustrating, not on the retouches part, but just like, hard projects that I've ever done in terms of post. And I asked a lot of my retoucher. And he did an incredible job. And, you know, it was a lot to ask. But again it was one of those things where we just had to communicate about it. And figure it out. So. For your retouchers, do you just send them your raw photos? Or do you do some post yourself before you send 'em? No. I mean you wanna give 'em your raw photos. I mean, I think if you talk to any retoucher worth their salt, probably, they would, they get so frustrated if someone does that. I mean, it's like, don't do that. I mean you're, you're just, it's like taking the wheels of a Ferrari telling 'em to drive it. You know what I mean? It's just, you can do some retouching yourself and send it as a reference. You know, I'll do that all the time. We'll send something back and it's like, the one thing I probably tell my retoucher more than anything is more contrast, less saturation. I usually go beyond what most people think is good. That's just kind of what I like. So sometimes it's much more efficient and easier to say, here's a PSD. I mean I took your image. And here's a PSD. And then they can see. I de-saturated it globally by 10. And I added this contrast curve. And so, you know, and sometimes I'll say, don't do this exactly. This isn't great. But this gets at the idea. And then they can do it well. But at least I've given them some sort of reference. So, I would, if you need to, if you feel inclined to do any retouching I would do it in that sense. But for goodness sake, if you're gonna let, if you want them to do the best work they can, you gotta give 'em the raw file. Yeah. So, what, what, do you send them over like a download? Or, like a? Yeah, I mean you could use like a. 'Cause I know they can be pretty large file sizes. Yeah. I mean DropBox is a great resource for that. I think, We Transfer. I'm sure there's others as well. But we, Is that what you use? Yeah. So, here's another one. Where we kind of mix some natural light. So this was a personal shot that I did. And I mentioned earlier, this was a little bit in response to a job where someone was telling me you can't do environment. And I realized I wanted to environment in my advertising work. And so it's like, we've gotta, we've gotta, I've gotta show what I want people to hire me for. And so, how do we do that? So, first thing kind of going back to scouting. I knew I wanted this shot to take place in a kitchen. I did not have a budget to build a kitchen. So it became, okay, we gotta find a kitchen. But I had very specific ideas of what I wanted it to look like. I wanted it to be very clean. I wanted it to be totally white. And there had to be a window. 'Cause I really wanted window light. And so what we did was basically we contacted real estate agents. And looked at real estate listings and stuff. And it took weeks. It was really hard. And a lot of people kind of, said okay and then backed out. But finally we found someone who was willing to work with us. The house was empty. It was for sale. And so I was able to go in there. And also I ended up, the real estate agent connected me with the home owner, and they agreed to let us use the house for free, if I would do some portraits, for the owner, had their own business actually. And I did some portraits for them in exchange. And actually now, we work together. And it's really, we have a great relationship. But that's how we met. And that's again another example of you can't let price get in the way. How are you gonna make this work? And you can pull off some huge amazing things for no money. You just have to think about what do you have at your disposal? And I can tell you right now what you have is a talent and a gift at taking great images. So use that to leverage what you need. So, we found this, we found this location that was perfect. And, it was actually raining. Which was like a little scary. Because I needed window light. So what we did was I shot a bunch of frames. And this all took place on the tripod. For this kind of thing, you can't move the camera. 'Cause it's gonna be a bunch of different plates. So, if you're not familiar, what plates are are basically just different images. But you use them to kind of overlay over each other. So each image is for a specific purpose. So this image was to capture the detail of the environment. This is the exposure that I wanted the environment to be at. The sink is blowing out a little bit here. I think that's just the contrast of our screen. But, I bracketed like crazy. Even if it was blowing out in the real image. We had an exposure for the sink. We had an exposure for the other side of the room. You shoot and kind of cover all of that. And then, you take an exposure for the window completely blowing out too. Which I have pictures of as well. So we get our environment. Then the next thing I do, is I bring in, I bring in the subject. And I want to see what they look like in that environment. I think here we actually did have a light firing out of the window. But we were doing a slow shutter to drag in light in the environment as well. So you can kind of see how, the, if you watch, especially by the stove or something, you can see how it's very similar. And so now I know what the light, what the light should look like in a natural situation on this guy. And this is what we call motivating the light. So, when you see someone sitting here and you see a window behind them, it would scream I'm fake, I'm fake, if the brightest light was coming from the other side of him. Now maybe there's, maybe there is a bright source over there. But, you know, again, there has to, everything has to be justified. Unless you can really convince me and explain visually why the other side is brighter, it's gonna look really weird if the window light is not the light, the brightest spot. So now I know, this is kind of what we want it to look like. So why don't we just shoot it like this. I actually, I like the light. It looks really nice. The problem is I'm shooting at a half of a second exposure. So, that's a really long exposure. That means he has to freeze. Which takes away my ability to kind of work with him. And express emotion. Which is what I want him to do in this case. I can't be like, oh that's the perfect millisecond. Freeze. You know. So we're just checking our light here on the subject. This is a flip around. So this shows you again what the key and the fill light is. So we've got that gridded beauty dish up top that's out of frame. That's our key light. That's setting the tone for the light on the subject. It's to my right. Which if you flip yourself back around is kind of, is also, not kind of, it is also the side of the window. But again, we're wrapping it to kind of, we're not trying to imply that the key light's coming from the window. But you could also assume there's more windows on that side. And then I have this big seven foot soft box that is generally I like to use it behind me. It's just kind of like, a non-directional, fill. So it just kind of fills in the shadows. It's not creating its own shadows. But it's just bringing up any values that are a little darker. And then here's a shot where, as you saw earlier, we still have a big light out the window that's basically mimicking window light at a much powerful rate. 'Cause again, to get the window light as bright as we need, it's a very slow exposure. So, the light outside the window is doing it at a much more powerful rate that I can freeze with the camera. And then we put that soft box up on the back to kind of cover his hair. Because the nature of using strobe is that window light outside is not gonna wrap as much as natural light probably would. And so again because we're on a tripod I don't need to worry about it being in the frame. I can take that out when I use my background plate that we already shot. Is that, everyone tracking with me? Is that? I know it's kind of a lot of moving pieces. And then, here is, so here is the shot. This is what it looks like when I'm photographing the subject. And again, I don't care about anything other than him at this point. We already have a shot of the environment. We saw that was the first one we saw. We have a shot of the window light. Where the windows are blowing out. So we're gonna use that. So now, I just need to get a shot of him that will blend into that entire environment. So, we're using all of our strobe now and no natural light. So you can see with out strobe how the kitchen itself looks a little darker than the plate of natural light that we did. So basically once we got all of those pieces together, this is where we ended up with. So, these are, this is a plate for the windows, which we shot separately. I think that was actually in the end. We tried one where the windows were just totally blown out. And I think it started to feel a little too, not heavy, but too distracting. There was too much white going on over there. So we, we found some detail. That was actually a shot from my backyard that we just put in out there. And then, we put him in. And the shot of him is just the strobe on him. And then we have the plate of just the natural light in the kitchen. And so that's how you motivate light. That's, and mix strobe and motivate light. And that's why we did it. Why use that complex process? Not just because it sounds complicated and cool. But because, the specific reason was I would have just done it in natural light if the exposure was fast enough. Maybe on a certain, the Hasselblad is terrible, not so much the newer ones, but, historically is terrible on a high ISO. So, you've got, I have always had to shoot it at like 100 ISO. I don't have the luxury of going up to like 6400. I know a lot of SLRs these days you can really bump up and you don't lose a lot of clarity. But that wasn't a benefit I had. So. Any questions on that? Yeah. So when you're shooting the different plates, are you keeping track with exposure values? Or, are you saying like, okay, I want his, shadow side of his face to be like two stops under the window? Or are you just doing that in your brain? Are you metering it? Yeah I, that's a good question. I am very much just like I feel it. So, it, when it feels right. And I'm shooting tethered. And I'm seeing it on a color calibrated screen so I know what is on the screen is what I'm getting. So, I stopped using a light meter a long time ago. And it's just more a feeling for me now. And I'm sure someone could come in and technically show me why some of these pictures are not right or whatever but, if it feels right to me, I'm okay with it. That's kind of, that's, not okay with it. I'm excited about it. I want to be excited about it but, I don't feel that I need like, that, at least for my process. Some people might prefer that. And that's fine too. Thank you. Another question regarding the composite, from Jane Aimes who says, do you have to be considering sort of the height perspective, the lighting focal, and the focal length, and the aperture and the lens type, all of that? Can you speak a little bit to those considerations when working on a composite? Yeah. That's a great question. You absolutely have to consider your angles and all of that kind of stuff. This is, in terms of like, technical detail and stuff, this is probably ideal situation because, even though it's a different plate, I am shooting him in this environment. So, going back to the original shot. The first thing we did before I took this plate, was I had him come in, where I knew I wanted him to be. And I focused on him. On his eyes. And then I had him leave. And then that sets my focal point. So, naturally, depending on your aperture, I tend to not shoot tac sharp throughout. That sets the background will be a little out of focus. In a way that feels most natural. Now if you shoot him and, let's say I hadn't thought about that, and I shoot him, and he's at f8 or something. And then I shoot the room at f19, you're gonna see some fall off on him and then no fall off on your environment. And that's gonna be a major cue something's wrong here. So you wanna avoid, you wanna maintain consistency. You don't wanna call out the fact that you're doing post production. I don't want people to, I don't, if my work is interesting because it's done in post it's not actually interesting at all, you know? It shouldn't be noticeable unless I show you these images. So, we set the focal length. And then we don't have to worry about camera height and distance because it's all, I never move the camera at all once we set that. At the end I think just for total safety, once I knew I had everything. I did take focused pictures of the background and all. Just in case. You never know. I'll over shoot more than I need but, in general, kind of the way we talked about at first, is the way to go. If we were shooting this environment and I didn't have the subject there that day, that becomes a little trickier. Then what we do is we measure the height of the camera from the floor, and then we measure the distance from the camera to your focal point, or where the subject might be. And then, you have to kind of write down lighting and things like that, and kind of, you have write down angles. Like, where's the window in relation to this. So then you get your person in studio, or wherever it is you're gonna photograph them, and you do need to recreate the height and the distance and all of that stuff because if I shoot the environment from here, and then I shoot the person from here, the scale is gonna be completely wonky. It's just, it's gonna read really quickly to anyone, even with an untrained eye, that something's wrong. So, I'm a huge believer in maintaining consistency and all that. And, in the, in one of the first things we talked about in this course today I showed you some of those conceptual landscapes. That's why I always start with the least controllable element. Which in those situations is your environment. You can't control the sun. You can control up what time of day you show up. And you should definitely take the best possible option for whatever you're going for. But you get that first. Because then you can control the light on your subject. You can mimic the sun. But you can't dictate nature. So, I always try to take an approach like that where you think about, what do I have control over? And what don't I? And then how do we make them come together and work?
Class Materials
Bonus Materials
Ratings and Reviews
a Creativelive Student
What an amazing show. I'm so happy that I could be a part of it. It was so great to see John at work and in his element. I learned so much from watching his process from beginning to ending. So many questions have been answered. I feel more confident, to get myself out there and create and make work that comes out from my imagination. I will definitely be keeping a journal/notebook with me at all times. I would also like to suggest that we have another course for John Cornicello, home studio. I'm curious to see what John is working on in his studio.
Doppio Studio
It's amazing to watch and understand how this great creative professional work. There's a lot to learn about with his production process. For me, that lives in Brazil, is a major opportunity to enjoy this class.
Vitamin Dee
Wow! There's just so much great information in this class. If you've ever wondered what it takes to produce an environmental portrait, this is the class for you! John did a superb job of taking us step-by-step through his process. From model casting to set building, lighting setups to culling; it's all here. He even wraps up the class with next steps and how to put it all together. He gives the knowledge so you can take it to a place you can create your own magic!
Student Work
Related Classes
Portrait Photography