Lessons
Class Introduction
01:36 2Fundamentals of Night Portraiture
04:49 3Gear and Preparation
16:50 4Basic Settings
08:15 5Locations
06:15 6Subjects
04:22 7Safety
02:25 8Beating Adversity
01:28Lesson Info
Fundamentals of Night Portraiture
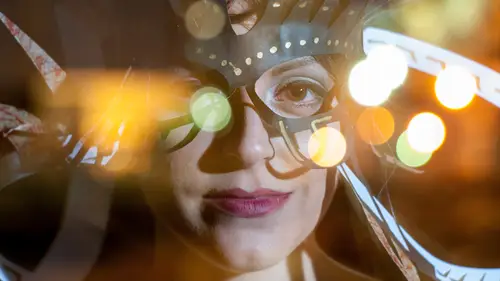
Let's talk about the beginning. The beginning is fundamentals. How do we start to even think about making portraits at night? Cause it is kinda complicated. I'll break it down for you. First thing you need to do is get a great ambient exposure. Don't even put a person in your frame. The second thing is find out what your portrait exposure is for whatever light source you're using. And the third thing is how do you demonstrate that it's a night portrait? It's a good question, right? I call that time bending. What elements can you exaggerate in a scene or pull out through photographic processes to say this happened at night. It could be a night sky, or it could be so bright that you have other things in motion. We're going to cover all of that. Let's start with the ambient exposure. The ambient exposure is how much light is available from all light sources that just exist? You take one exposure for that. In here you can see that I've controlled the highlights of all of these city buildin...
gs. That's a good example of getting a good ambient exposure. Second, what's the portrait exposure? I'm gonna zoom in and show you, I used the flash here. So my model appears out of the darkness because I used the flash to illuminate her. And the third is time bending elements. Pretty subtle in this one, but even in Central Park in New York City, I got little mini star trails. So there's the time bending. And I like subtle sometimes because when somebody is studying the photograph they go "Oh wait a second, those are stars." I love those moments. They make me very happy and they make me do this over and over again. So this is the whole portrait together. Combining ambient plus a portrait exposure, plus a little bit of time bending. But then I always ask What If? What If is one of my favorite questions. It drives me to create things that I've never created before. So my level up on this one was what if I add a pixel stick? Ahh, if you don't know what a pixel stick is, stay tuned. On the left you'll see the first exposure. On the right I used everything I used before plus I added another time bending element which was light writing with this tool called the pixel stick. So you can see as we zoom in, all I did was do the same thing and walk behind with a custom brush that I made and wrote this light in the air. How do we do that? Well, I'm gonna talk more about that as we move on and on. But most of all it seems like this might be a little complicated. Honestly it is. But you don't have to worry about it because I have this simple formula. Set your camera, achieve the base exposure, choose a proper portrait exposure and then add some time bending elements. Pretty easy, you got your four steps. You might do variants on stuff throughout this process but it's not really much more complicated than that. But you have to get good at all four of them. How do you get better fast? Ugh, that's the big question, right? Number one, practice often. What does that mean? Go out and shoot. That's why we're here, we love doing it. Number two, have patience. If you haven't done night photography before, you might have to ease your way into this but when you're taking long exposures, they're long exposures. It's not a fraction of a second, you have time to sit around and think and enjoy what you're doing. Patience comes with this. Third, be curious. What If is a symbol for an exaggeration of curiosity. But while you're sitting there say, "Huh, what's happening around me? What can I exaggerate?" Next, review your results. This is great for all kinds of photography. Look at what you did, study it. What worked, what didn't? And most importantly, get uncomfortable. You get those little butterflies? You're in a good place. And then once you've looked at all this stuff, do it again with something different. Make it better. Take what you did and level it up. And on top of everything else, don't panic. That's why you're here, learning with me on Creative Live and I promise that you will rock it.
Ratings and Reviews
Jan
I learned some techniques in Matt's class, which were helpful, but believe this was for the advanced photographer and i was a little confused at times. i would've liked to know the "how to" with the lights, showing how to program them with more detail. I am just learning how to set my camera for different lighting situations. But a very interesting course and glad i went through it.
Kirk Edwards
Great class! Liked it so much that I booked a trip to Colorado to work with Matt and Lance on one of their National Parks at Night classes. Highly recommend.
Margaret Lovell
While I believe this course is more beneficial for a photographer with better night photography and lighting skills, I learned quite a bit. This class made me think of some interesting ideas, especially using regular light sources such as flashlights or a pixelstick.