Lessons
Lesson Info
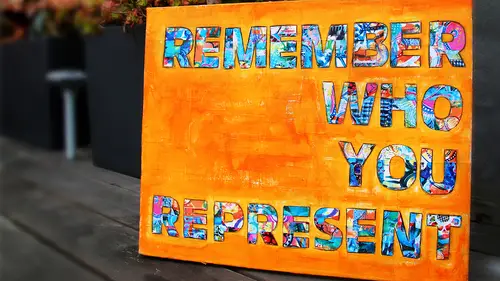
Surface Additions
So I'm going to go on with my next step, I see you guys are getting years dry, then what you're going to do is place your words on here so that you like where they are sky feels kind of like, I'm covering all of this up, it's ok, we're still going to see some of the patterns, even though if you look really close, you do see some of the pattern around here, so we're not covering it up with a totally opaque like I'm not spray painting this that block black, although I could I'm not doing that, I'm still able to see some of the pattern through what I am seeing is also the the texture of the layered paper, so I'm going to talk a little bit about texture we have deco art was very generous and sent as a whole bunch of mediums, and one of them is modeling paste, and what I can do is take a palette knife. This is just to add a little extra texture to show up where my words aren't, so this is just adding some interest. I'm going to take a stencil and throw on a little bit of this texture now I'...
m not doing a whole bunch and I'm not even filling in all of the bits of the stencil, and it just slipped, but that's ok really hard for you to see they're going to do it one more time and hold it up before I take the stencil off so I'm throwing some of this texture paste onto the stencil I'm not filling it all in yet I'm not covering the entire part. I'm just kind of getting fragments of it and I'm gonna hold this up so you guys can see ok? So I've puts the texture pace through with a palette knife on its side, not filling in every bit of that. But it is it's going to dry white, but we're painting over this, so it really doesn't matter. Gotcha. Okay, good question, kate. Now I do need to be careful when I lay this over multiple places like I wasn't thinking about that. I laid it over where it's already right there. And I got some of it on the back of the that's. Okay, it's just it's texture, right? This is that's. The whole idea there so that's a little bit of texture, stencils and modeling pace do not play well together as far as if I let this modeling pace dry on here it's going to build up thick layers of my stencil and it's not going to be as crispin oven image later, so I was want to make sure that I wipe my stencils off usually if I'm close to a single just run back to the sink and scrub it down but if I'm not I'm going to grab baby wipe their or whatever I haven't hand which is paper talyn water that works and I'm gonna wife my stencil off usually I think of my stencils as tools and I don't wash him off afterwards the exception to the rule is jess oh texture paste gel medium now we just used texture paste I'm gonna get that drive but I want to add a little more texture to this so they also sent us some crackle paste that did it uh so I'm going to take some of this crackle paste on I'm just applying it with a palette knife in a few areas remember we learned the rule of threes if I apply it in one place I'm going to apply it in come on students three places there we go the thicker the layer the longer it's going to take to drive with the thicker my cracks will be the center of the layers the finer the cracks will be so I'm just applying this with the palette knife now there's even another way that I can get texture on the surface so we've got crackle pace who got texture medium um I can also add paper that has texture in it all of you in your original envelope have maybe a doily and their remember seeing that a doily thiss doesn't I don't always use the doyle because it's kind of lacey and it may not be my aesthetic for the piece that I'm doing, but I want to show you how cool this shows up underneath, so I'm going to glue I'm going to use the gel medium and I'm gonna go out I wasn't using that before is using this one and the reason I do this after I put my words on there is I don't I don't know where I was going to put my words on their right, so now I've got my words placed I could do all these mediums and techniques to the surface before I painted out, and we'll be just fine, putting a little bit of that they're one place, three places remember I showed you I don't have this for everybody remember I showed you before the paint that peeled off of my stencil, okay? That's great texture could throw that down on, they're not going to, but that would be a great use for that it's going to show up its texture underneath the paint layer that we do over top. What I'm going to do at this point is I'm going to go ahead and force dry my texture paste and because we're in class like this, I'm going to force try it ideally, you let it sit an air dry okay, I am not a patient person when I'm doing this I have a limited amount of time most of the time I'm teaching a class everything needs to fit into two hours so we do four strike things again it's not ideal if you have time to let this sit overnight fantastic a couple hours should be adequate we're just going toe we're just gonna make it dio make it work so we're using crackle paste here which is going to dry white and it's going to have a crackly finish there's another way to actually crackle the surface of your pain we're not going to do it because we've already thrown this crackle paste on here but another way that I'll dio I'll create a crackle finish on the surface of my collages all drizzle some good old white school blue overtop okay, drizzle it over top and then when I paint over top of that, what happens as the top coat of the paint dries the glue cracks so you actually see through which is really cool effect on this because we're painting over it with a nope hey paint on when it cracks through you see your background in there it's really interesting so you guys worked with these meetings before the crackle pays texture pays texture, paints, texture pays you have a little bit of crackle model all excellent did you use it on a canvas or on a art journal page on our journal page? Ted's okay, downtown, great. Can you think of ways that you would recycle your artwork into some of your jewelry designs? Sweety, yeah, I would think maybe etching you could transfer, you know, just a cz you did here, um, you would release are walking like, yeah, you know, waiting that's something I haven't really thought about. Nine e matched with black and white photos before, but I hadn't really thought of the artwork. Yeah, that would be really cool, and I think you could also incorporate into your kind of your tags and you're, you know, ephemera around your jewelry absolutely make a statement, absolutely that the rate point, kate, when you're selling your art like let's, say you have a jewelry design business, but you also love to dabble in this mixed media art, you can make your tags or the things that your hearings would hang on, you can make tags out of copies of your art. It says a lot about you and your line and additional cool idea absolutely so I think the key thing to remember is to continually take pictures of your artwork as you as you go, because who knows what part of this is going to make it back into so I question for you so when you take all of your photos yeah do you organize them in some way or do you ideally would you work and ideally I would my engineer has been with love for me to have my my photos more organized um artistic me is like I don't know today I'm going to put these in a folder that says creative skills and tomorrow it's going to be class sample so yes, I do have folders that I that I dumped you know imagery and I try to name it something that I can remember when it comes back that this is art that I want to print in part to print right? Right. Um so yeah that's a great question and it's also maybe I might think about organizing by color oh that's a great idea because when I were leads or thing I have all of my brilliant whatever it is by color so it is tracked right paint beads, color even if it's titled that way that's a great idea, you know, like I would never know what to maybe a title this be the light but what I know that it was blues and oranges because in pinks, right? So if you put in the title that's a great I don't know if you guys all caught that on what kate was saying about organizing her photos and titling them or putting them in a folder with color because if you're looking for if I took pictures of this art and I want to do something that I want to use a lot of blues in our blues and purples if I had this organized in such a way that I was able to come back and say, oh here's a whole folder full of blue art right? I did some custom some some things at christmas time in my etc shop that I let people kind of select what colors they wanted and so one person did say I want, you know, pinks and oranges and it was really it was a challenge for me to go back and find something that had pinks and oranges to do in her background but the fbi had had them organized that way that would be great I mean when you said here's your addition your color palette so that would be a way to really think about it yeah okay so this is feeling to me dry enough that I can go on to the next step it's not, you know super super dry but it's dry and built up a skin that's what I say it's built up a skin so when I put my hand on it it's not coming away with the medium on it so that'll be ok I'm going to start out with a thin layer of jess. Oh, again, you might think, oh, I wanted all that work and now I'm just going to cover it up it's okay? You saw how easy that it was a lot of work, but it wasn't like that much work less than an hour kind of therapeutic, it was kind of fun to dio so you could do it again. What you want to do is make sure that your edges are down on the post, it notes, and I'm going to start with not a super wet paintbrush, so I'm gonna dab some of that off. I'm going to get my palate she I don't like using the paint directly out of the jar because it does get contaminated, and I've had some of them turned really funky because there's some organic something that got on there really ended up stinking bad, so I am going tio use a palette knife and put some of this out on my paper palette. You don't have these fancy shmancy palate pads from art alternatives you can use freezer paper, but I think it's worth it to get these pallet pads are fantastic and I'm gonna take a damp paintbrush I'm using a one inch flat brush for this I'm going to start from the inside of my letters on I'm just going to brush out now can you imagine why I'm not brushing towards the letters? It'll lift him up and push the paint behind him, okay, that the post of no paper is really thin and so it may start to curl up, but once you get that first layer on their you're good and I don't really want to see well, I could see brush strokes that could be just part of my design, but if I do see the brushstrokes, I want alternate them, so they're not all going one direction medium I'm sorry and very using now, this is jessica, just just just just so and I don't do not watered down no and it's not covering every square and jess, so to be completely opaque needs to have a couple of layers fills up on it, and I don't really want that what I'm really trying to do is prime the surface with just a kind of a milky ah white ish pattern because then I'm gonna come over this with another color white ish milk if it's totally wife that's fine, but you know, we did so much work to make that beautiful background underneath there, so I do want to see some of that through just not necessarily the color of it, just that the pattern design is showing through and when you're drying, the texture pace in the crackle pace and anything else that you have on there just a skin is fine it'll drive I mean ideally if you were doing this at home you would get it really dry let it sit overnight but in a classroom situation like this it'll it'll end up drawing eventually so I am alternating my brush strokes I'm not going all in one direction like I says one direction again uh you guys thank you makes me feel right at home there's just no need to cover the crackle tio yeah just get a good layer of just over everything and once that just so is covered I'm going to go ahead and get it to rye and this is covered enough see that I'm going to hold it up like this so you can see over there a swell you can still see some of the pattern through that's totally fine but in fact it's great that you could see some of the patterns through um but there is a layer of the jess oh everywhere jess oh nothing rex the good brush like jessica so go ahead and dip your brush and water you want to clean it off you can then we're going to get a dry ok so my jessa layer is dry and I have a lot of extra just so too but because it's not tainted or anything like that I can put it right back in the container if I'm feeling like being conservative if not, um, yeah, I usually do. Just skip this back up in the in the container again. I have a big, huge piece of paper in my studio that I swiped all my extra paints and things like that onto it. And I'll cut it up and use it as collage paper later. Or turn it into a book later. Um, it's all kinds of ways to use this, rather than wiping it, washing it down the drain. And, I think. Or rather than throwing it away, I was twenty one to try and re use as much of my mediums as I can.
Class Materials
Free Downloads
Bonus Materials with Purchase