Lessons
Lesson Info
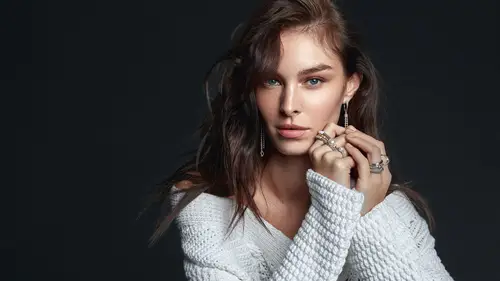
How to do Local Dodge and Burn
local doctor. Good morning is like grabbing your dungeon burn toe, which is actually here. This is dodging burnt. All this is like if you, you know, you start, it's very low. But anyway, if you start like scratching on the image or a drawing on the image, what you're going to get is like it's going to elevate the range that you set here, right turn, shadows, highlights and by the value or percentage that you said you said there, that's the thing. And now what you do is that we split that into two cars layers, which is going to be very efficient for the following reasons. We have masks. That's so we can manipulate masks, weaken, delete parts of the mosque. We can brighten it or anything like that. We can draw on the mosque, and it's It's not about like, Oh, I have to do it again. We have to Rio. You know they're awesome tricks, but still it's not too efficient. The only problem with this is that it's like it's two layers. So while we had one layer for the simple dajun burnt or or like t...
he simple gray layer and that on soft light mode Dajun burn tour. Now we have two layers on going between those two. It's a bit difficult in a way. I mean, ivory Sted just, you know, like, Okay, I have to dodge that. I'm just going Teoh Dodge, You know Andi. Okay, but now I have to burn. Oh, wow. I have to switch. You know, that's what you do. Now, here is how to use this. Um, you have, You know, Dodge and burn the burn. Looks like this. So just a minute. Turn dragged down. This is you know, the amount are use. You can use a different amount. You can. You can drag it down like here. Not this one. You can drag it down more or less, but just keep in mind that try to use the same amount every time. Every time you used this because you can get used to this. And then you are okay. I knew how much I have to dodge there. I'm going to move it like three times and know it's over exposed because I thought, you know, I had the same, but not to set the same stuff. If you can't make turns, Dodge is just the same just up. I am very used to these values on what I do when I start with this. Just put on my Lou Eminence. And here is where practice comes in, what you need, Teoh know. And I know that there are some retouching studios that are only going to hire you if you know, like, and that to me, you know, my human and it to me anatomy. And that's what you need to like apply here. You have to know from practice and also from, you know, like, well, basically practice, that's that's the main thing. I mean, you can learn about how how it works, where those bones are, which is great, but with practice, you can just kind of bypassed that. Basically what I'm trying todo here is just I have these shapes and these shapes. I want to make them cleaner. And I want to make them, you know, like simplified so that people are going to look at those parts of the face that I want them to look at, always work with a very, very soft brush. Oh, wow. Okay, is getting bigger. Great. Once again. Okay, So I would work with just a 0% softness of the brush. Now here's the thing. I am working on a tablet, and it can be like pressure sensitive. Some people like that. I used Teoh do retouching like If I pushed it down harder, it became like a bigger brush and then the other way around. I don't think I do that anymore, but I don't dislike that. It's just that your personal preference, you either want that or not. I would never say that. It's just don't do that. Just do whatever feels right. I knew that when I did that, it was okay. So now, dodging and burning, I'm trying to identify the that. Oh wow. I'm trying to identify these areas that are problematic and need to be done with an arm modifying the flow 0%. 1%. That's right. The flow is going to provide you with a buildup of your of your drawing. You know, like what? The friends, it can flow and opacity, right? Everyone is not a great so it's just a build up and that's what you need, because with opacity, what you would need is like draw one up, draw another one up and and that's just not what you want to do. You want to be like, as I mentioned, like a horrible painter. So what I do? I I just saw that that light area there that I wanted to get rid of just taken together. You see, it's now it's a very simplified part of the face. Like if I, if I were to keep that in, that's almost like a bump, which is non existent, is just that the highlights? I mean for the strobe, That's the way it form the face. But I don't want that there. He probably looks nothing like that in a sense. So that's what I'm trying to do, always like, zoomed out and just trying. Teoh sort of equalize the whole thing and like getting Teoh dodging and then, you know, getting these areas out like I don't want shadows on the ice too much. I'm not going to, you know, erased the whole thing. I just don't want it too much on you can see I'm here. Is this highlight? I always looking for highlights that I like, you know, like broke, you know, when you have, like, a highlight here, But you have a shadow across if you just kind of unify that highlight No, every time. But most times it helps to have, like a clean or image, you know, So that's basically what I do.
Ratings and Reviews
JIll C.
Viktor describes his method of organizing his Photoshop Layers for all the typical edits that he will apply to an edited portrait. He also clearly demonstrates the power of Curves Layers to make tiny, but useful edits to an image. This is definitely a class I will have to watch over and over to be able to take in all the subtleties of his process. On the sample image, each of the individual edits are hardly noticeable, but the cumulative effect is a dramatic improvement in what appeared to be a very good image to begin with. Mostly what I learned about high-end Retouching is that I have a lot to learn!
Mitch
Loved the class. Viktor teaches the why behind retouching techniques and encourages students to think about the image before applying techniques. One of the best online classes I've taken in a while.