Lessons
Day 1
1Essential Retouching Techniques
55:08 2Intro Q&A
25:31 3Portrait Retouching
1:10:38 4Body Shaping: Liquify
25:37 5Beauty Retouching
1:04:41 6Shoot: Portrait, Beauty, and Avant Garde
41:29Day 2
Workflow and Lightroom
24:15 8Beauty Image Retouch Review
40:08 9Portrait Recap and Frequency Separation
15:40 10Frequency Separation Q&A
25:21 11Blend Modes
11:32 12Creative Techniques: Color
14:40 13Miscellaneous Creative Techniques
08:13 14Faux HDR Look
12:53 15Avant Garde Retouch
23:25 16Displacement Maps
35:10 17Audience Image Retouching
17:14 18Special Shoot: Halloween
24:59Day 3
19Compositing Basics
45:55 20Compositing Examples
26:01 21Creative Skin Effects
21:12 22Additional Creative Techniques
22:21 23Retouching Dark Skin and Q&A
17:13 24Common Problems
29:12 25Perfect Mask Plug-in
13:37 26Audience Image Retouching
18:46 27Sharpener Pro and Color Efex Plug-ins
30:41 28Cinemagraphs
37:32Lesson Info
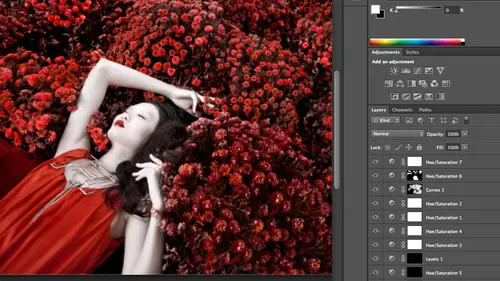
Portrait Retouching
A couple things I wanted to say now that I remember things, I forgot I didn't say, you know, okay, um, first one to merge all into a top player and this is why I was doing and they actually turned something on now, so if I hit a button and you can actually see it. So that's now on my computers, you guys will see um, it's command option shift e copies everything below. You have to be selected on the top layer, its command option shift e it copied, emerges it all into a new top level there, but it keeps all the original there. So for some reason, I have to go back and you realize, oh, I photoshopped over this part of the skin and you need to back up a little bit or cut and paste all your original information is still easy to access. So the other thing that I wanted you guys to make sure you knew, uh, we talked about how in, um, light room you guys can use presets, and I don't know if you've ever used actions before. If you have a siri's of keystrokes or things that you're doing, you can ...
save it, and actions will run and do it for you, you can save your brushes, your favorite brushes as presets as well so let's say that you know when you fill in under the eyes you have roughly for your purchase like for example in your studio we know most your head shots or maybe this this big and so you know that it's the brushes two hundred pixels wide fifty percent softness at forty percent of capacity enlighten you khun save that and then easily access it what you khun dio for example here I'm selected on my clone stamp s if you come up to where you see the clones sam symbol and click there if I click on the new document that's a new document symbol but here it means new tool preset you can click there and you can name it so I could call it four light sinning under the eyes whatever you could you could have that and now we'd be able to access it so if you have something you're using over and over again whether it's clone sample last tow away, whatever it is you can save it and I I have about on my home computer I probably have about ten that I regularly access and then of course you can modify them they don't they're not rigid, you can change them after the fact all right? So we're going to go back through this is one of two skin softening things that I will show you today of one more trick tomorrow we start off with image gnomic portraiture and how I use it as I select targeted areas of the skin I soften it based on those areas on so I can apply a lot of softness to the back a lot of smoothing son actually softness less moving to the back and then maybe do something less or more subtle to the face and then merge them all together okay, so now we're doing something that is skin softening or smoothing using high path in the way that this works is very funky uh actually will softened and blur things and it gives you a lair to paint in smoothing basically is what you're doing you're creating a layer that will allow you to paint in smoothed out skin so walk into these steps very slowly do you want to take your layer and you're going to duplicate it and you're going to turn your layer to soft light and so bland moans we're going to talk about more in the future I use them all the time and we're going to use them mostly in this section for bringing out the highlights and shadows on the face is to really enhance somebody's features so we will be getting to that but for now you want to switch your blend mode too softly and then this is where the watcher or magic new tool okay um command I is your inverting inverse ng that's that effect and so we're going to zoom in and the next step you're going to take is you're running your high pass filter suit filter other and high pass and so I think in this example, what I'm looking for in a zoo man is I'm looking for this is basically my smoothing lair I'm looking for a level of softening and so you know, if I completely obliterate all texture that's no good to me either, so I don't know there's not really a right area I usually pick something between ten pixels and thirty pixels it is something like that, but let's do something at this point around twenty twenty pixels you can see the before and after you can see a little bit how it's kind of been a little bit smoother, so I said such switch here you see this, but right now, at this point when you flip back through this is just by just doing the high pass on the soft light and inverted it's just soften, so it is blurry you've lost that detail so that final step is you use goshen blur and you're taking a layer that's blurred and when you blur, it actually brings back detail so it's this just how this stuff works? You don't really need to know to much more than that, so I'm going to go to filter blur goshen blur and notice see how when I blurted those few pixels actually brought back that skin detail someone do the before and after see that so that is a mega on your own without a plug in way to smooth out skin but it maintains detail because we ran high pass so when hit okay you can see some of this before and after and where it really helps me out I'm going to apply a mask to it and I'm actually gonna fill that mask with black so that's going to hide it so I'm on ly going to apply the softening where it's appropriate so right now it's it's back to normal I think it be to grab my brush and I'm gonna we're gonna do that next I'm gonna go up here and I'm going to grab a brush make it smaller maybe this thing's funky the button's showing up never done that before okay and so I'm going to grab my white brush and now wherever I paint on this new effect that I just created it will smooth out the skin so watch when I come down maybe between her fingers same was there you have that kind of rough skin here I paint white let's do one hundred percent capacity starts moving in around there it's kind of evening things out of it let's come up here to this area see I was just kind of smoothing out some of those blemishes but a big area where I'm going to need the health for smoothing was down here you know, I needed some additional skin softening here so as I paint kind of smooth a few things up I need a little bit of a softer brush because you can see those hard edges that it's creating so I just went back I can click my softer brush I'll fill this in and so you'll see foreign after you know, it's really kind of softening things up there can soften up the skin and around the face of it I see and I just look around and I say okay, you know, I need to smooth up there and her nose top of her nose is a little bit too rough but to do the before and after using this high pass are sharpening it just kind of gets rid of some of that texture that was underneath her chin her jaw line and I have plenty of examples I can grab another example here let's see, uh grab this example um this model came to my studio for a sample like, um a lighting demo and I'll show you the before shot uh she had a lot of texture there and so let me show you before and after again you're going to see that and so what I did is I clean up the blemishes using spot healing and then to get that smoothing use the same high past technique the same thing so you duplicate your layer uh soft light blend mode inverted run a high pass and then run a goshen blur so after it's cleaning up it go it looks roughly like that so it's something that I would use regularly if I didn't have portraiture I do purport prefer portraiture so for something like this if you did want to do it by hand you could go ahead and run port trying it again if you wanted to combine the two so okay I'm gonna give you a little bit more more to this photo so let's say I smooth out the skin looks nice uh the next thing I want to do is I'm going to focus on her eyes and we're gonna talk about eyes for a minute things that I found useful okay first one and this is a short cut that I absolutely recommend you use going to use the lasso tool to select her eyes and right now I'm holding shift because it's selecting each of the eyes all right shift lets me select the first one then when I go ahead select the second doesn't lose this election and then my fate one of my favorites is command j and what command j does is it copies that selection and paste it into a new layer so what you'll see I have here is as it's happy hour so um I just have her eyes selected okay uh and I said I actually would do softening at the end but for this kind of flow we were going with that wanted to get it taken care of there so four eyes some of the things that I want is there it's supposed to be you know the window of the soul they're supposed to the part of the picture you're drawn into so there's a few things I do I increase the contrast and I pull out detail one of the ways the pullout detail is if you go up to image adjustments shadows highlights and this works with lighter colored eyes pretty much anything that's not a dark brown um you need some detailed to be able to pull out and so if I zoom in here and I do a controlled before and after I'm going to drag my shadows more to the right and kind of give you an idea so it's kind of making them lighter and pulling out some of the detail works really well with kind of blue slate eyes it pulls out a lot of detail so before and after so hit okay and at this moment um if you're looking you see that when I did that effect it showing up on the sides actually selected some of the eyes and I don't want that so I could go ahead and add a mask to my layer to hide it. So we've used mass so far for adjustment layers with their land mass to hide levels to hide hugh saturation, we can add a mask to hide, actually, lair. So if I click next to my half moon cookie there's, a rectangle with a circle inside of it, when I click on that, I congratulate my black brush and I can paint away the effect so anywhere I paint black it's hiding that effect, and so you can use this for pretty much anything same thing in retouching, if you overdo a retouch, you can add your layer mask, grab black, maybe a fifty percent opacity, and back off of that, so to show you before and after, you know, I've lightened up those eyes, and I brought a lot of detail in what I found that I like to do a lot a lot too, really give you intense eyes is I lightened up the whites, I lightened up the iris, but then I usually leave it dark around the edge of the iris, and it just gives kind of this mysterious look to the subject. So if I'm still on my black brush, which I'm using to basically hide that effect, if I make it very small, which in what I'm doing here and I come in and I trace around the iris just kind of painting off that lightning effect around the iris here you can see it lightens the eyes and it makes him really really intense another thing that you might do is add some contrast so you could select the eyes and add levels and make them pop that way that's another way you could do you could actually use some sharpening and sharpening isn't one of those things that you want to do as a last step um this is one of those things that now is going to apply specifically and people will see us five and they were just putting that out there when emerges that layer down and to show you a cool sharpening tool that from what I've read in the people I talked to in toby it sucked previously to see us five before they fixed it so you guys probably are familiar with maybe you have a sharp mass hq and smart sharpen personally most of my sharpening I do with on one sure nick on one sharpener pro make sharp an approach that's a next probe um if you look that up I'm going to use it later I love it I use it all the time but again you don't need to own every plug in ever so the tool that is built in that school its over here where you see your blur tool usually what you see looks like and I'd like a teardrop if you click on the sharpened tool, what you need to have selected is this key called protect detail. If that's not clicked, it's goes back to the crappy mode again. Um, so I'm gonna zoom in and with my protective detail, you can trace around the eyes and eyelashes and noticed see how it's bring out that detail now I'm overdoing it so you guys can see it. You can see how much it sharpens their, but imagine I just want to pop out those eyelashes. I just traced them and they go darker and they go sharp or so let me do that. I'm just gonna step back for a second, so if I zoom in and now I just trace around the eyes and those eyelashes and the strength is basically I mean, it's the strength like how much intensity you want, so maybe you want to build up? Maybe you do twenty five percent strength, but if I trace around these eyelashes a couple times, okay, and around the edges of the eyes and maybe for that detail here in the eyes and I sharpen a bit and I was just show you real quick, kind of before and after between those two steps, so I've lightened it, and I've also sharpened and if you increase the strength it's a little more obvious to see and I can flip over the other eye but notice how I'm pulling out detail can you see that detail as they keep tracing now? I went so much as it goes too far but you do whatever feels appropriate so I might just go over yeah, just just a little bit pop out these eyelashes see other getting darker and there popping out so that's the sharpened tool is where the blur tool is um you don't want to sharpen your entire photograph with that but it's great for when you have just little details because what it's doing and it's working to increase contrast as well as using more in depth scharping algorithms it's great for eyes, lips and just little details that you really need to pop, so watch how we've made the eyes just really pop out there in a couple steps sharpening and shadows highlights so that's one twelve years I'm going to get a little more creative now and I will tell you I don't use this tool regularly but sometimes okay um I'm looking at her here and I think that her eyelashes look a little sparse and a little pc and so there are tools that brushes that you can actually find online for free that are eyelash brushes and on my block block that lyndsey other photography dot com I provided a link to one of the free eye lash brushes that are online so you're actually importing a set of brushes into your tools and you can access them so hit b get your brush tool if you come up here where you normally get your brush ok if you click on the little pop up men you're the one that looks like a gear when you click on that you have the ability to load brushes okay and so I've downloaded let you know there are a ton of free brushes out there there are grunge textures they're our eyelashes they're our eyebrows if you wantto tio paintbrush to get a cool shape and then fill it in there are I mean there's endless there's everything so search uh justin google even free photoshopped brush packs and you'll find plenty of them so what you do is you hit load brushes and you would in this case it's the ss dash eyelashes that a b r that's what the file looks like um usually come zipped and you have to double clip to click to unzip it on your computer but you open it and what you do is if you look it loads all of these eyelash brushes on the bottom of all these different tools um two ply the I brush are the eyelash I would create a new layer and to create new layer uh you would hit the button next to the trashcan niller and I can get this roughly sized to be roughly the size of my eye that I have here and if I click um it feels like that now I don't think that it looks super realistic but you could make a few changes to do so a couple things you might consider first of all is moving the eyelash and warping it so that it fits the correct size so if I click t or the command tea and I click if I click here I'm unmoved tool and then hit show transform controls what it does it says okay that layer that I just created with the eyelash it just put a bounding box around the eyelash okay that that's cool so I can move it around and I can adjust it but I also have the ability it's clicking this like thing popping up okay hold on momentary freezing try this one more time we're going to come back to that in a second so it's kind of being funky so a couple things that I do to make it more realistic one hundred percent that black black doesn't look real so I would back it off too maybe something with great they're my capacities at seventy percent I can also add a lair mask and if I zoom in maybe some of the places it doesn't look realistic is around here I can paint the effect ofthe by going back selecting a normal brush, okay? It's like my normal brush and I can make it smaller and I could come in and maybe paint off. I don't know see a little bit around here where I think it's a little bit too crisp, let's select a softer brush and I can kind of like vary it. Um what you can also doing a shift this down if you click on the top left that's your move tool and if you just click your arrows, you can shift the whole thing, so maybe it's lightening it up so that those others come through or maybe it's completely getting rid of that line and just having the eyelashes that come up something to that effect. So I use this if it's not going to be viewed large, I can get away with it. I know eight and a half by eleven, which is magazine size for most magazine as long as it's not like a close up here if it's kind of a magazine head shot. If I'm doing this, you don't realize that it's fake another thing that you can do is add some noise or add some green that's. One of the reasons that your brain doesn't process that it's riel is because it's too black and it's too perfect so you can go ahead, go up to filter noise and add a little bit of noise kind of break it up so it's not just pure solid black and so you can always zoom in here and so I've added a little bit of texture ready, here's the before and after clicking at a little bit text, you can add a little bit more I need monochromatic and I want to be kind of colorful. Something like that makes it a little bit more believable when zoomed up when viewed up close. So if you click, go back to your brush again, there are also bottom lashes that yu can install ah, that you can use to hear some bottom lashes that you can, for example, I can put it on a new layer click and then I can rotate it, so using my transform controls, I can also rotate this brush and fit them appropriately so I don't use it all the time. I use it sparingly, but it does look cool. So those were a couple ways to pop out the eyes. Yes. Can we take some questions on that? Actually. All right, cool. So just a couple quick questions, and that is bonnie from h from bonnie in alberta, canada. How do you deal with the tiny hair that goes across the eyes? I think model left in this image. Yeah, sure I know that what I would do for the most part is one of two tools I probably would use a healing brush or spot healing brush first I try it okay? Because that's the easy way to do it so let's see here another thing that's interesting is for spot healing if you click and hold the shift key and then click again it'll draw a straight line between the two of them and the same thing is true with your clone stamp so if I could hear hold shift it actually see how drew a straight line so that's really great for me if I have like a hair going all the way down the face if I have to try to keep that straight myself I never can it's my my hand is not that stable um so I would click and that works decently well, I think it's believable enough what I might have to do is go back in and blend a few things so kind of the edge here but that worked pretty well um in the same thing I could do for the eye you know the island so seeing that that worked pretty well the other thing that I would do for cs five or also in c s six depending on the hair is selecting it and using content where phil so let's find another hair example here I mean, I can't even just select this one if I go to my polygon alas a tool that's something I use sometimes if I click wherever I click it kind of holds on and so I can draw straight lines so that's if I have that really really long hair and again my hand with a lasso tool is not steady enough to select it it definitely isn't that I will use the probably gonna last a tool and that kind of gives me a nice selection and so will select it loosely good, perfect and if you have if you delete um sacrament option really uh thing freaks me out so you guys like can suit on doing over this thing what you can do is you can fill it using continent where fulfill there's also if I go here I also have the ability to move this area um someplace else or what you could do is let's say I select an area outside so let's say I say ok, I'm going to select this skin and I'm going to content aware move it what it allows you to do is I can drag that onto the hair and it will blend and erase it among the rocks where well then top level er ok I mean do it one more time select an area click on my content where move, click and drag it and it doesn't work so that's, why you no like that's? One of the things I'll try it doesn't work, didn't content like it? Um, so yeah usually might go to is going to be my, um, spot healing, then I'll do patch if ash isn't work, then I'll do cloning. So when there's like rogue hairs on the edges, it's the same thing I dio here the whole thing I'm going to show you what I would do for her hair, but a lot of times it's like cloning and if it's a black background, I'm cloning on darkened because it'll just darken and get rid of it. But swat healing usually, um I actually going to fix one more thing I'm going to fix the hair while we're talking about it and show you what I would do for this instance there's no way at all I could possibly clean up the edge of that hair and make it look real like it's a giant mess. Um, so would I think that I would do is fill it in, and so what I would fill it in and with would I would be duplicating the background there, or I could create a new layer if I wanted to, and I'm going to use my clone stamp normal on a hundred percent capacity and I would clone it over on and there's a couple different ways you could do it, but if I'm cloning on a new layer and ijust clone this over, as long as you don't see too much repeated pattern, it looks believable, so maybe I think I need to break it up a little bit. Um, so might click here to break up that pattern just a tiny bit click appears that it's selected, you're just looking to not be exactly so, maybe else click selector roots here, drag it down, and then maybe click over and what looks repeated to me is this hair, so I can maybe erase to blend it in, and I just kind of click and do things like that just looking so that it looks believable and like, I don't like that hair maybe wanna clone over it. So it's it's just kind of little tweaks like that, but if I zoom out, depending on how you clone it and the textures you add to make sure that it's not too repeated, it looks believable. What I would likely d'oh also another interesting thing you can do is I'm gonna back off on that so I could go to this example and let's say I select her hair, so I'm on, I'm going to do what we do before, where I make a selection and hit command j copies and paste it into into a new layer if I'm on my move tool, I can actually stretch it and it's it's, how far do you stretch it before it doesn't look good? How long before you see the edges? So I'm going to click and if I hold my command, he I can had dragged that top edge up and I can actually start to make the selection larger and if I zoom in and take a look here, can you guys see it? You see it a little bit, so you just have to blend the edge so it's the same thing we've been doing time time again to add your lair mask you grab your black brush, not an eyelash breck flack, russ, grab another one. I want a soft edge and I'm going to come in here and maybe I don't know maybe twenty five percent capacity thirty something like that and just kind of blending it so you don't see the edges but it's all about being good enough. I have ah good friend joel grimes and I've seen him teach one of his real compositing classes she did something together and well, he said, is your job is to be an illusionist, you know you're korean here, there doesn't need to be perfect it has to be believable so if somebody looks at this would you know that that hair was cloned? You don't know I mean it's because you don't see repeated patterns and it's not stretching enough to be noticeable so if it's good enough it's it's okay, I don't mean toe make it sound like I used to be a major perfectionist and got nothing done ever and when I was able to let go of those things and make sure that it was high quality and that it would be totally acceptable to my clients and to me as well and my standards of work then I made a lot more money because I wasn't spending my entire life retouching it used to be two hours a photo and then I was doing senior photos where the kids would get twenty photos how could you possibly make a living so it's that that same concept anything else related to that I'm just gonna public there? I think I look anything in the audience know all right, I think we're good. Okay, well, thank you. And so I'm like you see what I'm doing kind of blend things make it look believable stretch them do what every need teo okay soon as merge things down and just so you all know out there I'm sure you're super nice people and uh are not like this but like I totally see when there's like little mistakes but teaching and doing this and I'm not using anything notice I'm using my laptop I thought it would do that as encouragement that you don't need any special equipment you don't need a tablet I tablets are great they increase your efficiency is the same thing as I would say for plug in and tablet both will save you time if you're a professional time is money it's worth the investment but I'd never want you to think you need a tablet or you need a plug in so hopefully no I'm just I'm tryingto working out here ok so and lindsey quick question because I'm sure people are asking what is the tablet that you use um I have a couple um but the one that I have is okay what's actually called it's the twelve inch welcome tablet were you right on the screen is this antique I think the city but I don't know the number and I bought it five years ago but that's all right that one that one thank you perfect. All right so looking at her so far the other things that I know that I would fix up for example is coming down here I would still go over her clavicles this is where I'm gonna start to teach you guys about carving out the facial features because it's not just appealing to facial features but also to things like the clavicles and the lines in the next so if I want to enhance her facial features what I can do is I can actually paint them in and I'm going to tell you everybody out there there's ten different ways to do this technique is going to tell you the one I do you can burnin dodge on a soft light layer with a fifty percent neutral gray color like you could do that but I'm just gonna show you usually what I do there's many different ways so I'm gonna pull out her facial features I'm going to create a new layer and for this later I want to draw and highlights so what I can do is for right now the internet too soft light and anywhere that I paint white I'm gonna paint white maybe like twenty five percent capacity is something like that and I'm going to paint where I'd want my highlights to be and so I'm gonna paint kind of where the top of those cheekbones should pay so if you can see starts to give her a little bit higher cheekbones there for women this is a little bit more intuitive because we put on makeup and you put your blush or the shading underneath your your cheekbones because you want to make them look deeper more pronounced so same thing if I wantto carve out thes clavicles you come down here and paint your white paint your lighter color on the clavicles now the problem that you'll see is that it's a little bit you can kind of see the edges I used kind of uh harsh brush what you then can do is you can soften it with the gods gambler so all right so I painted wherever I want highlights will I want and even highlighted her nose so it may be pain in the highlight on the nose there if somebody has kind of you know sometimes you will get the bags like almost next to their nose it looks a little poofy you could paint white and it will lighten up there so soft light then I could do the opposite and grab black gravel opacity black and pain underneath in the shadowy areas I can paint underneath her cheek bones underneath her jaw line underneath where the clavicles are so I can kind of paint here and obviously right now when I created this new layer I wasn't on soft light so the key is blend mode blend linds for lairs affect how a layer effect you create interacts with the layer below it uh so there are many different ones I will show you right now I'm going to keep it vague until we do the creative retouching part and then I'm going to go through much more specifically blend, multiply and screen and hardly soft light overlay luminosity all of that but for right now just know that if I go to soft light it's going teo kind of fake that shading a little bit more and I could do the same thing underneath the clavicles and above the clavicles and the biggest issue that I come across is that it's a little bit too defined so I can blur it so I'll go to filter blur goshen blur and I just want to and you can watch the before and after I just want to soften just a little bit and then apply the same thing it's got a filter blur blur just trying to soften my edges a bit and you can always back off your opacity so I've done it a little bit more intense than I might do in reality but let me just show you um okay because that I can't pull back on a passage if I think it's too late I think it was a little too dark but watch the effect my turn these two on enough for ji funds if she gets significantly higher cheekbones um so I'll do this a lot with somebody that say I raised up my life um one of the ways that you could bring out somebody's cheekbones there darling is to do it right in camera okay so you raised the light up and you when you do that you're having a light from above so what it does cast shadows down and then a shadow underneath the cheek bones and jaw line so makes it protrude, but, say, there's a reason that you don't want to do that for example, um, somebody has a larger knows you don't want to cast a big shadow from their nose because it draws attention to a larger nose also raising that light up the lights closer someone's forehead um, what my assistant likes to say, some people have five instead of four hands, and you don't want to draw attention to that. So if you believe the laid up now, it's closer, it's going to be brighter, okay, maybe you don't want to do that, or maybe somebody has really bad skin, and as you raise that light up, the late is now breaking down the skin as well. So maybe you're just like, okay, I know that I need to pull out their cheek bones and jaw line never round face, and they need help with the features, but their skin is just going to become horrible or whatever else, so you can help enhance it here. So again, let me show you before and after, and I'll use that a lot. Um, we're going to see, and there we go a lot, and, uh, and my beauty photography, so it really pulls it out so that's a starting point and notice, you know, I only did one of her eyes in the complete file that will have available have both eyelashes, it'll be the exact retouch howitt would do it. Each layer will be labeled, so you guys will have an idea like I said, for what I'm teaching it's easier to just teaching interact, but you will have the complete layers for something like that. So for the next example that I want to do and also like, you know, get rid of stuff in here and also anytime people's fingers on their face, you gotta watch for nasty fingernails. I'm always cloning out ugly cuticles, um, smoothing out the edge of fingernails, it's one of the things that I have a checklist that we had for the download, something that's not on there but that I wanted to make sure he remembers someone's hands on their faith. You tend to forget because you're thinking I'm re touching someone's face, but bad fingernails can ruin a photo easy like I know I would go in and clean up all that because that you know, if this is going to be a sixteen by twenty on the wall and you have kind of the correct finger now, it doesn't look nice, so I thought I would go now step away from perfect model on dh try something with more of a portrait effect just a couple of things glancing at this photo and I know I might dio I might also dark and down her eyebrows just a little bit um I feel like it's maybe like a little bit light and sometimes it makes somebody looking a little more intense. Uh, I have a couple of techniques that I'll show you for that later, so let's, grab a portrait. This is just a plain old portrait. Um, that I did of a high school senior don't judge the photography we're doing retouching. Okay, we'll start with this and I'm going to show you another skin softening flash a blotchy nous removal technique if I can put it as basically it's possible um, sometimes you get a subject where they have a blotchy patches skin or maybe how about when the face isn't the same color as the chest or um somebody has a lot of skin problems and you go ahead and clone stuff out and it's bright red because you were sampling from bright red areas? I'm sure if you guys have done a lot of portraiture, particularly high school seniors, you've run into this, okay, so what I'm going to do is just give you another tool for how you can improve watching us and skin and deal with it so this just opened up in camera raw real quick and so I analyze what I want to do and I know that I want to clean up blemishes white and teeth on and then I won't have to smooth out watching us and skin so that's what I see on initially opening its when open the image and the I also he has beautiful eyes and that was one of my my favorite features and so regardless of whether it's port a portrait or a fashion image, I know that I always going in hand size um geir girl it doesn't matter if that's something beautiful about the person, so I'm going to use my last tool and hold shift to select both eyes and then just like normal command j to copy into a new level, a new layer and then the same thing we did before image adjustments, shadows highlights and if you watch, you'll be able to see when I zoom in in the before after kind of how much detail you know, it really increases the contrast and pulls out a lot of tea so I could go more extreme didn't really want teo I'll talk about later and more creative retouching how to change the color of eyes onda couple things using blend modes somewhere to add my lair mask is usual paint my black brush and remove that effect from around the eyes all right, so we've popped out his eyes I wanted to do that just to start with because I thought that it was a really beautiful feature that he had and you can see before and after you know it makes them pop so all right, so next thing I'm going to dio is I would normally go ahead and like let's let's do a teeth whitening real quick to make sure we cover that um grab my lasso tool I select the teeth and I'm going to want a feather I don't want to have a sharp edge around this adjustment what I'm going to fundamentally do is pull out yellows but skin tones have yellows in them so you don't want need something soft because you actually would be able to see where you pull out some of the yellows if it runs into the skin tone so I'm going to select modify and feather and people always ask me well, how much do you know to feather? It depends on how big your file is and how big the mouth it's like if it's a close up shot a mouth might need to be feathered thirty pixels whereas if it's a shot where the mouth is one of fifty and a picture it's feathered two pixels if that makes sense because it's a much smaller area so you're feathering it kind of just depends there's not really a set amount so next what we're gonna do is we're going to grab one of our adjustment layers with their mass as we go to the half moon cookie we go to hugh saturation and like we did before we pulled out the blue in the eyes or the red in the eyes we go ahead and go into yellows and like this we pull out some of the yellows and we can see a show before and after I d saturated here's concede that it makes a significant difference now one of the things that you may run into I've run into this before sure somebody in the audience is not in their head somebody see they're so yellow that when you pull out the color they go, gray said it would seem that, um there's a couple things that you need to dio sometimes you need to go ahead and add contrast, go back in maybe select select the teeth again um this is not the case with this this individual, but you do it a feather again, same thing and you would go ahead into your levels or into curves whatever when you're more comfortable with and you need to pull up the mid tone and the white point so in this the far right is going you're white point so I could kind of pull that up it whitens the teeth and the mid tone lightens them it looks like you kind of muddy the picture with less contrast you can always dragged back down to give yourself a black point now his face and his teeth were already pretty light so he didn't really need it but those people with the greater teeth would need it another thing you could do is well we added highlights using a lair with soft light painting white you khun lycan teeth by doing a new layer taking a white brush and painting it in and that's going to give you more control because what you could do is you can paint heavier waiter brush, layer it more on areas that need to be whiter or back it off and use a very low opacity brush on areas that already were white saved the two front teeth and so it would make it a little bit easier have control of what gets land or maybe somebody has one tooth that was yellow I've had that before and then you pull the color out and it's grace so you don't want to fight the entire mouth you could just paint your brush white on soft light and light it up so this is how we've kind of waiting his teeth all right? So looking at this individual I need to go ahead and remove some blemishes so I'm going to duplicate my background there and I'm going to go in and I'm going to start and I'm thinking that chances are because the blemishes are so close together if I use my spot healing which is what I love to use god it's easy just click it's going to blend in more blemishes because it's surrounded by blemishes so I probably have to select from different areas of the skin and I don't know about anybody else but often you know I see skin like this you know, it is a little more daunting because you know, it's going to take a lot of work but it doesn't have to be so I've granted my patched fool in this instance and I can select an area of skin that needs to be improved and I can click and drag it and he gets replaced in blended now notice it's not perfect and so you'd probably have to do it multiple times if the higher contrast it doesn't always work um I could go in try to grab this area and blend it and if you look you know you start to get errors so a couple things that I might dio is I might use my patch tool I mean factual my clone stamp unlighted and switch to lightened and try to sample skin from near there and try to click around now more or less that's what I would do click around see what I can grab that I could have it blend see blending around clicking skin guys get the idea but if you notice the skin is very red so I would spend more time doing this you guys know that would probably you know I'd probably spend my fifteen twenty minutes like I said on the skin let me come over here and just for the sake of this get rid of some bigger blemishes and then I'm going to show you howto even out that skin tone this also applies to people that women that put on the wrong colors foundation and they come in and their skins yellow on their face and not in the rest their body it's a pain um things like that all right, so almost done with this guy I'm just right now just using my patch tool I'm just trying to drag around said it's believable okay all right so next thing that I'm going to dio is I'm just going to real quick emerged this the eyes later down to duplicate his lair now we're going to go into channels all right? So if you're looking on the right hand side you have your layers palate if I click on channels ok and I hit command and then click on the red channel it makes a selection of the red channel so what we're going to try to do is we're going to try to maintain some detail and then paint back and the correct skin tone so if you flip back over to lares and so if if I zoom out let's, see what it looks like five mile here. It's made a selection of the red channel and you can't really tell what it looks like you're not going to tell by looking at this well, you have to do is you create a new layer by clicking the tool next to the trash can and then you click on your lower mask so I'm gonna run to that again. But what is giving you can you guys see this over here? You can kind of see his face in that mask. Basically, it is. You went to channels and he said okay, everything in a skin skin detail on dh what not let's? Look for red and let's. Turn it into a selection when I create a new layer when a mask that out so when I go ahead and I paint a new color it keeps thie detail that was in the skin but allows me to paint a different color. This is kind of how it's working that makes little sense. So what I created is flipping over two channels uh, command click on red, flip back over into layers, create a new layer and add a lair masks and I have a mask of skin detail in the red channel so what I can do is I can zoom in and for all of this, I just don't you know, I don't mind the detail being there, and I don't wanna have to clone out all the hairs, but I want to get some of that that red's watching this so what I'll do is clicking on that new lair, not the mask like the empty layer. I will grab my eye dropper tool, and I'm going to pick a more neutral skin tone. Um, so if you see, when I clicked on that, it popped up the skin tone in the bottom left, so not the red, more of a true kind of peachy skin tone, and when I grabbed my brush, I wanna paint on a lower rapacity and I can start painting in maybe not that having going back off just a little bit if I start painting in, it keeps the skin detail, but it brings in that other color. So if I show you real quick, what it did see how it's kind of cancelling out some of that red and so you could do the same thing over here, and I can select a tone near these reds, pick a small light brush and kind of paint over them, same thing when people have, like, pisa perfect example that that rosie nous under the cheeks I don't mind his, um underneath the eyes, I don't mind the skin detail there he doesn't really need retouching in that sense, it's just red and so what do you do? Well, if you need to clone it out, then you're reducing skin detail if you pull out red's using, you know, a few saturation, then you're trying to make it look more yellow because now it looks gray. So this is what I d'oh I'll grab my eye dropper, grab my paintbrush and see how it kept all the skin detail, but it allowed me to just change the tone. So this is what you do when somebody has blotchy nous or different areas of skin that are different tones, and so I could keep doing this, but just to give you an idea, let me back up a little bit kind of before and after and it reduces it um and so it makes it a lot easier in that sense. Do you have any questions and how that worked? Basically channels control, click on the red channel, come back overto lairs create a new layer adler mask and the other thing to be careful of is if you just pick one color and pain not it won't match that area the face, so every time I moved to a different area, the face say, I'm trying to smooth underneath his eye I have to pick that tone near his eye because maybe the tone I picked before near the side of his cheek might have been like a really dark color really dark red or a deeper brown something like that so I have to keep selecting a different area the skin the same thing you can come up to his forehead here for the scar now I would probably for a scar like this just patch tool it out what's giving idea I would select right next to it with my eye dropper it gave me a darker color and then I could kind of paint in and notice you know, I can kind of reduces uh the scar all right questions roughly making sure I have one real quick about the patch tool about which the patch tool your, um mine unsuccessfully seems tto when I circle and move, I'm not it's not giving it likes goes over and then lightens a bunch so you can still see okay? And I can't find it it's the opacity I've tried I've so am I doing something wrong with it? It's like it almost looks transparent a little bit on lee thing that I can guess have you played with these appear? Have you switched those whose chances are if you're on destination or transparent that's what it's doing I don't know if you've tried those, but for example, what destination lets you do is it actually does like opposite it will pull the tool okay on dh then if you're watching I mean transparency changes see how it kind of jumped and it made it a little later so I'm guessing something clicked on their and see clinton something to that effect something else to watch for two let's say you're using your patch tool and you feel like it should work, but it's not one of the things that I'll click on and off is under here where it says patch this is normal try normal and try content aware in c s five and cia six content aware it's kind of like how patch tool works issue basically it's it's kind of a patch tull's spot healing brush you selected area and when you use content aware, it says, based on what's around this area, what should we put here? But it won't just take pixels around it'll actually make up pixels for you, so maybe had a pattern in the background. It was brick you selected area continent where it will make a new part of the brick wall but it's not just copying and pasting it, it actually will create an entire new area brick wall it's awesome it's really cool and you can use that sometimes for retouching eso fur patch tool sometimes my on ly continent where phil patch works and I have to switch it and sometimes that's the one that doesn't work and so if it's not working I give it a try if not I switch on move onto the next thing ok alright so thats for him all right now I'm going to switch over to my dear old dad that if you're watching I love you by the way lindsay what what is your mom's first name? Kathleen oh good she met she's watching she's saying hi she's your biggest fan he's a chat room she loves you abusing my mom and dad like I know my dad's probably at work and has us on and he's good hold back all that's my face I know it isn't you this time not in front of just sixty people so don't tell him that he doesn't know he doesn't know ok ok so here's my dad and I love you dad I'm going to be touch him improve if you think for a portrait is the same thing like I don't want to make him look twenty years younger I don't want to make him look a hundred pounds lighter like this not like I don't want to change somebody that they are who they are you just want to improve things particularly when I have a client come in and they complain about something whatever it is that you complain about their forehead and complain about their hairline whatever it may be I'll fix a few things um so that's what I'm going to do here and I have a couple tools when I get to liquefy after break I believe yes when I get to liquefy after lunch um I'll be showing you a few tools that I use all the time to help people with what they say the problem areas for example you can fix receding hairlines you can people have the five had not forehead you can reduce that as well there's a lot of things if people feel like they have a double chin or that there something anything I can really improve a lot of things with er liquefy but we're going to get there all right? So for my dad a couple things that I would do first thing that I would dio is teeth whitening and we are talking about to do this so that's quick and easy make a selection select modify feather maybe feather it I don't know fifteen sixteen pixels adjustment layer you saturation go into the yellows pull out the saturation guys you can do that pull it up again if you wanted to notice maybe I don't maybe I wanted to light in them I will show you you can create your new layer you can switch it too soft light I could grab a white brush and I can paint teeth later doing so if you watch kind of for after you know I can light it up that way so it sze all of their tools I can also lighten things up by there's there's a way that I can kind of lighting up eyes by paying with softly you have to know what all these different blend modes do if you have a aa lair that's on screen um you duplicate the eyes all this explain I'll do an example let's say his eyes were really dark if I do that selection like I did before maybe somebody's eyes are kind of recessed into the sockets, okay? And you get those shadows fi hit command j copy and paste it into a new layer I can actually use blend modes toe light in that up I don't have to use levels I don't have to pay anything so I can flip through and for example try screen in the cot lightens it up so what I could do then is back off my capacity add my lair mask and this is um this is what I do frequently is I messed with the blend modes when somebody has kind of darker eyes or something like that also sometimes people have, um kind of darker areas under the chin which makes it look heavier could do the same thing make a selection command j change the blend mode in this option in this instance it's to screen um and it will make the difference so I could do something like that so I could light in the eyes up so you do have that available tio um for the most part it all depends on what your client wants and how much they like what they want removed as I said before, if I duplicate the background I could come in here and I could totally remove if I wanted to the bags under his eyes but when I'm looking at them they're not bags under his eyes there's the smile lines you know, so what I would do is I would feel things in kind of fill things in and then just back off my capacity a little bit you know? So if you're looking it's just a little bit later why don't you know I don't really want to get rid of a lot um but one thing that I know that he specifically complained about we're going to take a moment to fix um and let me show you a couple options you have okay, so what did he complain about levy chan okay, so what I did is I selected underneath his chin and I hold on god changed my capacities are messed up once that okay? So I selected underneath his chin I'm sure you guys have had somebody that's had a complaint in the past that wants something changed so what I'm going to dio is I go and select that area um copy and paste into new layer using command j and then I have the ability to go to my transform controls and using right now many's the command tool hold down the edges and what basically show what's medio I can kind of shift things okay all right so let me real quick I'm going to give you a good um shortcut I think it will give you see if this works hold on one sec e back this up a little bit give a selection here and if I that should be good I mean duplicate good try and figure out how to do the shortcut if I can't remember it I'll tell you after the fact okay perfect all right and so if I go too I'm giving it back I'm going to figure this out if you want to give me a question I'm going to figure out what the short cut to this is because it makes it so much easier than trying to find it do you have any we did yeah well we have question kind of general one wondering about how some of these techniques for processing skin would defer for other ethnicities ok good question um I might do an example like this on um say three um a lot of things are the same and so I don't want, you know, a lot of the same technique supply um what? I tend to have problems with our say some of the darker skin tones depending on how I process it gets really red in the shadows and so a lot of times I'll go out, I'll go ahead and I'll pull out red tones in the shadow areas if you want to get that kind of silvery skin look for african americans and I have like tons of those in my in my portfolio like that that kind of silver effects um tried where you do one where you open up the hugh saturation here quick you saturation uh I I mean thea vibrance if you open a vibrance, try one where you pump the vibrance all the way of the right and then decreases saturation and then try it in reverse. It depends on the person sometimes decrease the vibrance and increases saturation on dh it tends to give you that kind of cool silvery look okay, all right. Um anything else so far? Nothing. Uh maybe it's easier? Easier question while you're working on that I f stop ask can use a patch tool in a new layers so you don't have to touch the original it won't have any pixels to drag from um so the answer basically is now yeah are you trying to right click to get the way you're talking you have toe control t to do actual transform not the but it's on your right with royalty no eso try that's that works control to take off the show transform controls and then comes a command tea then perfect. Okay all right so what's the difference man into this okay, so this is the shortcut that I was trying to show you because there's a way to do it a menu but nobody ever wants to do it in a menu um all right so when you make a selection so what I'm going to do is I'm gonna decrease I'm goingto basically get rid of double chin there's a couple ways you can do this the first way that I was doing is if you are on your move tool that transform controls you can actually move the edges but then you have to blend it and then it's kind of a pain so another thing you khun dio is liquefy and that's what we're showing after the fact is I'm going to show you how to liquefy but the other tool if you hit your saying command tees how you access it you hit command thi this is actually all of your transform controls for adjusting size and angle and that's usually when you're making modifications for um look I'll do that a lot if I'm mirroring things in a picture if you do this and your I'm goingto hit command j so I'm in a new layer so you have to hit command tea first if you right click you get all these different things you khun dio on basically allows you to mess with the pixels okay so you can scale things that's justin size you can skew things I have not found a really useful use rescue but the one that works well for double chins is warp uh and what work does is going to give you all these different points that you khun drag um and it tends to be easier to make it look a blend realistically with the rest of the skin using warp compared to say look a fine so what? I'm going to dio increases back up there and I'm gonna grab say here and it does it doesn't have to be on the point see how it's a grid it doesn't need to be on this point I can click here and dragged up and so what you'll see is if I hit ok and I hit command d two d select it shifted everything up and then basically what I have to do is just blend everything back to being realistic um so I went a little extreme for teaching purposes you can add your lair mask, grab a black brush and I could go back in and kind of blend and so if I kind of decrease male path so I could actually see where the chin was originally maybe I bring it back to here I could go back in and draw the chin where it was originally, but now the double chin is gone, so if you watch let me go to maybe eighty percent capacity and outline something like that if I go back and put the letter back to its normal a pass ity you know it's just a matter of blending that so I have a little bit of a rough edge here that I need to go ahead and blend back and you can do that, so let me assure you quick the before and after so far and so the rest I'm sorry it's just a matter of blending, so that is what I would spend the rest of time doing. I'd come down here and I would blend in this edge and what you have the ability to do as well is when you're doing the warp, you could actually hold certain areas in place and kind of lock them so they can't move too maybe you wanted that bottom to hold in place I can actually lock it so I could just warp you know the bottom after chin up and then I have to bend uh, blend the bottom area if that makes sense so it'll actually lock and let me undo this let me select so I can select just chin teo community let me copy it. I'm gonna copy this into a new level I mean, select this okay, so I'm gonna do is first make this election I'm going to command j so it's in a new level, a new layer I'm going to command tea so it brings up that transform this is going to make it easier um, toe actually, right click and to get to warp and so if you're looking up here, I can lock different areas of the work tools so I could lock it so at the bottom left corner stays in place and doesn't move, I can lock it so that the middle stays in place and doesn't move it's basically what's your reference point and then you can actually change shape so you know, I could make it arc in a specific way maybe you create a preset whatever it may be, so I'm going to lock it in the bottom and then just kind of pull up here and see how it kept the bottom left much more in place and now I don't have much blending two dio and I can kind of just pull up and so hit that I'll do the blend and you'll see makes it significantly easier and I can just blend back in to where his chin wass and so a lot of other people they're trying to clone this out and it's I mean it's so much harder than just doing something like that um if somebody has darkness underneath um underneath what you can do is you can duplicate that layer and you could also turn it to screen mode ever I said that could lighten it so if somebody had a lot of having this underneath you could change it to screen mode and then of course back off of that effect and so you can I have my lair mask is before I can paint my black decrease it and just maybe lighten up underneath just a tiny bit so overall, if you do the before and after the two it makes it lighter and it uh makes it smaller that makes sense that, um same thing works four people's noses people's arms people's foreheads like all of that so if I have somebody who has maybe a wider arm I can select on this I'm gonna pick somebody without a wider arm real quick we're gonna do this and liquefy but okay, she doesn't have a wide arm ok, we know this okay? She's very skinny but I'm just going to demo with her um if for example he wanted teo change her arm here I could select arm command j into nuclear command tea to bring up the transform right click to grab my work and then I could maybe pull in this bottom part of her arms I thought it was hangout and look funny it could pull that part out from trying to change the shape and I could you know you could do the whole thing and you can lock which point you want to stay consistent so arms, nose, forehead, chest, stomach, whatever really great to know if you're not working on a desktop because it is significantly less processor intensive, then liquefy liquefied takes up, freezes your computer almost instantly so you're better off making a selection command j knew lurk manti for transform right click warp and unlocking one of the edges in place so do it. I'm done with time, right? And I want to start something new or how we don't know this is perfect right on talk eyeball do we have any last minute questions in the audience or online? We have a question from fashion tv uh kind of looking at this little different way maybe would you suggest that we create shadows like maybe darken areas under the chin to remove a double chin or liquefy or something other ways usually darkening under for underneath the chin for a double chin eugene usually makes it worse because of how double chins work if there is an area into the chin where maybe like okay, let's say that it's recess and back here we're like well put it this very oddly like you know when there's not that nice looking neck you know that next that doesn't look so nice the wrinkles in the kind of nastiness ok um you can if you darken that down it just gets rid of it you don't see it so maybe it was dramatic light and that would be fine but usually a double chin is right next to the face so there's not too much you can do besides make it smaller and light in it so that it kind of received in what you're saying yeah and then liquefied fine I used to fight most of time the question from nazi this's hopefully you're not sick uh from maryland could you how did you lock it? Yeah, sure. Um if you click your war tool and if you're here command tea okay? And you have your warp tool which was right. Click warp in the top left here it's right next to where the words has warped and the ability to kind of lock one point place and so by default it's on the center point but you can pick a point in the bottom left uh before I forget because I'm not going to come back to this picture uh one of the things used this concept for somebody who has dark roots okay, if anybody has dark or light routes that you want to switch uh I managed to go how I could get my death bright white I'm not sure how it darkened it down. This doesn't apply to hand like you can't take white hair and make it black I mean it's not the same qualities it doesn't catch like the same what I say you can't obviously with massive effort, but if if you're just trying to, you know, make his hair dark it's it's not gonna happen, but what you can dio is using your blend mode if I selected his hair okay, and I command jade into a new layer and I changed the blend mode to multiply you see how it darkens everything down? No, obviously deploying to everything around him so I'd have to go in and I'd have to paint it for example, I have to paint it it's like in the one thing I'm going to give you my lair mask back, click on their mask, I'd have to paint the effect off of the face and away from the hairline and there's a few more adjustments, but if you're watching this before and after, I'm darkening his hair down, but what this means for you guys, if you go ahead and somebody has dark hair with light roots, you can select that those roots duplicate it on do. If they're light, do multiply, it'll darken it down and then you just blend it. But the same thing happens for somebody who has light hair and dark roads. If you select it and change it to screen, if you do the selection and change it to screen, it lightens up the roots, and so then you can just blend it in, and now you won't have dark roots it's in the london so that's the easiest way to handle that, and also dealing with making someone's hair later a darker you can get to the point. If you wanted to, you could actually make blonde hair by layering a couple of these. You could make blonde hair brown if you wanted to someone. Once somebody pays you enough money to see what they look like with brown hair, you can do it. You can change the color and you can also use multiply so light roots you change it using multiply dark roots, you change using screen.
Class Materials
bonus material
Ratings and Reviews
Sean
Fantastic Photoshop course. I knew Lindsay was great at Photography, Lighting, Posing and Public Speaking, but I am really blown away by her mad (great) skills at Photoshop. Lindsay really is a fantastic teacher. She turns what might be a more or less dry topic into a fun and entertaining topic. Thank you Lindsay and thank you CreativeLIve. You have a real superstar with Lindsay Adler.
a Creativelive Student
This is a great workshop for photographers wanting to learn and hone in on their retouching skills. As a photoshop user and photographer of 10 yrs I have been able to take away some further techniques to help better my skills and more or less tailor them. I would suggest you have some adv beginner knowledge of photoshop because I don't think some of the techniques you will be able to keep up with unless you buy it. There are two things that I wish she did better in her teaching and that is to teach new users to label all their layers and what they are as you are working. As you can see Lindsay ends up with 20 layers and unless your the one doing the editing you will have know idea what is what when you have to go back to it. So its best to teach this in the beginning so people get into the habit of organization early. Also I wish she used a Wacom. It really does cut your editing time in half and you have more solid movements in precisely selecting areas of a photo. From a photographer to other photographers. Use a wacom. You can start with a basic baboo for $89 and when the apple wireless mouse cost $69. Time is money, and a wacom truely save time! I used to use a mouse and my trackpad and once I switched I was like OMG what was I thinking before! So I wish she just emphasized that point more. Overall I think it was $99 well spent.
Christian G.
Not only is Lindsay very knowledgeable and a very good teacher but I REALLY TRULY appreciate her no-BS, straight-forward style.. No time wasted on long tangents talking about herself (or what have you), on cute remarks or on off-the-mark humor. She has showed us many great techniques, has presented to us various creative/different ideas AND she has also really been able to explain "how she thinks of a solution", how there is a bit of trial and error, "even" at her level.. All in a all, a truly excellent course and worth every penny!! Thank you Lindsay and thank you to the CreativeLive team for a great course!!