Lesson Info
8. Frequency Separation
Lessons
Class Introduction
08:32 2Hue Saturation For Color Correction
12:35 3Gradient Map Color Correction
10:19 4Camera Raw For Color Correction
04:22 5Channel Pulling For Color Correction
12:08 6Painting & Rendering Fabric Effects
20:02 7Adding & Removing Detail
03:47 8Frequency Separation
08:44Lesson Info
Frequency Separation
I'm gonna do this a little quickly. Please don't be afraid. Be a little afraid but only a little afraid. Alright, this is strictly a little demo quickly about what frequency separation is, okay? So frequency separation is the mode of taking away detailed information and separating it from the color and tone. Okay, that's all it is. So it is a action and/or function, you have to do it, you're gonna blur a layer. I've got the formula, please don't panic. I have the formula for you. I'm gonna gauzy and blur this. I'm gonna blur the heck out of it, just for this demo, 37 who cares. And then this is where people are gonna get confused. On the detail layer, you go under Image, Apply Image, you pick your blurred layer. You put it on Subtract, and you put two, 128. Okay, did you hear me go, "Ooh, two, 128"? I have an action for this. I never have to type this in, so I get a little stuttery. This is what gets a little confusing for people. The formula is the formula, it is gospel, it is all ove...
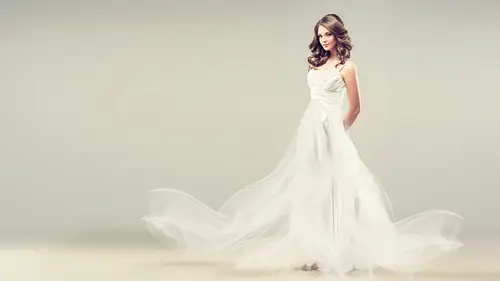
r the internet, everybody knows it who does beauty retouching. They just don't use this for fabric. So I've got it written down for you, don't panic. I'll be giving it to you, but this is the formula. It always stays the same, unless you're working on 16-bit or 32-bit color. What will change is the amount of blur, okay, but this will never, never change. Alright. Now, as I said, I have an action for that. Let me see if I have it loaded, 'cause it would be so much faster. I don't, no bit deal. Command J, Command J ... Blur. Image, Apply image. Go to your blur layer, and if you labeled it, you'd know it's your blur layer. Alright. Why you do this is: it makes retouching so easy. Now if you look at this, I have two gray layers. That makes no sense. If you're on your detail or gray layer, or high frequency, as people like to call it, you need to put this on linear light. Go back to your leather, gray layer on linear light. And what I like to do for continuity is I like to put it in a folder called frequency separation, just so I know what I'm looking at. When you've done the method of frequency separation, you have done nothing to your file but prepare it for retouching. So I've done nothing but prepare myself to go into this mode called frequency separation. Now, what I want to show you is if I took the blue color, the blue blur ... And I drag it into the leather ... I now have blue leather. If I take the gray detail, and drag it onto the blue blur, it's a very hard word for me to say, I now have the same thing, just on opposite. Detail, it allows you to change your texture and your color. Do you see that? Seamlessly, quickly, in two seconds. This is why this is great for fabric, okay. I know this is a hard thing to grasp, but it will change, it will revolutionize how you do your retouching if you can adopt this. So let's put this to practical use. I'm gonna do this on a Adobe stock image. Can we go back to the keynote for just a second, please? Thank you, alright, so here's the assignment. You have a fabric that's messy, and you wanna clean it up for a catalog, and you have to do 200 of 'em. What you're gonna do is run that exact frequency separation that I showed you, the exact frequency separation that I showed you, and then, what you're gonna do, it's all written down here. You're gonna have it. It's basic, okay, I'm not gonna run through this again. What you start doing then. There's your gray layer, there's your blur, is you then start retouching ... And you start painting. I'm gonna do this demo for you. So what I'm gonna do is I've got my blur layer and my gray layer. I'm ready to retouch. I'm now gonna come over here, and I'm gonna add a paint layer, and I'm gonna start painting out the wrinkles. You'll see it here. And then the next move I'm gonna do ... Is I'm gonna start retouching out the lines on the gray layer. And the key caveat you have to know is when you're retouching on the gray layer, and you're cloning out lines, you've got to make your hue, pardon me, your stamp tool on current layer only. So let's walk through this, you guys. Alright. I throw all my extra bits away. I have a bunch of actions for you for this, and you'll be able to use it. So what I have, and let me just put it into a different layer. There, set to make this a little easier for you to look at. Okay, so we have a frequency separation. I'm gonna put the original outside of it, just so you can see. Come on, my love. There you go, alright. Frequency separation on and off, nothing happened, right? Nothing happened, why? Because I've only prepared myself to do work. I have the blur layer. There's the shirt blurred. There's the gray layer with the detail. Make a new layer called paint, spelled right or wrong, I don't care, just call it something. Select the shirt color and start painting. I'm painting a little ham-fisted 'cause I'm rushing. You could be a little careful. But there's the tone. There's the tone heading out. Oh, but I still have those lines, right? Go to your gray layer, take your stamp tool, current layer only, select ... Start retouching out your stamp -- your -- your lines. So in pretty short order, you can clean this up as much as you want. You can fill it with a pattern. I have to tell you, you got catalog work, you got busy work, you got wedding dresses to clean up, you have families, if you have a mom in a family group shot and she's got rolls on her tummy and she wants 'em out, you go to that paint layer, you select a color nearby, and you start painting out the wrinkles. Do you understand? Wrinkles gone, wrinkles gone. And sometimes what you guys can get away with, what you can get away with is you don't take all the wrinkled lines out, you just take the tone out. How big is the file? Is the file up here, up in their nose, and they're gonna see it? Is it far away? If it's far away, you don't have to hardly do any of that, and you just do it on the tone. Well that's two seconds. Can you imagine for a second trying to clone those out? No, frequency separation for fabric. This is gonna hurt your head, but I think you should see this is why you wanna use frequency separation. Imagine they do a photo shoot, and that's what they shot. And you have to change that to solid blue. You should be crying right now, 100% crying. Frequency separation ... There's the blur layer, you repaint her, you repaint it. You have to watch out for shadow lines, but you repaint it. The gray layer, you clone out the lines. Frequency separation for fabric. That's a two-hour job, but it's not a two-day job. If you had to clone that, that's a two-day job. If you're using frequency separation, it's a two-hour job. And Bob's your uncle. (audience laughs) So keynote real quick, please, my beauties. Pants, you can do it on jeans. There you go, sample of that. It's not easy but you're gonna love it. Get good, get fast. I have a bunch of other classes on CreativeLive and ... And you can find me at LisaCarney.com. Oh, click here for a free PDF on booklet on frequency separation for fabric.
Class Materials
Bonus Materials with Purchase
Ratings and Reviews
Sean
Photoshop Lisa is the best teacher. She makes learning Photoshop fun. Great course. Lisa has a great teaching style. She mixes in a great speech cadence, great voice up and down and pausing, jokes, and is extremely knowledgeable and fun to watch. Awesome course. Learned that skills can apply to other projects, not just clothes. More tools for the toolbox.
Amy Vaughn
Fabric retouching presents some unique challenges and I appreciate finally getting a class devoted to it. The explanation about how to change from dark to light (or vice versa) was my favorite thing I learned from the class, and I appreciate the out of the box techniques like using frequency separation (it isn't just for faces!) and painting fabrics. The slides were outstanding, well organized and I appreciate how we get them all as downloads with the class for very fast visual reference when we're trying to remember how to do something from the class later.
Charlotte Madsen
Love this class! Lisa is so energetic in her way of presenting her knowledge and she has an amazing way of making complicated stuff sound simple and affordable. I find this class very motivating and can't wait to get started. Oh, and she has a great sense of humor as well!