Using the Flame Filter To Create Hair
Lesson 10 from: Retouching Techniques for Hair in Photoshop CCLisa Carney
Using the Flame Filter To Create Hair
Lesson 10 from: Retouching Techniques for Hair in Photoshop CCLisa Carney
Lesson Info
10. Using the Flame Filter To Create Hair
Lessons
Class Introduction
04:33 2Demystifying How to Best Treat Hair for Compositing
02:46 3How to Create the Best Mask
10:55 4Methods for Removing Halo
15:56 5Add Hair by Painting
07:53 6Use Brushes to Create Hair
08:53 7Cleaning Up Cross Hairs
06:39 8Screen Mode to Paint Hair
05:17Lesson Info
Using the Flame Filter To Create Hair
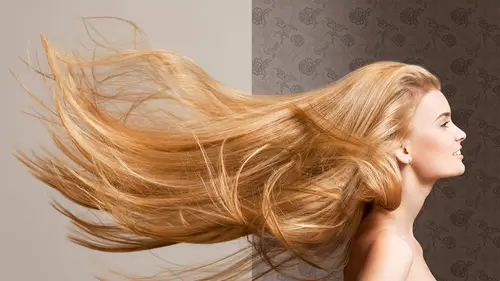
All right, I really want to show you this groovy, cool trick. So let's say you really suck at drawing, there's people out there who suck at drawing. (whispers) I suck at drawing. you can actually use the flame filter to make hair. What? Yes! It's a script that comes in Photoshop, it's really great. First, you just need to draw a line for the hair, you're gonna use the flame filter. Then you might blur the flame, and then you're gonna color correct the flame. Shall we do it? It's really fun. And I'd bet dollars to donuts no one knows how to do this in your town. They don't know it in my town, I assure you. All right. So how are we gonna start? So let's take a look at this. You got your chiquita, and she's got all that hair. And you want a more illustrative look, something a little more illustrated, maybe. This would have worked on the X-Men post, like the hero who's got the Medusa hair, I don't know her name, she's got orange hair. It's coming out on ABC this Fall, look for it. (whisper...
s) I don't know what it's called. All right, when I do the paths for the hair, I like to put a gray or white layer that just screens back a little bit because when you draw, the pen tool is very hard to see the paths. Okay, so I'm doing it for no other reason than that. And look, I've already come prepared, and I drew a couple paths. So how I did it, is I just took the pen tool, very important if you're writing this down, draw from the crown of the head out, do not start from the ends of the hair or you'll be sadly disappointed. And let's just say for giggles, we like these three paths. Point number two, very important, please have said paths active. That means hold the command key, click and drag, and make sure your paths are live, they're active, they're highlighted, they're black, they're happy, they're dancing. Then what you want to do is make a new layer, and call it "OHHH, is this gonna work?" Because you're not sure are you? I'm sure, but you're not sure. All right. Again, make sure your paths are active. Filter, render, flame. Warning. I don't care that they're gonna be too big, that's all right. (gasps) Wait what? Look at this, look at this! All right. You do not want multiple flames. You do not want paths directed on a line, or that's like frizz. It's kind of like what my hair's doing right now, you don't want that. You want one flame along one path. One love baby, one love. All right. Under the advanced windows, please take a look at both the basic and the advanced. Here you can change how crazy. Oh, the wind is blowing, look at it blowing, it's all hair. You can change the jag, how jaggy it is. You can change the opacity. So do you guys notice this on the opacity? It's getting finer, so maybe you do those for your top. Change the alignment, I can do some with the alignment, but let's just save it like this. There's a start, all right. And what you do, don't be afraid. Don't think that it looks a little strange. What you do is you keep going. So look at this, back hairs, a few more, a few more, a few more, a few more. A little back curl, whoa, look at that. Have some fun, top of the hair. All right, now, here's where it's like, well, that's nice, but she's not on fire, right? So you just have to do some color adjustment. And I'll show you how to do that in just a second. Now, I am in no way trying to say that this is her hair, okay? There's obviously not a match, but it can be very fun. It can be great for gaming. It also can be a great base. So let's say you have a really out of focus shot, and you really need to make something out, you put this underneath, then you do your fine drawing on top. Or better yet, that image library, and you steal someone else's hair, and put it on top. But it's a great base. And then for the color correcting, there's a gazillion different ways of doing this. How I would suggest you consider starting is draw a box around the hair, the whole flame, and it's a temporary mask. You add the mask to your layer sets. I hope you guys use layer sets, I think they're really handy. First of all, just make it easy on yourself and take a look at the shot below. And on this particular shot, I really like the gradient map. So the gradient map you'll find on the bottom, please make no mistake that is a gradient map, not a gradient fill. It's down here on the bottom, gradient map. And what a gradient map does is it allows you to put a gradient along the tonal value of the image. And what do I mean by that? I mean, where it is black, you'll have this color black. Where it is three-quarter tones, you'll have that brown closer to mid-tones. And you can set this, you can set this to whatever number you want if you're one of those number folks. This would be an upper mid-tone, quarter-tone, and highlights. And you can move them, you see how the picture's changing, do you see that? You can take these houses out, okay? So I'm gonna say for giggles this is cool. Turn it off and on. Getting started, and then there's really a contrasting issue, right? So I'm gonna add a little contrast. See, just a little contrast. And then, yeah, then Bob's your uncle. Then what you need to do is just mask it in, right? So I'm gonna put a white mask on this. Oh, whoops, let's take her out. I'll show you this in a second. And then mask it in as needed. And you can mask more of it out. Do you guys remember we talked about back, mid, top? Well, because we did back, mid, and top you can also mask in or out as needed in the back, and the mid, and the top. Isn't it cool? Come on, you know it's cool. (crowd giggles in agreement) I think it's cool. Anyway, you get the gist of it I think. Then the other thing that I just want to remind you about, do you remember how I said it was really, I don't know, really wispy? Really, I don't know if out of focus is the right word. The smaller you make the flames, you can start making these look sharper, and add contrast to them independent of the rest of them. So don't be afraid to color correct on individual flames. I'm just doing adding a curve by going to the add a curve adjustment layer. Make sure you clip it, always important to clip it. Make sure your properties are shown, they're there, I couldn't find it, right there. And then you can make it darker, and it'll look more in focus. Justo? I'm speaking Italian to you now, justo. Cool. So hopefully you find this useful. I think this flame thing's really fun and cool. And you can do that with a mouse. You can do the flame hair with a mouse. If you don't have a tablet yet, that's a workaround. Cool? Great, do you guys have any questions? Not a one? Wow! Are any of these ready that you could show us back in the scene that they were in in the beginning? Or that Eiffel Tower, or was it an Eiffel Tower? Oh, you mean Big Ben? Big Ben, sorry. (laughs) No, but I can put it in Big Ben. Heck yeah, let's do it. Is Big Ben on fire? Wasn't London burning, isn't that in a movie? Yeah, that British guy. No, the Welsh dude. That looks better, too, because London is on fire. All right. Actually I should probably put one where she's actually retouched. Well, you get the idea. So that's a little crazy town. I'm gonna open up my final image. But you never know, oh, the adjustment layers. Do you guys notice, this is really important, please don't let me forget this. Do you see this layer set, it is on the normal. If you have that layer set on pass through, London is on fire, okay? That is a really, really important detail to remember. It might be what you're looking for, but in case it's not, very important. I have to tell you is that a habit nowadays, I make my layer sets normal from the get-go, just from the start. I wish it defaulted that way, but Photoshop hasn't made it so yet. All right, let me open up my last image on painting, and we'll put London in there. So there you go, I mean, it's not bad. Especially for a complicated jobby like that, it's not bad.
Class Materials
Bonus Materials with Purchase
Bonus Materials
Ratings and Reviews
LindaK
This is a fantastic course. But is clearly intended for very experienced PS users and retouchers. This backup materials, especially the workbook, are first class. She does speak too quickly and is a little difficult to follow. I felt like the right amount of material was covered. I would have loved more. But it needed more time to do it justice. She just seemed so rushed. I would have payed more for a longer class. Overall, I would highly recommend to anyone interested in this type of work. I found it fascinating.
user-01901f
If you love Photoshop and are serious about retouching, this is one of the best classes from one of the BEST instructors I've ever seen. It is fast pasted, but well organized and completely to the point. I don't know about you, but I prefer an engaging instructor that is passionate about her field and wants to give you as much information in her course as possible. The bonus materials alone are worth their weight in gold and should help anyone having trouble following along with her advanced techniques. I hope CreativeLive brings her back soon!
Jennifer Funk
Absolutely love this class! I've owned it for a couple of years now and find myself coming back to it time and time again. Lisa is really easy to listen to with her clear and confident direction. I Own a few of her other classes too and truly enjoy watching her teach. Thank you for the amazing content!