Pocket Scrapbooking & 12 Months Layout
Lesson 11 from: Scrapbooking Your Baby's First YearNicole Samuels
Pocket Scrapbooking & 12 Months Layout
Lesson 11 from: Scrapbooking Your Baby's First YearNicole Samuels
Lesson Info
11. Pocket Scrapbooking & 12 Months Layout
Lessons
You CAN Scrapbook Baby's First Year
18:02 2Studio Calico Kits & Welcome Layouts
32:51 3Organizing Photos & Using Momento
19:54 4Using Sketches & The Be Happy Layout
26:24 5Collages in Design & The 5 Months Layout
26:17 6Milestones to Document
10:01 7Skype with Ali Edwards
19:38 8Journaling & The Around Here Layout
36:24Lesson Info
Pocket Scrapbooking & 12 Months Layout
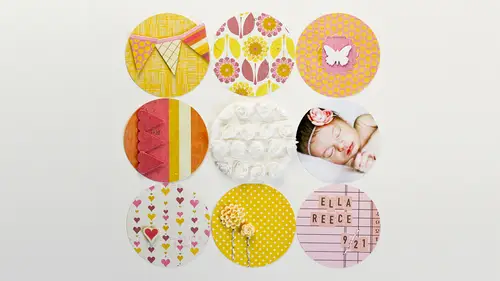
You can go ahead and get out those two page protectors that should be there at your seat there like we said their design a and when I'm doing of spread like this I usually start with my photos so I'm just going to gather all my photos up here and really the first thing I do is just lay everything out on top of the page protectors so I don't actually slipped some slip things in just yet I just kind of play around with where I might want things um and obviously I've already kind of gone through and picked out the photos that would work on this style and this is, you know, baby picture idea as their first shoes you know, what are the little first parrish shoes look like? And um will was pretty was like eleven months old friend got a fair riel shoes that weren't those soft side at ones and he was very proud of himself when you have those ons like that doesn't there here is that, um you can see kind of what it looks like when you do order a four by six print with the two three by fours on i...
t like we talked about before becky joined us so here's what it would come from the printer like so it can just I'm actually going to slide that one just into a four by six by itself because as you can see I'm going to run out of spots because I still like to leave some openings for journaling cars obviously and then some filler cards to so say so you can kind of first figure out you know how many pictures do you have where you going to put them are they size the right way and I like to just lay them out on the sheet that way first okay so then I like to always have a title card to kind of tell me what the pages about and I usually like to put that in the same place and you know what I forgot to mention about studio calico kits the project life kits which are so great is that a cz becky with saying some of the layouts are different so some page is that this is the design a but there's other designs that maybe have more vertical photos and more vertical four by six openings all of these are horizontal the project life kid from studio calico is great because they give you that option so on one side of the card it's in a vertical orientation and then on the flip side I'm sorry hard on on and on flip side it's vertical so you can use it either way and it makes it even more versatile for you you put the photos grab your photos first and then start doing this or help because my grandbabies not five months and I don't have any pumpkin stuff. I'm going to put all my cards in here and then specifically take the four by six horizontal of him to fit in so you can do it either way. I mean, exactly already figured out what can be the pumpkin here and then going taking picture that's gonna go here? Exactly. Oh, yeah. And that's kind of the beauty if you know that you're going toe dio scrapbook in the project lifestyle and you like design a that the basic design here you can. If your baby's first year, you can kind of be intentional about that. Like I'm going to take mostly horizontal four by six photos on by no, kind of complain ahead a little bit. I think most people naturally take, you know, hold their camera that way. Although now with phones it's different that's true with with normal cameras. I think most of us did it horizontally, but now now might be a little bit different. Okay, so I'm just going to, like, you know, now that I have my openings figured out, I know what I need to fill in here. So this is the fun part for me, you know, like I said, the photo printing part not so fun for me that's kind of like a chore in my in my book, but this part, when I can actually start playing with everything and getting creative, this is the part I really enjoy. So, um, an idea that you could do so I have this one photo down here that I couldn't really crop down to three by four was a little too big, and I didn't wantto I'm cut off part of his forehead there, so I'm going to take a card that four by six car that I'm not going to use, um, it's, just a calendar card, and I didn't really think that I would use it, and I'm going to use that as a background for my photos, so I'm gonna just clear this down, and then I'm going to take one of these because remember, we have these lovely principal cars that are available as part of the bonuses for the class, and these are great they're neutral kind of baby cards that you could use for different things on dh they're perfectly size to be for project life spreads like this, so they're three by fours and they work really well. I really love this one, it says, I want to kiss those cheeks for days, I think that's so cute, so he's got some chubby cheeks here I was going to pare that with that photo and another one of my favorites from the set is this one that just says first and then it has like a banner underneath so this could you could print like twelve of these you know and for each month that you document you could fill in a different first that happened that month and then journalists so they're they're nice because you can customized for exactly what you want to do and it's a neutral enough color scheme that you can use it with all different kinds of photos and in all different seasons I'm missing something they open on one side you have open and towards the middle to put him in backwards thank you yeah it's going to be on the backside for that question you know it's a good question um all right so let's see I'm gonna finish this and if you didn't wantto you know waste one of your projects like cards by you know putting a photo covering it all up because basically that's what I've done I've taken this this car that had the calendar on it and I've covered it completely with my photo and my principal card because I just wanted this to be one seamless card to slide in if you don't want to do that you could just trim a piece of four by six cards stock and it be the same the same idea I need to trim this down a little bit get fit in the rest will be ok I think that's going to go there and remember I said we were going to customize this because I don't really want this to say harvest that doesn't really speak to anything of what this pages about so instead I think what would be fun is to use one of these month circles that aaron the principal kit also and this was when my son was turning twelve months that month so I'm going to use the twelve month circle and that will just perfectly cover up the harvest and now it's a customized car just for our babies page from the slide that ink that cards finished and then you can kind of start sliding some of the other things in a lot of people have different feelings on whether you should corn around everything how about you folks to you corn around you're not corner around sometimes yeah for a situation like this where my cards already have rounded corners I feel the need to round the rest of my corners too feverishly grounding every photo what did you do that to match the cars there's just something you prefer yeah I like to match the cards personally it's all about your personal checks is not russia role that's exactly right and becky against has her own corner rounder that will perfectly match thie angle of her card so that's nice. Because not all corner rounders are the same corner. We better not have you found that out the hard way that way. Sad my perfectionism. E had radio thing, did you? But now I have her okay on this photo, I'm going to do some stamping. So I there's a bunch of white space right here. You know, some space that there's nothing really in the picture besides the background. So I thought that'd be a good time to use some stance and let's see, I think you guys might have my ali edwards stamps, anybody those line around here e I just need a lot. Well, I need some talking. Thank you. All right. And the nice thing about these color theory inks from studio calico is that they are going to stamp on photos. They won't if you just stamp and then just let it sit for a minute, it won't smear so that's. Nice. This is this is a color called deja blue, which is a really nice navy blue that will work well with our color palette here someone's going to stamp that there? Yes, you can see upon the picture with these things, you know, just give it a second to dry, I'll probably wait to put that in page protector but yeah, it's and I love this when you have a lot of white space in the photo where there's nothing you know the subjects not here it's a perfect timeto add a little bit camping concerned thiss process there's a lot of my pictures aren't so when I'd scrap booking cut him out right and try toe make him worker crop him but that's a good wayto not have to do that right? Yeah. Okay, so I'm gonna leave that one out over you've done great jessica for being a newbie to the whole scrap booking process. You're doing wonderfully excellent. Okay, we need to trim adalbert more. Wait this one in okay, so this pages there is starting to fill up a little bit. I think I want some more color over here because I've got the white and just the rest are just photographs. So I really liked let's say I like this one because these are pictures from the month of october in his first year and so this picture is perfect. Plus it has the pumpkins photographed on it. So I mean slide that one in there and these air called filler cards because there's not really any room or space for journaling on them it's really just almost like a little block of pattern paper and color to put into your page for your eyes rest so exactly and then I'd like to have a journaling car there that I can write from stuff down on yeah say and he's this oneness have happy fall and I gather you can do some stampings I'm going to take another color of ink this one's called yes peas sofa name these colors are just brilliant named yeah and again you wouldn't have tio add these little touches to your page if you didn't want to go to your spread you could leave it just cards and photographs you know I like toe play with product so I like to add little things here and there but you don't have to I'm just gonna stamp remember on there pretty green you don't seem to worry about being drawing substance of these cars pretty much stick straight away it's real fast train ok so in just a few minutes we've got that page finish that side of the spread finished and then I will start in on filling in the gaps in this one and I knew that I wanted to incorporate that fall leaf filler car and I thought this was really pretty and it pulled some of the orange that he's wearing over here onto this sign I think we need another to journaling cards it's wander card maybe there and then I'm going to use this principle since this was his first pair of shoes this first card it's perfect you can just turn around us and the customized this one I'm going to use these little the miniature letter stickers I love because these air scaled down to something that would be appropriate for the size card so I'm going to put first shoes under there how's everybody doing online could you in okay, yeah, absolutely actually we've got a question from mary mary specifically about this nicole how many photos or pages are there in an average album let's get really up to you to just put in the pages that you want yeah, that would be up to you I think it gets to be for me it will probably depend how bulky your individual layouts are if you use a lot of dimension or if you keep things really flat for me, I kind of once the album gets to the point where it's full to hear so that the album's like opened parallel there, the two covers once it's about that thick I'm done with it because if you do it too much further and it can't close properly and your pages start to curl a little bit at the binding at the a place where you insert them into the finder so I would say I probably don't go thicker than that as far as the number of pages I've never not more than sixty I've never counted, so I'm not sure I'm not sure that that's a good question do you every week of my daughter's first year because your room for like the story of the birth story their name or something before fifty two weeks a fantastic day and it's not what you've actually been doing there I started I'm up to ten but I haven't done any journaling and I'm kind of at the point where I feel like I need to take clothes out this is too many photos and two very similar I mean like she said every photos cute you know it's like hard toe para down christine have you given any thought to how you're going to approach this as a zoo wait for this the wonderful moment you're going to have you thought how you're going to actually document everything is you go through on well this book is a baby on the way pregnancy one so I have that you've already done that yeah but I don't know if I want to do double work and do baby's first year in the journal and a photo of scrapbooking so I want to just try to do it as much as I can but that's just me wanting to dio who knows if I'm going to have the time um but having these pages that I'm doing today which is making it kind of easy I can't just set them all in this is probably one that's kind of on hold the most yeah so you have photos? Yeah I just want to be able to I need to make the time like emily was saying it's really important and it doesn't take that especially if you have a plan so if you have a plan and I'm not going to make it drive me crazy like it used to so hopefully and becky's idea of batch processing things might appeal to people you know if you can if you would rather focus on one part of the task all at once whether it's printing all your pictures and for you would be different cause you're going to be in the midst of that first year but it was someone who's doing this back you know, scrapbooking from years ago you wanted to print everything first so you get that out of the way and then you can sit down and start putting it in or designing the pages I mean that's the way to approach it that might make more sense, you know, books for my brother and sisters and now I'm not going to do those no more because down when I my own baby, you're going to use these little paper clips, one of them they're just really cute I'm just going to slide this on the side so this isn't really functional paper for this isjust for cute factor, okay on this wander card right here it has a room for a date and there's these lovely little groban's in the pack in the kit I'm just gonna use one of those for the word october and a rub on if you've never used them before. It's best probably cut out the one that you want to use because they can easily rub off too many and then you lose the whole sheet, so I kind of cut it out and then you let the backing go. You don't need that anymore, and you're left with this kind of clear my clear piece of of material not sure exactly what it is, but it's got this design on it, so then you need something called a rob on tour fancy or you can issues a popsicle stick or you could use the end of a pen doesn't really matter she's something that can apply pressure. I'm gonna lay that down once you get it positioned like you want it, you're just gonna kind of almost like color over it with your tool and these look really nice on top of photographs to so again, if you had some dead space in your picture that you wanted to fill, you could use some of the designs on here, and it looks really like clean and pretty right on top of the photograph, so I would add journal into that card, but that's done for right now and then I wanted us to have a chance to play with the silk screen that were in this kit because it's kind of a fun little thing that's in this kit particularly and I'm going to just use I have this orange orange county and some was asking if there are matching embellishments and things for this color theory line the are some matching paints, so you could out a match up your pains with your thanks and have the whole rainbow available. I only need a little bit just gonna squeeze some out it's probably way too much but how it goes, okay there's different ways to do this. I just do the paintbrush now I've seen people real silk screening, they kind of take something and slide the paint down across the filth screen because I'm using this on a photograph and I only want a small little word out of that silkscreen that makes me a little nervous, so instead I am going to just use a paint brush like and be more precise with where I put the paint. So are you with your silk screen? And if you wanted to practice is on you know, if you don't have a photo with is that you want to use it on, you could just practice on a piece paper if you like you guys have should have paint there too and I'm going to kind of get this a little bit on sticky because I'm putting it on a photograph and I don't want to tear my picture something, and I get some of the stickiness off the back just by putting it on my hand, okay? And then I'm going to use the word hello because this was his first time experiencing sand and if anyone else's baby does this, but the first time is always kind of funny because they don't know it's like grass to write. They don't quite know what to do with that new texture when we first plop them down in the sand. He was not quite so sure what to do, and I love in this picture is kind of like holding his hands in his feet up the gray side facing me or face seems so hard. Yeah, there's a backing there, so make sure you take that off and then it's, basically like a stencil is what it is and the polls very, very neat. I put washing tape on either side of the muscle. I didn't get the other words. Yes, right? Because washington comes off, right? Right and that's a great idea and, you know, like I said, a lot of people use. Um, like a credit, no credit card or something, and pull the paint down from the top and that's really probably the proper way to do it, but since I just wanted that one little word, you don't have a lot of control doing that so it's easier for me, it is a paint brush in the situation. So look how cute that look I know and it's just a little pop the color right on your photographs and again using that kind of negative or that white space in your on your pictures to add some fun little design elements. So I have hello there, and I'm going to add the word sand with these letter stickers we talked about earlier, I think, in times gone by, people being very, very anxious or worried about in any way of spoiling the photograph, but because we now have the ability to reprint them almost at will it's actually fine isn't reassuring to go ahead and add thes embellishments because, you know, we know actually because you had that one precious original was all you have before, right? Have technologies moved on, ok? And so this is pretty much my completed spread, I'm gonna wait for the paint to dry, so I don't want to put that in, but I'll show you you know what it looks like and and again if you did this for your baby scrapbook you could do one of those spreads for each month of baby's first year so there's you know twelve crabs but when it's all finished you know about at my journaling on these cards you've got a nice representation of what happened for each month and baby's life so that's really fun and it doesn't take a ton of time takes some of the design stress out of it because you could just slide the photos in and again you could have done it really simply or you could at a lot of embellishments each car we kind of did a mix of both but what you guys think of that that approach do you like using a kid like that and putting together the pocket pages good I wanted tio talk a little bit about another pocket page system because even this large you know the twelve I call traditional layouts or one thing then you can kind of go to this which is still told by twelve it's still a lot of space to fill up right? But if that even seems like too much then you can always try something like this this is called a handbook this is studio calico's pocket page system or album system and what I like about this is it's a smaller scale so there's less room to fill up and you can kind of mix and match the page protectors just like you can with becky system as well so I wanted to share my album like I said when I did will my youngest will his baby book I kind of did some things in it but it's not a complete baby album and there's gaps missing so I thought I'd be fun in preparation for the class if I went back and tried to complete a whole year of his life in this handbook and I didn't have a lot of time because I was doing everything else for the class but I thought if I can challenge myself to try to get this done in a few days time and that would be a good testimonial to tell you all that you can do this to it doesn't have to be super complex that doesn't have to be super time consuming my he will is in preschool from ninety one and so I said I'm gonna take three of those mornings and I'm just going to attack this project and so that's what I did I had to even print the photos as I went because I didn't have them all printed ahead of time I didn't follow my own advice of having your photos printed and ready to go so that took up extra time so if you already have your photos printed this is really a fast way to put something together you can see I just started the size of those page protectors, the large one a six by eight and then they have smaller ones that have divided four by six and three by four size is just like the project life system, but I just started with a picture of him in the hospital. You can see that I used that same silkscreen, but with a different colored paint, and then I had printed his name on there before I printed the photos. So it's right there, um and this is just, you know, these are cards that go with this system that you can purchase from studio calico, and I think they're actually at this point transferring over to a different it's still a handbook system, but the number of binder rings is a little bit different right now, so they're kind of in transition. So if you're interested in this, you might want to go ahead and look at their newer handbook. So you're not buying the old product, but here you can see, I just have some of these inserts I have hello and put his weight there. This is a little envelope that I put on the outside of the page, protectors that I can unwrap it and asking journaling inside. But it's really just a lot of room for writing, and I don't like to just write like this usually, but I just said, you know, if I'm doing a page and I want to get it done, I'm doing this book and I want to finish that I'm just going to just start writing to share the story here. Um, this was a fun little pocket that I put you know, his footprints in its little feet there. Another great thing about pocket pages is that you can slide things behind it, so if you have multiple photos and maybe we're talking about how many photos we all take if you have a whole bunch and they're pretty much the same, but maybe they're just slightly different that you can't really decide which one do I use you could fly some behind since you're not hearing them down, you're not gluing them to slide them in there, and instead of a photo on this one, I just put some journaling on a card and stapled a little tab there if you can pull it up more journaling, you can see some of these are a four by six horizontal on the bottom and then two of the three by fours. This is for through by four openings. And again it's not a lot of embellishments it's just little things here and there but I wanted to add that I felt like add it to the story on the page picture of him with santa claus and I still need to fill in some of this journaling but you can see that it's you know, I didn't put every single picture from his first year obviously because that would have taken a long time but I kind of tried to do highlights you know, what are some of my favorite pictures from that first year? This is another way to add extra space to these pocket pages this is a little slip up up peace and these actually I'm going to show this is just from a company called memory book and I've never seen anything else by them except for these pockets where these foot pockets so I don't know if they make other on scrapbooking products or not, but I think there's other companies now that makes similar things and these are great because they're just like a single four by six page protector basically and they've got a little strip of adhesives you khun slide your extra photo in and then it here down on top and then you've created like your own little flip um car that you can contained more you know I have another photo underneath more journaling and so that's a nice way to get more more information into your book you know it's just it's just easy way to kind of get a whole overview of his first year and it's something that just took me a few days to d'oh what do you think of handbook says this something that you like or have you used them before? Caddy I like I do the december daily or I'll do like just all of halloween from in the beginning october to the end the summer I'll do one for the entire summer because it's easier to put it into, you know a little book where they can just flip through it then it is for me to put it into the big so more like a smaller themed solve all of our adventures oliver trips during the summer and you know their drawings and their pictures and things like that it's a way to fit a lot of pictures pretty easily, you know clay and it's quick it actually is quick. I mean, once you have the pictures you just problem in and yeah, you feel like it's complete in a quick commander, right? Right, yeah. Seems like could be a really good gift to yeah oh yeah, not as that was a great idea perhaps is this a big book right here's another one of those flip ups and you know for this one I cut out with some scissors the middle of that card so I had room to write a little bit on the bottom and an opening to show the picture. All eight grand kids there I've always loved this picture of him. Jack was doing his homework and he was just checking out that pencil like he wanted to eat it or something but you get the idea there's a lot you can do in here you can again get as creative as you want, adding as much as you want or you can keep it pretty simple so I kind of did a combination. I embellished some I kept other simple, but I fit a lot of pictures in here and a lot of information. So, um I just wanted to share that with you because I think it's I hope that it's encouraging that even if that's like still too much, you can accomplish a lot just by giving yourself a few days to sit down and kind of go through this project from angela pains joining us online would you recommend adding memorabilia that isn't very bulky like the hospital I d tag directly into the baby album? Or do you usually keep those things separately? I would probably keep those separate for two reasons one because of the bulk and I mean there's that hard plastic piece on those hospital bracelets, for instance so I think that's good to kind of keep that separate so doesn't dent your other pages and also I don't really want it hear it down because it's kind of fun to take it out and be able to show your child like look how tiny your wrist was and hold it up to them and so it's best not to have that glued down on your page but something that you can pull in and out good advice all right if we could get my slide back up I think I'm ready to give you my final pep talk um because I just want to leave you with the motivation and some encouragement that you can do this you can do this project you can have fun with it so my first advice is scrapbooking is a scrapbook a baby's first year is a gift to both baby and yourself we've talked about it as a way for you to kind of pause and really take stock of what matters most in your life to count your blessings and just have a time to really be appreciative of all the good memories at your recording in your book and obviously it's a great gift that you're giving your child because there have ah record of their first year and they have a piece of their family history there that they can have for years to come and hopefully they will appreciate that sunday and really enjoy it king through that as well. U a z years go by. I also recommend you just find the style or the format that works best for you, and just start just start doing it because you can hem and haw, and look at all these different formats that we shared in the techniques and kind of get I don't know what I do pocket ages, right to regular, just pick one and start because we can always mix and match. You can always do a combination of traditional pages and pocket pages meshed them together. There's really no right or wrong way to do it, it's just what works best for you, and if you're comfortable with it, and if you're enjoying it, you keep you keep at it. Um, I kind of mentioned this earlier, but I wanted to emphasize it again. Any little bit that you get done in this book is a plus, any little story that you document, if something good to have later on and so don't feel intimidated, overwhelmed them, thinking, I'm never going to finish this. So why even start? Even if you got half of babies, you're accomplished, or even a quarter of it, it would be a great success and something that you enjoy remember what matters most and tell those stories, so try to force yourself to kind of look be on those milestones those baby book prompts that you'd find in the baby books that we often used and look for stories that really talk about babies personality, the relationships he has with other members of the family, things like that because those are the stories that are really going to be meaningful to you and to your baby as the years go on and then finally I would just say enjoy the process a lot of times I think people I talked to scrap bookers and like, I'm never going to finish that project, I just can't wait till I finish scrapbooking that book and in my opinion I'm never going to be finished, rabbi, because it's not really a start and finished book it's if it's the story of kind of your life, you're always going to be having more photos there's always new stories and new memories and so it's really just about enjoying the process if it's not completed in a year's time two years time that's ok, just enjoy every bit of it enjoy the whole process, so as I've enjoyed today, this has been great oh, I'm so glad you could join in the caucus we've so much enjoyed having you with us, sir, thank you very, very much that's a great way to end this particular course thank you to everyone. Who's joined us online. We really appreciate we can't do this without you and it's. A great to engage with you in the chat rooms and see all of your thoughts on one of your comments. I know you've really enjoyed this course to is inspired you to get out there and do some scrapbooking as well. So thank you all for joining us. Thank you for our wonderful ladies in our studio audience who are always so great. I was expecting trouble from denise beef actually seen as she always is. She's a delight to have in the studio thank you to all of you. Give yourselves a round of applause is great theme so much students we have this morning, I'd like to say a huge thank you to you, nicole who's been a wonderful instructor, nicole. I hope you come back and join us again on creative life. But for now, let's give nicole samuels a huge global created by a round of applause thing. Really amazing creative life, but for scrap booking your baby's first year but nicole samuels that's around.
Class Materials
bonus material with purchase
bonus material with enrollment
Ratings and Reviews
user 1399659125750739
This was fabulous! I enjoyed Nicole, she was easy to understand and follow. Her class had a ton of useful information and I took many notes. I look forward to any future classes she teaches.