Lessons
Day 1
1Day 1 Pre-Show
10:04 29:00 am - Why Does this Class Matter?
39:15 3What Do You Want From This Class?
29:46 4Getting the Word Out
29:31 5Aggressive Marketing
25:49 6Marketing on a Budget
20:34 7My Pricing Strategy
30:19Pricing Catalogs
34:35 9Pricing Q&A
18:27 10Radical Pricing and Most Successful Advertising
20:26 11Pricing Phone Call Example
32:59 12The $2000 Average
23:04 13Day 1 Wrap-Up
04:21Day 2
14Day 2 Pre-Show
10:58 15Equipment and Indoor Lighting
30:27 16Outdoor Lighting
14:52 17Posing Indoors and Outdoors
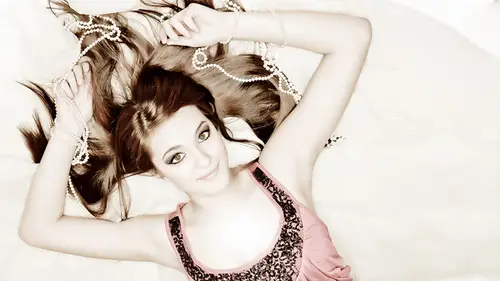
33:51 18Indoor Shoot: Senior Girl, Lexi
27:31 19Indoor Shoot: Senior Boy, Shawn
18:37 20Indoor Shoot: Senior Girl, Raven
19:53 21Shoot: Outdoor Rooftop
34:49 22Scratching Things off the Board
28:56 23Underwater Photography
52:57 24Review of the Day
07:09 25Day 2 Wrap-Up
04:17Day 3
26Day 3 Pre-Show
10:17 27What's Left on the Board
15:06 28Speeding up Your Workflow
35:13 29Workflow Q&A
23:38 30Overview of Adobe Bridge
45:05 31Camera RAW Workflow
30:22 32Perfecting the Eyes and Proof Building
45:54 33Sharpening, Album, and Action Building
35:20 34Thanks + Credits
03:29 35Colors and Backgrounds
34:13 36Liquify Tricks
21:59 37Day 3 Wrap-Up
08:39Lesson Info
Camera RAW Workflow
So one of the first things that happens is I have You can set up bridge and adobe camera raw two default to a certain sequence of default settings that you use the most. Okay, So what you're looking at right now with all these images is straight out of the camera. Okay, Now my default setting Is this right here? Default. So you'll notice stuff started to happen to the images on the screen. Notice the edges air getting a little burned. She got a little more. They get a little more contrast. E some sharpness is dropping in. There's all sorts of things that is happening t to these images right now. All right, so that is actually when I say that the images come in and they render, that's what I mean, they come in and apply this default setting toe everything that comes in. So presets is your friend So like, if I knew, for example, I wanted this image to be black and white, I could just click this image right click, go to develop settings and then change black and white. And that's a preset...
that I pre organized in pre done. I know for example, that when I shoot a high key image, see this dark vignette on the edge. I don't want a dark than yet on a high key right click. I want either a white vignette or I want remove. And yet, okay, so those are some some default settings that I can do? I don't know. Let's see what this looks like. Let's right click develop, setting Let's change to blue There I could make it a blue image. Okay, right Click develops, adding, See, Pia, you see that change? OK, and there's all sorts of presets. Bright, black and white. There's bright color. That's kind of it's kind of a stripped out color, you know, weird. Sometimes I use it, though, about vintage bright. That's kind of that's another effect. How about vengeance? Vintage. It's kind of a stripped out color look. And then there's grainy fuzzy. So there's all these different presets that I haven't again. That's part of my work flow system. The way you can install those on your computer, go back to default and put him back to where he waas all right, and so you can go through these very, very rapidly just clicking and right clicking and making these little default settings. You can create your own little default setting something that you find yourself doing a lot. Enbridge make your own little default and the and where all that stuff happens When I double click it, it opens up this dialog. Now, this probably looks very familiar to the light room people out there all of a sudden finally, something familiar. This is adobe camera raw. So whether again, you're in light room or whether you're in bridge when you get to the conversion stage, you are going to use adobe camera. Okay, okay. On that happy place. Good. So this is where all these different settings you know, there's there's this crop tool and you know all these we can rotate and zoom in. You know, all these different things are here in adobe camera. Now all the different settings down here allow for all sorts of tweaking, like we can add clarity. See how it kind of made it kind of a special kind of contrast, all right, Or we could just add straight contrast or remove contrast. We can add exposure, or we can remove exposure. All right, I have this little warning set when I start to see this red, that's it's done. Got so white. There's no detail, Same thing. I got this dark set, the wear. Now this that's black or just dark without detail. And so have those two little warning set up in here. All right, the the exposure is exactly what it sounds like. Contrast is exactly what it sounds like. Highlight makes the just. The highlights go up and down. So it's again. It's exactly what it sounds like. Shadows makes the shadows go up and down. White makes just the whites go up and down black makes just the blacks go up and down. So I mean, to me, it just it a rocket science They named the adobe graciously named it what it iss Okay, now, over here on this, there's a tab setting all across the top. This tab allows you back access to all these prefect presets. So there's that grainy, fuzzy effect that's removing yet see Peotone Black and why reset default And I could put it right back the way it was. Default, default, Default from it is a collection of settings. See, right here watch. Let me reset. Reset turns everything to zero See down here. 0000 Whereas watch with default when I go to default. Now I have plus five on the highlights, minus 10 on the shadows, plus 10 on the white zero on the black, plus 40 on the vibrance, plus 10 on the saturation plus 20 on the clarity. So it's a It's a sequence of things that I find I have found that I use the most. That's what default iss. No, this is the This is adobe camera, raw presets. And no, it's I created that default and then I saved at sea right here. This is this is your presets. And then down here you can trash these votes. That's what the trash can is. Or if you could have all sorts of crazy tweaks, we could create another default. So that's what that's what all these little did and you name it whatever you want to name it. Hold that thought. And so you get him all set the way you want upset. This This default is one that I wrote to get to the point where my images look the most normal to me from here. I tweak. I may look at this and say to myself, All right, that the blacks need to come up a little bit. The shadows need to come up a little bit. The whites need to come down just a little bit like the exposure, the clarity. Maybe just a hair more clarity. All right, now, now I like this. So I make a little minor tweak. This is again when win, Kirker. You making these tweaks? Let me tell you, I'm doing this while she's changing into the next outfit. You understand? So that's so This cannot be something that takes a lot of time. That's why I have the presets you say to get first I get to the default, Then I get it to where I'm a making slight minor shifting of shadows and highlights. And things like that makes sense to down Answer your question. You have no go ahead. I just think it is right. A lot of people, probably they're like me and say, I want to be you. I want to add it like you. So I think probably a lot of my questions are is just me. What are the numbers that he is your formal like a what? What do you use for your default? Preset. So I know that from that you're going to take a little bit depend of the image of your Charlotte. You have that one. That is almost the magic number for contrasts for Can you Can you show that? I mean, it was No, it was zero on the exposure. 5500 on the temperature. Let's start at the top on temperature zero on the 10 0 on the exposure zero in the contrast. Plus five on the highlights. Minus 10 on the shadows plus 10 on the whites plus 20 on the clarity authority on the vibrance and 10 on the saturation. That is my default. The only other defaults there was zero here is for is the curve there was. The sharpening is 60 minus 1 55 30 20 This is the noise reduction. 30 50 0 25 50 Down. That count column, then zero on the Houston HL as h s l and Grace L. None of that. No saturate, no saturation adjustments. No use that. No Hugh Adjustments. I'm gonna show you how I use that a little bit. No split tone adjustments, no lens correction. The effect is I have the post crop vignette set the minus 50 45 35 90 and 75. And then no camera. Well, the default camera calibrations. And then that's that's presets. And that's it. That's that's my default. Thank you. Great. Sure. Now, every time you hit one of these like if I hit this too Change. Desy, Pia, all that just changed. See how my numbers change now? Look like the clarity that plus 20 the black went to zero plus 10. All that changed this change. This l this all those numbers changed all over the planet. And that's what those presets do they make. It's a device called a pre setted presets. All those numbers once, once the number it once it's there, you can then tweak car tingly. If you find for example, let me go to reset me, go to default. Let's say you find yourself you're opening up on image and you catch yourself and I always dropped to 2020 plus on the black. I dropped 20 plus on the black. I dropped plus on the black I dropped Every time I open an image I seem to want to drop 20 plus under. But hey, rewrite the default to compensate for the fact that you always adding 20 on the black. See what I'm getting that So they make yourself a new default. Make it your defense. Cool. All right. I'm sorry. I see you always go back to Greece. Yours go back to one, and then you go back to full service. Yes. See certain things like I'll use how use watch when I removing. Yet all it does is remove. And yet, but watch time ago you reset. Default watch. I'm a turn it, See, Pia. But I'm going to remove and yet notice it did not turn it back to color. So certain things on Lee affect certain areas. Okay, so that's why if now I wanted to get it back to color and I clicked Blue pixie p a click. Well, wait. I want that. I just wait. Let me reset the whole thing. Then go back to my default. This is my starting point. Makes sense. So it's like you're building. Yeah, And look, I'm talking a lot. I mean, can you imagine how quickly this happens? I mean, it's just that the detective gone so it takes This has taken way longer. To explains, then for sure that it does, and then you can do it in bridge is because now you made your own or you don't want to make my own. I z z has a bottom. Just Yeah. Look, let's say look, let's make a Let's make a crazy retorted looking creativelive preset. Mr Instagram? Yeah? Is that? Oh, we're gonna call that the creativelive preset watch. Click right here. I'm gonna call this okay, very soon. Okay. Here's how you can adjust What's happening? You put a check mark on each one of these of all the different things that you messed with. But of course, if you was really making that, you know what you missed. But I'm just gonna check them all. Click. Okay. So look, we've got a creative live one now, right now. Okay, So I'm gonna take this. I'm a reset. The thing Go back to default. But you know what I really like that created live one. Watch back. So it's real simple. Very, very simple. to make it so you can make Brazilians you make. I don't think there is a limit. I don't know. Soon as I said that watch the Dhobi people gonna go Bring Look, you can only do 2000. I'm sorry, Kirk. Oops. Sorry I made you get doing the limit. OK, anyway, Gold did that help us? So that that is adobe camera raw. That is all of these different settings. And there's, you know, there's tons of I'm gonna I'm gonna cancel out of this and I'm gonna show you the slip over to this. We're gonna pretend she has on a green dress. We're just gonna pretend she does not have on the green dress. You're gonna see the dress change, but we're pretending that's not happening. Okay, I guess I should have put her in a different color if I really wanted to do this. But the blue looks so good on her, but we're pretending she has a green dress and we like Why didn't I buy the green background? What was I thinking? Every senior this year has come in with green, if only over a green book. Okay, watch this. We go over here. We changed. We go to Hugh and watch what happened to shift the blues to green. Whoa! All right, where is it? I probably should show you this in photo shop. It's way more dramatic in photo shop, I would say. Okay, there it is. See her dress shifting? Do green. Okay, but again, we're pretending that's not happening to the dress. We're just pretending. Lows the background. Forget the dress one more time. Forget the dress. We're just looking at the background. We want to shift it to a green background. This was before this is after. So why Blue? What? What's the point, Kirk? Almost every background that I purchase. If I'm if it's gonna be a, um, nontraditional backgrounds. Kind of like what you see on the screen right here. I try to buy things that lean to the blue world, and that is because I don't care what race you are. You do not have blue in your skin. Now, if you're doing stuff like this and the skin tones are shifting, you have big problems. Okay? You have serious color issues when you're photographing, you need to fix that. Before you ever play with this. Or maybe you live on planet Avatar? I don't know. Okay, Where? Everybody's blue, But in in on Earth, humans do not have blue in their skin. All right, so notice. Notice her face watching. Undo it. I'm a redo it. I'm undo it. Noticed there is no Just changed to her face. Now what if she has blue eyes? Kirk? Ah, yeah, You're freaking out those blue eyes. So that's why I said a second ago. I probably should show you how to do this in photo shop. So we start playing in photo shop in the next segment. I'll remind me if if I forget, I'll show you how to do this in photo shop. The most common way I do this is Photoshopped, but just want to show you that if you're all about getting it done before it have a hits Photoshopped, it can be done right here in bridge where we shifted the background color too green to better match that green dress. She had boom convert. And so that's a blue background. Can be any color out there without freaking out the skin. Cool. Hi. Let's see if there's anything else in here that really is the amount of vignettes. See, that's another thing I do a lot. I really like a vignette on an image, because what happens is it forces you into the face. So you can. You may be a person who likes a really heavy vignette. I don't You may be a person who likes it. Just a touch of in yet. No problem. I like just a medium shade little bit somewhere about in there. But I caught myself, haven't setting this over and over and over the exactly the same way. So I just incorporated into my default. Ah, shoot more low key images than I do high key images. So whenever I shoot a high key, I just take it out. That's why I had to create another preset that takes it off, and I don't want to mess up the rest of the image. All I wanted to do was take off the vignette. Yeah, so all I do is I come over here. If I wanted to take off this vignette, I click remove and see took the vineyard off, or I could add white. If I want a white one or I could add a oh, dark vignette. When you create that priest that you have all those checks, Just check that. Pretend to that. Yes, Not the whole image. Yeah, but if you check everything, it's going to do everything I see. So, yes, you can adjust those preset checks to adjust accordingly. Cool. All right. Moving on the sea. Adobe camera raw. I guess the next thing I want to show you is less so. We've gone way haven't. But we've now gone through every one of the images. Watch. Yes, we have. Watch right here. Okay. Boom, Boy, that I did I check on? Did I fix those in adobe camera? Raw Fast or what? So this one, this one this one every one of these now has been tweaked the way I wanted it. See this one right here? I added boy made it nice and bright. I made this one black and why I added a bit of a blue sky to this one. Using that little bit of a trick that I showed you just a second ago. Instead of shifting it green, I just kept the blue and I saturated it up. Make that Scott, You can also watch this. She had blue jeans on, so it was a little bit difficult. Watch, watch, watch. Watch time. Go fast, Lew Minutes. See what I did with the blue? This is normal. Dark and just the blue. If she didn't have blue jeans on, Look what he's doing to her blue jeans. You could take that blue way down like that, seeing a mess in a doing nothing to her face because there is no blue in the face. I could take green looking trees. I wanna lighting just the trees. No problem. Blues and greens or fun because there's no blues and greens in the face. See that? Yes, ma'am, Could you go ahead and take the blues all the way up that you want? Open the image and then use the history brush on the gene. Okay, but we're in raw conversion right now, or I can leave it normal. And then Hugh is where I want to take way over here. I want to shift it from this color to this color or from that color to that color. Or you know where you're changing color. So that doesn't happen a lot unless I'm shifting a color of a background that just add a little possess. Do it so cool. So I look, I can lighten up the trees if I want. It is all sorts of little things with this luminous, luminous means brightness. Okay, and you're changing the luminous or brightness of all those different colors. Saturation means I'm adjusting the saturation Watch, Watch the blue I can I can make the blue gray scale. Or I could make the blue riel blue right here. That's what saturation means. Same thing with green. I can make it very saturated, or it can leave it normal. And then Hugh is where I want to take way over here. I want to shift it from this color to this color or from that color to that color, or, you know where you're changing a color. So that doesn't happen a lot unless I'm shifting a color of a background. So that was another thing that I wanted to make sure you understood before we went on. So at this point, we have now tweet all the images. You know that she's she's changed, were in the red dress. We did the detective that red dress. Now we go back, we take more pictures and we tweak. Okay, well, right before before we leave to start photographing into the next outfit. What you're going to dio we're gonna do, Adam here is you're gonna highlight those six images and we're gonna go tools, photo shop, image processor, and it's gonna open up this dialogue. Okay, inside Photoshopped. And what I'm saying that happened is I want you not the selected images. Yes. Excuse me. One. The selected images to process See process files from bridge on Lee six. Open first image to apply settings. No, I've already applied the settings, so make sure that's unchecked. Number two. It says select location to save process images so you could send them off somewhere else or save in same location. That's what I want. I want it right there inside the customers folder number two, file type save as JPEG quality 12 conferred to profile s RGB. That's what my lab wants. I could I could custom set a size. Let's say I'm on Lee doing web work. I could say I won't. I want the with that not to be. I don't know. I have 1000 on there now, 1000 pixels wide, 1000 pixels high. It's gonna force it into that size. In this case. No, I want the full rez J pic. So I have that unchecked. I could save his PSD as I could save as tips. So if you're one of those people out there who wants the working as a tiff, no problem. Just don't check J. Peg, come down here and check Tiff, and it will do it for you. Number four preferences. And this is again, I'm about to pull about to pull another tab off of the board Another. Another thing that I caught myself doing all the time was applying portraiture first to every image. Now you may or may not know about portraiture. You can buy it from image nomics dot com image, you know, am I x dot com. It is a very, very good skin softening effect. I love the effect I love, how it softens up the skin and makes the skin so nice. Some people say it's too much. I'm OK with that, but in my fantasy photography world to the customers that I sell to, they love it. Love it. So I then proceeded to write a nice little action that used portraiture in such a way that I liked it. So that action see it says run action Cavey workflow gave you lurk flow 2012 is where the action is stored. In the name of the action is portraiture. First run and I click check. And so what it's gonna dio is. But as the conversion process is happening, it's going to run this action. You'll follow. So let's say you are. There's some action that you apply every time you open an image you could do it right now is part of your raw conversion. We'll follow the power of that. You could do it right there, you know, and it would save it off somewhere for you. Okay, I'm getting at Okay, so now at this point, I click run and I put my pin down. I then walk off and start taking pictures of the senior in the next outfit, and you'll notice what's happening on your screen that those images are being opened by photo shop. It's like having an extra employees. They're reading the raw format, opening it apply, running that action. That portrait. Your first run ad? Not a little bit of softness. Saving it off is a J peg. I'm not touching the screen. See? Camera, Hands up. I feel like I'm a master chef. Um, hands up. OK, so I'm now taking pictures in photo shop is running for me in the background, and I'm over here taking pictures of the customer. So how long does this take model care? Somebody else's? Actually, photo shop is working for me right now instead of me working for photo shop. Cool. I don't even get paid to work. Photoshopped understanding it's running it through portraiture, right? It is running it through portraiture right now when you buy portraiture like you have to buy one, I think they have. They have for one for light room, another one for photo shop. So this one is the border to four photoshopped, correct. And you have to create an action putting there on now. Course, that action is part of my work flow system. I'm don't Don't think of that as I'm trying to sell you something. I'm just saying that you can write your own action. I'm gonna show you how to do that in the next segment. Okay, you can write your own action if you want, but if you want to use my actual and that's why it's in my workflow system is because that's what I would get from people who know card. I want to use your action. I want to use the one you use. No problem. It's in there and that we all my numbers and stuff rolled right there. So if you notice on the screen it has finished, it is done, its bit school. So that that is basically up to the point. Now, I brought you through my work flow system to the point where by we have gone through bridge. It was a fast tour, but you see how the flow of bridge works, how I open him up into adobe camera raw. Actually, before that, I re number them. I moved them into the customers folder. I used my little presets to make my life happened much, much quicker, I think go through them one at a time, one at a time, doing like little slight tweaks. And then I start the conversion photo shops working for me while I'm over there taking pictures, and then I do the next process. It would happen again. The next thing would happen, the same thing would happen next. Again, She's going change into another outfit. I'm going to sit here and work the files. You know, those the last six that I did. And we go back and pull it back and forth, back and forth when they leave, I'm now gonna have all those images ready to go. To start doing my magic to them makes sense. Cool. We're not happy place. So at this point, at this point, this sort of brings us to the next segment. Because the next segment I want to start open in Photoshopped. So before we go, obviously to the next segment before we go to break, I'm feeling I'm feeling the little bit of love from the Internet to be a bridge question. You're feeling some questions. Okay, so we have a question from photographic Miami. What about when you run the smoothing action? How does applies it uniformly and you do not want this applied to the eyes? Yes. That is part of what portraiture does. Portraiture seeks out a specific color and and I guess that's why it's their gig. It's sort of this matrix or something. I don't know how they do it, but it seeks out a very specific color, and then it only applies the softening to that color. Now eyes are not skin color, so it does not happen to the eyes. And I could feel the next question. What about blonde hair? Yep, it happens. The blond hair. But I don't want it to happen to Bron hair tough. That's my honest answer. It's tough. I have yet yet to have a blonde haired girl come in and say, My hair is so blurry, like my face. I don't get that. No, it doesn't happen. And again, remember my background. I told you all my background that I'm an old film guy. And with film, we used to take a filter and we would drop that filter in front of the lens and everything was blurry and people I got. That's how that's. That's been my style from the beginning. So now I have a filter that Onley affects just the skin man, that's awesome. So in effect sometime, a little bit of blonde hair I don't have a problem with my customers don't have a problem with it. Next. Next question at Sykes Photo is wondering at what point in your workflow do you fix blemishes coming up next? Perfect. Does the batch in effect, the WiFi transfer of the photos he's currently shooting, as in Lock up the computer or Photoshopped crashing? No, the WiFi is Onley, sending them into a specific hot folder. I then in Bridge, move them from the hot folder into the customer folder and then start the conversion so I could be over there while photo Shop is doing the conversion and wife eyeing again into yet the original hot folder And Photoshopped has nothing to do with that hot folder. It's gonna go there, regardless of whether photo shops running or not running. However, if you find your photo shop is crashing a lot, buy more RAM. We didn't have a question on your technical settings with your computer. Like how much ram you have in your computer most the most Ari I did when I bought the laptop. I was like, What's the most when I bought the desktop? The Mac pro isn't, I believe, whatever the big box thing. I wanted to know what the most Ram Waas and they told me and I said, OK, that's what I want because the more ram you have, the faster all these worlds work. So this next question is for from Mr and Mrs So parents are actually seen just the raw files before any work is done to them on the back of the camera or on the IPad. Yes, and that's why I have that little conversation with him now about now, Let me tell you, this is what we photographers call roll files. That means that I don't want you looking at this, Cameron say, I don't like this one because of that zit or something. I will say that to them. So don't not like it because of his it. I'm going to fix that and people get that. They understand that there's editing and magic and work and all that stuff that's done to it. So they get that. But the first time they see it on a printed page on a paper in an album or whatever the case may be the first time they see that that they see all finished in perfect
Class Materials
bonus material with purchase
Ratings and Reviews
a Creativelive Student
Enjoyed the course from start to finish especially all the marketing, advertising opportunities and pricing ideas. My wife and I spent Labor Day re-watching the marketing and pricing section and came away again with so many great ideas. Workflow and shooting the pics is more my responsibility of my business and his posing, lighting and workflow is awesome...In the beginning of the course I was disappointed in the actions as freebies but the more I got into the course and especially the last day with workflow, I broke down and used the Pro4um coupon from the swag bag and joined. That's what really made the actions more valuable because when you join the Pro4um, you get the entire setup for Kirk's workflow. The bridge setup, the scripts etc...I greatly appreciate what Kirk taught in this course and his passion for this line of business because it's helping WHP in every area from start to finish with our buisness!...Thanks Kirk and Thanks creativeLIVE for having Kirk do this Senior Photography course!
Leroy Tademydandp
If you want to take you photography to the next level you need to buy this course. Great content with an experienced passionate instructor who is also quite entertaining. Kirk's knowledge of marketing, cameras, and workflow are second to none. I urge you to do yourself and your photography a huge favor go to the top click the green button that says BUY! If you don't your missing out.
a Creativelive Student
His work is amazing and he has been a big font of inspiration for me... I wish I could be there to be part of it, live... :-)
Student Work
Related Classes
Portrait Photography