Basic Sewing Techniques Part 1
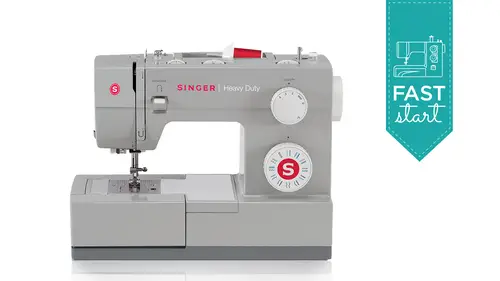
Lesson 5 from: Singer Heavy Duty™ Sewing Machine Model 4423 - Fast StartBecky Hanson
Basic Sewing Techniques Part 1
Lesson 5 from: Singer Heavy Duty™ Sewing Machine Model 4423 - Fast StartBecky Hanson
Lessons
Lesson Info
Basic Sewing Techniques Part 1
You did see me remove this, uh, extension table from the end of the machine and I just wanted to point out that what that also does for you, besides giving you access to this the dropping feed switch which we've used is that that helps you do things like hemming smaller tubular areas I won't take time to stitch this I think you can see clearly what's about to happen here, but when you've got to him maybe a little children's clothing little areas like this like sleeves on any size garment having this free arm helps you get in here and when you start stitching you just so in a circle and it keeps your area nice and flat when you don't have access to a free arm that's just a little it's not it's, not impossible to do but it's a little fiddle ear because then you have to work on the top side of the fabric and everything is up on top here and it's real difficult to manage so having access to that free arm just slide that off and whether you have sleeves or trouser legs or children's clothin...
g, anything small, smaller tubular areas like that wonderful for that so I just wanted to point that out okay, so I would like to do next week the last thing we did, we were using that multi stitch zigzag and we sowed that little repairing stitch and I'm going toe leave it on my multi stitch, the eggs, egg and like, they're not my stitch length just a little bit, but I want to show you how to do in the last two concession. We did this yesterday, too, but I think this is a really neat thing to know this presser foot and stitch with, they're a little wider than the machines used yesterday, so I've got a little bit wider elastic this one is the three eighths inch wide, and what I'm doing is cutting a little angular tip off the end of it, and I can actually use my presser foot as that third hand to help hold the elastic in place as I stitch, what I want to do is attach my elastic to my fabric if this wass maybe a little girl's dress or some lingerie or children's clothing, whatever, whatever you want to, so you can actually turn this over impressive and apply it to this side. So you, your whole, um, elastic is in case right in there, you could do it right to the ross site, whatever your depends on your project and what you're doing, but what happens is when I put my fabric underneath here, and I have my if if I didn't use if I didn't use my whole in the foot like this you don't have to do it but I just find it's a nice little help this is just a helpful little tip you're elastic was underneath the foot but the thing is you have to stretch your elastic from behind and in front as you go and sometimes what can happen is it can slide around underneath the foot so using that hole in the foot actually kind of helps you keep it feeding straight so you can pay attention to stretching the elastic and the from behind and in front you're just stretching the elastic you're not stretching the fabric or pulling on the fabric you're just stretching the elastic so let me just take a stitch or two to get that started and will do our last concession trim that thread taylor stopped to readjust probably see it's already starting to do the gathering you could see how that whole what is actually acting like a helper for me to hold that elastic in place like so on a really project they usually tell you cut your garment this size and your elastic that size and you would pin it in and then just stretch from pin depends so you know it would fit proper correctly I'm just demonstrating on a scrap piece right now but your project would tell you how big a cut it struck when you're done trim that off so that out and then just lift your press afoot, remove your work, trim the thread and there is your last two concession, and if you wanted to like I said, you could have had that folded under, so that was all captured at the same time. It's, cute and great for doll closed to I mean that it could almost be full dress in making there so that's a neat tip for your last a concession. The next thing I'm going to do is switch to one of our other decorative stitches, and that would be my slant over edge stitch and you know, I think it might actually, yeah, he's used the over locking stitch there is one over here. There we go and I'm going to show you how to put a ribbing into a sweatshirt or t shirt, so this is a technique you could use if you were fixing or creative, fixing a sweatshirt or even sewing one from scratch, but here I have readings are different, too. I might just mention to just give you the nicest experience possible if you're making t shirts or sweatshirts, readings aren't all the same. You wantto feel that like this one here is some of them are one hundred percent cotton and they don't have as much memory as something that has more of a lycra spandex content to it. So check the label on the end of the bolt when you buy these, but some of these have there really springing have a lot of memory, and what that will mean is it'll fit and clean tighter to your neck area and your sleeve, some of the some of them that are, like, one hundred percent cotton will stretch out a little too much and not give you the affect your after, so make sure those have a nice lycra or spandex content to them. So let's say, we're going to so are ribbing into our, um t shirt or sweatshirt, and so I'm going to just cut a little temporary nick neckline and here to demonstrate this this is a sweatshirt fleece here and then here's the ribbing, so I'm going to turn this over it fold that in half like so because what we're what we're ultimately after here is I'm gonna put this little neck banned in here so you can use there's an over lucky stitch, there's, a slant over edge, there's several choices that you have in your machine, and I'm what you'll do with this similar to how we were stretching the elastic as we sold, what I'm going to do here is stretch my ribbing as we so just get this started, start feeding along there and then you can stop in india just as you need to but what I'm doing here if you can see it or not but I'm just guiding the bottom fabric and straight I'm not stretching the bottom fabric I'm just stretching slightly the top fabric that's what makes it want to curl back in and give me that next band that's gonna be snug in my skin when I'm done and again this is one of those things where you would pin around it your pattern would tell you helping to cut your ribbing and how big to cut your neck van so it would fit properly this is of course just a demonstration but here you see there's my stitch on the back side of my fleece the front side of my ribbing and when I'm all finished I have ah beautifully inserted ribbing that stretches cause this stitch stretched so that's a great little thing to know how to do is well kind of opens up some new possibilities for your garment construction. Another thing that you got with your machine is this piece called on edge edge guide or edge quilting guide and it's a straight piece that gives you a little um um edge for if you want to so parallel rows and so the tip of this there's a spot on the ankle of your machine that this fits into and I'm going to just slide this in back here and you kind of have to jiggle it around a little bit to push it through, but you can set this wherever you want it, it holds it nice and firm, it doesn't really rest on the needle plate. It sits up just a little bit, but you can move this wherever you wanted to. So for example, if you had, like, a little let's, say, we're doing a little quilt and I just have ah, quilt sandwich here of batting a fabric, batting and backing fabric. And I want to do some quoting on this. Um, you can use this is a fairly thin wait. What if it was a thicker when you probably want to use an even feed foot, but for something as fine as this, you can use this technique, but you can sew along. I'm going to set this for straight stitch and lengthen up my stitch linked a little bit back to abort more of a medium and put my with zero somebody straight sewing and well, so along, and we'll also our first roll. So now what will happen is if I want to. So another row that's completely parallel to this, I can put my fabric under here and I can use this guide, I can move this closer. Further apart where? If I if I determine I want to sew like here parallel to this role, then I would put my guide here and I can use this as a way to kind of eyeball where I'm sewing because an excuse me, I don't have to eyeball because I can follow the guide here. And as long as I keep that guide on my previous road stitching, all my rose will be perfectly parallel, so we wanted to do yet even another row, then we could just leave it set there and you can see as I come in and do my next role, I put the guide there again and I just continue to soul and all my rose are perfectly perfectly even from one another saves me a lot of time for marking all those lines on my fabric with fabric marker. I can just use that little edge guide, and then if you wanted to come along the other way and make kind of a diamond shape you could, you could actually come the other direction and do them this way to create like that quilted look, ingrid ok, so that is your edge guide that came with your machine. All right? So I think what I'm going to do is move onto satin stitch applicator because I think that is so popular and that everyone loves to applicator and so let's, take a look at some places satin stitches use because it's not just applicator here is a little tablet case. My name my given name is really rebecca. So I go by becky most of the time, but here's my initial r as an applicator on this tablet case, and then reverse just to give it kind of a fun little effect, just mere image that but this is a satin stitch is actually a zigzag stitch with a very short stitch length, and I'll show you how to adjust that on your machine. Um, and how to do that applicator doesn't have to be a dense satin stitch, though here's a series of little eyeglass case is that we put together. And if you look at these really closely these air, this is also an applicator, but the stitches just a zigzag with a very open stitch length setting and a very narrow setting tio put take this. This is actually a felt the glasses application is really felt, and then just I zigzagged on with a very narrow zigzag, but not a very dense one like we did on the tablet case doesn't have to always be a satin stitch can have that look, however you want it to ok here's another example of, um satin stitch on this christmas stocking um this is satin applicator we've got the cotton here this is a do peony silk and we did use a dense that stitch but this is a ray on thread ah here it is a metallic thread to give that a little bit of blame to outline around that you can mix your threads be creative hears that edge quilting guide I just showed you two do parallel rows on the cuff okay, just trying to give you a little inspiration there here is a pillow that can is going to try to put in her suitcase when I leave but it's her initial on a little pillow and again that's a satin such it's a little bit narrow a few narrower with if you look at actually here this is a better example the stocking we used a much wider satin stitch this is a little bit narrower really kind of depends on the look you want for your project and the effect you want where that width and length goes so there's no set with their length if I'm going to do satin stitching I have to put my machine here it really depends on your project but short of having a machine in embroidery machine this would be a way you could do some monogram ing by by a machine application and then finally we have this pillow here which it's the satin stitch and I'll show you how to how to do this but this is just a piece of do peony silka had left over from another project, and these stripes on this pillow are nothing but the satin stitch that is normally used for applicator. We just took a fabric marking tool and drew on the silk and followed along and sowed our satin stitch, and it looks just like a pillow that you'd find it some, you know, just design designer boutique that has home to core items in it for sale, so create your own match your color scheme in your house, you don't have to go shopping and shopping and can't find what I'm looking for just make it ok so let's set up for doing a little satin stitching on to do that I'm going to sew a little heart applicator grab a piece of interfacing here or excuse me stabilizer so to put your apple k onto your base fabric, if you've never done applicator before you cut your shape and susan in the class, you just mentioned susan's class, she did quite a bit of applicator in that class, so that would give you some details on this the specifics of preparing and applying your application to the base fabric, but I already have that on here use a product it's thie jen general term for it is a fuse herbal web, but there's on pelon makes one there's one called wonder, under, I think that's the pell on one misty fuse, there's a few different brands out there for actually at hearing your top fabric to the base fabric, but once you've got that done, then you set your machine for a satin stitch, and you need to use a satin foot now that's, an optional accessories items that I'm going to be talking about next for you are optional accessories that are available for your machine, and it'll just help you take your machine to a whole new level. Now the satin foot, the reason you use that for applicator, as opposed to your standard foot, is just because of the design in the foot itself and here's. Why your regular general purpose foot is designed for garment sewing? Uh, when you turn it over and look at the back side, it's, nice and flat, because what happens is, the foot is pressing down on your feed dogs on your fabric, which your fabric, then is in contact with the feed dogs, and you want that all flat. So all of these rows of feed dogs are evenly up against the fabric, feeding your fabric through. So this foot is flat by design, but when I try to seoul, these really dense like in the case of this right here, if I try to sew these really dense stitches with a foot that's flat, what can happen to you and maybe you've had this happen is your stitches tend to start bawling up in the front of the foot, or they don't want to feed it all, and because you're bringing your stitch length down really short, but then there were piling up inside the opening of the foot here, and they're not feeding through. They can't, because the foot is flat on the bottom side, so when you get a satin foot, when you turn that one over as compared to your regular foot, you'll see that there's try to turn these around little bit so you can kind of see in there light but there's a there's, a groove like a tunnel or a channel on the underside of this foot as compared to your regular foot. And when you do these dense dance stitches like this, it actually lets them go freely underneath so you don't have that obstruction for your stitching so that you want to get a satin foot in the other nice thing about it, too is it's transparent in the front so you can actually watch your sewing as you go. And so it has to really great advantages to it over a general purpose foot for application so let's put thie satin foot on and it just snaps on like, all your other feet do, and I'll set my machine for a let's see, do I have a white bree on thread? Here, let me get a white free on threat here's one so we can do some white stitching around the heart. I'm gonna set my fabrics there, my threat school on the spool pin, and in this case, I'm going to use. There was a smaller school cap that came with your machine, so I'm going to use that to slide this on and hold that's polling place using that smaller one will probably give me more success than using the big one that might have. My ray on threat is very slippery and it might fall in behind here, so to keep that from obstructing, I did had that happen to me yesterday and s o you want to just make sure you use the right school cap for in this case, for the ray on it's, very slippery with that feed really smooth over there and then snap that in the threat guide at the top of the machine. In here now remember we have to raise that have that take up lever in its highest position before we move on and double check that you press the foot lifter is up so we're in good shape to continue threading and you might want to just hold your thread with your right hand just hold this firmly as you bring your threat down up overwatch that it does indeed slip into the eye of that take up lever were great around your thread guide here and there's another one just above the needle and make sure your needle is in its highest position again for using that built in automatic needle threat er chuck your thread up underneath there but that little pin pulled the loop through and we're in good shape to start doing applicator now I also um I'm gonna switch I wanted during the break I just wound white bob and so we'll get rid of this gray one that we were using for those other things it's getting low anyway and we wanted so for a little while here without stopping so I'm gonna switch to my white bob in and we're going to draw up that bob and thread I can't quite grab it there there we go pull that up to the top and then put our cover on and we're good to go use that cutter on the side to trim the threads so they're not too short and the senate stitch requires a zigzag, and you probably want to do this on a little scrap before you start it right on your project, because again, you're going to want to find tune that stitch for the weight of the thread you're doing and for the size of the applicator, you might want a wider one or a near over one, as we just said, so we put that for a zigzag, and I'm going to start with maybe like about a three on my wigs. I'm just kind of guesstimating right now because I'm going to just stitch over here in the side and see what my stitch looks like, and then that stitch length we know is probably going to be fairly short, so I'll start with something pretty pretty short there and see how it looks and then I'll tweak tweak it from there, so put the presser foot down before we start to so and as we so this is going to go back and forth, back and forth, back and forth, just running into that so you can stop and have a look at that and that looks like it's a little narrow. Maybe for what I want to do here maybe I wanted a little bit wider so I'm going to make my with just a bit wider and I can still see a little bit of fabric and between the stitches so I'm gonna bring my stitch length just a little shorter so that might have been the look I wanted maybe sometimes if you want it to look a little more organic on dh see the fabric and between the stitches that's okay too it's just another look it really depends on what you like it's no right or wrong so let's widen this out just a little raise my need a lot of the fabric when you make any of these adjustments here make sure your needle is out of the fabric because the needle bar couldn't move depending on what you're doing and you don't want the needle down in the fabric when you're moving things so need a lot of the fabric make your stitch just a little wider we're going to get just a little bit shorter on her stitch length and we'll test this again to see if we like this better ok so still I think I'd like it even just a little shorter so I think I'll just bring that down one more tweaks I'm gonna raise my need a lot of the fabric we know a little bit shorter try one more time that looks nice and deaths let me take this out of here and I'll show you the difference see how nice and dance this got really shortened looks really solid I don't see air or fabric excuse me in between the stitches if that's too dense for you just move it up a hair really just this is like you're fine tuning dial for your satin stitch just depends on what you want it to look like so we're ready to so and so what we will do here is start stitching around our heart for application you also want to make sure you use a stabilizer on the back side of your fabric satin stitches because they're very dense they they will tend to want to make your fabric like pucker like this if you if you just sold applicator on your fabric you just started sewing right on the fabric you put your in this case the be on here and you start application this is probably going to pucker and tunnel like this, you know like what is wrong with my machine? Nothing you didn't use a stabilizer. The stabilizer will give this a nice firm foundation for your application and then when you're finished you just tear it away off the back side and you've got a perfectly smooth application now um thie stitch when you so just I guess I'll just use the point of my sister to show you this um you want I'll call it the zig and the zag of the stitch left and right zig zag zig zag like that you want the kind of the zig or the left motion of your stitch to go you know well into your applicator and the right hand swing of the fabric to just go off the raw edge kind of in closing that raw edge so yours eggs eggs, eggs, eggs, eggs, eggs like this you don't want to go zigzag way over here zigzag way over here really in close that will give you a nice consistent raised pretty edge on your application and you'll feel more in control too so let's go ahead we're underneath the needle we're going toe start right at the point of our heart and just a just a little bit that foot being transparent I can see right where I want to be and I'll just usually turn this one hand turned to make sure looks like it's in perfect place and now I'm going to just start stitching now I'm on a bit of a straight away here so I can just so but I'm going to be coming up to an area that has a pretty sharp curve to it so we have to negotiate curves someone get me that I have that be that pink be on a little wall hanging that's a nice example to show to while I'm talking about this so I'm getting ready to make a turn. I'm going to sink that needle down onto the right hand side of my application. Thank you. And then I'm gonna lift my presser foot just a little bit just to raise it up off the fabric. I'm just going to tweak my fabric, a hair just to reposition a little bit to continue negotiating around this now what I'm talking about is negotiating kers. This is a very sharp curve around this heart, because, it's a very small application here in the case of this be that we did, you might still do it in some parts, but you have these greater straightaways because it's so let it's a more gradual curve you might not have to do it is often because you can just sort of guide it, but when it gets around to a real sharp curve like this, you may be lifting, pivoting, lifting, pivoting a little more frequently. Ok, so let's, just go ahead and do that. Continue around my my piece. So I'm gonna needle down on the right hand side. This is an outside curve, so the needle sinks into the right hand side as I go around it, not the left, if I was going around and inside curve than I would stop with the needle down in the left, and the reason for that is when I have my needle down in the right and then I lift to pivot a little bit. Um, I'm I'm not going to leave a gap if if I had left my needle in the left hand side to do this on this outside curve and then I lifted and pivoted, I'd have, like a little v over here when I pivoted and have a pocket there that I don't. So by leaving it in the right hand side, I keep that filled in looking so inside coroner's, you leave it in the left outside. Excuse me inside curves, leaving in the left outside curves. Leave it in the right. I won't take time to go around this whole heart, but I just wanted you to see how how to do this and just pivot a little bit. So nothing wrong with just stopping and repositioning it will give you a nice when you're done that she'll really, really, really like a little down in the fabric, little more kneel down. On I think you're getting the idea of what we're doing here, so I'll just remove this for now and show you we have a nice dance satin stitch, and we would just continue around our heart that we would come around, leave the needle down. In the point, we would just lift and pivot and continue around until we come down to the point again. And then, when you're all finished, you just simply remove your stabilizer from the back side, and you have an applicator. You would. If you had an initial, you would cut out your initial and bonded on this way and just just stitch around it. Um, the k pillow I showed you, we had a narrower zigzag. It really just depends on the look you want.
Ratings and Reviews
Hilary Larson
WOW what a great little class! I finally bought a Singer HD 4432 without even knowing my Creator Pass included sewing classes, and was thrilled to find everything I need to get started right here! Becky is obviously very experienced and breaks things down clearly so even beginners like me can understand. My only qualm is that sometimes it was hard to see what she was doing because her left hand was in the way when zooming in from over her shoulder; it may have been nice to have a 2nd close-up view from the front angle. But her verbal descriptions of the processes are very precise. Overall, this is an excellent addition to the user manual, and has given me a boost of confidence in getting started.
a Creativelive Student
I watched the entire three hour class of Singer Heavy Duty™ Sewing Machine Model 4423 - Fast Start with Becky Hanson. It was very outstanding. I was doing some things incorrectly on the machine, which I had purchased for my granddaughter. She is only 7 years old, so it is important for her to be told correctly. There were accessories in the box attached to the machine that I could not identify, but now I do know ! Also, Ms. Hanson explained some additional items that could be purchased, such as the quilting twin needle, the blind hem foot and the free motion quilting foot. My granddaughter wanted to try the free motion foot so I have ordered that for her. I went ahead and purchased the program after it was finished so that I would be able to refer to it later. Thank you ! Sincerely, Darlene
Elle
These 'fast start' sessions are awesome. I am definitely motivated to give sewing a try!