Selecting a Stitch
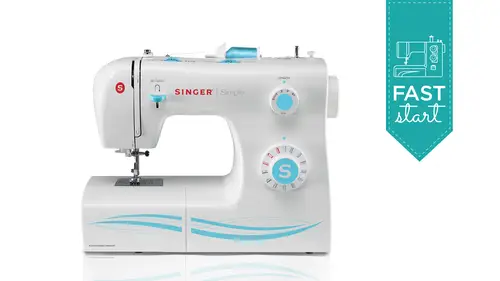
Lesson 2 from: Singer Simple™ Sewing Machine Model 2263 - Fast StartBecky Hanson
Selecting a Stitch
Lesson 2 from: Singer Simple™ Sewing Machine Model 2263 - Fast StartBecky Hanson
Lessons
Lesson Info
Selecting a Stitch
When you look here at your machine, I'll just lift this up a little extra high and get those feed these little things underneath the foot right here that looked like kind like little teeth when you turn when you're sowing, I've tried to do it by turning the wheel you see how they how they move in a kind of like an arc in motion they come forward, they come up, they move back, they dropped down, they come from when they're done low, they come forward again, they come up, what happens is they're coming around to grab the fabric was once fabric goes in here and you put the presser foot down the feed dogs down below are what are pulling the fabric through what I notice beginners do aa lot is they feel they have to push or pull the fabric to so and so you'll often see where they start to so and there as they're stitching there actually pulling this fabric from behind or pushing, pushing and pulling, thinking they have to make it feed, but you don't have to do that the feed dogs do that work...
for you, all you have to do is steer it now with regard to steering it where do you where do you how do you know where to stitch sew on your needle plate? Here there are some lines that are marked and hear their indentations right on the needle plate and those air various seem allowance with dhs and you can't I was just looking to see where I have my little ruler here you can use a little gauge like this from center needle position if you want to know which seem allowances the's are you can kind of measure and check for yourself like this one's for your half inch this one's for your five eighths inch and so on different projects you do like a lot of craft projects and doll clothes have like quarter inch seems you quit with quarter inch lot of home decor projects have five excuse me half inch seam allowances lot of commercial dress patterns have five eighths inch seam alone so there's different lines for different um seem allowances that you need a seam allowance is this area if you're really new to sewing, this is your seem and this is your seem allowance so when they say in the pattern see malone's of so much, then you want to have the edge of your fabric be lined up with that guides so you're seem allowances according to what the pattern is there. The garment, for example, won't fit properly so you want to use the right seem alone's so sometimes when folks are real new to this and they're not really sure how to guide the fabric I noticed a lot when I've had beginner students who have never really saw one before they tend to stare at the needle and not pay attention to what's happening over here and so the result will be where you kind of just sewing all over because you're not really paying attention over here and one thing that might help you if you're really really really a newbie is to indicate decide for example let's say we want a five a cinch see malone's maybe put a piece of like a masking tape or some kind of tape over here just try to lay that in position so you've got a little bit more of a visual guide for guiding thie edge of your fabric that can be helpful for some folks to do that so let's start again by selling a c milan's and this time we're going to do some reverse stitching and the reason you do reverse stitching is that locks the stitch so if you're doing a seam you don't want to just so straight because the threads can start coming undone and that's true of any sewing machine so you need to do some locking stitches at the beginning and end so we'll start here with get this where you can reach it there we go we're going to sew a couple three stitches and then we're going to press this reverse lever down and it's those backwards until I release it and you just need to do that for two or three stitches really no more and then so you're seeing on then you do the same thing at the end of yours seemed nearly to the end press this down two or three stitches release it to come to the end and then lift you want to make sure that your needle is in its highest position and the needle just starts to descend that lets the stitch complete its cycle and then you'll remove your work and either cut it manually or with your thread cut her up here. One thing I would like to tell you is I notice folks do this a lot when we've had sewing classes that they'll come here pull their threads out and they'll snippet here like real close to the foot and if you do that you'll just be re threating your machine again really quickly because of minutes we start sewing again the threat is going to come out of the needle so you want to give that a nice long tail and that's part of the nice thing about using the guide up here is it leaves those tales nice and long the way they need to be so that you don't have that happen to you when you start something cause then you'll just have to keep re threading the needle okay so now that we've done our stitch we should talk about what a balanced stitch looks like and to do that I'm going to show you a little slide that we have, and I'm gonna press my button here to move to our slide, and I'm going to go up around the back to point to this chart on the monitor to show you that this's, what a balanced it should look like. This is your fabric top, this is your fabric bottom and what you want when you're trying this for the first time and you're just sort of testing this to kind of see for yourself, it might be interesting if you want to put a maybe a different colored thread in the needle than in the bobbins. You can really see the difference well, but your stitches you should see the needle thread here, the bob and thread here, and they should just kind of be locking right in the middle of the fabric, so it looks kind of the same on the top is it does in the bottom as faras the what the stitch itself looks like if your needle thread tension is too tight, that could happen for a number of reasons I'll talk about in a minute what you'll see when you so is this's your fabric topside, here's your fabric bottom side, but it doesn't look like this. You see how nice and smooth these are, and these almost looked like they have little beads on the top that's your needle thread is so tight, it's almost like a straight line across the top of the fabric, you can almost pulled the thread right out that needle tension is too tight, and so I'll show you how to adjust for that. We want to turn the tension dial down to a smaller number. Here is the opposite effect, where the needle thread tension is too loose, where it kind of looks normal on the top, but when you look at the bottom side, you'll see a lot of loops from the bottom thread showing it's almost the opposite of this and that's, where we have to increase the upper thread tension a little bit so let's see how to do that. So I'll just take a fresh piece of fabric here, and you're sowing along, and you want to have your your, um, your machine is all threaded and on your tension dial here. This is the tension wheel, and you can see it has a range on it from zero, and it goes all the way up to a nine and there's a little range here in the middle, marked between the three and the five, and it's got a little black line that kind of shows you the general area, where you can pretty much leave it for most all the sewing you do that's kind of like the normal tension range, but don't be afraid of this dial. This style actually helps you adjust your stitches and the reason you would need to adjust them is different threads you use different fabrics, you work with different needle sizes, which we'll talk about in just a few minutes. Those can all affect the way your tension looks. So if when? When you are sowing and you're seeing something like what I just showed you on this slide, you know to come over here to your dialling adjust accordingly. So how can you know that your attention is really correct on your sewing machine when you threat it? So I'm going to show you a little test for your upper thread tension and for your bob and thread tensions so that you'll know that your machine is threaded properly. So right now I know machine a machine is threaded properly and when I have my press of foot up and I pull my upper thread, the thread should pull really freely through here. I should be able to just freely pull this thread no obstruction at all looks great. When I put my presser foot lifter down and I pull that thread, I should feel resistance like when I pull this thread I shouldn't be able to pull it like that again I should see in fact when I pull it I should even see the needle um tugging a little bit because I'm feeling resistance on that thread then I know my tension is threaded properly if my presser foot lifter is down like this and I can pull it freely that means that you did not get your thread when you threaded the machine you did not get your thread into the tension assembly properly and you will need to cut your thread remove it make sure your presser foot lifter is raised because that's probably why that happened is you had your press afoot lifter down when you threaded and then just re thread the machine and you'll be fine so that again when it's down and pre threaded properly when I pull this I should see you can even see the needle tugging there a little bit that is correct when I lifted up it should move freely that's correctly threaded if this is down and you can pull freely and really pulled out freely it's not threaded correctly now you're bob intention let me just show you that one take this little cover off open this hinge latch cover there's a little test you can do for the we call this a front loading style bobbin and when this is threaded correctly I should be able to, like kind of snap my wrist or jerk my wrist a little bit and it should drop just a little tiny bit like maybe an inch at the most and that you know you've got good tension on that there's a little screw on the side of this bob in case and the screwdriver that comes with your machine is perfectly fitted for this little screw and you don't have to turn this much and this should really be after you tried the upper thread tension this should be the last place you look. This should be very little adjusting, but if if if if this is too loose on me to show you what to loose looks like if I could get it toe, see how like now when I really said it just falls if it's falling like that that's not enough tension on your bob in case. So you want to put your little screwdriver tip in the tip of that little screw and turn that back so that when you snap your wrist it just goes about an interest. So if it's not going at all it's maybe a little too tight and you want to just give that a little tweak so it just has a little bit of give and then you know, u you've got good tension on your bob in case so let's, put that back in there so we can continue selling. And again, we'll just set that in here with that little arm pointing up at twelve o'clock, make sure that snaps in place hold your needle thread, turn your hand well toward you. Always turn your hand well toward you that's. One thing I want to also mention is on a particularly on machines with a frontload style bob and you don't want to turn your hand well away from you. I almost always see beginners just grab that hand wheel when they want to move it and they turn it naturally away from them. It has to come forward in order for this stitch to cycle properly. If you turn it backward, you may cause a thread jam in your machine and it's just from turning that backward and making the cycle goal opposite. So just keep turning that toward you. If you I find that you've done that, just take all the threat out, re thread your machine and just keep turning that hand will toward you. Okay, so let me talk a little bit about decorative machine stitching on the and the stitches that you get with your machine another time you would adjust your upper thread tension is when you're doing decorative stitching. You really don't want any of your bob and thread to be showing on decorative stitching, you want that pretty decorative thread. So here, in the case of a zig zag, we've got our this is the top of our fabric, and this is the bottom of the fabric, and in this case, you actually do want to see a little bit of that needle thread appearing on the bottom side of the fabric, and usually you can do that by just loosening up a little bit on the upper thread tension, it just relaxes that upper threat a little bit. So all you see on the top is, is the decorative thread, the next slide that I have shows you what the thread would look like if you didn't have it threaded correctly, what we were talking about if you didn't have the upper thread, if you didn't raise the presser foot lifter before you started threading, and you've probably had this, we've all had it at some point or other, just from threading quickly, you're not paying attention, but you've had that looks like a bird nest of thread on the underside of the fabric and what's funny about that is, you think, something's wrong with my bob and threat, because it's all loose on the bottom, and that actually has probably nothing to do with your apartment engine it's it has to do with that you didn't thread the upper thread correctly and the way you can fix that again just take your threat out re thread your machine with that presser foot lift her up and that should alleviate that kind of bird nesting of thread on the underside of the fabric that's true of pretty much any sewing machine ok s so let's talk about our patterns selector dial and choosing stitches so here's a wheel on the front of your machine and this is how you select your different stitches I can turn this either direction I can turn it to the left or to the right and you'll notice that I have markings two different stitch markings each time this clicks into place I want a line it up with this little arrow marking right here above the dial that's how you know which one you're picking uh and so when I lock that into place like let's say I want to just go on and do I've done a straight stitch now but now I want to do a zig zag stitch it's going to turn that to zigzag but you'll see that I have two different stitches on there so how do I know which one I'm going to sew well the black colored or charcoal gray whatever we want to call that that black one is kind of a regular sort of basic, forward moving kind of stitch I like to call them and the blue one. Those are reverse cycle stitches where in the formation of the stitch where normals exact kind of goes eggs, eggs, eggs, eggs, eggs, eggs, like thiss the stretch version of it would go forward, back forward, forward, back, forward, forward, back, forward, so there's reverse movement in the blue stitches so the blue ones are like stretch stitches and the kind of black colored ones are the non stretch stitches. So how you choose which one to use any of the black stitches when I wanted so one of those is then I would just come up here to my stitch length dial, and I would select a length between zero, which is no length at all, and as I turned this more to front from one to two to three to four, as I go to a larger number, the stitches get longer and so that that is how I would adjust the length for those if I wanted the stretch version of that, I turn this well so that the s for stretch is lined up with the length marking at the top of the machine, and then I know I'm going to be sowing the blue stitch, so you're basically lining up blue with blue pretty simple, and then you're with would be selected up here. This is your stitch with dial, and when you're in limbo, back for a moment, just to straight stitch and put this where we were earlier, you'll notice at the top here on your with dial there's, sort of like an oval with a dot in it, and that indicates you're that you're in center needle position. So when you want to just so straight, so in center with the needle, right in the middle of the foot area, there said it so that that oval has the dot in the middle there, and you know you're in center needle position, and then you can go ahead and make your stitches shorter or longer when you want your stretch stitch let's, go back over here, the zigzag we would perhaps to have them really look their best. They looked the best it's with the width setting lightest, and then turn that so that that's lined up with the s there. So just to show you some examples of what the stitch length dial khun due to a stitch, I had just chosen the zigzag here's, a zigzag stitch, and I'm here on the table top, where I put my stitch length very, very short, almost down to a zero, and I got this very dense, satiny look and the more that I went toward the direction of the four, the stitches got longer and longer and longer and longer, but they got more space between them. So it really depends on what you want to use the stitch for, where you're using it, how you're using it, what you want it to look like, um, that's, what stitch length does for you, it affects a lot of your different stitches. For example, here is our scallops stitch. Those look really cute on like little girls dresses on callers and doll clothes and things. But if we make the stitch length longer, we can even affect the way our decorative stitches look here's that zigzag again with the straight stitch, the stitch length, getting shorter and longer what's great about that is. You can adjust that for the different fabrics you work with. So if you're working, for example, with really lightweight fabrics, you want a shorter stitch length when you goto medium fabrics usually it's about a medium stitch length. When you go to thicker fabrics, you need a longer stitch length.