Lessons
Day 1
1Calibrating Your System for Accurate Results
40:07 2Shoot Prep: Workflow & Lighting Setup
17:07 3Shoot: High Key Beauty Portrait
19:13 4Shoot: Hollywood Glamour
17:54 5Student Shoot: Colleen
13:48 6Student Shoot: Andrea
12:27 7Image Review and Q&A
15:46Skin Tone and Black & White Points
27:01 9Image Selection
25:20 10Global Color Correction
21:02 11Retouching Basics
46:12 12Advanced Skin Smoothing Technique
46:36Day 2
13Luminosity vs. Color
14:44 14Shoot: Low Key Dramatic
28:43 15Student Shoot: Ian
11:54 16Student Shoot: Michael
11:20 17Student Shoot: Colleen
03:41 18Shoot: Beauty Light
12:57 19Luminosity Blending in Photoshop
16:07 20Applying Luminosity
12:19 21Color Correction in Lightroom
23:57 22Detailed Retouching
23:55 23Color Space Discussion
19:16 24Darkening and Lightening Skin
21:10 25Spot Treatment
12:20 26Sharpening
29:57 27Compositing
54:51Day 3
28Introduction to Shooting Movement
11:41 29Shoot: Dancer Leaping
10:52 30Students Shooting
44:15 31Shoot: Dancing
14:59 32Student Shoot: Ian and Colleen
08:57 33Shoot: Dancer Portrait
15:49 34Dancer Session Q&A
11:30 35Figure Retouching
10:52 36Liquify Filter
10:16 37Masking and Edges
13:22 38Importing a Background
16:47 39Color Change and Motion Blur
24:45 40Enhancing Color
17:59 41Removing Tattoos and Adding Effects
21:30 42Lee's Photoshop History
21:56 43Final Portrait Edit
19:03Lesson Info
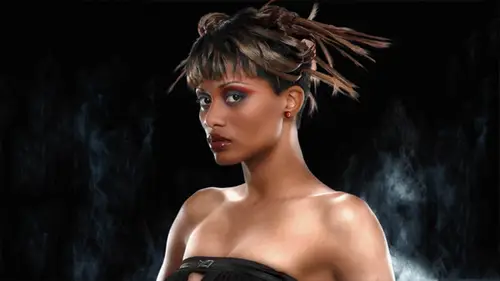
Enhancing Color
We work on this image and and I just I just loved her tattoos right uh the cover on the cover of my skin book are is ah is an image where I created a fake tattoo and applied it on it's it's kind of nice toe and different toe work with riel tattoos because the different challenges with that um but I thought what I would do with this image to really sort of draw your attention to the tattoos has created black and white and then have the tattoos appear in color so let's let's do that and of course whenever I think about doing black and white I'm going to look at the channels and look at the individual red, red, green and blue channels and look at what the black life looks like so here's our red channel and a green channel and our blue channel and I think just looking at that it's good pretty clear that like the red channel looks really pretty good by itself uh I've when I when I brought this in to photo shop from light room I left you know the skin is a little on them saturated side but I...
don't mind that because actually helps the red in the tattoo stand out and since I'm going to turn it into black and white and I'll just use this red channel to do that and I'm halfway there so let's go ahead and do that we've seen that we were doing that a lot yesterday so I'm going to make a channel mixer adjustment and we'll take the uh preset for the red filter which gives us this rendering okay so now the trick is what I want to do is mask off this effect off in the area of the tattoo so we're gonna zoom in here kind of look at that now in the red channel this area's dark and uh I would liketo mask off the effect from this area so I can bring out these colors so I'm going to actually utilize this shape that's already in the red channel that's making this black and white effect as a mask so so we're going to do something we haven't done yet I've targeted the layer mask here and I'm going to do something pretty trick here this is this is a thing that's been in photo shops since day one really thing called apply image and uh it's not used too often but it actually can be quite powerful because apply image allows us to grab anything if we have several images of the same size we could pick a different image and send it into this layer mask in this case what I'm going to do is choose the background layer and the red channel and throw it into the layer mask and it's given me a preview right now now let me solo that red channel so what I want to do when I want to achieve here in this red channel is all the skin I want to be white and the areas which are tattoo I want to be a cz dark is possible says I want a mask off the black and white effect from everything except uh everything that is not a skin okay so I'm going toe run a contrast curve on this layer mask which now has this image in it if that's makes any sense for you but bear with me as I go through this I'm just going to call up a curve and we're applying this occurred directly to the layer mask and I'm just going toe enhance the contrast of the skin is pure white and then make the tattoo is dark as possible so I'm creating a contrast mask and so uh things that are black are going to be masked off and to further refine this mask I'm going to use the burn tool to darken the wings of the bird here oops I want to work on on on highlights but on shadows okay I've used to burn tool I'm burning down the shadows so as long as I have shadows selected I can't make the highlight which is white any darker but I can make sure that I burn in the wings I think these bird wings are either green or blue or something in the tattoo and I'm just kind of trying to make sure that all of the things that are dark and the tattoo go is dark is possible and this burning technique of burning the mask is a great way of refining a mask that you steal from part of the image so I'm kind of enhancing the contrast here of the tattoo in in order to mask off the black and white effect from the tattoo ok uh now let's let's go ahead, turn on everything so I have I have kind of a black and white effect and in the darker areas it's showing the color again but everything else is turning to black and white and I can now kind of refine this this uh, layer mask so that everything that I want to be black and white stays black and white so paint with uh white okay, so where I paint with white it's going to be more black and white? I got a little bit of shading on the arms that's picking up some color so I'm just gonna paint that out and I'm going to paint out all of the green leotardo because my goal here is to end up with just the tattoo having some color make sure all of that green leotardo painted out on I'm not sure I'm gonna work on the hair uh actually kind of like the hair having a little bit of color a little subtle color but I'll take out the shadow under the arm make sure that all my shading is got eliminated all of that shading that's in the mask and now here I am working on this area I don't want the green strap of the leotardo to be have any color I wanted to be grace I'm going to zoom in and really trim my brush down here and I'm just painting with white into this area to mask off the color, so just trying to be careful again this is a lot easier than welcome tablet, which I don't have here way already took care of that. Okay, so now I kind of need toe work this this tattoo mask and if we look at this again in the red channel, that center of this is white because actually the flower is red, so I'm kind of I can see that I've got some red areas here uh and I need to bring them back so I'm gonna paint with white paint into these read parts of the of paying I need to paint with black paint mask off the black and white effect to bring back those red flowers and inside the the tattoo here little bird has a little orange in it red flower, but I'm using the sort of overall shape that has the detail on the edges here to work for me in that layer mask this is where I need to refine the mass to bring back those brighter colors okay, so we're kind of we're kind of getting there and I think he just check I'm turning it on and off second ceo that was sort of a red spot here so I'm gonna make sure you bring that back okay then appear the whole inside of this flower is red so we're going I hate that in bear with me here we're gonna do something pretty interesting in a moment painted too far in there okay so now we have essentially black and white I'm going to let this hair stay kind of partially colored of but I'm going tio let's see I think under her chin I need to get that to stay gray can her eyes face okay all right so we've got a nice black and white image with color tattoo but the problem is the the other colors the greens and the blues in the tattoo are more subdued and there's still another subdued on the on the regular image but because you see them in contrast with the warmer skin they look cooler they look like there's more color there because it's sort of the color contrast when I drained all the color on route of the surrounding skin I get kind of you can see that it's not actually that colorful um so I'm what I really need to do this sort of pump the cooler colors to saturate them up so that I could get a little more color into this tattooed because my mask I've got those areas pretty well masked off black and so I should really be seen the color coming through there so we're going to first turn off our black and white I'm going to duplicate this image duplicate the merged just want one layer here the background layer and I'm going to convert this into l a b l a b is it turns out, is really good color space when you need more saturated color and there's a trick here s o I'm going to duplicate the background layer and then change the apply mode to overlay now overlay when you overlay the image on top of itself it's a contrast enhancing effect his overlay is one of those calculations where is as things deviate from medium gray, it has a corresponding effect and that the idiosyncrasy of leiby is that the luminant sis separate from the color. So I've got one channel that's just the lights and darks and the other channels are just color. So I'm going to go into my little friend that we've been visiting a couple times my blending options and you see here we have l a b instead of rg because we're in an l a b document a lab document if I un check l it takes out the con the luminous part of calculations so I've gone back to normal contrast but the other two channels are color so increasing the contrast and the color channels creates a lot of saturation so now we're really over saturated uh and what I want to do is target the saturation to the greens and the blues so that's where blend if comes in so in the a channel ah I don't think need I don't really need things to get any more magenta so I'm going to take out the magenta part of the calculation so all her skin now goes back okay uh in the beach anall I don't let's see and we're going to have any effect with this guy take out the yellow we'll leave that and seems like mostly my my saturation issues are with with red and now this is just this one move is sort of pumping the green saturation kind of see it in the leotardo as I added up I add some saturation there but I can keep going let's just let's add a couple more copies these time I do this I'm I'm increasing the saturation in the green and the blue what little blue there is I think it's sort of more graying that looks blue ok so you see what what's happened here if I go down to the background image I've taken out the saturation is back to normal you kind of see these green areas just sort of popping and look at the green leotardo course ok, so I should have a bit more saturation there and maybe in this top layer since what I'm going to do now is dragged that back into the rgb image maybe in this top one on a double click and get my layer style it's back I'm going to bring back a little more red saturation just for the hell of it just I'm splitting the sliders here and just sort of feathering in a little more magenta and it is sort of strengthening these the's more magenta red's a little bit and also blasting the skin but I don't care about that so much because that's that's already massed off okay, so I'm gonna flatten the image here and I'm going to drag it back on this one underneath the black and white adjustment okay so select this layer let's see what hopefully this will do what I think it's going to do because I haven't tested this out it's live it's photoshopped without a net so hold your breath okay interesting because this is so much brighter more red it's lighter in the red channel so this is uh doing the channel mix on top of the more bright color so here is a little trick that's a really kind of advance trick to get this channel mixer to deliver the result from the background layer instead of this layer little trick, because I don't, I don't want the skin to break toe white the way it is here is just it's, a little too much for me, so this is kind of getting into advanced stuff. I'm gonna double click this again and get back to my my blending options, and this is the secret to get it, to knock down, to reach down to that background layer, to do its calculation for this channel mixer, grayscale rendering, I go knock out deep, and now it returns. It goes back again to the background layer, gives me the smoother of black and white rendering from the red channel of the background layer, not layer one, which we amped up all the color. But my amped up color now is showing up a little bit better. Seeing the tattoo, ok.
Class Materials
Bonus Materials with Purchase
Ratings and Reviews
Luis
Skin tones correction and portraits editing are new to me. This course provides a set of tools for me to improve my portraiture work. Lee doesn't just show you how things are done, but also the reasons for the corrections. The delivery is a bit dry because the topic is quite technical. You can have a break between lessons, if it becomes too overbearing for you. I highly recommend to take this course, if you are planning to do portraits, head shots, or even senior pictures.